Gardening – Decorative and Functional Art

This is my favorite time of the year. The weather is lovely with highs in the upper 70s and lows in the upper 50s. The flowers are planted, my garden is growing and every day I enjoy being outside working on various projects.

In a couple months, my window box and planters will be blooming and full of color. In the meantime, I have to wait for the flowers to grow and bloom. So, I decided to add some glass art to my window box. A glass butterfly, a couple of glass leaves and glass flowers add some nice color. Once the plants fill in, the window box should look even better.

For these art pieces, the glass was cut from pieces in my scrap buckets, contour fused and then slumped into a ceramic mold. On the back, a two inch piece of 1/4″ copper pipe was attached to each piece and a metal rod inserted to support the art in the window box.

In addition to planting flowers and vegetables, I have also been patching areas of the grass. Up until a few years ago, I had a rain barrel under the downspout in the back of our house to collect the rain water. Unfortunately, this rain barrel cracked after many years of use. Without the rain barrel, during a rain storm, the flow of water can be very strong and the surrounding ground is eroded and the grass does not grow well.

To try to improve this area of the lawn, I thought about purchasing another rain barrel. Unfortunately, they are rather expensive and larger than I would prefer. Instead, I decided to try to make my own. After drawing out some ideas I put together the necessary supplies, an old Rubbermaid tote, some PVC connectors, a shutoff coupling and two rubber washers.

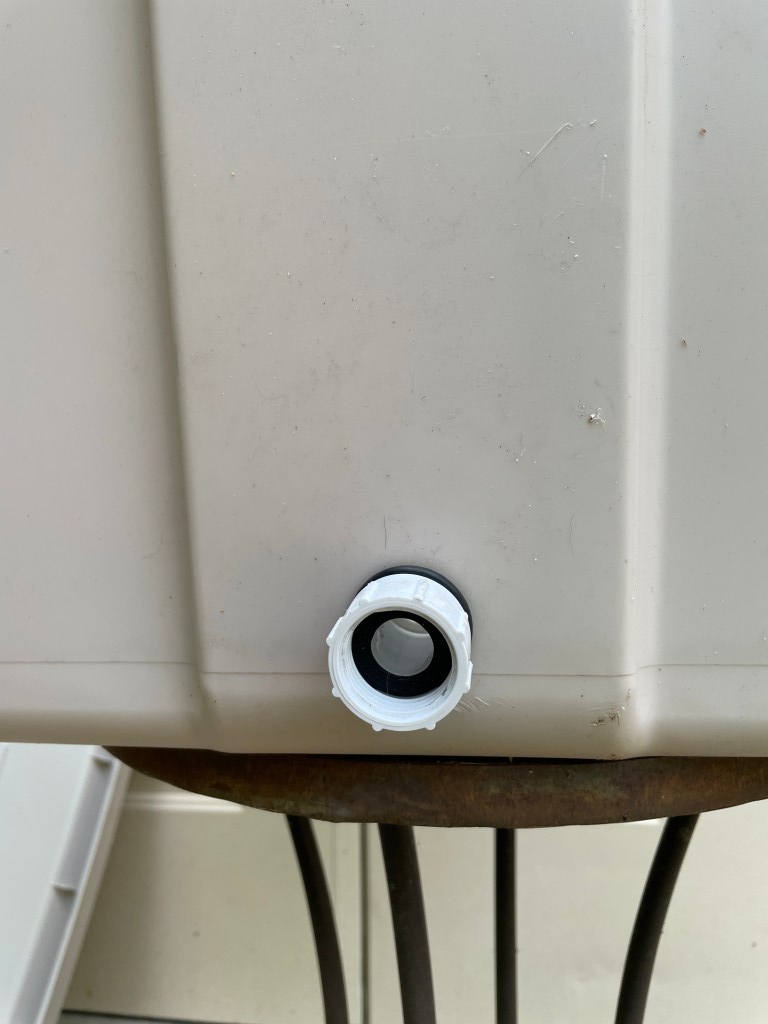
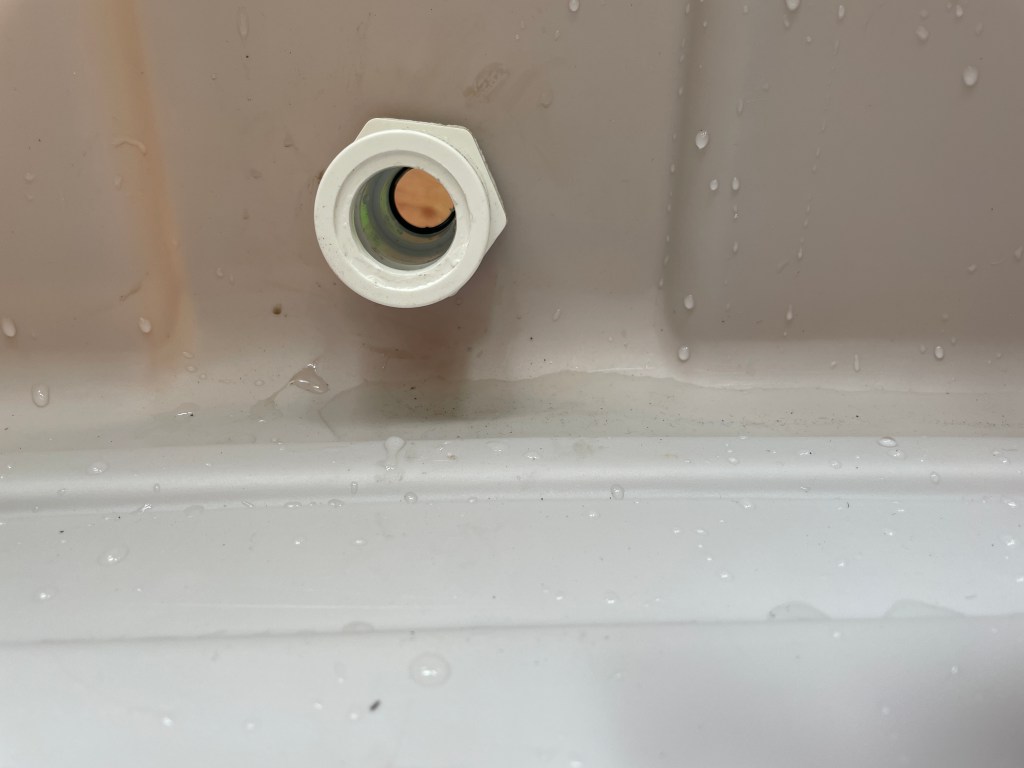
A one inch hole was drilled in the side of the tote and the edges of the cutout smoothed with a metal file. A 1″ washer was placed over the end of a 1/2″ Slip x 3/4″ FHT PVC hose fitting and pressed into the hole that had been drilled in the side of the tote. To hold the fitting in place, another 1″ washer was placed over the end on the inside of the tote another coupling was placed over the PVC fitting.

To collect the water from the downspout, a hole was cut in the lid of the tote.

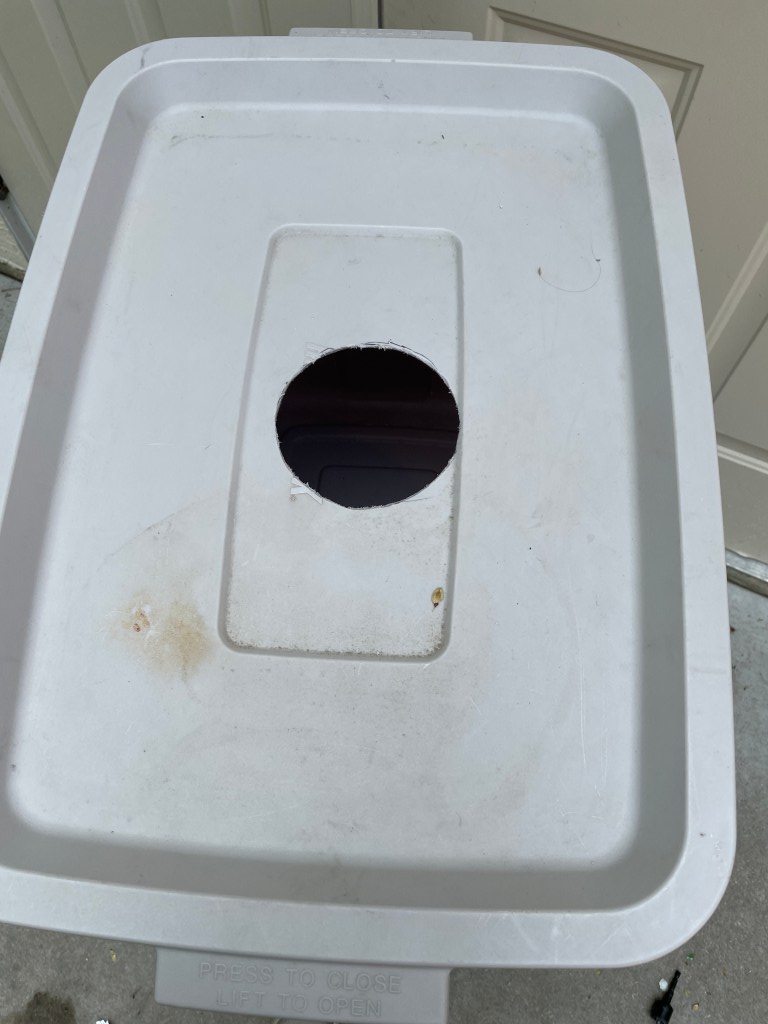
A diverter was attached to the downspout and the length adjusted to fit into the tote lid. A brass shut-off coupling was screwed into the outside of the fitting to be able to open and close the opening. The tote was placed on several brick pavers to raise the tote high enough to access the shutoff valve. The water collected will be used for watering the plants in my back yard.

Of course, I had to add some decorative art to this functional item. Using my Cameo cutter and some permanent vinyl, I added a couple cats (that match the metal cats on my raised bed gardens) and some grass. While I am unsure whether these vinyl decorations will last, they do add some whimsy to my project. And, hopefully the grass will grow better in this area of the yard.

Another gardening project was to update the watering system in my raised beds. Last year, I used soakers hoses to keep my garden watered. This year when I connected the soaker hoses, I discovered that the hoses (advertised as “leak proof”) had cracked in several location.

To replace them, I wanted something that may last longer. Using two 10 feet pieces of 1/2″ PVC, several couplers, a couple caps and a couple hose fittings, I made new waterlines. A PVC to hose fitting was attached to each water outflow on a timer. The PVC was cut and connected with couplers to create a waterline to each raised bed.

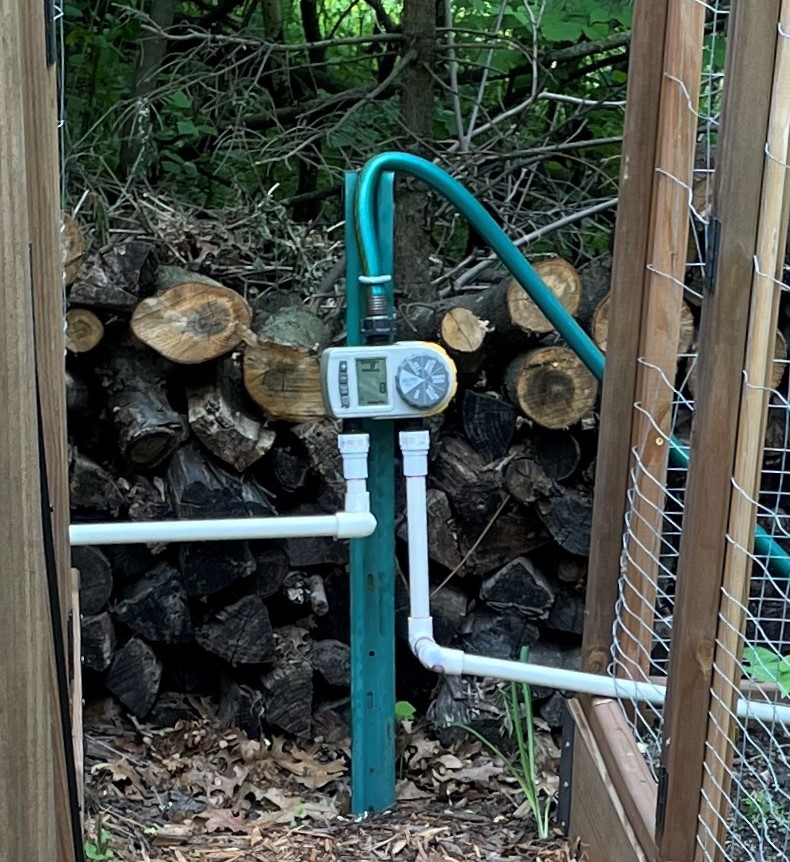
For each of the raised beds, 1/8″ holes were drilled every 2 inches along both sides of the length of a 90″ piece of pipe with a cap at the end of the tube.

This new watering system works great. It does come apart into sections that can be stored indoors in the winter and will hopefully last more than one year.

Happy Planting Everyone!

Scrap Quilts 2023

Most of my quilting friends know that I make quilts to give away to various charities. So, each year, I have friends that give me quilting fabric that they are not planning to use. Most of these are fabrics amount to less than a quarter yard, but occasionally there are larger pieces of fabric.

These fabrics are great for making scrap quilts. And, scrap quilts are a fun way to try new block ideas. So far this year, I have made nine scrap quilts. Each of these quilts will go to benefit young children, through an organization called Sleep in Heavenly Peace and to various people that I meet.

Weave – this quilt was made with thirty seven 3″ strips of fabric cut and sewn to appear like woven fabric on a black background.

Modified Eight Point Star Block – there may be another name for this block, but I unsure.

Double Square Star – each block was made of four coordinated fabric colors sewn with a 4″ square and a 2″ half square triangle on a white background.

Spinning Friendship Star Block – I really like this quilt! Each block was make with a 4″ square and eight 2″ HSTs radiating around the center square.

Bright Hopes Block – each block was made with four 2″ x 4″ rectangles. Another great way to use a lot of small scraps.

Chinese Lanterns – each quarter of the lanterns used 12″ x 2″ of fabric.

Zig Zag – this quilt was made with 2″ squares and 4″ half square triangles. It was a great way to use up small scraps!

Crosses Block – for this quilt, I had larger pieces of fabric – two yards of print blue fabric, 2 yards of a matching yellow, and a yard and a half of orange fabric. To complete the quilt, I found a matching blue fabric.

Links – this quilt used forty 3″ strips of fabric cut and sewn in a pattern of interlocking links on a white background.

Lines and Notes – A couple Fused Glass Clocks

Over the winter, I tried out a new fused glass technique call Frit Stretch. This technique takes advantage of the way molten glass will flow to create a uniform thickness. By stacking the glass to the sides of a shape, the glass will flow inward. When frit is placed on top of the glass, these small pieces of broken glass will stretch as the glass flows.

For my first attempt, I used several colors of coarse frit that I had in my supply. The teal, green and orange colors looked nice together. Unfortunately the pink frit was too light and did not show very well.

The hole in the center of the casting closed up after a second fusing to level out the glass. I added some green vitregraph and white pebbles to create a plate with a Lily of the Valley design.

After this initial project, I realized that coarse frit was too big for this technique. I have since tried other frit stretches with medium frit. The smaller pieces of glass look much nicer. I will post more about these other projects at a later date.

After seeing how my first attempts at frit stretching turned out, I recently tried stringer stretching. Stringers are thin, approximately 1mm, round strands of glass. I thought if I used twelve sections, it might create a nice background for a clock. For this project I used ridged clear glass with bits of stringer placed in the ridges in a pattern.

I really like how this stretch turned out. The hole was bigger than I expected and did not close when I did a second full fusing. To remedy this, I printed a backing of white PLA on my 3D printer. My attempt at making a clock turned out nice. Even without numbers, it is easy to tell what time it is.

After making this clock, I tried out another clock idea that I had seen on-line. This was a piano clock originally made out of printed plastic, but I wanted to try making it with glass.

First, I made a test tile to if cut pieces of white glass and black glass noodles (thin glass strips measuring 1mm x approx 4 mm) would make the pattern that I needed for the piano keys. This test tile turned out really nice. Not wanting to waste the glass, I added a jewelry bail and made a pendant out of it.

For the keyboard clock, I cut 84 pieces of white glass and 60 pieces of black noodle. These were contour fused to an 8″ circular piece of black glass. Another 5″ circular piece of black glass was placed in the center of the larger circle and the cut glass was carefully positioned around the perimeter of the black backing glass. A couple white pebbles and some waterjet cut musical notes were added for details and to designate each of the hour markings. After the project was contour fused, a hole was drilled in the center using a diamond drill bit and clock workings were added. Voila, a wonderful music themed clock! I have more music themed glass ideas that I hope to make sometime soon.