Experimenting with Sun Resist Dyeing

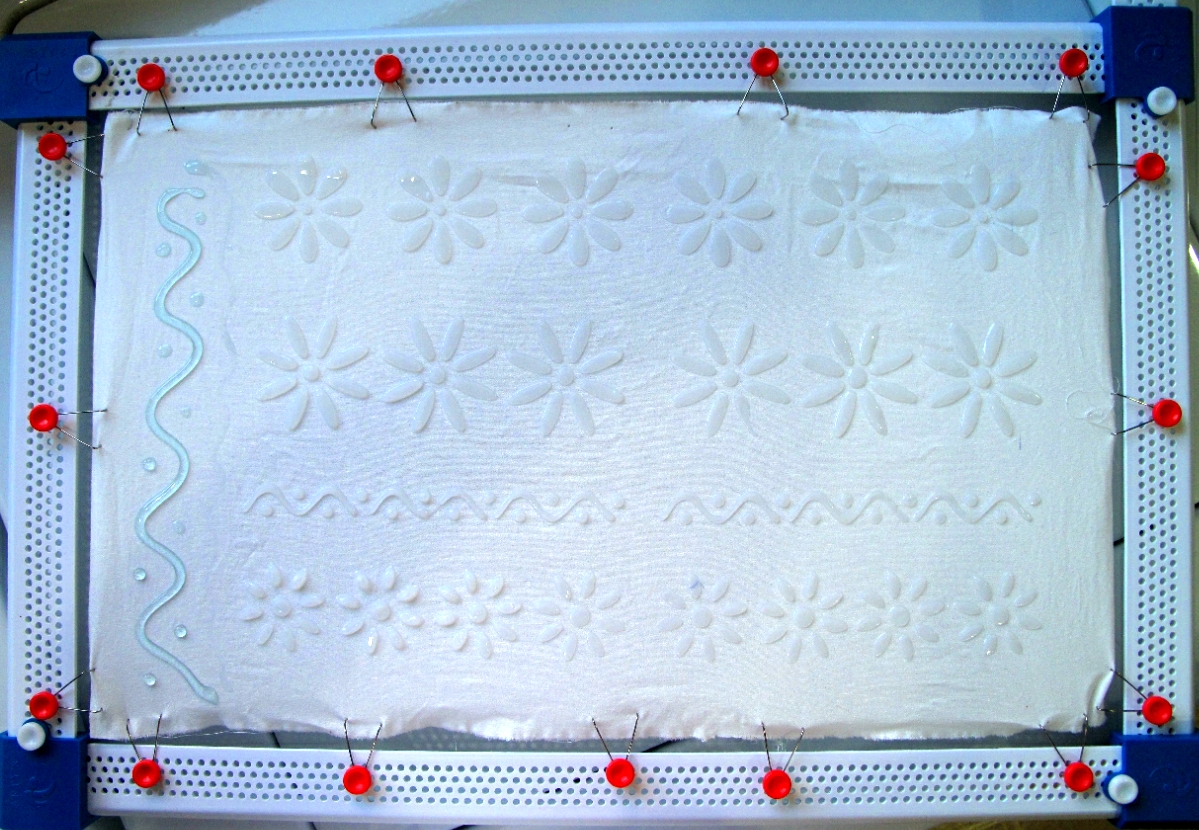
When writing about my latest Shibori project, I alluded to some sun dyeing I had attempted.  After that first attempt, I decided to do some experimenting to determine the best protocol to use for sun resist dyeing.

The idea behind sun resist dyeing is that objects placed on the wet soy-treated fabric will block the suns rays from activating the soy binding of the dye to the fabric.

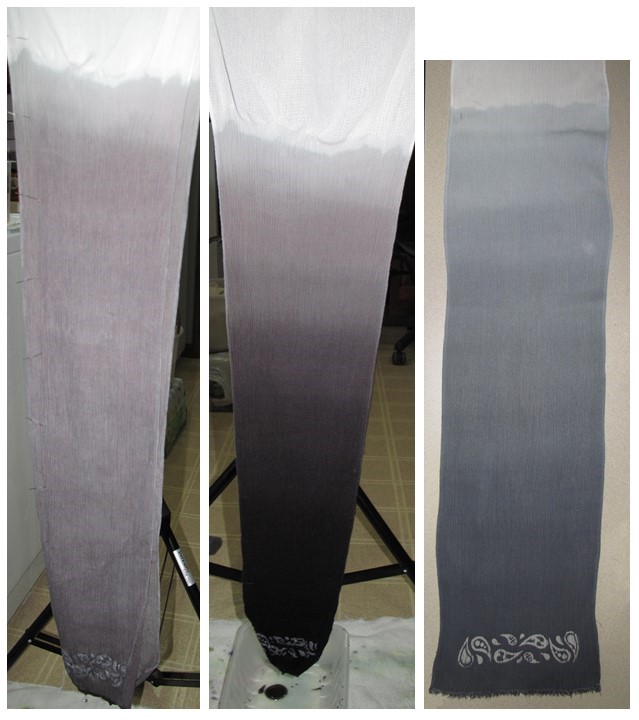
Having read several different articles about dyeing with soymilk, I first wanted to compare the different ways of prepping the fabric and dyeing the fabric. Some textile artists use just soy milk, some use powder from soybeans and other use soda ash as a pretreatment. So I set up to test several different combinations of pretreatment and dyeing.

For pretreatment, I used used three old pieces of partially dyed fabric (browns and khaki dyes). Each piece was pretreated with either soy milk (1 cup diluted with 3 cups water), soy powder (1/4 cup powder diluted with 4 cups hot water), or soda ash (4 tsp each of soda ash and salt, diluted in 4 cups hot water).

Fabric was pretreated with soymilk.
Fabric was pretreated with soda ash.
Fabric was pretreated with soy powder.

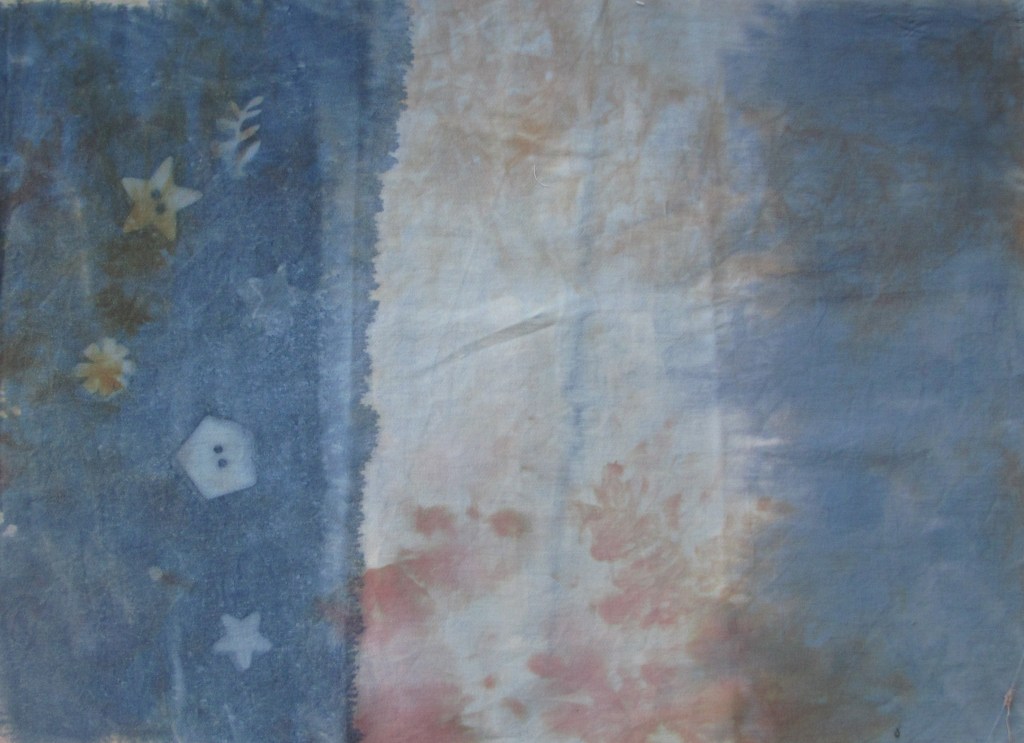
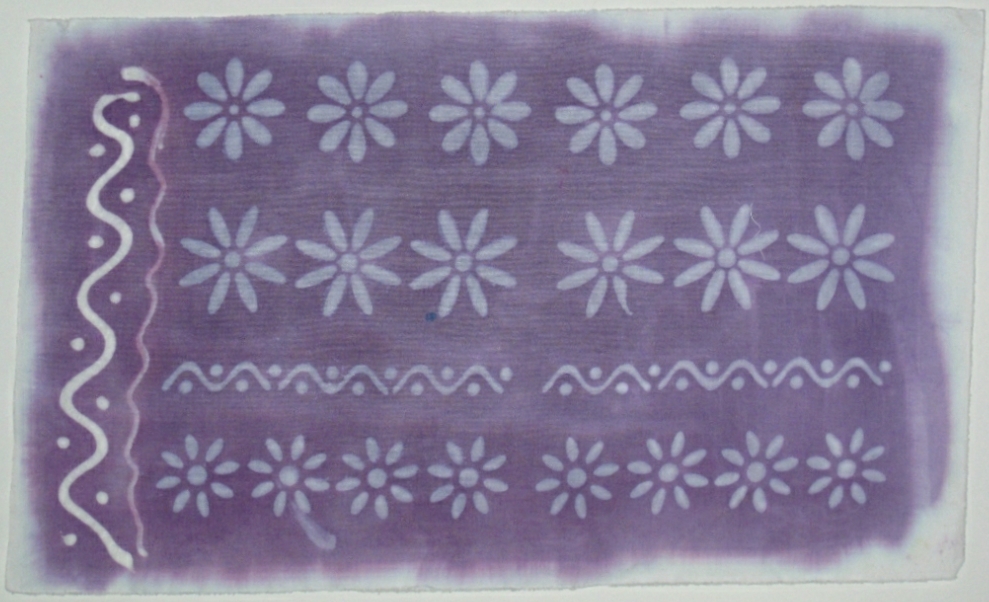
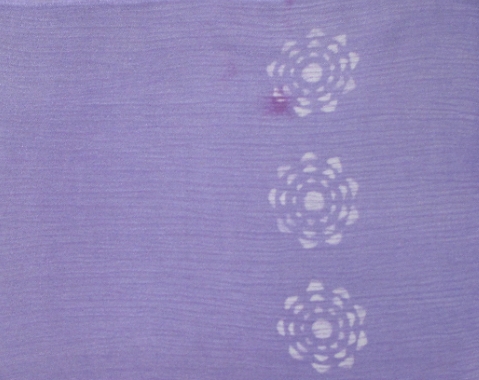
Based upon these test samples, pretreatment of the fabric with soy powder did not result in very strong binding of the blue dye to the fabric. Furthermore, mixing the dye with soy powder did not result in any binding of the blue dye to the fabric. Pretreatment with either soy milk or soda ash was successful in dye binding. However, only the mixing the dye with soy milk cause the sun resist to be visible.

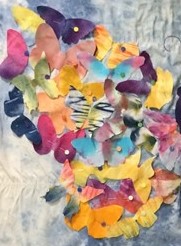
I did a second round of experimenting to verify my findings. In this experiment, the fabric was pretreated with soy milk (left side) or soda ash (right side) and dyed with three different colors of dye (Golden Yellow, Fuschia and Mixing Red) mixed with soymilk.

Wet dye painted, leaves placed to block sun.
Samples after drying in sun
Samples after washing with Retayne.

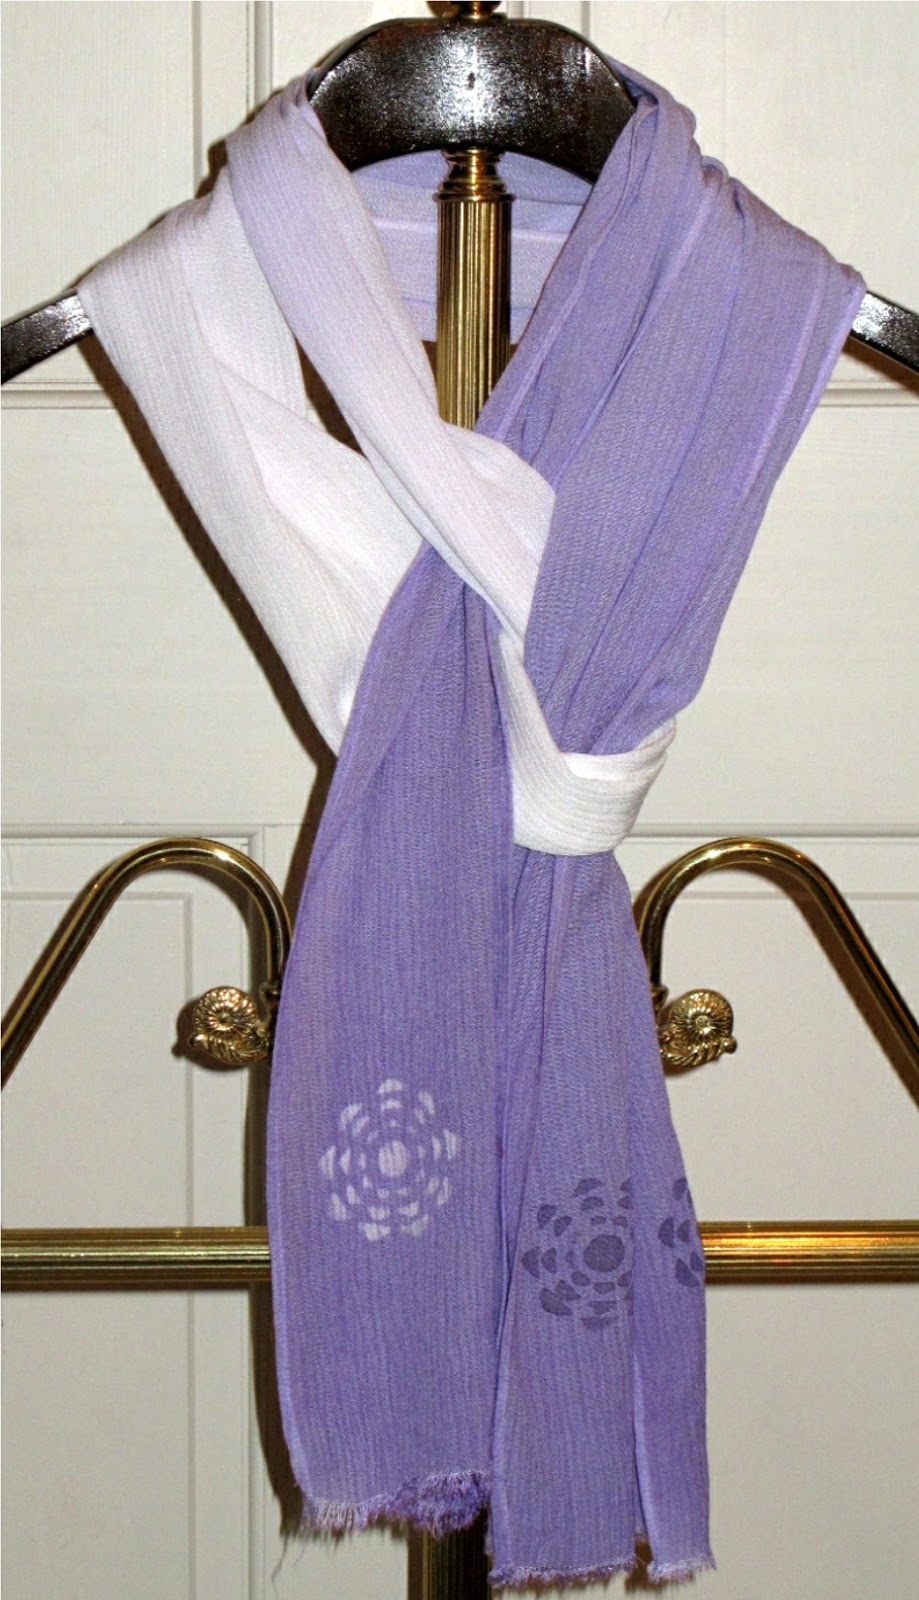
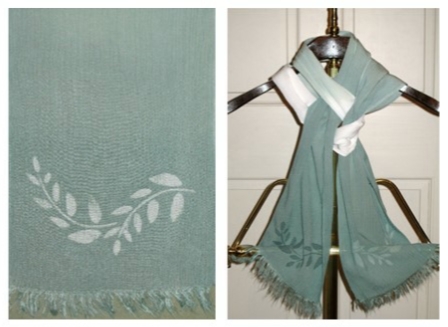
I love the results! I can’t wait to do more sun resist dyeing.

Small Shibori Quilt

I originally published this post on Sunday. However, for some reason the article disappeared from my blog. I know it was originally there, but someone asked about why I took it down.  When I went to check, it was gone. Luckily, I had saved a copy on my computer so I am able to repost today. 

For those who already read this article, I apologize for your having to receive it twice. For those who did not receive the original, please enjoy.

Pam

Free time is hard to find now that I am back to work. However, while my office was closed down in the spring, I had lots of extra time available. One of the things I did during my time off was to work on some fabric dyeing ideas.One bright sunny day, I set up some sun dyeing on my deck. I had seen this technique on a different blog (Tamarack Shack) and wanted to try it.I wanted to try larger shapes that I could then quilt around. I cut some large flowers out of cardboard, placed them on the dyed fabric and set them out in the sun for a couple hours. Unfortunately, and unexpectedly, the wind must have been a bit too strong at some point, because when I went to check on it, the cardboard had moved and distorted. The resulting dye blocked shapes were rather indistinct. I did like how the pink and purple splattered dye turned out. But the shapes were not as I had hoped. So, I’m planning to try this experiment again. Next time I will weight down my shapes with rocks or something heavy.
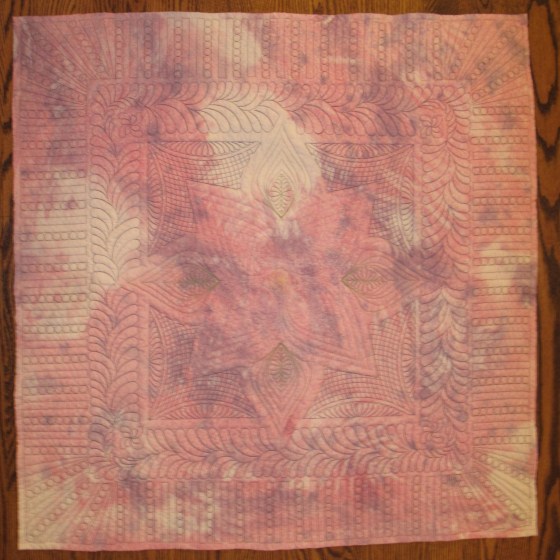
Rather than just stashing the dyed fabric away to use whenever inspiration hit, the next day I decided to work on an idea that I had for a Shibori quilt.Last summer, I posted about a Shibori table quilt I had made. Using the same technique, I designed the stitching pattern for the shibori, the fabric painting, and the quilting. All of the running stitches were completed with polyester thread. This is a rather time consuming step that took about fifteen hours to complete.The pink flowers were then painted with dye mixed with print paste.
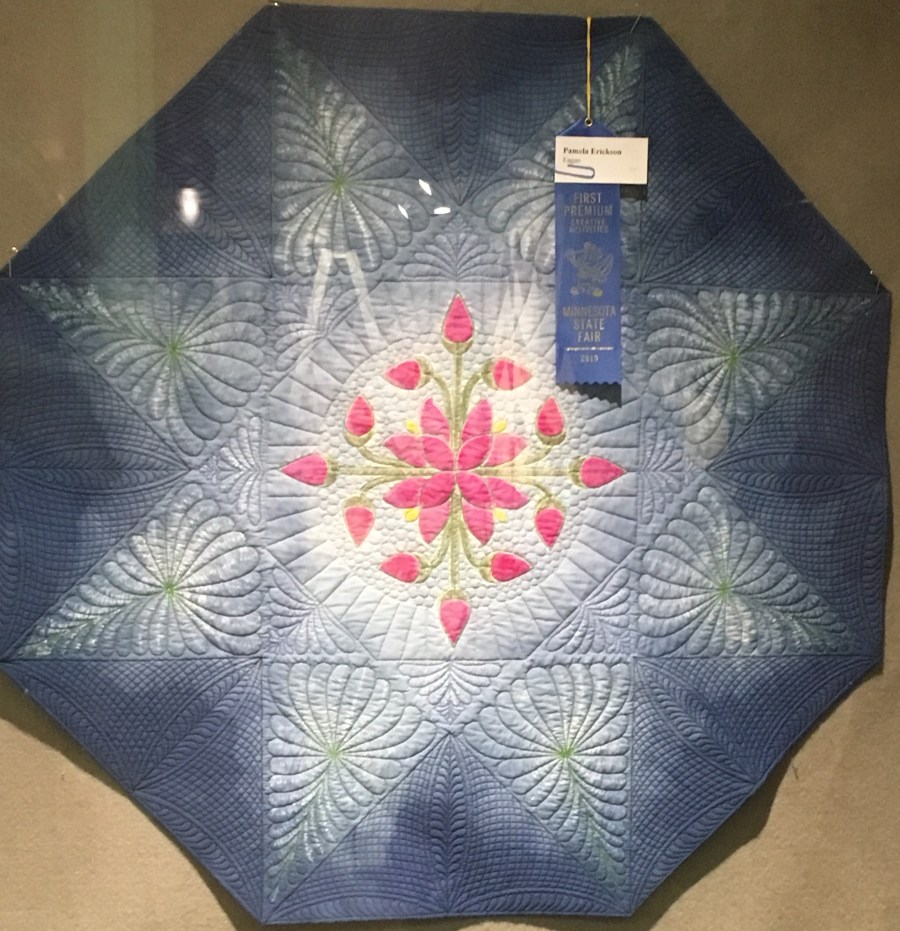
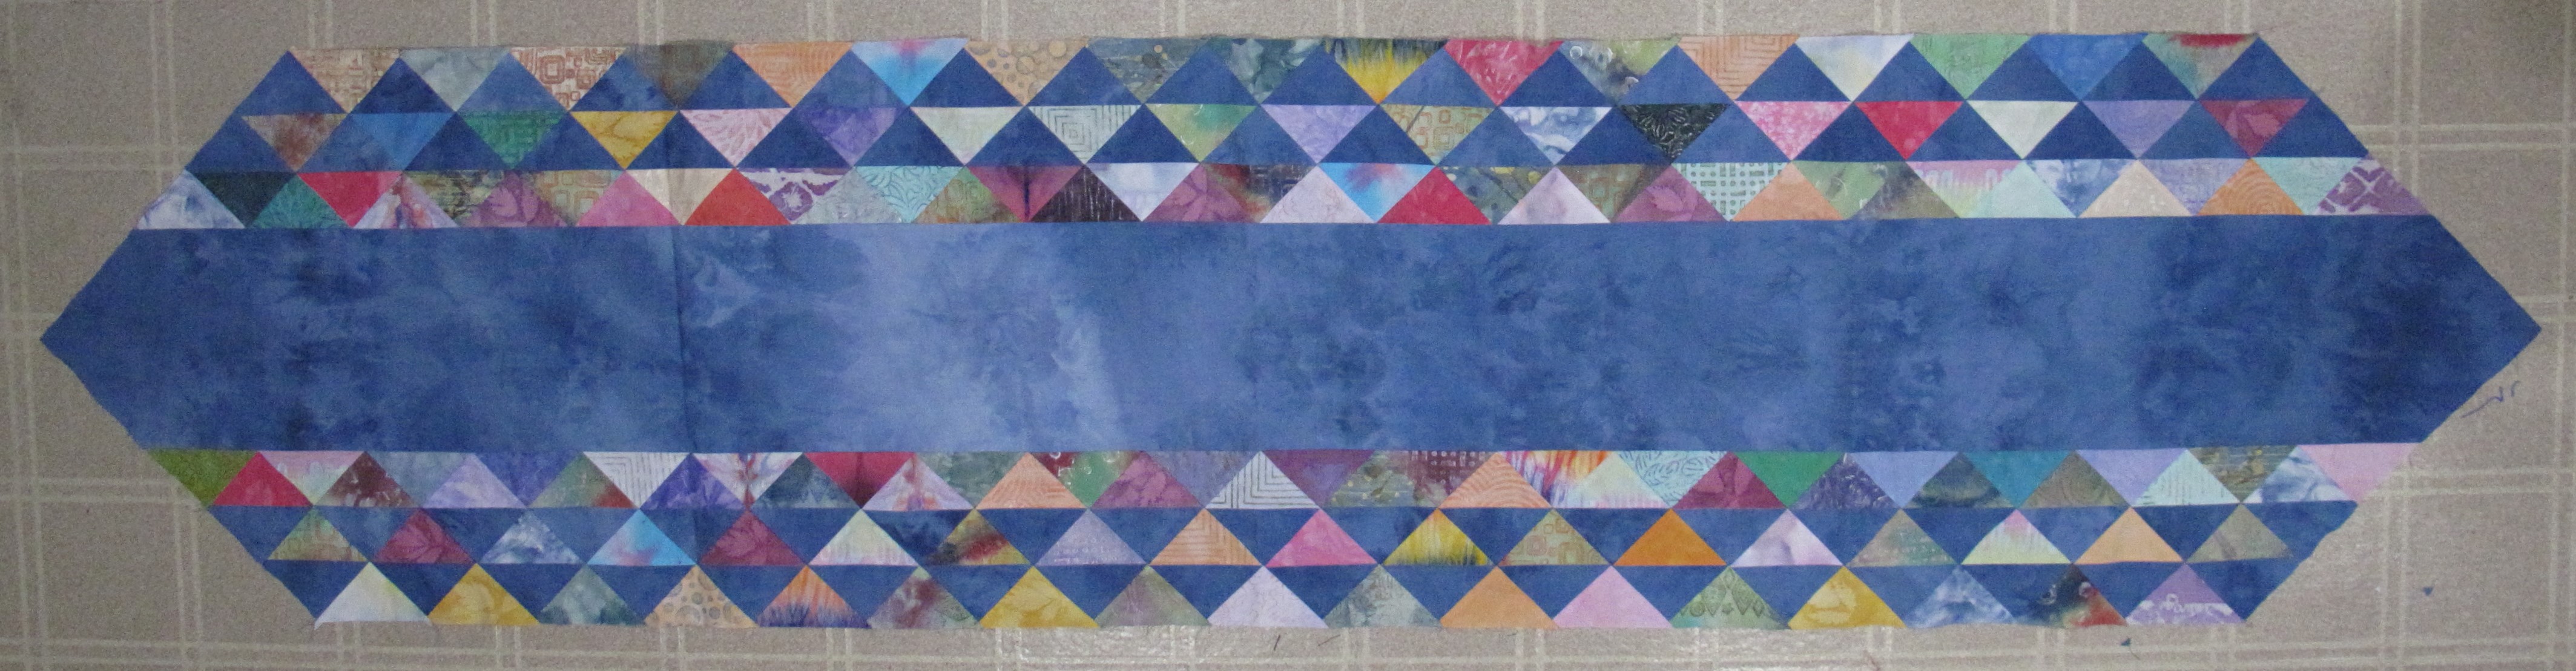
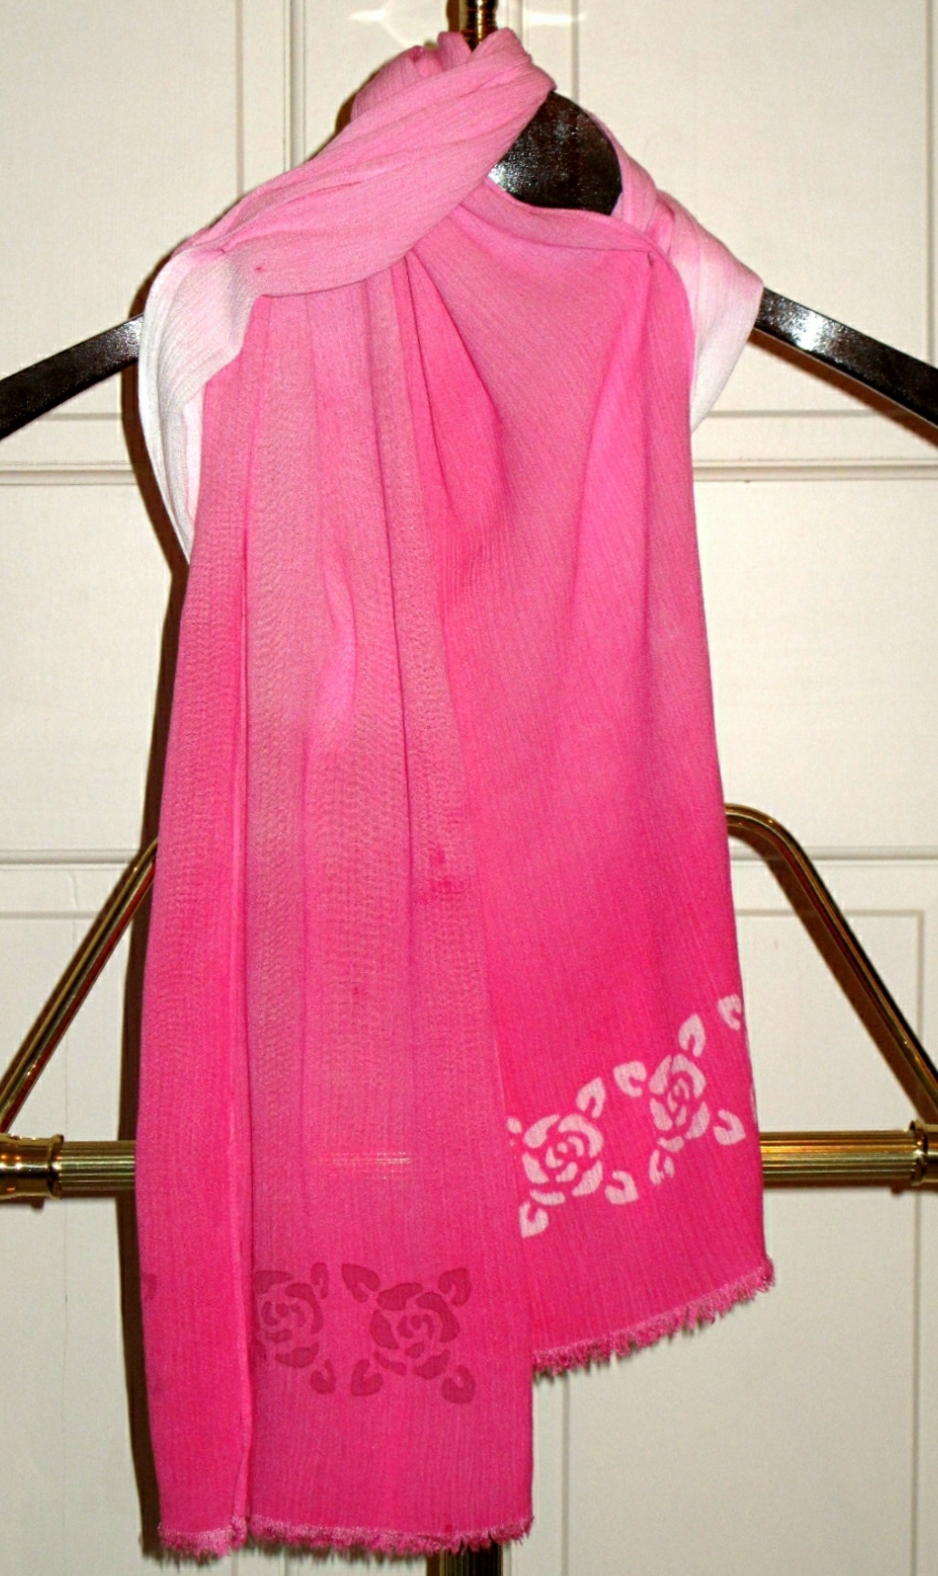
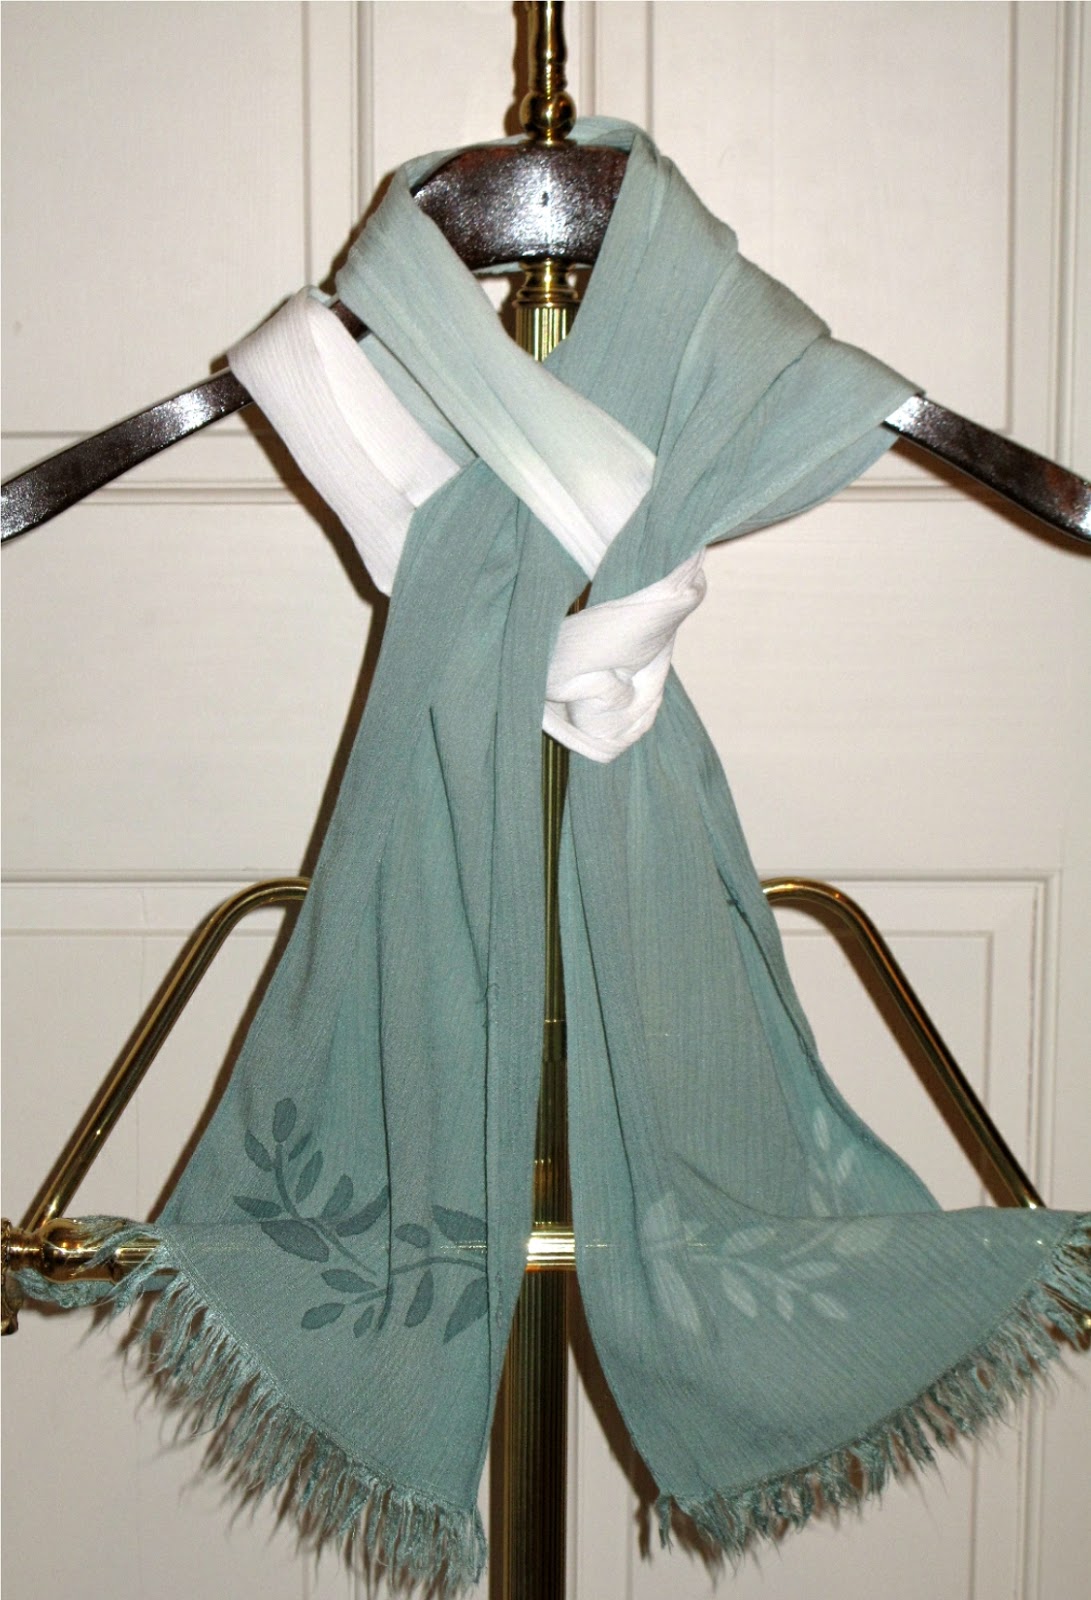
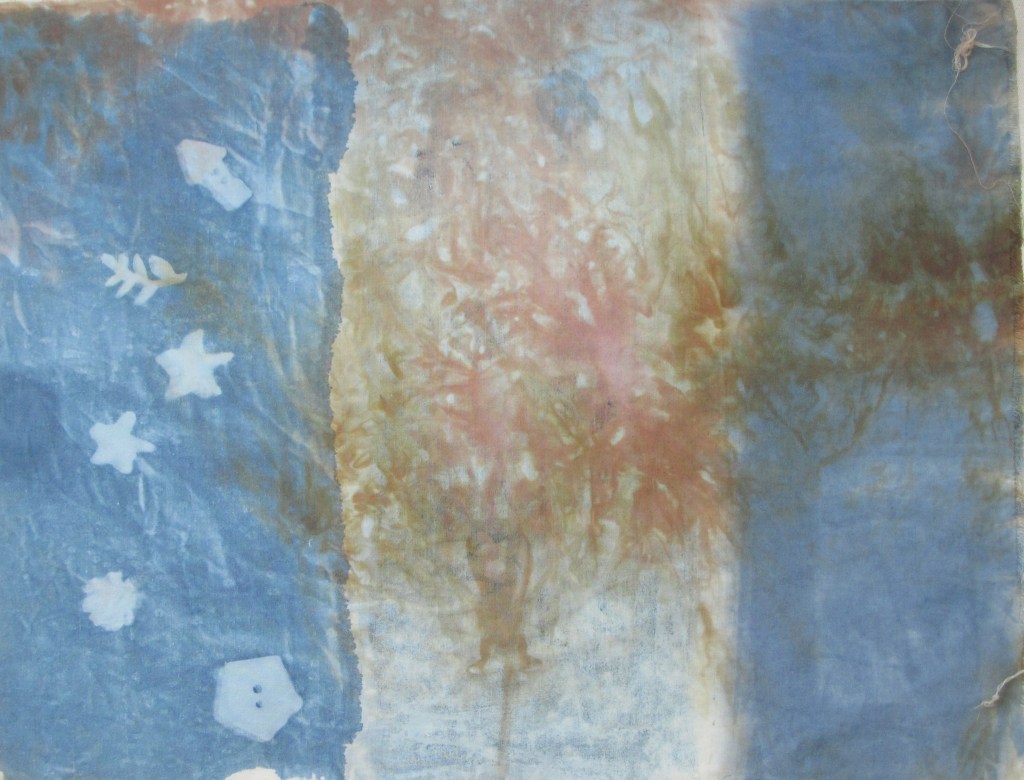
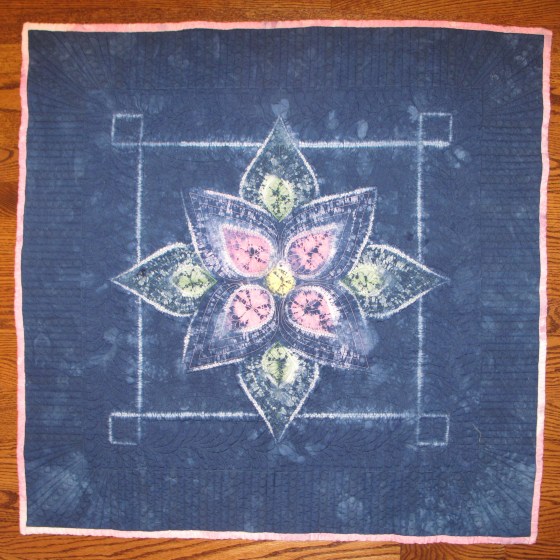
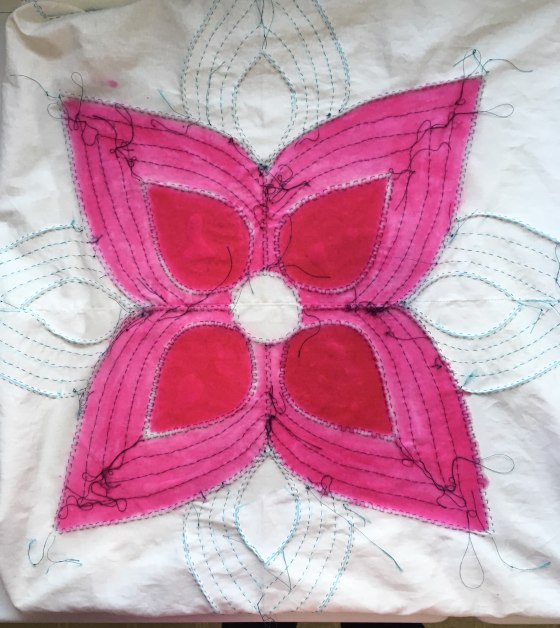
The Green leaves were painted.The threads were gathered and tied tight.And the background was dyed blue.
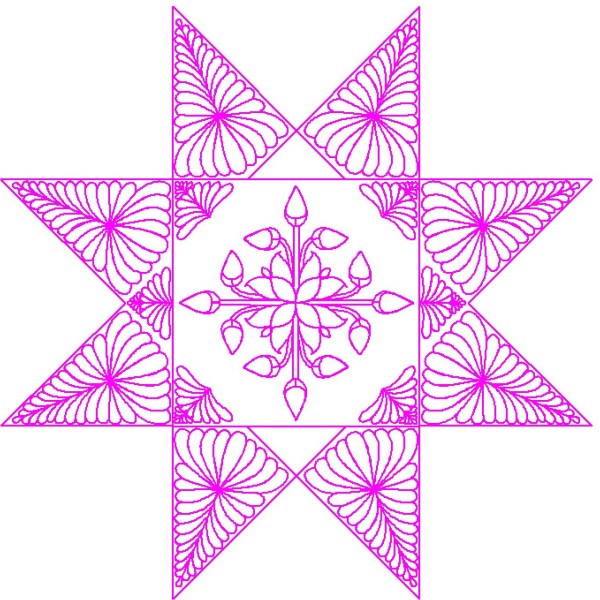
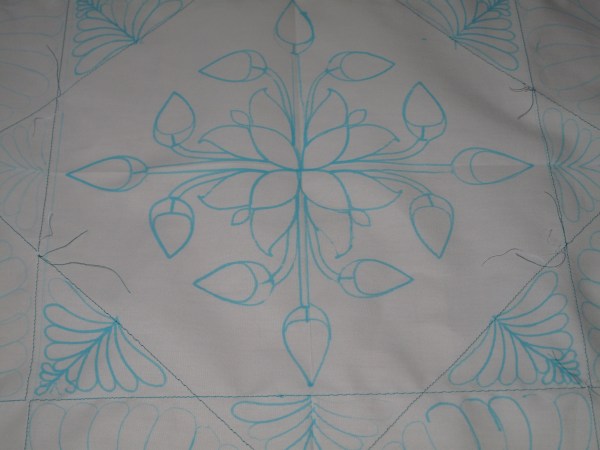
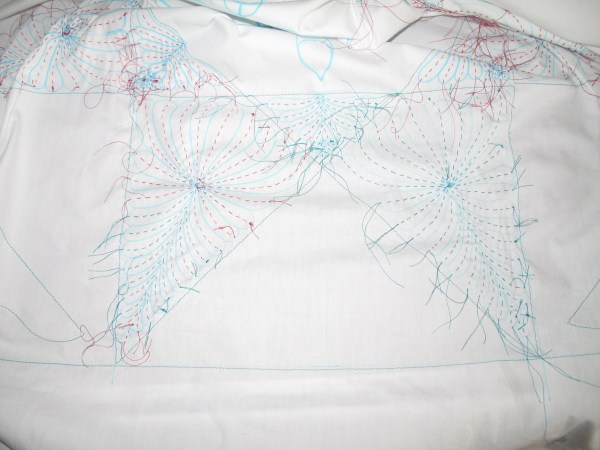
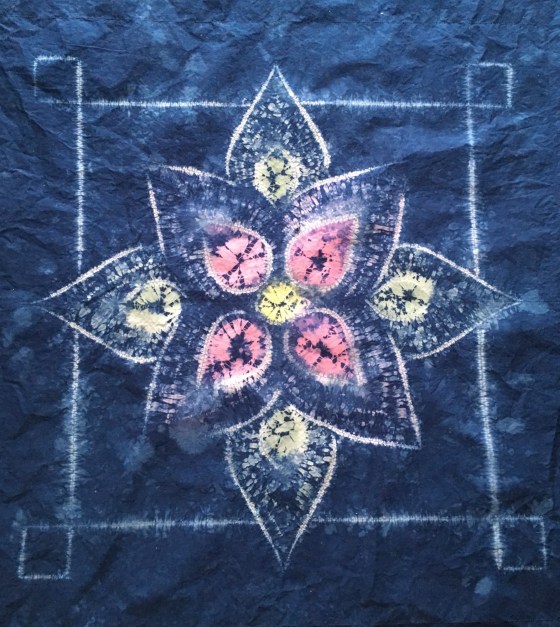
This project sat in my sewing room for a few weeks. Now, after a couple hours of long arm quilting and I am finally done with this project.

Nui Shibori Table Quilt

Fabric Dyeing has been a fun, creative way to make unique fabrics for my quilting.  This spring, I spent some time playing around with stitched shibori.  I wanted to figure out how to create drawings in the dye.  I also wanted to try hand painting before and after dyeing the fabric.

So, I set out to do a few experiments.

Experiment #1. Nui Shibori flower and over-dyeing painted fabric

  • Draw pattern on the fabric with a water soluble fabric marker
  • Stitch the drawn lines  with polyester thread
  • Dissolve Dye in 1 ml Urea Water, Add 2 T Print Paste, 14 ml Urea Water, 1/8 tsp Mixed Alkali, Mix well
  1.               Dark Pink = ¼ tsp Mixing Red
  2.               Light Pink = 1/16 tsp Mixing Red
  3.               Dark Blue = ¼ tsp Mixing Blue
  4.               Light Blue = 1/16 tsp Mixing Blue
  5.               Green = 1/8 tsp Evergreen
  • Paint dye on fabric areas within the shibori stitching

IMG_2592

  • Paint dye in sections for over-dyeing

Dye Paint


  • Allow to dry for 4 hours
  • Pull center threads and tie off

IMG_2589

  • Place in 1000 ml of 0.15 mg/ml Mixing Blue Dye (with Soda Ash)
  • Batch for 5 hours
  • Wash with Blue Dawn, Dry and Iron

IMG_2593

Dye Paint Overdye

Lessons Learned:

  • Shibori pattern turned out well
  • Dye painting turned out well, but the the color edges were too crisp – use less Print Paste next time
  • Over-dyeing does not change the underlying painted color very much

Experiment #2.  Whole Cloth Pattern:

  • Design quilting using QuiltCAD program

Capture

  • Stitch section outlines on long arm with polyester thread for pattern placement when quilting
  • Draw shibori pattern by holding water soluble marker in the needle position and running pattern on trace

IMG_2636IMG_2638

  • Hand stitch shibori sections

IMG_2642


  • Dye Paint:
  1. Mixed Alkali: ½ tsp mixed with 8 ml Urea water
  2. Yellow: 1/8 tsp Golden Yellow in 10 ml Urea water; Combine 1 ml concentrate with 6 ml Print Paste, 3 ml Urea water and 0.6 ml Mixed Alkali
  3. Green: 1/8 tsp Evergreen in 15 ml Urea Water. Combine 7.5 ml concentrate with 15 ml PP and 1.5 ml MA
  4. Dark Pink: 1/8 tsp MR in 15 ml Urea water.  Combine 7.5 ml concentrate with 15 ml PP and 1.5 ml MA
  5. Light Pink: Combine 3 ml MR concentrate with 15 ml PP and 1.5 ml MA
  • Paint on Fabric sections of shibori stitching

IMG_2697

  • Allow to dry for 4 hours
  • Pull center threads and tie off
  • Stitch Floss “Ties” to center of fabric to help with lifting in/out of water
  • Make Dye Concentrate: Mixing Blue 10 gm in 100 ml Urea Water (100 mg/ml)
  • Place in 4000 ml Soda Ash solution in bucket
  • Add dye concentrate at 5 minute intervals (10 ml, 10 ml, 10 ml, 10ml, 40 ml) = 0.25, 0.5, 0.75, 1.0, 2.0 mg/ml to create an ombre effect
  • Lift fabric a small amount after each dye increment
  • Prop fabric up on support dripping into empty bucket, cover with plastic bag

IMG_2699

  • Batch for 4 hours

IMG_2701

  • Clip and remove all sewing lines
  • Wash with Blue Dawn, Dry and Iron

IMG_2852

  • Quilt as planned

IMG_2942

Lessons Learned:

  • Paint center dye before pulling tight the outer threads – easier than having to paint on a bubble
  • If you forget the first step – sealed air packs work well to fill the bubble for painting

IMG_2700

  • Fabric will trap air, creating a bubble, in the middle – easy to keep the center section out of the dye bath.
  • Use a color of thread different from the color of dye – makes it easier to remove the threads.
  • The fabric dye paint did not turn out as well as I had hoped.  So, after quilting, I repainted the fabric dye without Print Paste for a smoother look


I entered this quilt in the Minnesota State Fair on a whim to see what the judges comments would be regarding the shibori  and hand painting technique.  Boy was I surprised that it was awarding a blue ribbon!


Shibori Quilt

Sometimes, when working on a quilt, parts of the original design are adjusted and changed as I proceed with the project.  This was the case when I was making the large butterfly quilt that I described in August 2016 posts.

Early in the design process, I had thought that a rainbow shibori border would look nice.  To create the border,  I made four 9″ x 90″ shibori panels with red, blue and yellow dye.  These panels turned out lovely.

The next step was to dye the fabric that the butterflies would be appliqued onto.  When planning out this step, I changed my mind about the border and decided that I wanted the butterflies to be in a more “natural” environment.  So, I made four more panels of shibori that looked like grass.  This change was perfect for the quilt at that time.

However, I had the rainbow shibori panels already dyed.  Not knowing what I wanted to use them for, I just stored them in my fabric stash and didn’t really think about them for a few years.

Recently, when organizing my fabric, I ran across these panels and decided I really needed to use these in a quilt. Utilizing a simple triangle quilt design, I combined the shibori  fabric with a black fabric.  This was a quick project that turned out really nice. I love the optical illusion that the dyed fabric creates.

IMG_3006


Spring Has Sprung!

It’s April, the birds are singing outside my window, the bulbs are coming up in my gardens and the grass is starting to get green.  So, it’s time to change the decor in my bedroom – a new Daisy Bed runner really added some springtime color.


IMG_2115

To make this bedrunner, I used the leftover blue fabric from the backing of my butterfly quilt as the main background.  To supplement the blue, I took out some of my custom dyed fabric samples, generally ones that were trials on different dyeing techniques. For added color, I decided to try out some fabric paint crayons.

A few years ago, I took a class on Shiva Paintsticks and Rubbing Plates.  I enjoyed the class and purchased some supplies.  However, time being in short supply, I really hadn’t used them since completing the class.

This project, I thought would be a good use of the paintsticks to embellish the fabrics that I had in my collection. After a day of painting, I set the fabrics aside for a week to allow the oils in the dye crayons to dry.  The dye pigment was then heat set by ironing the fabric between pieces of brown paper (absorbs the excess oils very nicely).  The resulting fabrics were really interesting.

Triangles were cut out of the fabrics and the border was then made by alternating triangles of blue and color.

IMG_1754

To enhance the bedrunner, daisies and leaves were appliqued onto the center panel. The runner was quilted and the binding added.


Arashi Shibori Experiment

Arashi Shibori, pole wrapping, creates an interesting dye pattern in the fabric. Because I liked how my initial samples turned out (see April 13, 2016 and August 12, 2016 postings), I decided to do a small experiment.  To assess the effect of the amount of compaction of the fabric has on the dye pattern, the following experiments were completed.
Experiment #1:
1. PVC pipes with caps (to reduce the amount of dye needed)
2. Three pieces of fabric  cut 8″ x 45″, stitched together using a long stitch length to form a tube of fabric, and scrunched onto the pipe
3. Scrunch one piece of fabric:
– loosely, about 20″ in length
– moderatly, about 15″ in length
– tighly, about 10″ in length

8 inch wrap

Experiment #2:

1. PVC pipes with caps (to reduce the amount of dye needed)
2. Three pieces of fabric  cut 9″ x 45″, stitched together using a long stitch length to form a tube of fabric, and scrunched onto the pipe
3. Scrunch one piece of fabric:
– loosely, about 20″ in length
– moderatly, about 15″ in length
– tighly, about 10″ in length
9 inch wrap


Experiment #3:

1. PVC pipes with caps (to reduce the amount of dye needed)
2. Three pieces of fabric  cut 10″ x 45″, stitched together using a long stitch length to form a tube of fabric, and scrunched onto the pipe
3. Scrunch one piece of fabric:
– loosely, about 20″ in length
– moderatly, about 15″ in length
– tighly, about 10″ in length

10 inch wrap

I now have samples that I can refer to when planning to dye fabric using this technique. Can’t wait to try some more fabric dyeing.

Butterfly Art Quilt

As a pediatric dentist, I see lots of kids with interesting clothing selections.  Some have mismatched colors, some have their shirts on backwards (or their shoes), but some are absolutely adorable.  Last winter, one of my younger patients (she was a little over 3 years old) came in with a t-shirt on that had a large butterfly printed on it.
Now, I love butterflies – with their beautiful colors and graceful wings. This little girl was fearful of having me check her teeth, so I tried to help her relax by talking to her about her t-shirt.  Turned out that she liked butterflies too and gladly started showing me her t-shirt.  On closer inspection, this large butterfly was actually made up of smaller butterflies and was really cute.  After a successful dental checkup, she left cavity free and happy!
Since it was a busy day, I didn’t think more about the patient until my lunch break when my staff commented that they were happy she overcame her fears and was able to complete an exam and cleaning. One of my staff commented that the conversation about the butterflies may have been what helped her to relax. This conversation sparked an idea in my mind – to make a quilt with a butterfly made out of little butterflies.

http://www.missoulabutterflyhouse.org/store/

An on-line image search was unsuccessful in finding a picture of the t-shirt that matched what I remembered seeing earlier that day. I did, however, find a link to the Missoula Insectarium. In their store, they sell a t-shirt with butterflies  that I thought might be a good inspiration for my quilt.

Using a graphics program, I did a quick design to see how the idea might look. This, I thought, was going to be a fun quilt to make.

Creating the applique butterflies:
Using the graphics program, I cropped the butterfly image around each of individual butterflies.  In doing this, I found that several of the butterflies were about the same shape.  So, I actually only had 12 different butterflies to work with.  Using the Bernina DesignWorks software, I created a Cutwork and Applique file for each butterfly.

For my fabrics, I used the samples from my many trials of fabric dyeing – shibori, mandala, etc).  These fabrics had symmetrical colorings and patterns that worked well for butterfly wings.

More on this project in my next posting…

Ombre Dyeing (Gradient Dyeing)

Ombre dyeing gives a nice subtle, ethereal look to fabrics.  It looks harder than it actually is.

Supplies:
Fiber Reactive dyes (MX dyes)
Soda ash
Salt
Buckets for dye bath
Rod to hold fabric
Chairs or some sort of support to hold your rod
Rubber gloves
Pins or clamps

Technique:
1.  Wash the fabric in Blue Dawn (unless using PFD fabric).                            Note: Some instructions say to presoak the fabric in soda ash solution.  I prefer not to do this to avoid too much color wicking up the wet fabric.


2.  Use pins to mark increments along the length of the fabric.
3.  Pin the fabric to plastic hangers for easier handling.  
4.  Mix up 20 ml of dye at a concentration of 100 mg/ml in Urea water
5.  Place 2000 ml of warm Soda Ash solution in a plastic container.
6.  For the lightest shade in your ombre pattern, add 2 ml dye concentrate to the soda ash solution.
7.  Wipe the inside of the dye tub to prevent unwanted dye marks on the fabric
8.  Dip fabric to the farthest pin and move up and down several times.
9. While holding the fabric above the dye tub, add 2 ml of dye concentrate and mix well.
10.  Dip  the fabric the the second pin and move up and down several times.
11.  Repeat steps 9 and 10 but adding 2 ml of dye concentrate each time until ten sections are dye at increasingly darker color.
12. Pull fabric out of the dye tub and hang over a container to collect any drips.  Allow dye to batch for 2 hours. 
13. Rinse the fabric in cold water, wash in Blue Dawn, dry and iron.


Some of my earlier posts included scarves that were ombre dyed.  Here are some images to show some additional samples of ombre dyeing.


Katazome – Stencil dyeing

Katazome, is a Japanese method of dyeing fabrics using a resist paste applied through a stencil. With this kind of resist dyeing, a rice flour mixture is applied using a brush or spatula.  Pigment, or dye, is then applied by hand-painting, immersion or both.  Where the paste mixture covers and permeates the cloth, dye will not penetrate. One of the biggest attractions of katazome was that it provides and inexpensive way for an over-all pattern.
Traditional katazome is quite labour intensive.

Traditional Katazome Stencil cutting

Stencil:
In traditional Katazome, the stencil is made by bonding multiple layers of mulberry paper together and waterproofing with persimmon tannin, resulting in a strong, flexible brown colored paper.  The intricate designs are then cut by hand with a knife. The resulting stencil is stabilized by overlaying with a fine net of silk.
This seemed way too complicated and time consuming.  So, I decided to use an existing plastic stencil for my first trial. For additional stencils, I used my Cameo to cut custom designs.

Nori Paste applied through a plastic stencil.
Far left shows Elmer’s School Glue drawn on.

Paste Resist:
Traditional Katazome paste is made using a complicated process (John Marshall has a very good description at http://www.johnmarshall.to/H-Resist.htm). While checking on-line for easier methods of making the paste resist, I found that Amazon carries a type of glue called Nori Glue that is made from rice and is water soluble.  I purchase some and found that it was an inexpensive, easy and satisfactory paste resist.
I also tried Elmer’s school glue.  This works well as a resist for drawing but was not a good stencil resist.

Resulting fabric after dyeing with Purple Procion dye.

I liked this technique.  So, I decided to try making some scarves.

Custom Stencil cut with Cameo


Technique:

  • Rayon gauze  12″ x 90″.
  • Tape stencil and apply Nori Paste
  • Dry overnight.
  • Dip in dye (Lilac) to create Ombre effect.
  • Rinse, wash with Blue Dawn and dry.
Dyed Fabric


Resulting Scarf
Green Scarf


Magenta Scarf