Experimenting with Sun Resist Dyeing

When writing about my latest Shibori project, I alluded to some sun dyeing I had attempted.  After that first attempt, I decided to do some experimenting to determine the best protocol to use for sun resist dyeing.

The idea behind sun resist dyeing is that objects placed on the wet soy-treated fabric will block the suns rays from activating the soy binding of the dye to the fabric.

Having read several different articles about dyeing with soymilk, I first wanted to compare the different ways of prepping the fabric and dyeing the fabric. Some textile artists use just soy milk, some use powder from soybeans and other use soda ash as a pretreatment. So I set up to test several different combinations of pretreatment and dyeing.

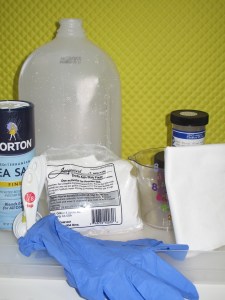
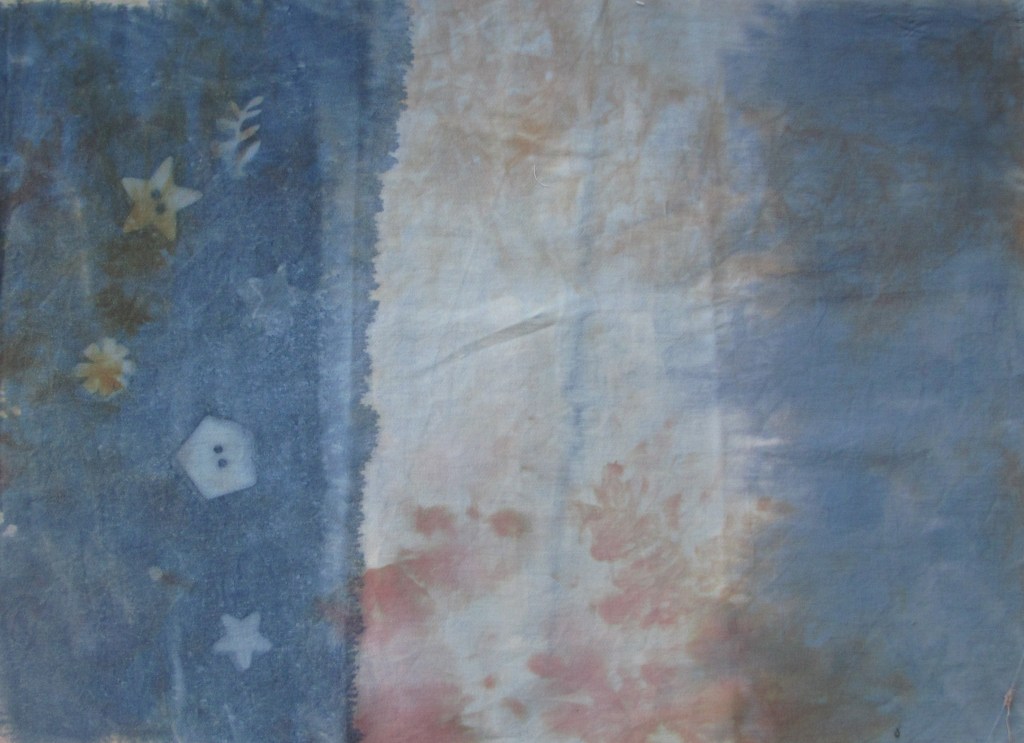
For pretreatment, I used used three old pieces of partially dyed fabric (browns and khaki dyes). Each piece was pretreated with either soy milk (1 cup diluted with 3 cups water), soy powder (1/4 cup powder diluted with 4 cups hot water), or soda ash (4 tsp each of soda ash and salt, diluted in 4 cups hot water).
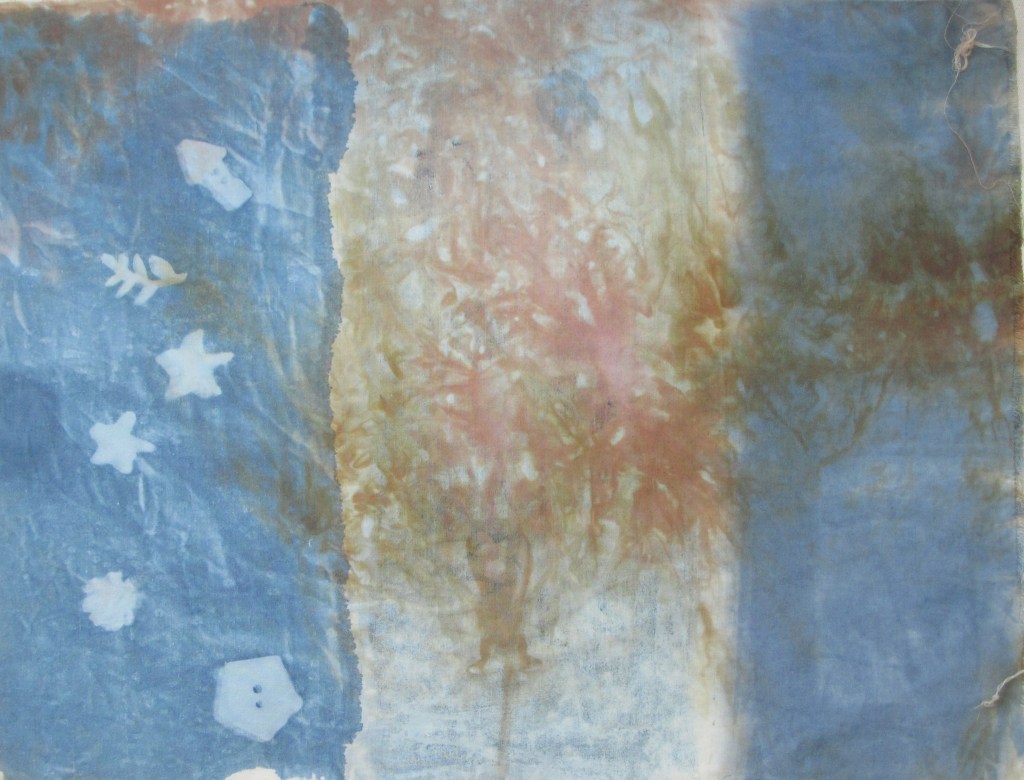
Fabric was pretreated with soymilk.
Fabric was pretreated with soda ash.
Fabric was pretreated with soy powder.

Based upon these test samples, pretreatment of the fabric with soy powder did not result in very strong binding of the blue dye to the fabric. Furthermore, mixing the dye with soy powder did not result in any binding of the blue dye to the fabric. Pretreatment with either soy milk or soda ash was successful in dye binding. However, only the mixing the dye with soy milk cause the sun resist to be visible.

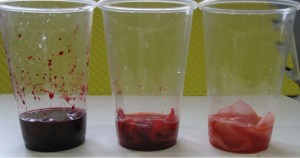
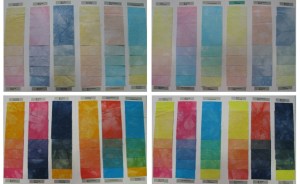
I did a second round of experimenting to verify my findings. In this experiment, the fabric was pretreated with soy milk (left side) or soda ash (right side) and dyed with three different colors of dye (Golden Yellow, Fuschia and Mixing Red) mixed with soymilk.
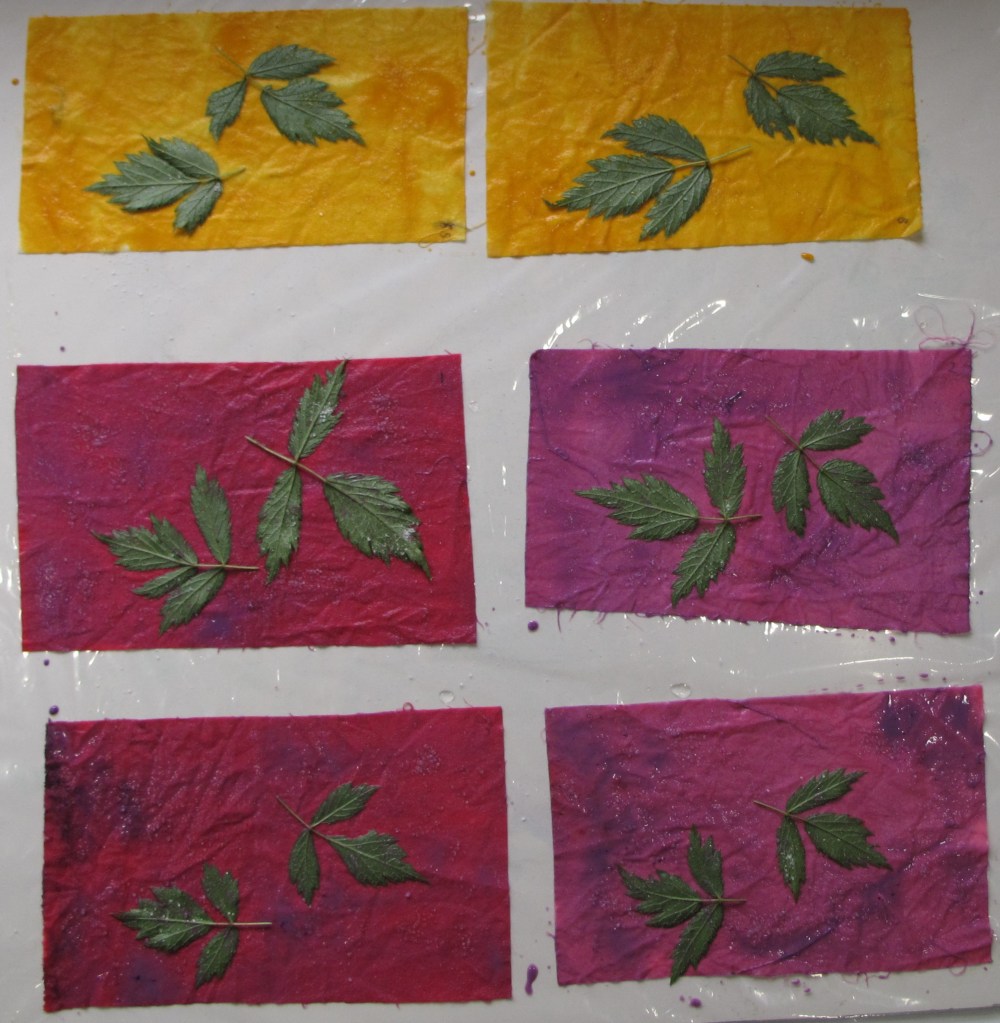
Wet dye painted, leaves placed to block sun.
Samples after drying in sun
Samples after washing with Retayne.

I love the results! I can’t wait to do more sun resist dyeing.
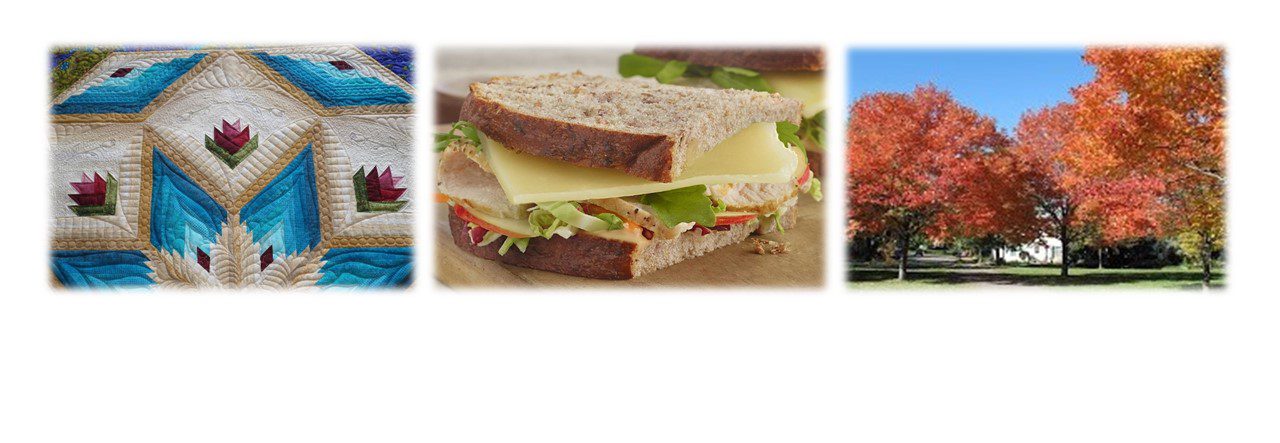
Small Shibori Quilt

I originally published this post on Sunday. However, for some reason the article disappeared from my blog. I know it was originally there, but someone asked about why I took it down.  When I went to check, it was gone. Luckily, I had saved a copy on my computer so I am able to repost today. 

For those who already read this article, I apologize for your having to receive it twice. For those who did not receive the original, please enjoy.

Pam

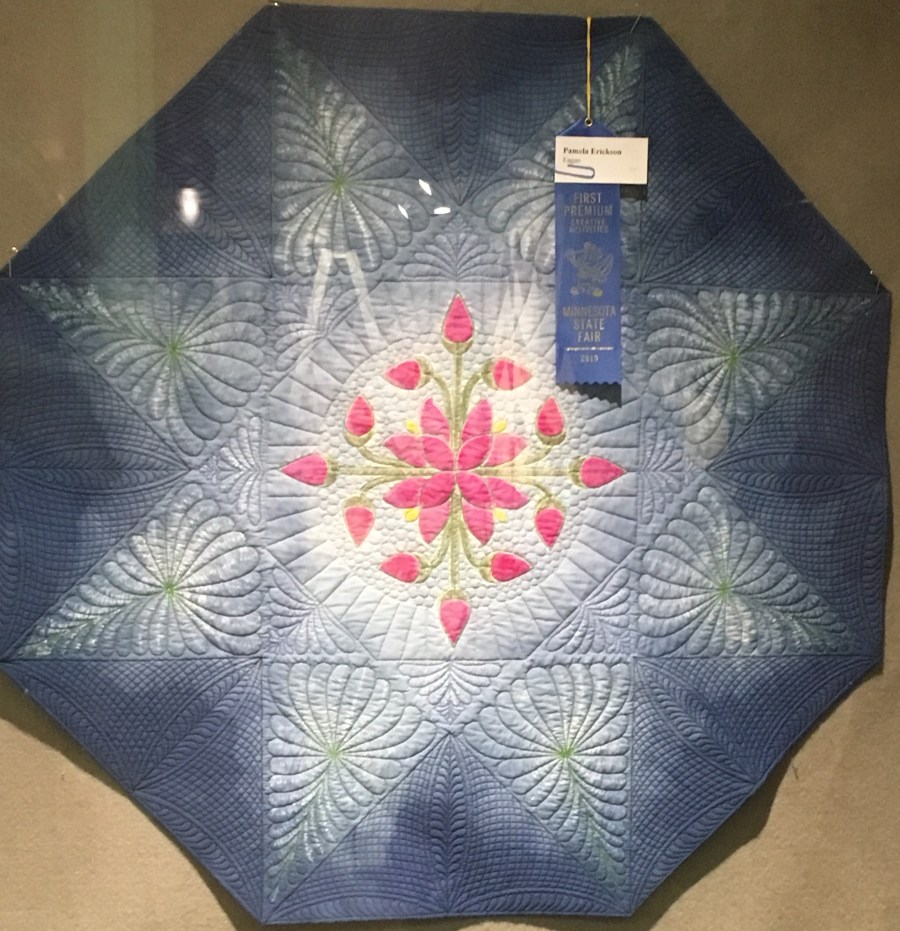
Free time is hard to find now that I am back to work. However, while my office was closed down in the spring, I had lots of extra time available. One of the things I did during my time off was to work on some fabric dyeing ideas.One bright sunny day, I set up some sun dyeing on my deck. I had seen this technique on a different blog (Tamarack Shack) and wanted to try it.I wanted to try larger shapes that I could then quilt around. I cut some large flowers out of cardboard, placed them on the dyed fabric and set them out in the sun for a couple hours. Unfortunately, and unexpectedly, the wind must have been a bit too strong at some point, because when I went to check on it, the cardboard had moved and distorted. The resulting dye blocked shapes were rather indistinct. I did like how the pink and purple splattered dye turned out. But the shapes were not as I had hoped. So, I’m planning to try this experiment again. Next time I will weight down my shapes with rocks or something heavy.Rather than just stashing the dyed fabric away to use whenever inspiration hit, the next day I decided to work on an idea that I had for a Shibori quilt.Last summer, I posted about a Shibori table quilt I had made. Using the same technique, I designed the stitching pattern for the shibori, the fabric painting, and the quilting. All of the running stitches were completed with polyester thread. This is a rather time consuming step that took about fifteen hours to complete.The pink flowers were then painted with dye mixed with print paste.The Green leaves were painted.The threads were gathered and tied tight.And the background was dyed blue.This project sat in my sewing room for a few weeks. Now, after a couple hours of long arm quilting and I am finally done with this project.
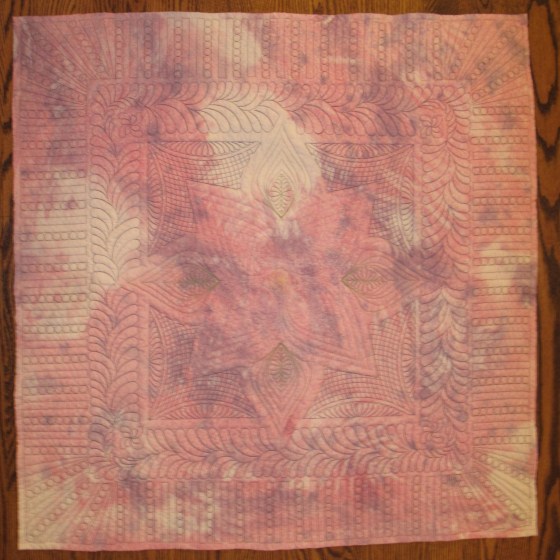
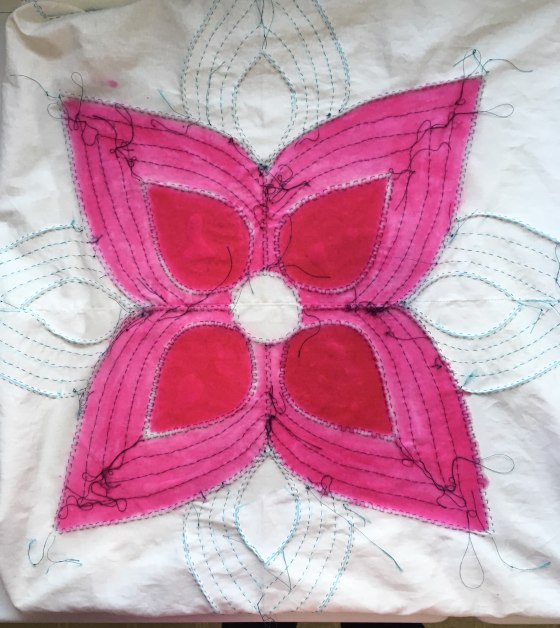
Nui Shibori Table Quilt

Fabric Dyeing has been a fun, creative way to make unique fabrics for my quilting.  This spring, I spent some time playing around with stitched shibori.  I wanted to figure out how to create drawings in the dye.  I also wanted to try hand painting before and after dyeing the fabric.

So, I set out to do a few experiments.

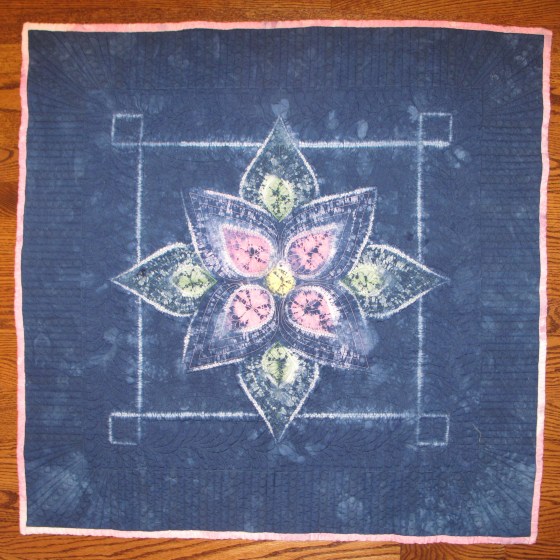
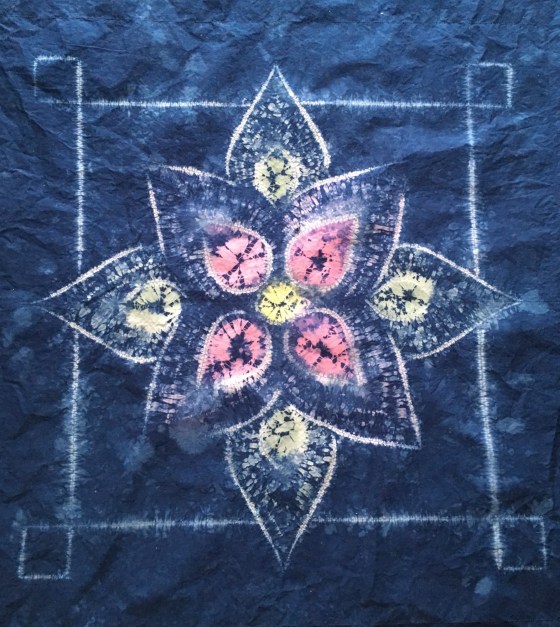
Experiment #1. Nui Shibori flower and over-dyeing painted fabric

  • Draw pattern on the fabric with a water soluble fabric marker
  • Stitch the drawn lines  with polyester thread
  • Dissolve Dye in 1 ml Urea Water, Add 2 T Print Paste, 14 ml Urea Water, 1/8 tsp Mixed Alkali, Mix well
  1.               Dark Pink = ¼ tsp Mixing Red
  2.               Light Pink = 1/16 tsp Mixing Red
  3.               Dark Blue = ¼ tsp Mixing Blue
  4.               Light Blue = 1/16 tsp Mixing Blue
  5.               Green = 1/8 tsp Evergreen
  • Paint dye on fabric areas within the shibori stitching

IMG_2592

  • Paint dye in sections for over-dyeing

Dye Paint


  • Allow to dry for 4 hours
  • Pull center threads and tie off

IMG_2589

  • Place in 1000 ml of 0.15 mg/ml Mixing Blue Dye (with Soda Ash)
  • Batch for 5 hours
  • Wash with Blue Dawn, Dry and Iron

IMG_2593

Dye Paint Overdye

Lessons Learned:

  • Shibori pattern turned out well
  • Dye painting turned out well, but the the color edges were too crisp – use less Print Paste next time
  • Over-dyeing does not change the underlying painted color very much

Experiment #2.  Whole Cloth Pattern:

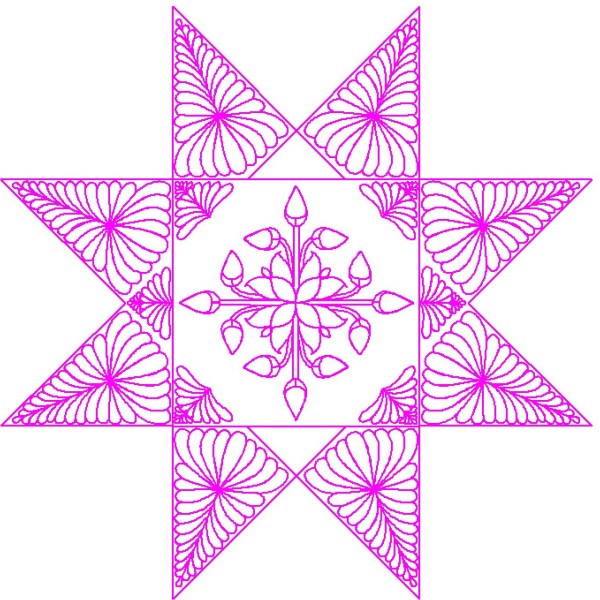
  • Design quilting using QuiltCAD program

Capture

  • Stitch section outlines on long arm with polyester thread for pattern placement when quilting
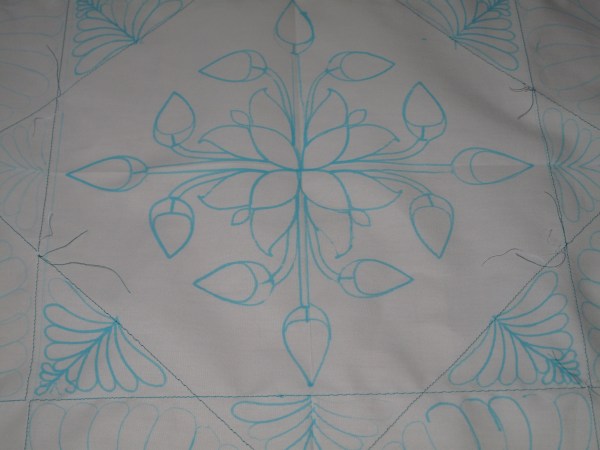
  • Draw shibori pattern by holding water soluble marker in the needle position and running pattern on trace

IMG_2636IMG_2638

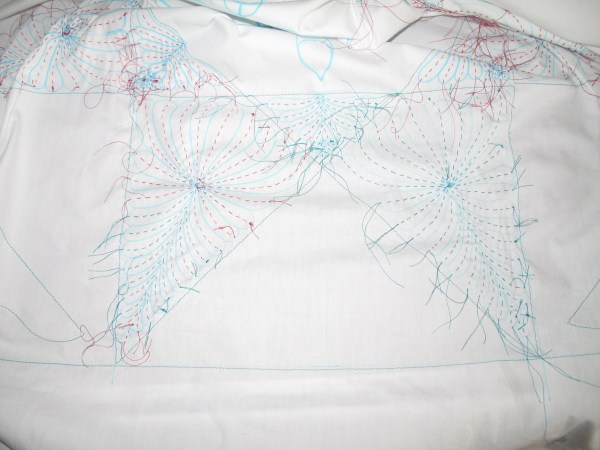
  • Hand stitch shibori sections

IMG_2642


  • Dye Paint:
  1. Mixed Alkali: ½ tsp mixed with 8 ml Urea water
  2. Yellow: 1/8 tsp Golden Yellow in 10 ml Urea water; Combine 1 ml concentrate with 6 ml Print Paste, 3 ml Urea water and 0.6 ml Mixed Alkali
  3. Green: 1/8 tsp Evergreen in 15 ml Urea Water. Combine 7.5 ml concentrate with 15 ml PP and 1.5 ml MA
  4. Dark Pink: 1/8 tsp MR in 15 ml Urea water.  Combine 7.5 ml concentrate with 15 ml PP and 1.5 ml MA
  5. Light Pink: Combine 3 ml MR concentrate with 15 ml PP and 1.5 ml MA
  • Paint on Fabric sections of shibori stitching

IMG_2697

  • Allow to dry for 4 hours
  • Pull center threads and tie off
  • Stitch Floss “Ties” to center of fabric to help with lifting in/out of water
  • Make Dye Concentrate: Mixing Blue 10 gm in 100 ml Urea Water (100 mg/ml)
  • Place in 4000 ml Soda Ash solution in bucket
  • Add dye concentrate at 5 minute intervals (10 ml, 10 ml, 10 ml, 10ml, 40 ml) = 0.25, 0.5, 0.75, 1.0, 2.0 mg/ml to create an ombre effect
  • Lift fabric a small amount after each dye increment
  • Prop fabric up on support dripping into empty bucket, cover with plastic bag

IMG_2699

  • Batch for 4 hours

IMG_2701

  • Clip and remove all sewing lines
  • Wash with Blue Dawn, Dry and Iron

IMG_2852

  • Quilt as planned

IMG_2942

Lessons Learned:

  • Paint center dye before pulling tight the outer threads – easier than having to paint on a bubble
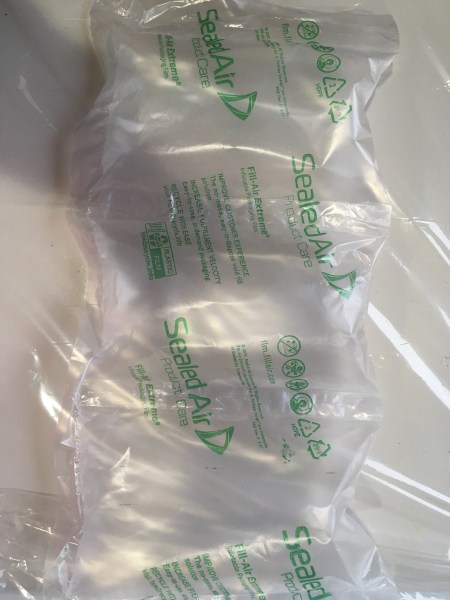
  • If you forget the first step – sealed air packs work well to fill the bubble for painting

IMG_2700

  • Fabric will trap air, creating a bubble, in the middle – easy to keep the center section out of the dye bath.
  • Use a color of thread different from the color of dye – makes it easier to remove the threads.
  • The fabric dye paint did not turn out as well as I had hoped.  So, after quilting, I repainted the fabric dye without Print Paste for a smoother look


I entered this quilt in the Minnesota State Fair on a whim to see what the judges comments would be regarding the shibori  and hand painting technique.  Boy was I surprised that it was awarding a blue ribbon!


Dyed Fabric Strip Quilt

IMG_3010

One of my original posts on this blog was about fabric dyeing (Sept 22, 2015).   At that time, I mentioned that I had watched a Craftsy class about dyeing fabric.  Before jumping in and buying numerous colors of dye and supplies, I decided to try a sample kit.
The purchased a gradation dyeing kit which was a smart decision.  This kit gave me the opportunity to try my hand at mixing dyes to get different colors, as well as working with low volumes and how to best handle the fabrics.
The first color kit I purchased was “STONES & SHELLS”. Stones&Shells
Colors included were: Camel 5181, Old Rose 5220 & Stormy Grey 6160
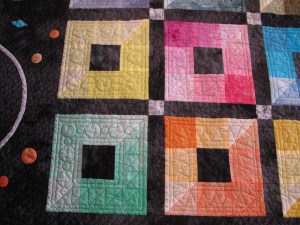
Following the directions, I created thirty fat eights in a gradation of earth tones.  While the samples were fun to make, I had no idea what to use them for.  So,  these pieces of fabric have been sitting on my shelf waiting for some inspiration.  Earlier this year when I was doing some strip quilting, I decided that a strip quilt might be a good use of these fabric as well.
To add some pops of color, I dyed three fat quarters of cotton fabric using a variety of techniques – marbling, sun dyeing and batch dyeing.  For the sides and the backing, I dyed a three yard piece of 108″ wide cotton with a evergreen dye.
The gradation fabrics were cut into 2.5″ x 20″ strips.  These were then sorted by color and then   The green pops of color were cut into 2 1/2″ x 5 1/2″ pieces.  The strips were then sewn together with dark green on each side.  After sorting the gradation fabrics, I split them into three groups and pieced starting with the first color of each group.  This allowed for the fabrics to be distinct rather than blending from one gradient to the next.
The quilt top was then put together using my long-arm machine just like a did with the black strip quilt earlier this year (May 8, 2019).
Another fun quilt to donate.  And, more fabric used from my stash!

Shibori Quilt

Sometimes, when working on a quilt, parts of the original design are adjusted and changed as I proceed with the project.  This was the case when I was making the large butterfly quilt that I described in August 2016 posts.

Early in the design process, I had thought that a rainbow shibori border would look nice.  To create the border,  I made four 9″ x 90″ shibori panels with red, blue and yellow dye.  These panels turned out lovely.

The next step was to dye the fabric that the butterflies would be appliqued onto.  When planning out this step, I changed my mind about the border and decided that I wanted the butterflies to be in a more “natural” environment.  So, I made four more panels of shibori that looked like grass.  This change was perfect for the quilt at that time.

However, I had the rainbow shibori panels already dyed.  Not knowing what I wanted to use them for, I just stored them in my fabric stash and didn’t really think about them for a few years.

Recently, when organizing my fabric, I ran across these panels and decided I really needed to use these in a quilt. Utilizing a simple triangle quilt design, I combined the shibori  fabric with a black fabric.  This was a quick project that turned out really nice. I love the optical illusion that the dyed fabric creates.

IMG_3006


Ombre Dyed Sheers


My eldest son lives in San Francisco and recently moved into a new apartment.  His room is quite large and has a beautiful bay window where he has his desk situated.  He enjoys this desk placement with lots of sunlight flooding him when he is working and a nice view out the window.


At certain times of the day, the sun shines directly into his eyes, making working at his computer a bit difficult. He attempted to remedy this problem by putting up some sheers that would block the sun, but still allow some light into the room.

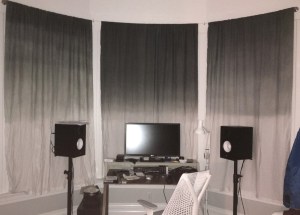
Unfortunately, the sun was still too bright in the late afternoon.  So, when the sheers did not solve his problem, he sought another solution.  His idea was to find some Ombre dyed sheers that were dark grey on the top and transitioning to white on the bottom.

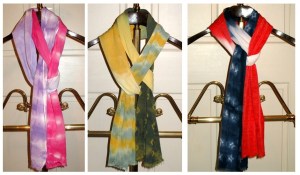
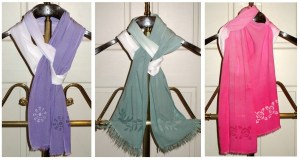
Due to the size of the window, the only ones that he could find were nearly $600. Before he purchased these, he sent me a message to seek my advice about whether this was a good idea. Having recently tried out ombre dyeing of scarves, I thought that the price might be a bit high and offered to make some sheers for him.

Supplies:
Mid-weight Linen (Dharma Trading) 54” wide, 5.1 oz per yard
Wooden dowel, 5 ft length
Support rods – I used two camera tripods with a board attached to the top.
Dye – Black Silk, Jet Black
Unsoftened water, 12 gallons
Soda Ash, Salt
Retayne
Dye Vat:
2 x 6 Cedar, 48” x 2
2 x 6 Cedar, 12” x 2 – screw to ends of 48”
Heavy duty plastic stapled to wood to create dye vat 48” x 9″
Trial Day One:
Cut fabric to 90” length
Sew 1” doubled rod sleeve at one end
Pin opposite end to wooden dowel, roll up extra fabric (cover extra fabric with plastic bag to keep dye from splattering on white end of fabric)
Mark fabric with pin at 8” and then every 4” up to 48” from rod sleeve
Set up tripods at 6 feet height with board attached
Fill dye vat with 4 gallons hot soda ash solution
Add Black Silk dye (250 mg/ml concentrate) – 1,1,2,4,4,8,8,10,10,20,20 ml
Dip fabric to farthest pin, hang and move out of the way
Add next dye quantity (see above) and repeat until all dye has been added
Hang to dry and batch for 2 hours

Wash with Blue Dawn in hot water

Lesson learned – Black silk dye on linen washes out to a blueish color

Trial Day Two:

Question – does a mixed of two different black dyes keep the gray color better?
Followed the same technique as above, but mixed two different black dyes
Black Silk (250 mg/ml concentrate) – 50 ml, mixed with
Jet Black (250 mg/ml concentrate) – 50 ml
Add dye (250 mg/ml concentrate) –  1,1,2,4,4,8,8,10,10,20,20 ml

Wash with Blue Dawn in hot water

Lesson learned – when working outdoors, monitor the wind to make sure that the fabric does not blow down and land on the dirty driveway, and Jet Black dye leaves a reddish tint to the un-dyed fabric.

Trial Day Three:
Question – does spraying the dye on work better? does washing in cold water keep the color from fading
Pin white end of fabric to clothes line

Mark fabric with pin at 8” then at 4” intervals up to 48” from rod sleeve
Spray fabric with hot soda ash solution to saturate bottom 48” of hanging fabric
Dilute 7.5 mg Black Silk dye in 1000ml SA solution
Spray 200ml on bottom 8”
Add 200 ml SA and spray next 4”
Repeat and continue up to 48”
Let batch for 2 hours
Wash with Blue Dawn in cold water
Lesson learned – spraying caused distinct lines to be visible on the fabric, but the cold water did help slightly.
Trial Day Four:
Question – does Retayne help set the gray color better?
Follow the same technique as Day One
Batch for two hours
Dilute 1 T Retayne in 1 gallon hot water, dip the dyed fabric for 5 minutes
Hang and allow to set for 20 minutes

Wash with Blue Dawn in cold water

Lesson learned – this is the center panel in the photo above and was by far the best result!!

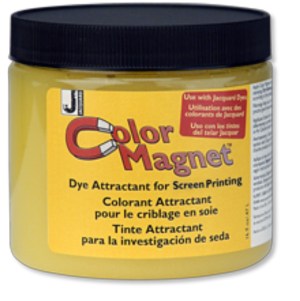
Color Magnet

This stuff is amazing!  That’s how the description of the Jacquard Color Magnet starts on the Dharma Trading website.  After reading that, I was intrigue and wanted to find out more .

Color magnet is a dye attractant that magically attracts more dye where it is applied, creating a unique, two-toned effect. The more dilute the dye, the greater the contrast of color. The color magnet has no binder, so it washes out completely after dyeing, leaving your fabric nicely colored but unchanged in how the fabric feels.  The color magnet comes in two forms.  A roller ball pen form that can be used for drawing or stenciling detail.  And a one pound container that can be used for screen printing, painting or stenciling larger areas.

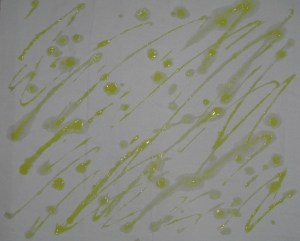
Fabric recently splattered with Color Magnet

My first attempt:

  • Combed cotton fabric 12″ x 12″.
  • Splatter the color magnet across the fabric
  • Dry overnight.
  • Soak in Golden Yellow dye (200 milliliters, 0.5 mg/ml) for 24 hours. 
  • Rinse, wash with Blue Dawn and dry.
Fabric after dyeing with Golden Yellow


My second attempt:

  • Combed cotton fabric 6″ x 18″.
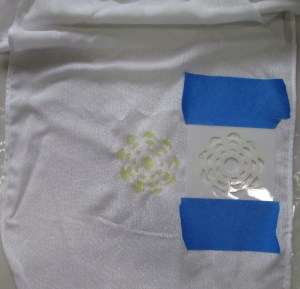
  • Tape stencil and paint Color Magnet using roller pen
  • Dry overnight.
  • Spray with dye (Golden Yellow, Mixing Red and Turquoise, 50 milliliters each at 0.5 mg/ml
  • Cover with plastic and allow to batch for 24 hours.
  • Rinse, wash with Blue Dawn and dry.

My latest endeavors:

  • Rayon gauze  12″ x 90″.
  • Tape stencil and paint Color Magnet using roller pen
  • Dry overnight.
  • Dip in dye (Lilac)
  • Cover with plastic and allow to batch for 24 hours.
  • Rinse, wash with Blue Dawn and dry.


More on the actual dyeing tomorrow.

Dyeing Silk Fabric

Silk — elegant, versatile and washable. Yes, washable! Sewing and dyeing silk was something I wanted to try.
Silk is a natural protein fiber (like wool) that is taken from the cocoon of the silkworm. Most animal protein fibers require acidic dyes which are different than the alkaline dyes that plant fibers like cotton require. However, silk is less sensitive to high pH than other animal fibers, which makes it the most versatile of all fibers for dyeing.
Silk can be dyed with acid dyes (specifically made for animal fibers), but it can also be dyed with fiber reactive dyes (such as Procion dyes).
Looking over the many approaches for dyeing silk, I decided I did not want to invest in yet another set of dye powders.  So, I looked for directions that used the Procion MX dyes I already had.  I found two different dyeing methods to try.

Soda Ash Dyeing

Similar to dyeing cotton, silk can be dyed using the soda ash method.  With this method, the soda ash acts as a mordant to bind the dye to the fabric. The only drawback to this method is that the soda ash is alkaline and thus will make the silk slightly less shiny and not as crisp. While others may find the loss of the crisp silk texture a disadvantage, I actually prefer softer fabrics for making quilts, garments and other household items.
Steps:
1) Soda Ash Solution – 1 teaspoon salt, 1 teaspoon soda ash in one cup distilled water.
2) Make Dye solution by diluting 100 mg of powdered dye in 50 ml Soda Ash Solution.  Mix well.
3) Add 5″ x 5″ fabric square.
4) Cover and store at RT for 3 hours.
5) Rinse, wash with Blue Dawn and dry.

Vinegar Dyeing

To avoid the loss of shine, fabric can be exposed to an alkaline solution for only a short period of time.  Thus to dye the fabric, an acidic dye solution is needed. Vinegar contains 5% acetic acid and as an acid it will bind the dye to the fabric. But, to lock the dye, the fabric requires heat.
Steps:
1) Soak 5″ x 5″ fabric square in Distilled White Vinegar for 10 minutes.
2) Make Dye solution by diluting 100 mg of powdered dye in 50 ml Vinegar.  Mix well.
3) Place fabric and dye in microwave safe container and cover with plastic wrap.
     Note: do not use dyeing containers for food preparation
4) Microwave for 30 seconds, wait two minutes, and microwave 30 seconds again.
5) Cool for 5 minutes.
6) Rinse, wash with Blue Dawn and dry.

Gradation Dyeing

I liked this second method – its fast and creates beautiful colors.  Here are the samples created using 2 mg/ml and 0.2 mg/ml dye solutions.

Now I need to figure out what to make with these truly beautiful pieces of silk fabric I have dyed!

Vinegar Dyeing of Cotton?

I liked the vinegar method for dyeing silk because it was really fast.  So, if it works for silk – will it work for cotton?  Sadly, the answer is No.  The results show that the dye intensity is only about 10 percent of the intensity created with the soda ash solution.  This should not have surprised me since cotton is a plant fiber not a protein fiber.  But, it was worth a try.

Fabric Dyeing


I love fabrics, especially unique, one of the kind fabrics.  So, about a year ago, I took a class on Craftsy called “The Art of Cloth Dyeing” with Jane Dunnewold.  I was fascinated, purchased a sample kit and gave it a try.  I was hooked!  I loved the results and decided to do more. 

Traditional fabric dyeing, which uses a large volume of water and lots of stirring, creates a smooth uniform appearance to the fabric. If multiple colors are used together, the dyes mix and become “muddy”. 
I prefer the results obtained with low water immersion dyeing.  This technique requires less time and uses as little water as possible.  Since the fabric is not stirred, the appearance is less uniform, with a resulting scrunch or crackle effect. 
Supplies Needed:
100% Cotton Fabric
Procion MX dye
Soda Ash (sodium carbonate, dye fixer)
Salt
Non-softened water (or Distilled water)
Mask
Gloves
Measuring cup and spoons
Assorted containers (plastic, glass, or stainless steel, not aluminum or iron)
Blue Dawn dish soap

Instructions
Fabric can be purchased as PFD – prepared for dyeing.  Alternatively, white cotton fabric can be washed in soda ash to remove any chemicals from the manufacturing process. Pro Chemical Company and Dharma Trading Company carry a variety of fabrics that work well for dyeing and quilting.  I have found that Quilter’s Cotton Sateen dyes well and has a softer feel than some of the other fabrics. For creating my test swatches, I cut 6” x 6” squares that were placed in disposable plastic cups.


I purchased my original dyes from Pro Chem.  The dye solution is made by adding 1 tsp soda ash and 1 tsp salt to 1 cup water and heating for 2 minutes in the microwave (to 110 degrees). From my most recent experiences, sea salt creates more vivid color than normal table salt. 

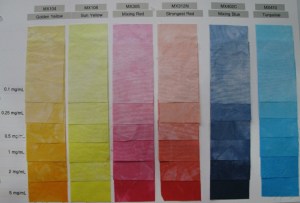
Using a mask and gloves, the amount of dye to be added to the water is measured. Be aware that soda ash is a color fixative.  So, do not dissolve the dye powder in the dye solution until you are ready to use it. Pro Chem lists their dyes by the number of teaspoons per pound of fabric.  For more flexibility and greater accuracy, I set out to determine the number of milligrams of dye needed per milliliter of dye solution.  Below is a photo of my intensity dyeing. 


Each swatch was soaked (“batched”) in 50 milliliters of dye solution for 24 hours. The excess dye was removed by rinsing in cool water, followed by washing in hot water. Dyeing instructions suggest using a detergent called Synthrapol in the wash cycle to remove any unattached dye from the fabric.  Blue Dawn dish soap works just as well, is easier to obtain, and costs less.

I have small metric scale and graduated cylinder for greater accuracy in setting up these dyeing experiments.  If you do not have a metric scale, I can give you some guidelines.  I cup is a bit more that 200 milliliters.  And, 1 teaspoon of dye weighs approximately 200 milligrams.  So, for the fabric swatch that was soaked in 5 mg/ml, you can dissolve 1¼ teaspoon of dye powder in ¼ cup dye solution and the results should be similar.
The cost of the supplies can really add up.  Pro Chem carries over 135 different colors of dye.  I originally only purchased a few dyes (two reds, two yellows and two blues) and created my own recipes for the other colors I wanted.  Below are the photos of my gradation dyeing experiments using 2mg/ml of dye and 0.1 mg/ml of dye.  I now have the recipe to create a wide variety of colors.


To be able to refer to these “recipes” for future projects, fabric swatch pages were made by neatly mounting a 2”x4” piece of each color to a piece of poster board and storing them in a notebook.  What to do with the left over fabric?  Make a quilt!  Below is the quilt I made from the fabric that was not used in my swatch book.