While the Minnesota State Fair was taking place, I received a phone call from the our local community television station asking for an interview.
Here is the resulting video that they posted on their Facebook page.
Creating a Legacy though the things I love – Fiber Arts, Flora, Food, Faith and Fun

While the Minnesota State Fair was taking place, I received a phone call from the our local community television station asking for an interview.
Here is the resulting video that they posted on their Facebook page.
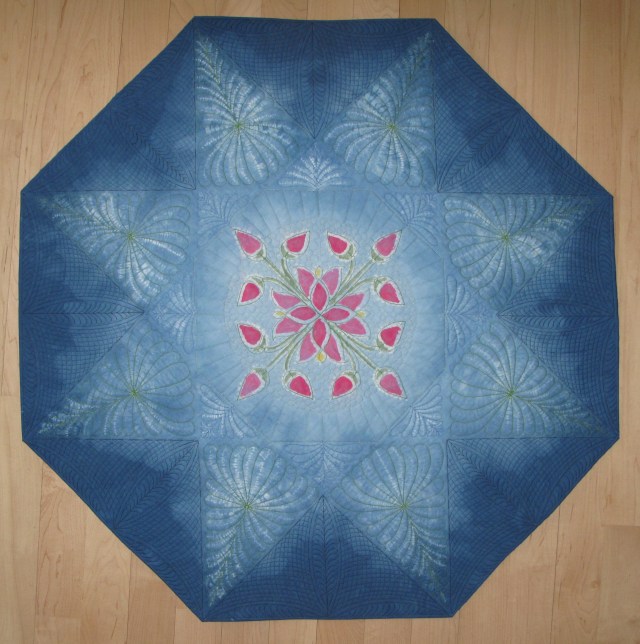
Fabric Dyeing has been a fun, creative way to make unique fabrics for my quilting. This spring, I spent some time playing around with stitched shibori. I wanted to figure out how to create drawings in the dye. I also wanted to try hand painting before and after dyeing the fabric.
So, I set out to do a few experiments.
Experiment #1. Nui Shibori flower and over-dyeing painted fabric


Lessons Learned:
Experiment #2. Whole Cloth Pattern:


Lessons Learned:

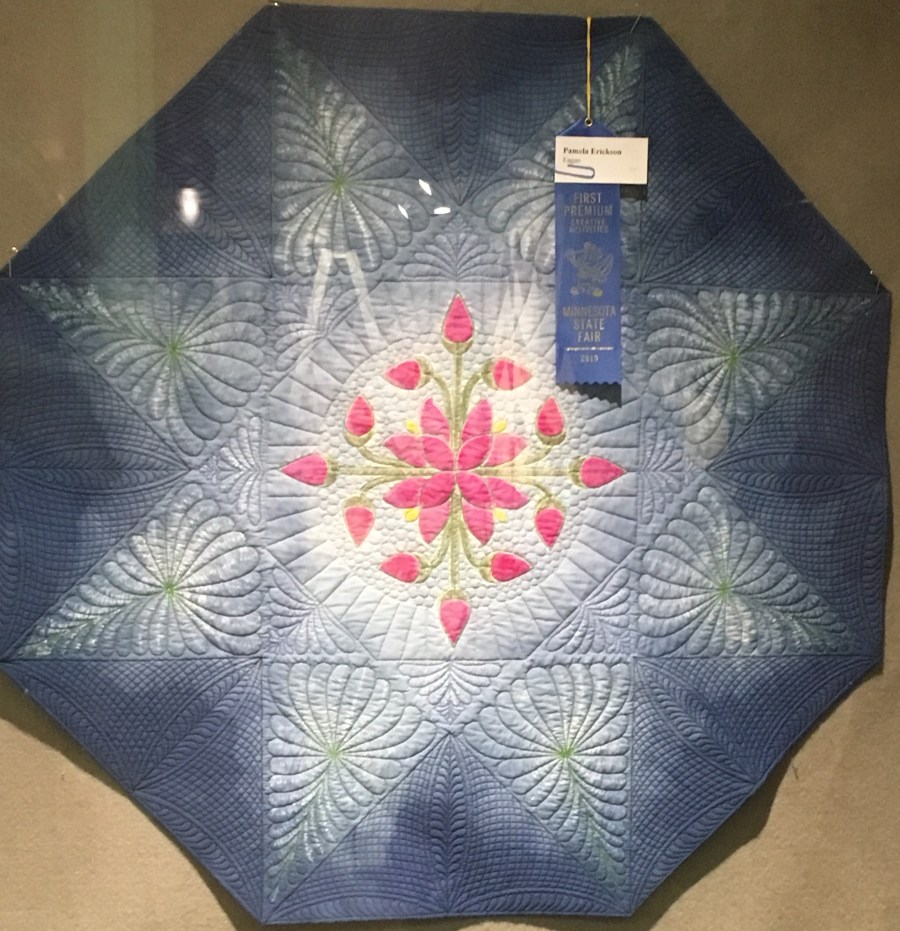
I entered this quilt in the Minnesota State Fair on a whim to see what the judges comments would be regarding the shibori and hand painting technique. Boy was I surprised that it was awarding a blue ribbon!
The weather has been absolutely beautiful the past couple of days, mid 70’s and sunny. Perfect weather for the start of the Minnesota State Fair. The first two days of the fair set attendance records for their respective days. After just three days, the attendance is over 500,000 – perhaps we may even surpass Texas this year!
On Friday, I went to the fair with a few friends. It was a fun day. Since my boys are grown, the past couple of years I have gone to the fair by myself, mainly to see the quilts and other crafts. Of course, even with friends, the first place I went was to see the quilts.

This year, I entered my “Fractured Tree” quilt hoping that it might do well at the fair. Unfortunately, I was disappointed to learn that the quilt did not ribbon this year. Fortunately, it was displayed in a spot where it was easy to see.
Interestingly, this was the only quilt this year that I originally planned to enter in the fair even before making it. The other quilts I made were not made with the fair in mind.

After making my son’s “Moonscape” quilt, I realized it was such a unique quilt that I thought I would enter it in the fair and see how well it might do. I did receive a ribbon and look forward to reading the comments after the fair is over.

When I was finalizing the registration of these two quilts for the fair, I decided to include two other quilts.
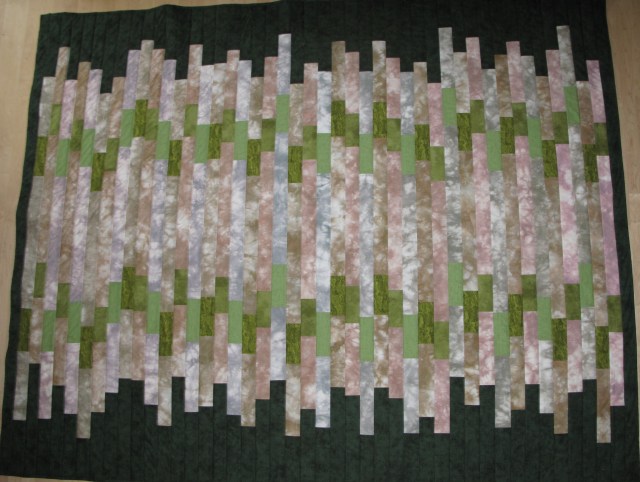
One of these was a shibori and hand painted wall quilt. I will describe the technique used for this quilt in another blog. I was pleasantly pleased to see that this quilt received a blue ribbon!

The other quilt was one that I was making for an acquaintance and finished sewing the binding on the day before I needed to drop it off at the fair. This quilt “Blended Cultures” was made to commemorate the birth of his first grandson. I was really surprised to learn that this quilt also received a blue ribbon. I am really glad I was able to complete it in time to enter it in the fair!

Sweepstakes Winner made by Mary Alsop. She has tremendous skill and is an award winner ever year. In fact, she was the sweepstakes winner last year as well.
I’d love to meet her some day.
Some other quilts that caught my eye:


After a day of exploring the fair, I think my favorite spot was the Horticulture Building. The flowers there were stunning!


I started gardening when my boys were very young. When they were playing outside, I needed to be there to watch and supervise them. While I would play with them, I found myself thinking of ways to enhance my landscaping and would decide to do something new to plant. When I were planting, I would have the boys help me. As young boys, their favorite thing was to haul mom’s supplies with their Tonka trucks. I would often have to walk behind them and pick up plants, rocks and/or mulch that bounced out of their trucks, or weeds that never quite made it to the disposal area. Now that my boys are older and no longer playing in the yard, I still enjoy the time in my gardens. Working in my gardens has become a relaxing and creative thing to do.
One of my more recent joys is to make art for my gardens. One of these yard art pieces was a beaded watering can that I posted about two years ago (July 12, 21017). Recently, I saw another watering can idea and decided to add it to my gardens.


So, another new project – a lighted watering can!
Materials
Steps:


In honor of the day, I thought I would post some photos of my feline friends.

")
Our first cat, Squigglez, enjoyed 14 years in our house. This was much longer than we expected to have him. Shortly after adopting him, he was diagnosed with the cat version of Ehlers-danlos syndrome. EDS a connective tissue disorder that is caused by a genetic defect in the production of collagen. This weakens the skin, gastrointestinal system and heart. The average lifespan of a cat with EDS is five years. Even the slightest scratch can damage and tear the skin of affected animals, leading to scarring. Heart failure is the usual cause of death. Amazingly, his heart remained strong, but sadly his GI system was too fragile and deteriorated with age. But, we had many more years with him than we expected.


About a year later, we adopted another cat. Comet was a really young kitten that was abandoned in the ditch near a friends farm.


My second son, Sam, adopted him as his own. Comet was incredibly playful and loved to run around – thus the name!


Comet also got along with everyone, human or pet. Both Squigglez and Duke (our Yorkie who past away a few months ago) would allow him to eat and sleep near them. That’s saying a lot because both of them were very independent and did not get along with any of our other pets.
Eleven years ago, Comet got out of the house one night. Now this wasn’t too unusual for him. Comet loved to roam the woods behind our house when it was dark outside. Usually around 5:30 am I would be awakened by him meowing as he walked through the front yard asking me to let him in. Unfortunately, one morning he never returned. We searched the neighborhood and contacted Eagan Animal Control, but he was not to be found. Every Monday and Friday I would go by the South Metro Humane Society to see if he may have been taken there. After six weeks, he was not to be found.
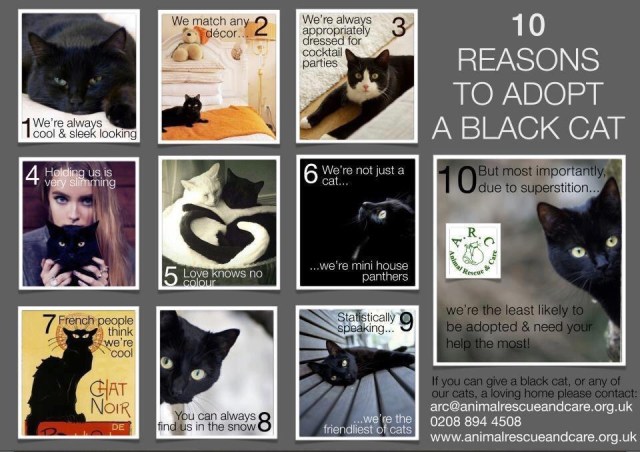
 Each time I stopped at the Humane Society, I would spend some time in the cat room playing with the kittens. After six weeks, I had fallen for one of the kittens that was really affectionate. I decided I would adopt her. However, this was early October and I was told that the Humane Society policy was not to adopt out black cats the weeks before Halloween (apparently there are some people that have done evil and cruel things to black cats at that time of the year). Sadly, I left without her but I would return and visit her several times a week. My plan was to adopt her after Halloween to take her home. Luckily about a week before Halloween, the staff decided that I was not going to harm her and allowed me to adopt her earlier than I had anticipated.


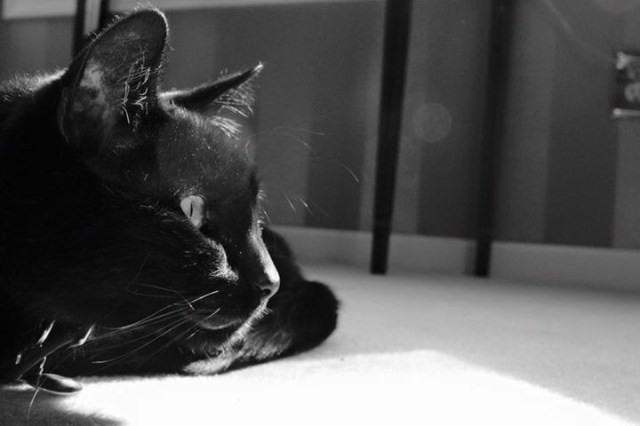
Onyx has since become my constant companion. She is close by me almost all the time. In fact, as I write this posting, she is sitting right next to my computer! Of course, she is sitting on the computer case because it is the softest thing near me.


Hopefully we have several more years to enjoy her companionship!

We’ve all seen and used them. The ever present emoji, especially in social media communications.
Well, today is a day to use them even more. It’s World Emoji Day!
So, our office decided to have some fun. Each member of our team picked out an emoji. Then, using my Silhouette Cameo cutter, I digitized and cut out heat transfer vinyl to iron the emojis onto T-shirts.
Here are a few close ups of the T-shirts:


And a couple group pictures:


 Waste Not, Want Not – that is my approach to my crafts. I just hate to throw away fabric, yarn, glass, or anything that could potentially be used in another project. That’s why I have baskets of small pieces of fabric scraps, drawers of larger pieces of fabric, other drawers of yarn, embroidery supplies and beads. I even save small pieces of batting because I never know when I might need only a bit.
In my glass room, I save all my glass scraps as well. I even save my failed projects, things that crack or just don’t turn out the way I wanted. These failed projects are given new life with pot melting. These pot melts are really cute made into mushrooms, of which I have made numerous. Running out of people to give mushrooms to, I really needed to find another idea for using pot melts.
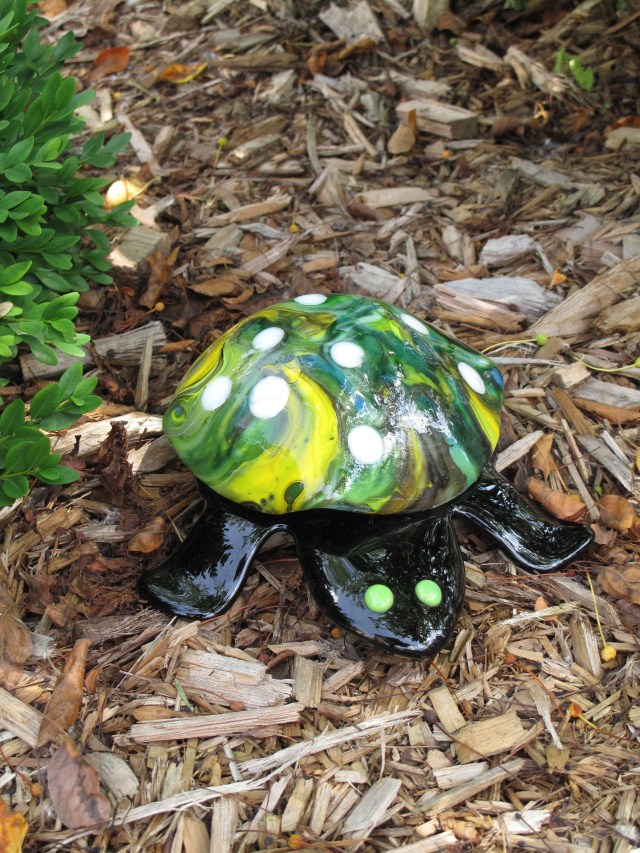
For the past year, I have had three different pot melt circles sitting on a shelf in my glass studio waiting for me to come up with an idea. When making the glass centipede for my garden, I finally had a bit of inspiration. I was looking at clip art pictures of different garden animals and insects and saw a cartoon of a turtle. Looking at the image, I thought that the shell of the turtle could be made out of a pot melt circle.
So, a new project – fused glass turtle!
Materials
Green COE 96 1/2″ pebbles, 2 pieces
Black COE 96, 12″ x 18″
Castalot Glass Mold Material, 3 cups mixed with water according to directions
Cardboard box for forming mold
Exacto Knife for shaping mold
Copper end caps, 1/2″, 2 pieces
Copper pipe, 1/2″ x 1 3/4″
E6000 Adhesive, clear and black

Steps:
1. Pot melt a 7″ circle of glass. Slump over a bowl shape. Since I already had some of these, I used what I had. In the future, I probably would not have fused the white pebbles onto the pot melt. But, since I had already done this, I used what I had.

2. Draw a turtle outline on paper and trace onto clear plastic. Cut two pieces of black glass from the turtle pattern.
If you want to replicate this idea, I am providing the turtle pattern. Print out the photo, making sure that your printer is calibrated to the 1″ box on the pattern.

3. Full fuse the two pieces of black glass.
4. Contour fuse eyes to the head piece.
 5. Create a slumping mold.
Again, I am providing an outline of the mold. If you want to make one, the mold is 1″ thick.

6. After allowing the material to set for an hour, remove the cardboard and use an Exacto Knife to carve the edges of the pattern smooth. Allow to dry overnight and then fire according to the directions on the package. Coat the mold with several coats of Primo Primer Kiln Wash.

7. Place your turtle shape over the mold. Slump the shape according to your kiln settings.
 8. Using the black E6000, adhere one end cap in the center of the back of the turtle and allow to set over night. Meanwhile, run a thin bead of clear E6000 along the edge of the turtle shell and allow this to also set over night. This bead will provide a cushion between the shell and the body of the turtle to avoid having glass against glass that could cause breakage.
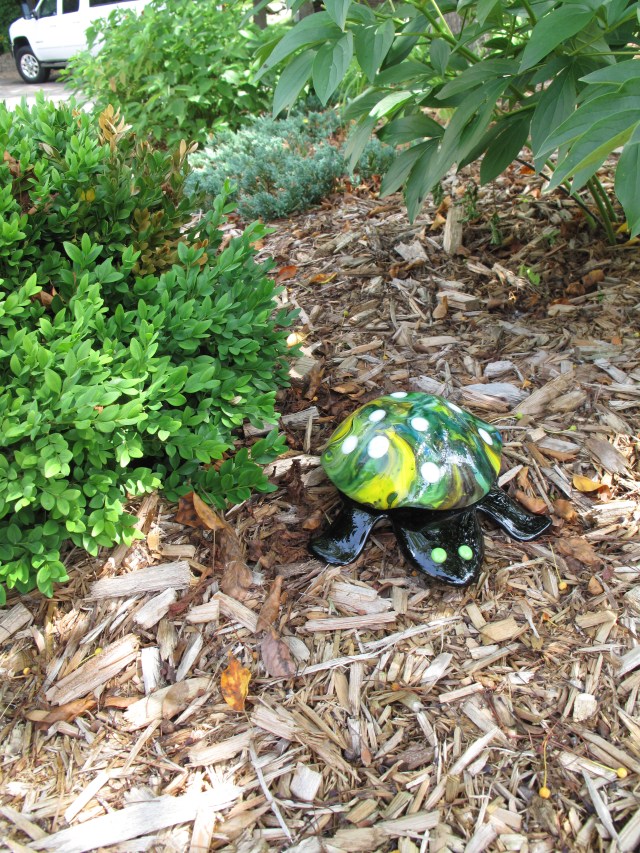
9. Cut a piece of copper pipe the height of the slumped pot melt. Generally you want the turtle shell to light rest against the turtle body. Insert this pipe into the cap on the turtle back. Add a copper cap to the top end of the pipe. Place black E6000 on the copper cap and adhere the turtle shell to the copper. Note that the copper pipe is not glued or secured to the copper caps. This will allow you to take apart the turtle a wrap it for save winter storage. Allow the adhesive to set overnight and your turtle will be ready to invade your garden.

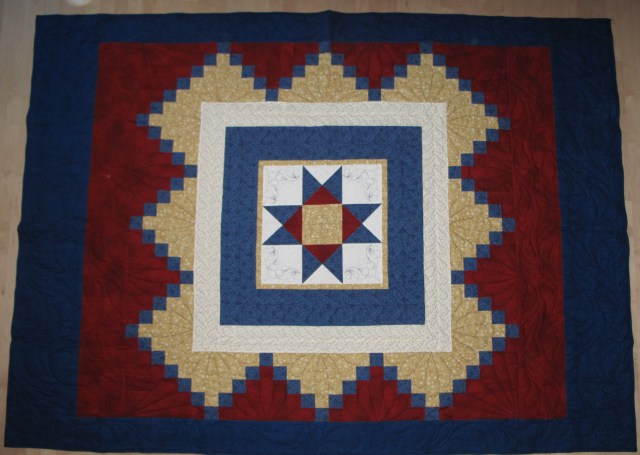
In honor of Independence Day, I decided to post a few Patriotic Crafts.
Red, White and Blue Quilt donated to Quilts of Valor

A quilt given to a foreign exchange student to remind him of his time spent in the USA:
A woven scarf:

And, some Raspberry & Blueberry Scones:

Raspberry-Blueberry Scones
Makes 6 scones
1 cup flour
1 Tbs baking powder
1/4 cup granular sugar
1/4 cup butter, cold, cut into pieces
1/4 cup milk
1 teaspoon vanilla
2 Tbs dehydrated blueberries
1/4 cup white chocolate chips
2 Tbs freeze dried raspberries, cut in half
Preheat oven to 375 degrees F. Combine flour, baking powder and sugar. Cut in butter (a mini food processor works really well). Add milk and vanilla. The batter will be very crumbly but should hold together when pressed into a ball (add a small amount of milk if necessary). Mix in berries and chips. Divide into six scones. Bake at 375 degrees for 15-18 minutes. Drizzle with glaze (optional).

