Flower Power

I love this time of year, the temperatures are nice, the days are long and there are few bugs so far.  But mostly, I love the flowers.  And, right now, my yard is lovely.  So, I decided to take some photos today.

Warning, photographic overload!

IMG_3055IMG_3056IMG_3057IMG_3058IMG_3059IMG_3060IMG_3061

After taking some general photos, I decided to play around with the Macro setting on my camera.  I need some more practice, but I had fun doing this.

Lest you think everything in my yard looks great, I thought I would also show the large patch of lawn that I am trying to repair.  Hopefully in a few more weeks the grass will fill in better.

IMG_3062

Split Personality

My favorite way to relax is to work on one of my crafts.  And, yes, I have been doing that a lot.

But, today was a day to do something very different.  With the temperature in the low 70s, low humidity and, most importantly No Bugs, it was a day to work outside.  I was able to crossed something off of my to-do list that has been on the list for a while (okay, so actually a couple years).

img_3697A few years ago, we had three large oak trees taken down by a local arborist (Branch and Bough, if you are in MN, is a great tree service).  These trees were hanging far over our driveway and the concern was that they might fall onto our vehicles. At the time, we had the tree crew take the trees down and then cut them into 1 foot length intending to split the wood to use in our firepit and fireplace.  Since then, these large pieces of wood have been stacked by our driveway.

Well, today I finally got around to splitting the wood.

img_3699.jpgWe made a trip to Home Depot last night to rent a log splitter for a day (my husband was kind enough to help with this since I am not confident towing something behind my vehicle).  Then around 7:30 this morning, I started working through the stack of logs.   Eight hours later and I had about a full cord of wood (8 ft x 4 ft by 4 ft) split and stacked.  At the current rate of $550/cord, I’d say it was a productive day.

img_3698img_3696

But, boy am I tired.

I think I’ll go back to my craft room before tackling another task like today.  But, it was certainly nice to get the log splitting off of my to-do list!


Glass Centipede

IMG_3635Centipedes (from Latin prefix centi-, “hundred”, and pes, pedis“foot”) are predatory arthropods belonging to the class Chilopoda of the subphylum Myriapoda, an arthropod group which also includes Millipedes and other multi-legged creatures. Centipedes are elongated metameric creatures with one pair of legs per body segment. They are found in an array of terrestrial habitats from tropical rainforests to deserts. Accordingly, they are found in soil and leaf litter, under stones and dead wood, and inside logs.

Okay, enough with the scientific definition.  According to a patient I saw this week, a centipede is a “creepy crawly bug with a lot of legs”.  Gotta love working with kids!!

Cartoon

 While looking at ideas on-line, I saw a cartoon of a centipede and thought that this might be a fun idea for a glass project. 

My first idea was to fuse copper wire between sections of glass.  This idea didn’t go so well.  The glass was very fragile with the embedded wire.

So, instead, I decided to solder a framework (or exoskeleton, if you want the scientific term) for the centipede and then use a glass adhesive to secure glass sections to the framework.

IMG_2987


Materials
Green COE 96, 1″x1.5″, 16 pieces
Black COE 96 chips
Copper wire, 6 gauge
1″ (7 pieces)
6″ (7 pieces) with ends bent back
Copper foil tape, 1″ wide
1″ x 3/4″ (8 pieces)
E6000 Adhesive

Steps:

1. Position and solder copper wire and foil tape.  Bend the wire 1″ on each side of the framework to make legs, then bend each tip outward to make a flat surface to support the glass sections.  

IMG_3522

2. Full fuse two pieces of green glass with black glass chips.

3. Contour fuse eyes to the head piece.

IMG_36344. Adhere each piece of glass to the framework.

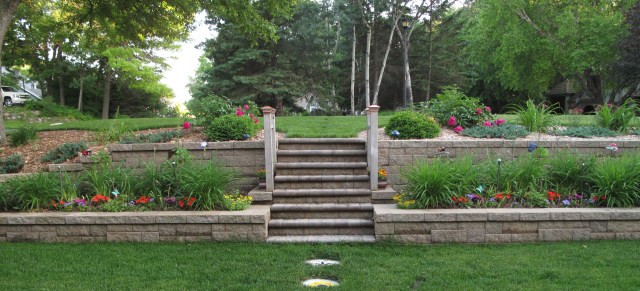
This new bug can now be found in my front yard flower garden crawling among the daylillies.

IMG_3636

Shibori Quilt

Sometimes, when working on a quilt, parts of the original design are adjusted and changed as I proceed with the project.  This was the case when I was making the large butterfly quilt that I described in August 2016 posts.

Early in the design process, I had thought that a rainbow shibori border would look nice.  To create the border,  I made four 9″ x 90″ shibori panels with red, blue and yellow dye.  These panels turned out lovely.

The next step was to dye the fabric that the butterflies would be appliqued onto.  When planning out this step, I changed my mind about the border and decided that I wanted the butterflies to be in a more “natural” environment.  So, I made four more panels of shibori that looked like grass.  This change was perfect for the quilt at that time.

However, I had the rainbow shibori panels already dyed.  Not knowing what I wanted to use them for, I just stored them in my fabric stash and didn’t really think about them for a few years.

Recently, when organizing my fabric, I ran across these panels and decided I really needed to use these in a quilt. Utilizing a simple triangle quilt design, I combined the shibori  fabric with a black fabric.  This was a quick project that turned out really nice. I love the optical illusion that the dyed fabric creates.

IMG_3006


Strip Quilt

IMG_2981Like most quilter, I have lots of fabric in my craft room.  But, unlike other quilters, I try to keep the amount as low as possible.  I no longer purchase fabric “just because see it and like it”. I have to have a specific project that I plan to use it in before I will purchase any fabric.  Over the past few years, I have also received fabric from my sister, my mother and some of my friends.  So, I really do not need to add to my stash.

When I am designing a quilt, I try to plan around fabrics that I already have.  If I do need to purchase fabric, I calculate the amount of fabric yardage I need to be a careful not to purchase more than necessary.  Sometimes this has been to my frustration, especially if I decide to change the design and find that I am needing more fabric to make the changes.  But, usually this works well and keeps me from having too many scraps left over.  I have even created an Excel spreadsheet that helps me calculate the yardage quickly.  If you are interested, email me and I can send you the file.

Every once in a while, the quilt design I am working on is too abstract or too intricate to be able to calculate yardage exactly.  This was the case when planning the “Moonscape” quilt for my son.  I did not plan out the quilt in enough detail prior to sewing to be able to calculate how much fabric I needed.  Using grey fabrics and black fabrics I already had, I added other shades to create the gradation I was seeking.  Not knowing how much fabric I would need, I purchased a half yard of each shade.  After I had pieced his quilt, I had a lot of excess fabric.

What to do? Make a scrap quilt?  Stick it back on the shelf for another day?

Make a strip quilt?  Now, this was an idea I liked.  I have been wanting to try piecing with strips on my longarm machine for a while now.  So, this seemed like the best idea for a quilt to try this out on.

I loaded the backing onto the frame and pinned the batting in place.  After basting the first strip in place, I cut and pieced 2″ x 72″ strips in the gradiant order of the fabric shades.  To sew, I carefully measured and marked the placement of the begin and end point of the seam that I was planning to sew. Then, I used the multipoint placement, border only sewing to sew the next strip to the the first strip.  The new strip sewn was flipped and ironed lightly in place before going to the next strip (my cordless iron was really helpful for this step).

A pop of color was incorporated with scraps of yellow, orange, red and purple.

I successfully used up my shades of grey and black and have another nice quilt to donate.

Moonscape

Last summer, my third son moved into a new apartment.  Prior to that, he had been renting a furnished room in a brownstone house in Brooklyn.  With this change, he needed to purchase some furniture, especially a bed.

Since I really enjoy designing new quilts, I asked him what he would like for a custom quilt for his new bed.  When expressing his ideas, he said he wanted a quilt that was not traditional block based, but rather something that was more flowing and organic. I suggested that he try to find an image of what he was thinking and asked that when he found something that he send it to me.

ForMomA few days later, I received an email with an image attached. The image was a topographical map of a section of the moon.  This was going to be a challenge – designing a quilt to represent this image!

After thinking about this challenge, I settled upon a modified bargello design. To help create that quilt, I printed out a copy of the map overlaid with graph lines.

The sewing of the quilt was probably one of the most difficult quilts I have made.  While there were no Y-seams, inlaid areas, or applique, the challenge was keeping the transition of eleven different fabric, ranging from medium grey to deep black, straight. There were numerous times when I thought to myself “I must be crazy”.

However, once the quilt was finished, I was very happy with the result.

IMG_2951

IMG_2952

Embracing my son’s desire for a more “organic” design, I decided to do free motion quilting connecting each fabric along the topographical lines.

The thread for the top of the quilt was grey 50 wt cotton following the topography, and black 100 wt silk crosshatching on the black background. The thread for the back of the quilt was rose colored 50 wt cotton ( to mimic the topography lines of the original image) and grey 100 wt silk.

This is certainly a one of a kind quilt !

Sunshine in St. Kitts

Spring Break has been a great escape from the snow of Minnesota.

Day One: MSP – MIA – SKBIMG_3215

We left behind the snow in our front yard…

Day Two:

…and after settling into our villa, we awoke to sun, sand and beautiful landscape.

Day Three: Tour of the Island

Overlooking the Southeast Peninsula of St. Kitts

IMG_3242

Atlantic Ocean, Caribbean Ocean, Frigate’s Bay and Basseterre.

Basseterre’s sites and Wingfield Estate.

Romney Manor and Caribelle Batiks


Brimstone Hill Fortress


Convent Bay

Lots of Sheep

Day Four:

My Birthday – Time to relax in the sun

IMG_3317

Sunset Dinner in Frigate’s Bay

Day Five: More relaxation in the sun

And some really cute cats to play with.

Day Six:

Ferry to Nevis

First Hotel in the Caribbean and Bathhouse (the water was really, really hot!)

Montpelier Estate – really quaint hotel!

Hermitage Plantation Inn – another really nice hotel.

Lots of old churches – all still active.

Back in St. Kitt’s

IMG_3327

We have one more day of sunshine before heading to back to Minnesota.

Hopefully Spring will arrive soon.

Custom Thread Racks 2

My favorite thread company is Superior Threads.  They carry a wide variety of thread contents, colors and spool sizes.  Occasionally they have a sale and that’s when I like to purchase for my “collection”. Recently they had a sale on their “Try Me Specials”.  These are thread options that you select the thread content, but have no selection of the color.  Because the price was so good, I decided to purchase some spools of thread that I had been wanting to try.  I also purchased several spools of Masterpiece thread. This is my favorite thread to use for piecing and quilting.  It is a 50wt thread and does not add much bulk to seams or on the surface of the quilt.  I thought that if I received a color I already had  in my collection, that would be fine because I knew I would be using it.  But, if I received a new color, that would add to more options for quilting.

I order five spools each of Masterpiece, King Tut, Bottom Line and Metallics.   When they arrived the colors were beautiful.  But, when I brought them up to my sewing room, I realized that my thread racks were full.

So, I needed to figure out a way to store them.  I thought about making a pegboard thread rack (like I have done before), but wanted more flexibility in the location for mounting them.  So, I looked around at Home Depot for other options that I could try.  I really like these because I can mount them in any configuration and more easily sort my thread options rather than having them all on one large rack.

Supplies Needed:

  • 3/4″ x 1 1/2″ x 8 ft White PVC Trim. Purchased at Home Depot for about $6.  Unfortunately I could not buy this in a short piece, so I have some left over for other projects, or more thread racks.
  • 1/4″ x 12″ Plexiglass Rods, opaque white. Purchased from Amazon for $10.
  • E6000 Industrial Strength Adhesive – already had available. Can be purchased at Hobby Lobby.  Use a 40% off coupon and its only $3.
  • Total spent was $16 for four thread racks.

IMG_3077

1. Cut PVC trim to length desired.  I used 12″ to fit the space I would be mounting them. The trim cuts really easily with a circular saw.

2. Cut the rods to 2″ pieces. The easiest way to cut the rods is to score them with a hand saw and then snap the pieces apart. Use fine sand paper to smooth the edges of one end of each rod.
3. Mark the locations for the rods, making sure that they are space far enough apart to fit the thread spools.  My spools are spaced 2″ apart. Using a 1/4″ drill bit, drill holes about to about half the depth of the trim board.
IMG_30794. Fill each hole part way with E6000 adhesive.  Place one plexiglass rod piece into each hole.  They will be snug and may require a small tap with a hammer to fully seat them.
6. Allow to dry.  I mounted mine to the wall with velcro strips.

I now have space for 48 more spools of thread.