Homemade Citrus Marmalade

After Christmas, my family headed to Arizona for some sunshine and a chance to visit my parents and celebrate their 60th Anniversary.  The weather was delightful, with highs in the mid 70’s.  Whereas, in Minnesota, the temperatures were well below zero.

With the help of my younger brother and sister, we also moved my parents into a senior living center.  This meant that they would be selling their home, including the many fruit trees.  During the years that they have lived there, they have enjoyed having fresh lemons, peaches and oranges available right in their backyard.  I too have enjoyed the fresh fruits.  Each time I have visited them, I have taken some fruit back to Minnesota with me.  Since their house will be sold, this trip was my last opportunity to take some fruit home.

As in the past, this year my plan was to make some citrus marmalade.  While most recipes call for making marmalade out of oranges, I prefer the stronger flavor achieved by using equal amounts of juice from oranges as well as lemons.  I also prefer the enhanced fruit flavor obtained when using SureGel Low Sugar Pectin – less sugar, more fruit per bite!

The first step in making marmalade usually involves cutting up pieces of the fruit skin to make the strips that are present in the preserve.  I am not real fond of the large chunks of skin that this normally creates.  Instead, I use a small grater to grate the skin off of the fruit – the size is similar to fresh lemon zest.  This creates a marmalade that spreads nicely, looks more uniform and tastes great.   This also leaves the white part of the skin still on the fruit which makes juicing the lemons and oranges much easier because your hand has something to hold onto.  Today’s batch included six lemons and twelve oranges.  Since each lemon was about twice the size of the oranges, this resulted in equal volumes of juice after squeezing the fruits. A result was 72 ounces of marmalade.  Yum!

IMG_2586
Ten 4 oz jars and four 8 oz jars.
IMG_2588
Delightful on a whole grain roll!
2017.12
My extended family.

Happy 60th Anniversary, Mom and Dad

1.Anniversary Announcement

Today is my parents 60th anniversary.  To honor them, here is the newspaper announcement and video I made for them.  Happy Anniversary Mom and Dad!

Wed on December 28, 1957, Gordon and Sheila Delzer will celebrate their 60th wedding anniversary this year.  Gordon and Sheila first met in a barn, being introduce to each other by her father.  A few weeks later, the couple of dates later, a few intervening incidences with another beau and they were engaged.  Their marriage was officiated by Pastor Zarling in Harland, Wisconsin.

They are the parents of four children: Richard, Joyce (Brian), Pamela (Keith) and Andrew (Nancy). Their lives have been blessed with twelve grandchildren and five great-grandchildren who live in various locations coast-to-coast.

The majority of their years were spent living in Watertown and Waupun, Wisconsin.  Gordon’s career as a semi driver lasted over 40 years.  Sheila worked as a machinist and in direct sales.  After raising their family, Sheila received her degree in Education from UW-Oshkosh and taught special needs children at the middle school in Ripon Wisconsin for many years.

In retirement, they have gone on the help many in the communities around them.  They served as missionaries at various location for over ten years. Their involvement with Mission America Placement Services (MAPS) took them to California, Texas, Arizona, Florida, Kentucky, Michigan and their home state of Wisconsin.

The couple now reside in Sun City, Arizona enjoying the sunshine and snow-free life of retirement raising peaches, oranges and other citrus.

Christmas 2017

Today we celebrate the birth of our King, Jesus. Our hearts are filled with gratitude for who he is, all he has done and his great love for us. Yes, Christmas is a special time of year here at the Erickson house.  Merry Christmas to everyone!

A Christmas Craft – Fused Glass Ornaments


A Christmas Recipe – Cranberry Honey ButterIMG_2579

1 cup salted butter, softened
1/3 cup dried cranberries, finely chopped
1/4 cup honey
2 Tbs orange peel

Beat together all ingredients and divide into jars.  Store refrigerated. Enjoy!


Holiday Baking

I enjoy baking.  And, since most of my boys no longer live at home, I will sometimes try a new recipe and bake for my staff. For tomorrow, I decided to try making Lemon Brûlée Mini Tarts.  This recipe called for four egg yolks.  Not wanting to waste the egg whites, I  also made Chocolate Cloud Cookies.  These cookies are gluten free since there is no flour.

I hope the staff enjoy these treats in the morning.

Lemon Brûlée Mini Tarts IMG_2560
Pastry Dough
1 cup flour
5 Tbs cold butter, cut into small cubes
1 Tbs shortening
1/2 tsp salt
2 Tbs ice water

Tart
1/2 cup heavy cream
1/2 cup sugar
1 tsp lemon zest
1/2 cup lemon juice
4 egg yolks
1 whole egg

Blend together flour, butter, shortening and salt until mixture resembles coarse meal (I used a mini food processor to do this).  Drizzle water over the mixture and pulse until incorporated.  Be careful not to overwork the dough or it will become tough.  Divide dough into 12 pieces.  Roll each section to 1/8″ thick and press into well of mini tart pan.  Trim edges and refrigerate for 30 minutes.

Preheat oven to 375 degrees.  Place the tart pan on a large baking sheet and bake the shells for 15 minutes. The mini tart pan I used had 12 wells with removable bottoms (to make removing the tarts easier).

Near the end of the baking time, whisk together cream, sugar, zest, juice, yolks and whole egg until combined.  With the oven rack extended, carefully pour the filling into the tart shells, then carefully slide the rack into the oven.  I had extra tart filling that I poured into individual custard dishes. Bake the tarts for 20 minutes, or until the custard is set.  Remove from the oven and cool for at least 30 minutes.

Remove the tarts from the pan.  Sprinkle the top of each tart with sugar.    Using a baking blowtorch, move the flame back and forth over the top of the tart, avoiding the crust, until the sugar is caramelized.  Let stand 5 minutes, top with a fresh raspberry and serve.

Source: this recipe is a modification of a Epicurious recipe.

Chocolate Cloud CookiesIMG_2555
4 egg whites, beaten stiff
4 cup powdered sugar
1/2 cup Triple Cocoa Blend
1/4 tsp salt
1 tsp vanilla
1/2 cup mini white chocolate chips

Preheat oven to 350 degrees. Line a baking sheet with parchment paper.  Sift together sugar, cocoa and salt.  Add egg whites and vanilla.  Drop by spoonfuls onto parchment paper and bake for 12 minutes.  Store in airtight container.

Source: I have had this recipe for several years and unfortunately do not remember the original source for it.  There are several different cloud cookie recipes available on-line.  Most of these use cream of tartar, but not this one.

Holiday Candy 2017

Now that some snow has fallen, it’s time to start making Christmas Treats.  Three types of candy, including two new recipes, was the goal for today – Fudge, Truffles and Caramels.

Chocolate Truffles IMG_2549
16 ounces semisweet chocolate chips
5 Tbs butter
3/4 cup heavy cream
1 Tbs shortening
1  cup dark chocolate chips
1/4 cup white chocolate chips

Cover a baking sheet with parchment paper. In an 8 cup microwave bowl, microwave semisweet chips uncovered on medium in 1 minute increments for 3 to 4 minutes until melted and smooth, stirring well after each minute.  Stir in butter until melted. Stir in heavy cream until well blended.  Refrigerate until thickened enough to hold a shape.  The original recipe suggested that this step would take 10 to 15 minutes.  It actually took me about 90 minute before I could shape the mix. Drop the mixture by teaspoonfuls onto the parchment paper.  Shape into balls. Freeze 30 minutes.

Heat shortening and dark chocolate chips in microwave until melted. Stir until smooth.  Dip each ball, one at a time, into the chocolate.  Place on a clean sheet of parchment paper. Heat the white chocolate until melting.  Drizzle over the truffles.  Refrigerate until set.  Serve at room temperature.

This was my first time making truffles.  I always thought that they would be a bit tricky to make.  However, this recipe is actually very easy.

Source: this recipe is a modification of a Betty Crocker recipe.

Apple Cider CaramelsIMG_2551
2 cups heavy cream
1 cup light corn syrup
2 cups sugar
6 Tbs butter
1/2  cup Boiled Cider
1/2 tsp salt
1/2 tsp cinnamon
1/4 tsp nutmeg

Line an 8″ x 8″ pan with parchment paper and lightly grease.  Combine the cream, syrup, sugar, butter and cider in a deep saucepan.  Bring the mixture to a boil over high heat, stirring to dissolve the sugar.  Reduce the heat to medium-high and cook, without stirring, until the mixture reaches 245 degrees on a candy thermometer, approximately 45 minutes. This will give soft caramels.  If you want firm candies, then heat longer until the mixture reaches 248 degrees.  Remove the pan from the heat and stir in the salt and spices.  Pour the hot mixture into the prepared pan.  Let stand until slightly set before transferring to the refrigerator to cool completely.

Remove the pan from the refrigerator and cut into 1/2″ – 1″ pieces.  Wrap in waxed paper.

The apple flavor and spices make these caramels very tasty!

Source: King Arthur Flour.

Fused Glass Wall Art – Birds, Butterflies, etc

Changes to the cabinets at one of my offices left spots with voids. What to do with these spots? Paint the wall and leave the space empty? Hang some pictures? Buy some art for these spots?

Make some art – now that sounds more fun!

After looking at the space and existing decor, I came up with some ideas.  And, with a week off for Thanksgiving, I was able to completed these projects:

Three different birds:

IMG_1176IMG_1175IMG_1174

A couple dragonflies:

And, butterflies:

The walls at the office still need to be painted.  So, these may not get hung until January.  But, they were fun to make!

If you are in Minnesota and come by our Burnsville sometime in January, you should be able to see them in person.

Fused Glass Daisy

IMG_2127
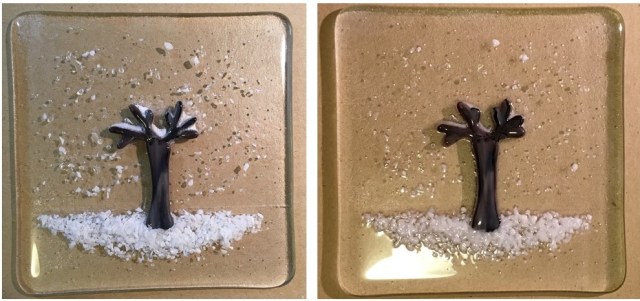
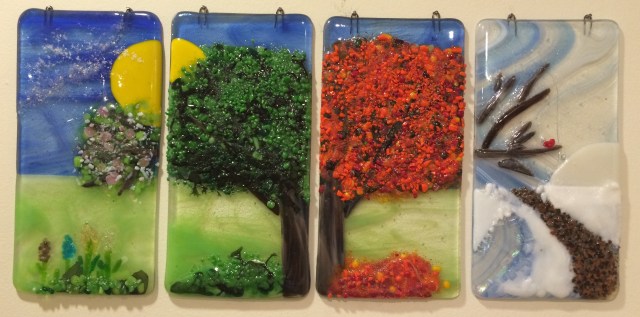
Last week’s post reminded me that I have not posted about a another four pane glass project that I created for my sewing room.  This project was ultimately inspired by two different items.

multicolored daisy

The first was an image of flowers that I saw when looking for ideas to embellish for one of my landscape quilts.  The image was a collection of four canvases each with a white daisy painted on a different colored background.  I really liked this and thought it would make a good glass project.  However, since I had just finished my four seasons tree (shown at the end of my previous post),  I wanted to try something other than four panels side by side.

White DaisyAbout that same time, I received a birthday card from a friend.  This card had only part of a daisy printed on it.  This gave me inspiration for how to display my daisy idea – four corners in different colors.

IMG_2423I found a four section frame at Michael’s that looked like a window. After purchasing it, I removed the hardware and spray painted it white.

Since the leaves were green and the center of the daisy was yellow, I decided to use the other colors of the rainbow for the background (orange, purple, red and blue).  Originally I was considering hanging the project in a window, so the background glass is transparent. When the project was finished, I realized that it would look better hung on the wall.  The transparent glass still looked really nice even though no light is shining through it. Maybe someday I will add some back lighting to it.

For each background, I cut two pieces of glass the size of the individual window pane – one piece of clear glass and one piece of colored transparent glass.  These were fused together using a Full Fuse schedule.

The daisy petals were cut from white opaque glass.  To add texture to the center of each petal, I sprinkled almond colored opaque glass fine frit down the center of each petal.  The petals were Heat Polished (maximum temperature 1300) to round the edges.

The leaves were cut from Uroboros glass – Oasis Green on Dark Green. Each leaf was scored with a curve near the middle and split into two halves.  The resulting pieces were then Heat Polished.

One set of leaf pieces and three daisy petals were placed on each background and Contour Fused.  The center of each daisy was Tack fused and each pane was secured to the frame with E6000 adhesive.  Due to the size of project, each color pane required four separate fusings for a total of sixteen kiln cycles.

Very colorful addition to the wall of my sewing room!

Fused Glass Seasons

IMG_2520

I recently completed my first “commissioned” piece of fused glass art.

After visiting a local art fair, my sister-in-law contacted me to see if I would be able to make something similar to a piece of art she had seen there.  The photo she showed me looked like a fun project to do – Four Seasons of Trees set in a frame that resembled a window.  The item that was available at the art fair had a black frame, but she wanted something more “organic” or natural looking.  So, we found an unstained framed made out of reclaimed wood on-line and ordered it.  After it arrived, it was time to start making the fused glass panels.

After measuring each opening, I cut two matching pieces of clear glass for each pane 5.75″ square.  These were then fused together with a Full Fuse schedule (maximum temperature 1465, 20 minute hold) to create the solid background for each pane.  No need to show a picture of this as it was just clear glass. Because of the size of my kiln and the size of the panes, each one needed to be fused separately – so four firings needed for this step.

IMG_0971 (Edited)

Next, I cut brown glass to resemble the tree trunks.  Generally a tree would be leafless in the winter, and in the spring the tree would be less full than later in the year.  So, I added some strips of glass to make branches for the trees.  These were then Contour Fused (maximum temperature 1375, 10 minute hold) to pull the pieces together and round the edges of the glass. Because glass wants to settle at a 1/4″ thickness, I could not Full Fuse these pieces.  If I had, the shape of the trees would have been melted away into a amorphous log of unusable glass. After making the tree trunks, I fused red opaque medium frit to create small frit balls that would resemble apples for the summer panel.  I chose full fuse for this step because I wanted the apples to be well rounded.  If I had been thinking ahead, I would have done these at the same time as I did the clear glass to save me one fusing cycle.  But, that wasn’t the case – so these two steps were two more fusing cycles.

Finally I was at the fun part – creating the pane for each season.

Winter:  I used white opaque glass for the snow – fine frit and medium frit, as well as some clear dichroic glass to add sparkle to the falling snow. The pane was then fired at a Light Fuse schedule (maximum temperature 1350, no hold time).  I chose this schedule so that I did not loose too much of the detail of the glass frit pieces.

Winter
Winter Pane – before fusing and after fusing.

Spring:  For this I used opaque green fine frit for the base layer.  On top of that I sprinkled Clover Blend medium frit.  To create the apple blossoms, I used Cherry Blossom medium frit.  This pane was then fired using the Light Fuse schedule.

Spring
Spring Pane – before and after fusing.

Summer: I used a mixture of translucent and opaque green fine frit with opaque green medium frit sprinkled over top. The “apple” frit balls were then placed in the tree and the pane was Light Fused.

IMG_1063
Summer Pane – after fusing. 


Autumn:  I used a mixture of translucent and opaque tangerine fine frit for the base of the tree.  The same green mixture that I used for the summer tree was used for the ground.  On top of this I sprinkled opaque red, orange and sunflower yellow medium frit.  I allowed some of the frit to land between the tree and the ground so that it looked like the leaves were falling.  This pane was then Light Fused following the same schedule as before.

IMG_1068
Autumn Pane – after fusing. 

After a total of ten firings, the panes were ready to be attached to the wooden frame using clear E6000 adhesive.

This project turned out very nice.  It reminds me of a project that I completed about two years, a Four Seasons Tree. This project required a total of 16 firings (four for each panel).

IMG_2256


Millefiori Garden Bed Runner

IMG_2234

Having been busy recently with several intricate and time consuming projects, I have not posted anything for a few weeks.  I will be posting progress on these newer projects soon.  But, in the meantime, I thought I would post something I completed earlier this summer.

While going through photos of my quilts with a friend, I ran across a project that I had not posted pictures of.  This bed runner was inspired by a pack of fat quarters that I saw at a local fabric store.

61ibtcj8YJL
Kaffe Fassett “Paperweight” fabric

The fabric made me think about some fused glass supplies that I have in my glass room – millefiori beads.  The term millefiori is a combination of the Italian words “mille” (thousand) and “fiori” (flowers). These beads are created by first making pattern rods.  On the outside, these rods are a single color. But, when cut across, the pattern becomes visible.  This multi-step process requires skill and special glass furnaces.  The results of this labor-intensive process are gorgeous “beads” that can be incorporated into earrings, pendants, bowls – any variety of fused glass projects.  While I do not have the skill and equipment to make my own millefiori, I have purchased some and love the look of them.

So, when I saw this fabric, I thought I would use it in a bed runner to add a real pop of color to my bedroom.  The design for the runner was based off of a photo of a quilt posted on the Blogger’s Quilt Festival. While her project was made with patterned wool felt, I wanted to use my sewing machine’s decorative stitches to create the the pattern in the flowers.  Going through my scraps of fabrics, I appliqued my “flower garden” and then used the lovely “Paperweight” fabrics for the border.

IMG_2236IMG_2235

This was a really fun project to do.  And, as an added bonus, I used up a lot of small scraps that were piling up in my scrap basket and too small to use in most piecing projects.

Hawaiian Quilts – four more quilts for Lincoln Place

IMG_2454
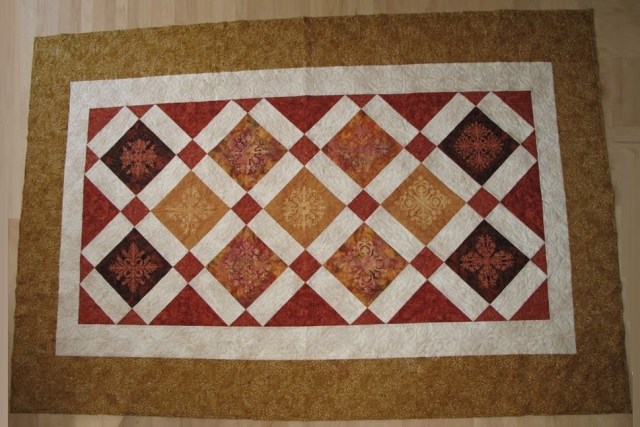
Being a pediatric dentist, summer is a busy time at my office.  But, when summer ends and kids go back to school, I like to take a week off to relax at home.  This year, I decided to spend my week quilting.

IMG_2466

A few years ago, while on spring break in Maui, I purchased some printed Hawaiian fabric panels.  When I returned home from that trip, I started wondering why I actually purchased these panels.  If I was going to make another Hawaiian quilt, I was going to make an applique quilt (not use printed panels).  Sometimes impulse shopping is not a good idea!.  So, I just put the fabric in a drawer and left them there.  This summer, when sorting through my fabrics, I ran across these panels and I realized that they would make nice quilts to donate. Being printed, I could do a simple quilt block/sashing construction and make several quilts very quickly.

IMG_2465
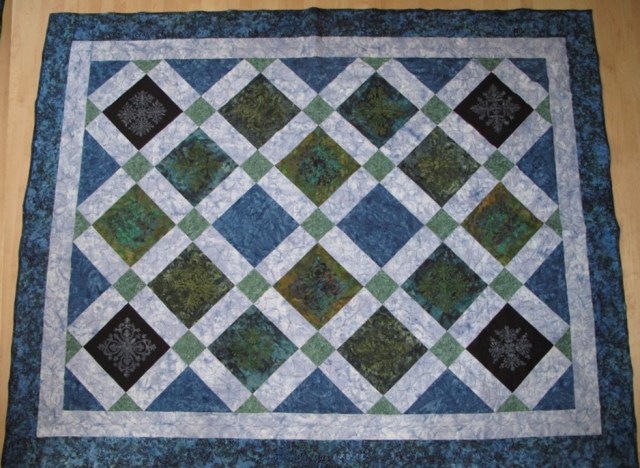
Taking out the panels – there were seventy two 11″ x 11″ panels in various colors  – I split them into groupings that seemed to go together.  Then I sorted through my other batik fabrics to find colors that coordinated with these panels.  Piecing the tops and quilting with simple block designs (definitely not state fair quality, but still very nice), I completed four Hawaiian quilts on my week off. I sure hope the new owners will enjoy these.

IMG_2472Now I’m going to start working on an idea for a quilt for the 2018 state fair.  Should be a fun one to do, but will take some time to finish it.