Marbling with Shaving Cream

Looking for some ways to create unique fabrics, I looked through the tutorials on-line at Dharma Trading.  Marbling fabric looked like a fun thing to try, but I didn’t want to invest in more expensive supplies and different dyes.  But, there was one technique that caught my eye because it did not involve significant purchase of additional supplies – Shaving Cream Dyeing.  The technique they described used the type of dye that I already had in my supply – fiber reactive MX dyes.  The only supply that I would need was shaving cream.  So, I bought a can and decided to give it a try.

Supplies Needed:
100% Cotton Fabric
Procion MX dye
Soda Ash dye fixer
Squeeze bottles for prepared dyes
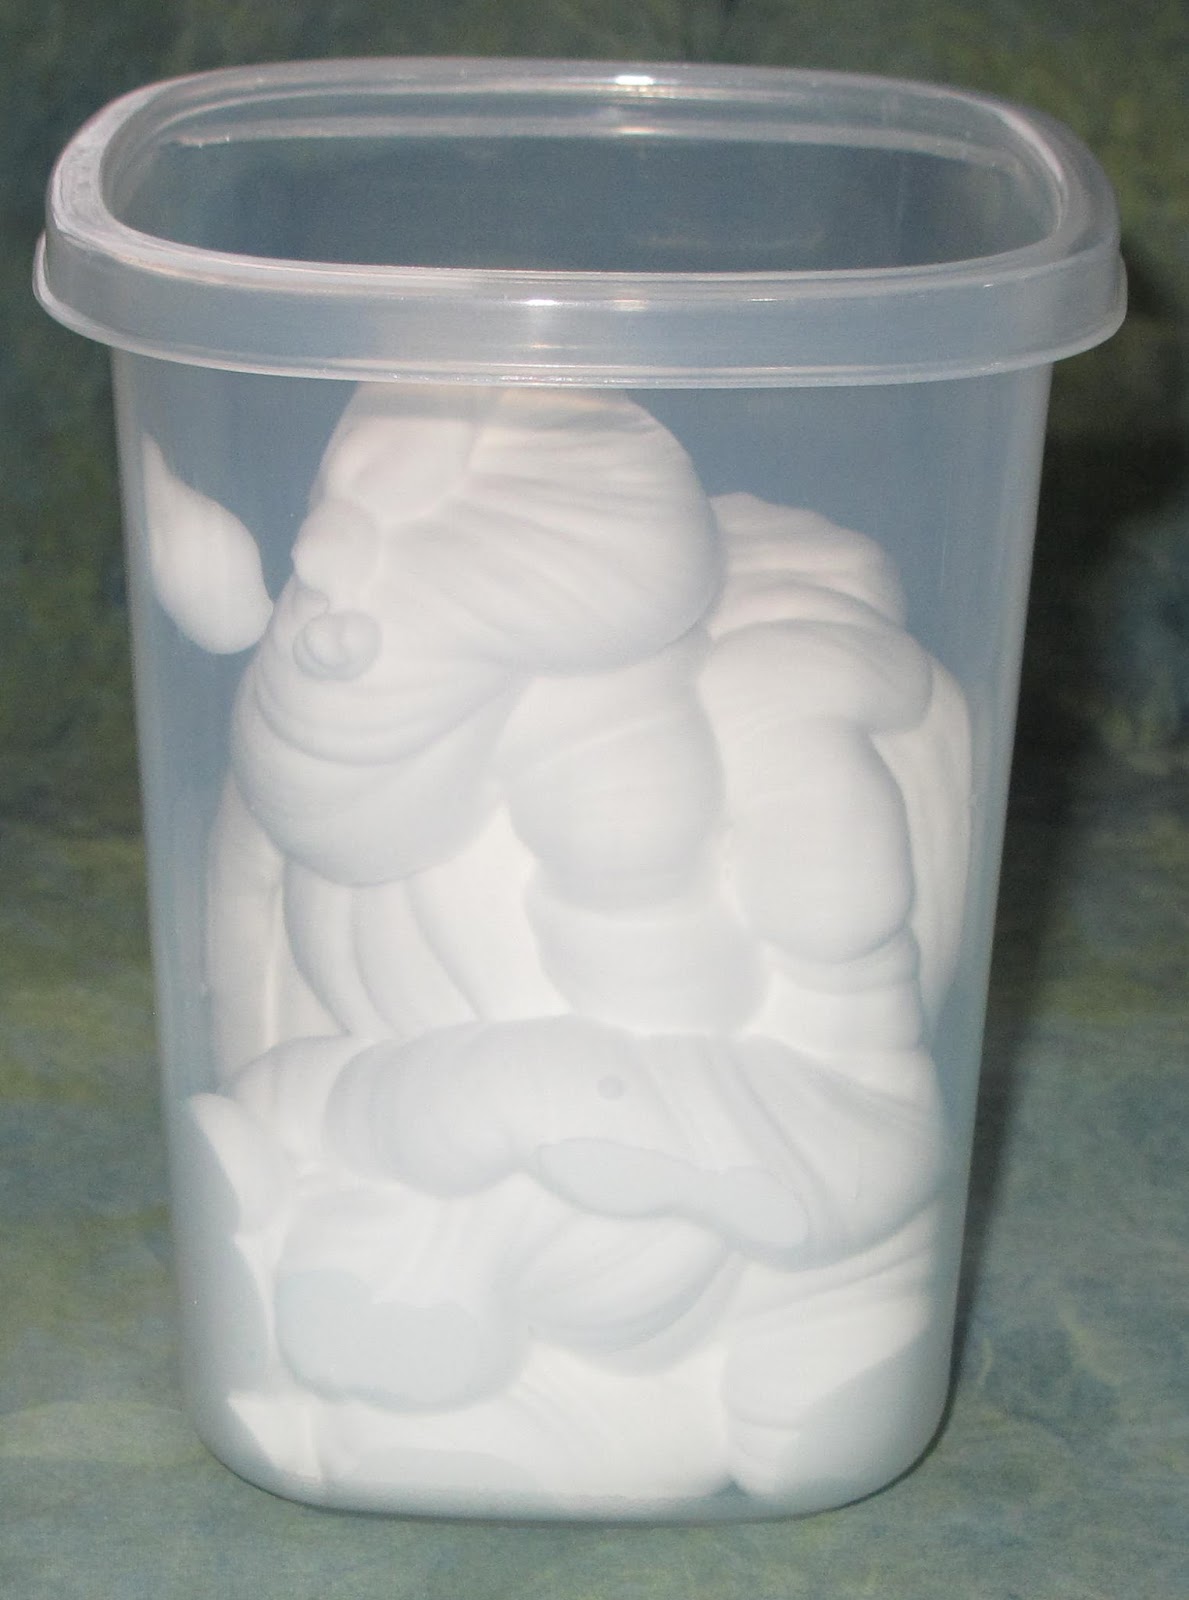
Foam shaving cream with aloe (I used Barbazole brand)
Non-softened water (or Distilled water)
Flat shallow plastic pan
Mixing container, plastic spoon
Blue Dawn dish soap
Instructions
1. Prepare fabric for dyeing (either purchase PFD fabric or wash in Blue Dawn).
2. Soak fabric for 15 minutes in soda ash solution, wring lightly and hang to dry.  Remove wrinkles with a dry, cool iron. 
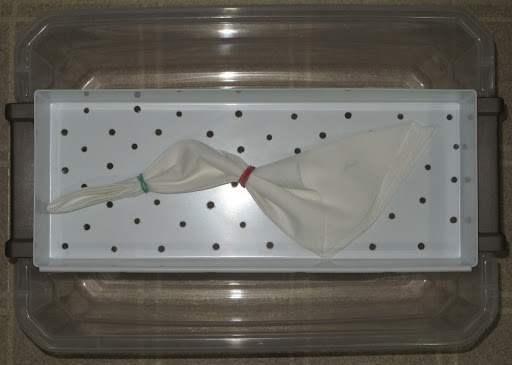
3. Dissolve dye powder (10mg/ml) in lukewarm distilled water (No soda ash fixer!) and place in squeeze bottle.  If soda ash is not added to the dyes, they can be stored and used again on another day. 4. Spray shaving cream into a container and add an equal volume of distilled water to the container.  Mix well with a plastic spoon and pour mixture into shallow plastic pan
 and tap pan on flat surface to allow the mixture to settle with a smooth surface.  
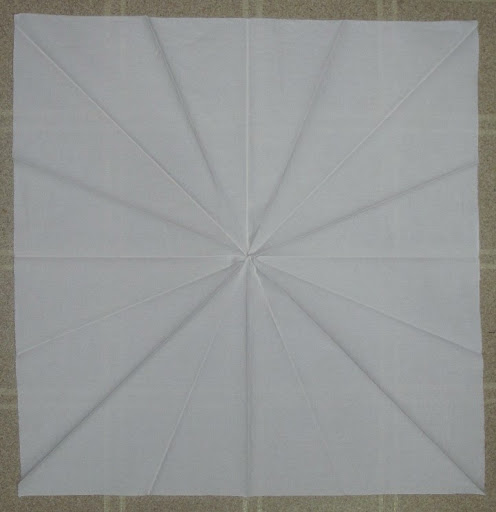
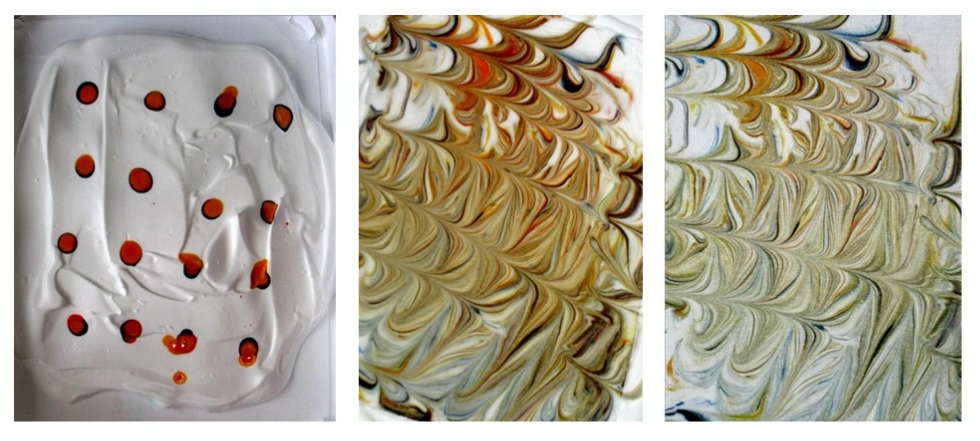
5. Drip diluted dye onto the surface of the shaving cream in any pattern you wish.  Use a comb, chopstick or any other tool to swirl and spread the dye into fun patterns. 
6. Place the prepared fabric on the surface of the shaving cream and dye pattern.  Remove any air bubbles by pushing down gently with a gloved hand.
7.  Allow the fabric to sit on the surface of the dye/shaving cream for 5 minutes, then remove the fabric by lifting carefully.  Place the fabric on a flat surface with the shaving cream side up. Cover with plastic to retain the moisture.  Allow to batch for 4 hours.
8. Rinse fabric in cold water to remove the shaving cream and soda ash.  Then wash in hot water with Blue Dawn. Dry and press and enjoy the results!

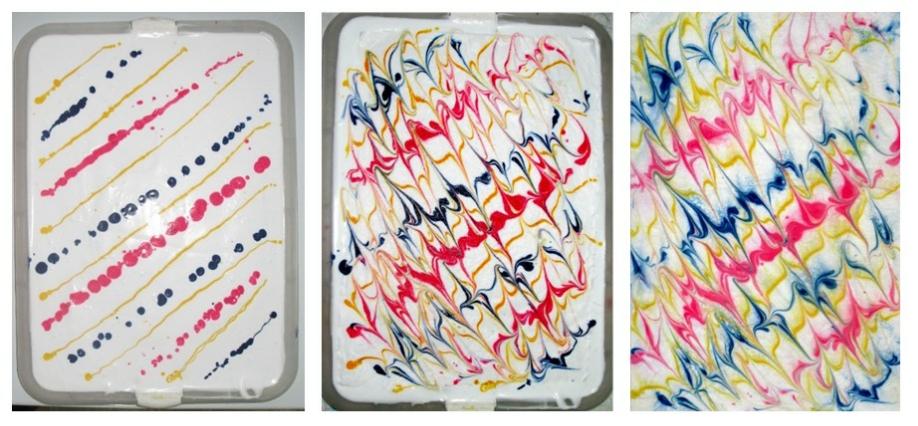
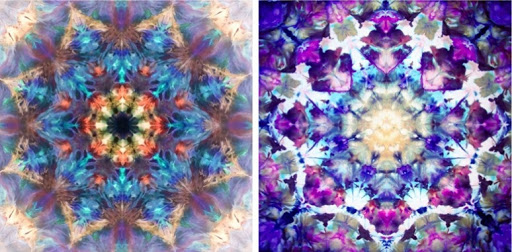
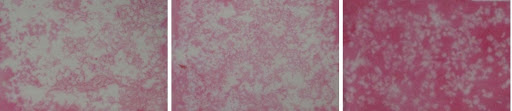
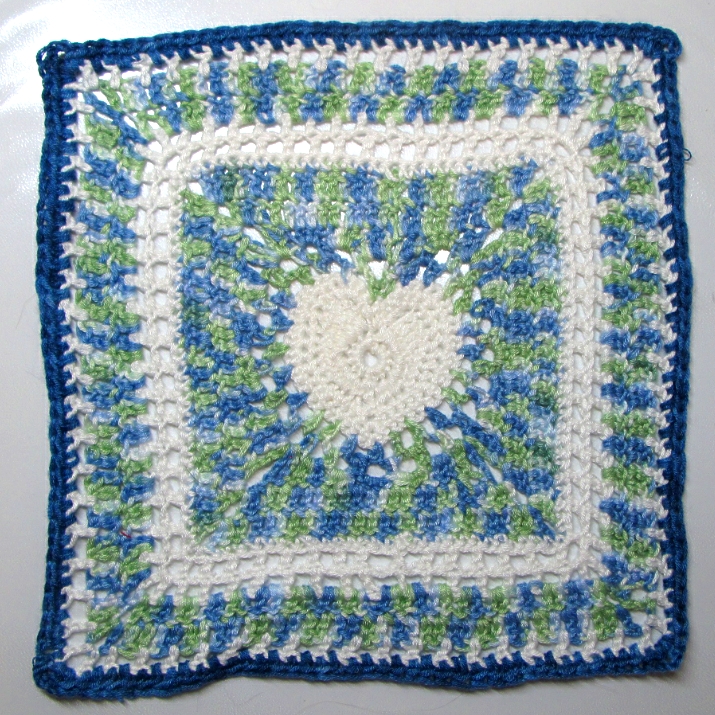
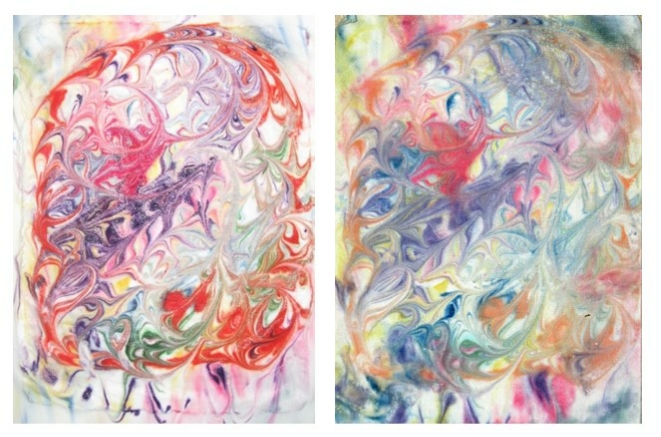
First Trial – turned out nice, but need more dye.
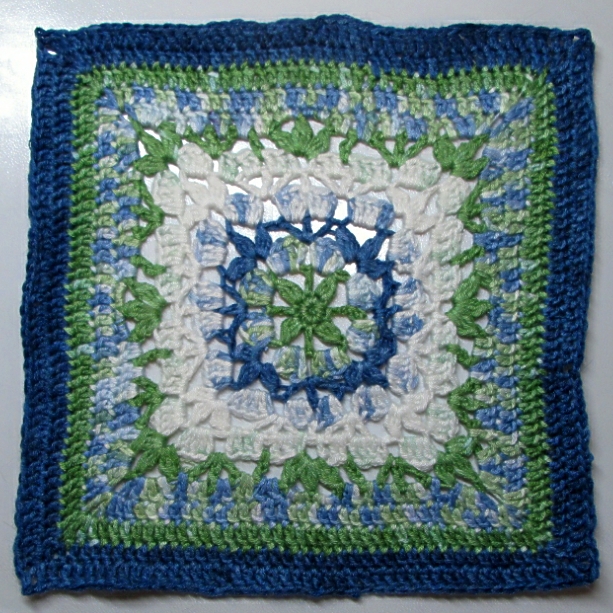
Second Trial

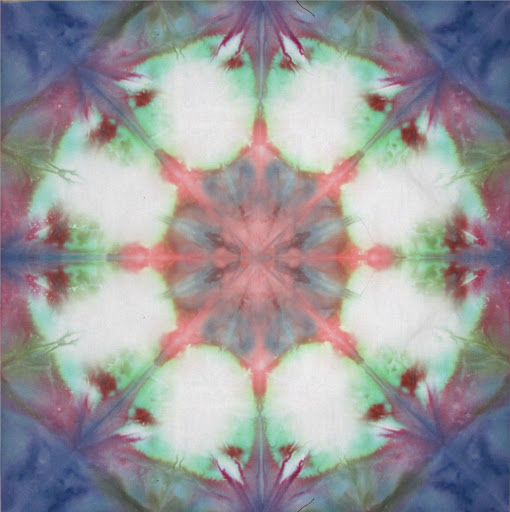
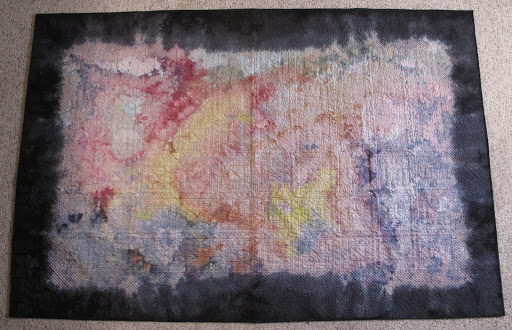
Third Trial – Fun Swirls
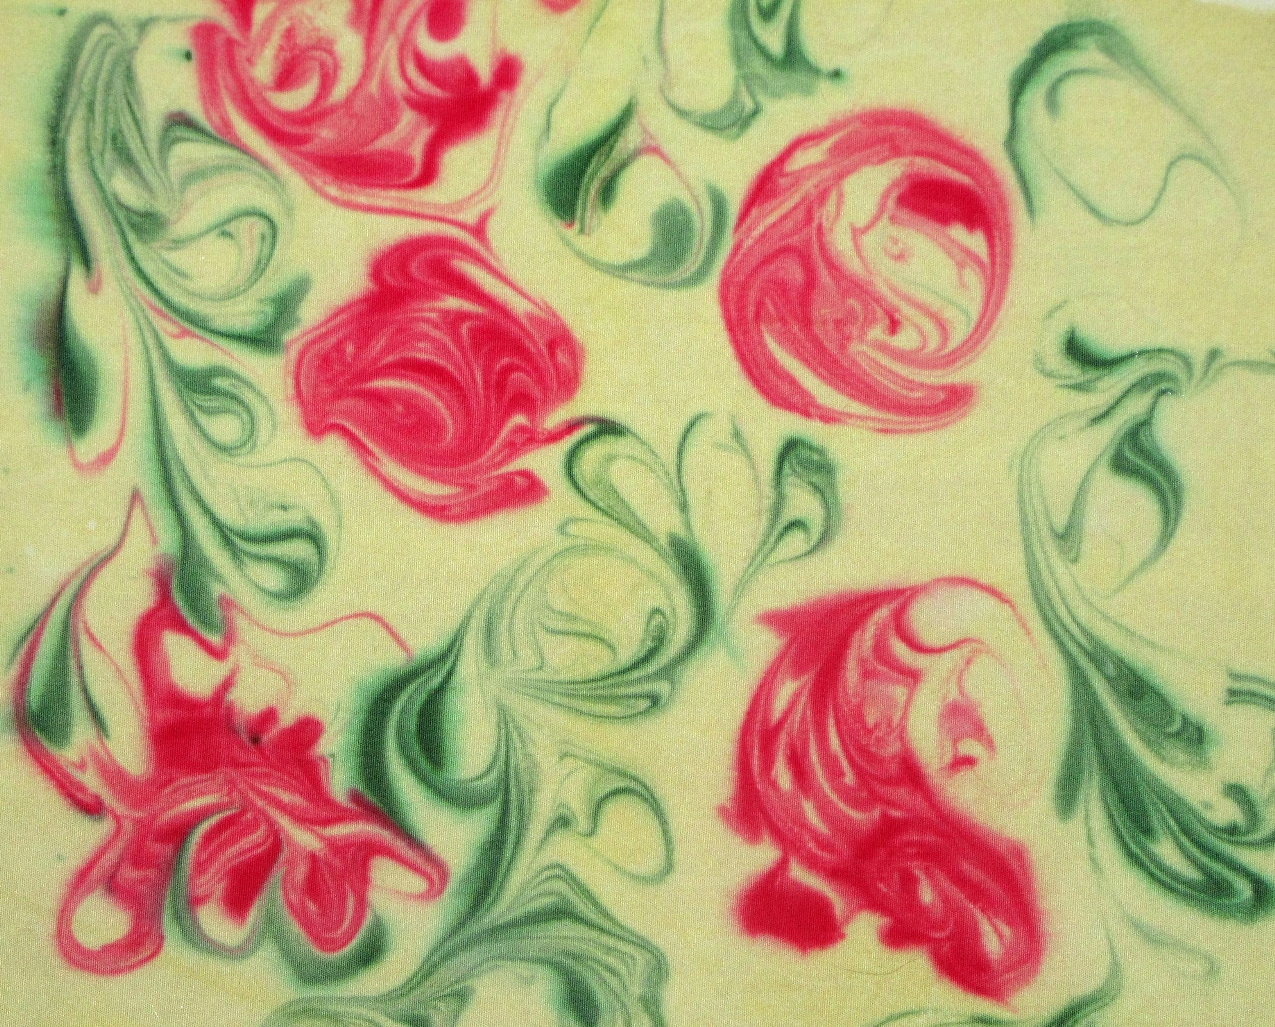
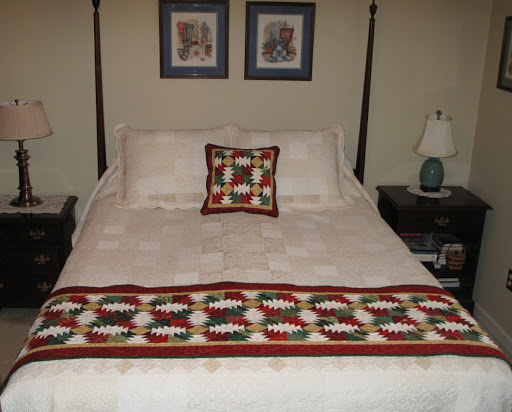
Last Trial – Kinda look like roses and petals!

Highlights from San Francisco

Having taken a few days off work – I headed to San Francisco to see my oldest son. After arriving, I spent the first day walking around the Mission District. I enjoyed viewing the many wall murals along my walk.

Women’s Building

And the other sights of the Mission…


Some of the highlights were actually getting the the higher places in San Francisco.
Bernal Heights… 


Twin Peaks….

My son, Tim.
We also visited Napa and Sonoma.  Being a non-drinker (I know that is not normal for visitors the the Valley), Tim and I went to see the scenery and art.  We stumbled upon the di Rosa Art and Nature Preserve and arrived just before a docent-led tour was beginning. We learned a lot about Rene di Rosa’s art collection, the various artists in the collection, and thoroughly enjoyed our visit. 


Crochet Along Blocks – Crocodile Flower and Lion’s Mane Crochet Squares

Two more  crochet blocks completed.  


“Crocodile Flower”

Designer: Joyce Lewis

Pattern: $1.99 at Ravelry http://www.ravelry.com/patterns/library/the-crocodile-flower

I really like this pattern.  There are many wonderful color combinations on the Ravelry website.

“Lion’s Mane”

Designer: April Moreland

Pattern: free at Ravelry

I’m still having fun making these!

Mandala Dyeing 2

My fourth attempt:

  • Combed cotton 22″ x 22″.
  • Fold and iron fabric.
  • Soak in warmed soda ash solution for 30 minutes.
  • Place in tray over bucket.
  • Place 8 cups of fresh snow over the fabric.
  • Mix dye with snow. Orange, Mixing Red and Royal Blue  1/2 teaspoon of each dye mixed with 8 cups of snow and packed over the fabric.
  • Place lid over the bucket and allow to sit at room temperature.
  • After 24 hours, rinse fabric in cold water.
  • Wash in hot water with blue Dawn soap.
  • Rinse, dry and iron.
Lessons learned:
  • colors are brighter, but still too much white, 
Things yet to learn
  • The amount of dye needed to migrate through the full thickness of the folded fabric.
  • The impact of clamping the fabric. 

My fifth attempt:

  • Combed cotton fabric 12″ x 18″ folded accordion style into eight sections, then fold in half or in thirds lengthwise.  Clamp one with large forceps.
  • Fold and iron fabric.
  • Soak fabric in warmed soda ash solution for 30 minutes.
  • Place fabric in tray over bucket.
  • Mix dye with snow: Golden Yellow, Mixing Red and Royal Blue (3/4 teaspoon of each dye mixed with 8 cups of snow) and packed over the fabric.
  • Place lid over the bucket and allow to sit at room temperature.
  • After 24 hours, rinse fabric in cold water.
  • Wash in hot water with blue Dawn soap.
  • Rinse, dry and iron.
  • Lessons learned:
  • colors are very bright and reached through 24 layers of fabric.
  • some undissolved dye particles made spotty marks on the first layer of fabric that the dye penetrated.
  • clamping was effective to give some controlled areas of blocked dye penetration.
After several additional trials, I have learned that I can selectively control the intensity of the resulting color by placing varied amounts of fresh snow (no dye added) over the fabric before packing the dye mixed snow.

My final attempts: 

  • Combed cotton fabric 22″ x 22″.
  • Fold and iron fabric.
  • Soak fabric in warmed soda ash solution for 30 minutes.
  • Place fabric in tray over bucket.
  • Cover with scrap fabric to collect undissolved dye particles.
  • Mix 1/4 to 3/4 teaspoon of dye powder with varied amounts of snow.
  • Pack fresh snow and snow-dye mixture over the fabric with varied positions
  • Place lid over the bucket and allow to sit at room temperature.
  • After 24 hours, rinse fabric in cold water.
  • Wash in hot water with blue Dawn soap.
  • Rinse, dry and iron.

Really happy with these!!

Mandala Dyeing

When I was first learning about fabric dyeing, I read about many different techniques.  One that I tried and really enjoyed was a technique known as snow dyeing.  And, living in Minnesota, we certainly have plenty of snow each year to play with!
After trying some small samples, my first major piece that I dyed was the backing to my dyed fabric quilt (see Sept 22, 2015 post for more information).  I wanted the back of the quilt to complement the pieced from quilt, so I snow dyed with my six main dyes.  I then folded the fabric in a manner that brought all of the borders together and over-dyed the edges with black dye. The result was very nice and looks much better in person than in this photo.

Now that there is a fair amount of snow outside, I decided to take my snow dyeing one step farther – Mandalas.  Looking around any craft store or art supply store, you will see adult coloring books.  Many of these have mandalas for coloring.

The word “mandala” is from the classical Indian language of Sanskrit.  Loosely translated to mean “circle”.  However, a mandala is far from the simple shape we think of as a circle.  It is a complex structure with overlapping lines of shape and color.
Unable to find specific instructions for snow dyeing mandalas, I decided that some experimentation would be necessary.

My first attempt:

  • Combed cotton fabric 22″ x 22″, soaked in warmed soda ash solution for 30 minutes. 
  • Remove the fabric from the solution and squeeze the excess liquid from the fabric.  
  • Hang to dry for 24 hours.
  • Iron the folds into the fabric.
    Unfolded fabric to show the pleating created by the folds


Folded fabric


Bucket with two folded pieces of fabric
  • Place folded fabric in drain tray.  I used a drawer organizer with holes drilled in the bottom. The organizer was then set above a large storage bucket to collect the melting snow.
  • Cover the fabric with snow.  Make sure that there is no fabric visible.  I used about 8 cups of snow.  
  • Sprinkle a total of 1/2 teaspoon of Procian MX dye over the snow.  I used several colors hoping for some colors blending together.  
Fabric covered with snow and sprinkled with dye powder.
I forgot to take a photo right away.
The above photo was taken after three hours.
You can see that the snow had melted and the dye powder had blended a bit.
  • Place the lid over the bucket (mostly to keep the cat out of the dyes) and allow to sit at room temperature for 24 hours.
  • After 24 hours, rinse fabric in cold water.
  • Wash in hot water with blue Dawn soap.
  • Rinse, dry and iron.
Lessons learned:
  • too much white, I need to add more dye.  
So, I checked for any suggestions on-line. One site stated that the colors were more vibrant if the dye was mixed directly with the snow.  I will give that a try.

And, to save time, I realized that snow melting over fabric will make the fabric wet (I certainly didn’t need Sherlock to help me make that deduction). So, next sample I will use the fabric immediately after soaking in the soda ash solution.

I also wanted to see what happened if I used preprinted fabric.  I was hoping that this might be a nice way to make my own fabric, but still have a pattern printed on it.

So, another experiment to try.

My second attempt:

  • Printed white-on-white cotton fabric 18″ x 22″, soaked in warmed soda ash solution for 30 minutes. 
  • Remove the fabric from the solution and squeeze the excess liquid from the fabric.  
  • Place damp fabric on table and fold for desired dye pattern
  • Place in tray over bucket
  • Mix dye with snow.  I used Mixing Blue, Golden Yellow, Mixing Red.  1/4 teaspoon was mixed with 8 cups of snow and packed over the fabric.
  • Place lid over the bucket and allow to sit at room temperature.
  • After 24 hours, rinse fabric in cold water.
  • Wash in hot water with blue Dawn soap.
  • Rinse, dry and iron.
I did take a picture of the fabric before dyeing.
Unfortunately white on white does not show very well.
So, I’m not posting that picture. But, this is the dyed result. 
Lessons learned:
  • colors are brighter – but, I think just a bit more dye would be even better
  • printed fabric looks nice, but maybe not for mandalas since it tends to distract from the pattern created by the dyes.

Looking at more on-line ideas, I found a site that used rubber bands to bind the fabric to create more detail in the mandala.  And, another site that used the microwave the speed up the dyeing process. So, more experiments to try.

My third attempt:

  • Combed cotton fabric 22″ x 22″ folded and bound with rubber bands. 

  • Soak in soda ash solution for 30 minutes
  • Place in tray over bucket

  • Mix dye with snow and packed over the fabric.
  • Place lid over the bucket and allow to sit at room temperature.
  • After the snow had melted, approximately 6 hours, place the fabric in a plastic bag.
  • Microwave on High for 30 seconds, wait 2 minutes.  Repeat 4 times.
  • Rinse with cold water.
  • Wash in hot water with blue Dawn soap.
  • Rinse, dry and iron.

Lessons learned:
  • Rubber bands left uneven marks on the fabric.  I liked the folding better.
  • Microwaving the dyes caused the colors to be more muted.
I do love this technique, but I still need to perfect my “formulas”.

Dye Resists – Oatmeal

Now that the holidays are over, I have time to get back to some more fabric dyeing. I have a bed runner that I want to make that will have appliqued flowers, which I plan to use only hand-dyed fabrics for. So, I need to get more fabric pieces made. To create some variety in the fabrics, I will be using several dye resist techniques. In addition to dextrins (see October 30, 2015 for details), there are a variety of other techniques to use for dye resists.  One that I wanted to try (because it was readily available and rather inexpensive was oatmeal resists.

I started by washing my combed cotton fabric in Blue Dawn (works the same as Synthrapol, is cheaper, and doesn’t require ordering – you can buy it at any grocery store) to remove any sizing.  The fabric was soaked in a solution of Soda Ash and allowed to hang dry. Once dry, the fabric was securely stretched on a hard surface, which was covered with a thin piece of plastic. Small binder clips worked well to secure the fabric to an old floor linoleum tile.

I tried out three different approaches for the oatmeal resist.
1. Slow Cook Oatmeal – 1/4 cup oats mixed with 1/3 cup water and microwaved on High for two minutes. Cooled to room temperature. The oatmeal mixture was spread over fabric using a 4″ plastic putty knife.  You can get a set of three putty knives (2″, 4″ and 6″) at Home Depot for less than $3. Allow to dry completely (approximately 24 hours).

Slow Cooked Oatmeal

2. Quick Oats – 1/4 cup oats mixed with 1/3 cup boiling water. Cool to room temperature and spread over fabric similar to the technique described for slow cook oatmeal.  Dry completely. Note – this mixture was extremely sticky and hard to spread.  So, that prompted me to try a different approach to using the Quick Oats.

Quick Oats

3. Sprayed Oats –  the stretched fabric was sprayed with warm water to saturate the fabric.  Quick Oats were sprinkled over the surface and then sprayed again with hot water to saturate the oats.  So secure the oats to the fabric, a paper towel was placed over the oats and the surface was rolled flat with a rolling pin.  Remove and discard the paper towel and allow the fabric to dry completely.

Quick Oats – Sprayed

To dye the fabrics, I tried several approaches.  First, I tried to brush on a mixture of thickened dye. Unfortunately, this approach caused the oatmeal to be pulled off of the fabric.  Next I tried to brush on a dye solution (without thickener).  This worked a bit better, but the dye needed to be tapped on the fabric rather than spreading with the foam brush to avoid moving the oatmeal  Lastly, I put the dye solution (1 mg.ml, no thickener) in a small spray bottle and sprayed the dye onto the oatmeal coated fabric.  This worked really well, but had the potential to be really messy. So, to keep the dye aerosol from making a mess of my laundry room, I put the fabric inside a plastic bag and sprayed the dye into the opening of the bag.  This was actually a good approach since the fabric needed to “batch” for 24 hours and the plastic bag helped to keep the fabrics from drying out.

Slow cooked oats                                            Quick Oats                                            Quick Oats – sprayed

After 24 hours, to wash out the oatmeal and excess dye, I added about a cup of hot water to each plastic bag and allowed them to soak for 30 minutes.  Since the oatmeal was really sticky, it is somewhat frustrating to try to hand wash it off of the fabric.  Instead, I found that if I removed the binder clips that were holding the fabric to the tile, I could then just pour the fabric and dye solution directly into the washing machine.  The fabrics were washed with Blue Dawn and dried.  
I really liked the results:
Additional samples:
Can’t wait to try some more fabric dyeing approaches!

Christmas Cookies

Cardamom Pecan Shortbread Cookies

Makes: 4 dozen
1 cup butter
1/3 cup sugar
1/3 cup brown sugar
1 egg
1 teaspoon Vanilla
1/2  teaspoon Ground Cardamom
1/2  teaspoon Baking Soda
1/4 teaspoon salt
2 1/2 cups flour
3/4 cup toasted chopped pecans
2 Tablespoons Butter, RT
1 cup powdered sugar
Preheat oven to 350 degrees F.
Line baking sheet with parchment paper.
Beat butter and sugars until light and creamy. Stir in egg and vanilla. 
Sift together dry ingredients and stir into butter-sugar mix. 
Shape into 1 inch balls, place on baking sheet and flatten.
Bake 14 minutes.  Remove from oven. Cool completely.  
Beat together butter and powdered sugar until light and fluffy.  Frost cookies. 
Store in an airtight container.
Enjoy.

Red Velvet Thumbprint Cookies

Makes: 5 dozen
1 cup butter

1 cups sugar
1 egg
1 teaspoon Vanilla
1 teaspoon Red Food Coloring
1/2  teaspoon Baking Soda
1/4 teaspoon salt
3 Tablespoons cocoa
2 1/2 cups flour
White melting wafers

Preheat oven to 350 degrees F.
Line baking sheet with parchment paper.
Beat butter and sugar until light and creamy. Stir in egg, coloring and vanilla.
Mix together dry ingredients and stir into butter-sugar mix.
Shape into 1 inch balls, roll in sugar and place on baking sheet.
Bake 12 minutes.  Remove from oven and immediately top with melting wafer.
Cool.  Store in an airtight container.
Enjoy.

Almond Meringue Cookies

Makes: 3 dozen
4 egg whites

1/8 teaspoon Cream of Tartar
1 1/2 cup powdered sugar
1/8 teaspoon salt
1 teaspoon vanilla
1 1/2 cup almond flour

Preheat oven to 300 degrees F.
Line baking sheet with parchment paper.
Beat egg whites and cream of tartar in large bowl until stiff peaks form.  Gradually fold in powdered sugar until light and creamy. Stir in salt, vanilla and flour.
Shape into 1 inch balls, roll in sugar and place on baking sheet.
Bake 12 minutes.  Remove from oven.
Cool.  Store in an airtight container.

Microwave Candy – English Toffee and Peanut Brittle

With three boys living out-of-state, I have started making my holiday treats a little early this year. Candy and Cookies really make Christmas tasty. And, I know they will appreciate receiving a box with some holiday treats.

Growing up, my mother and grandmother taught me how to make candy. I continue to do so as an adult with my own children. However, the recipes that I was taught were – lets face it – a pain in the butt.  They were messy and required lots of attention to time and temperature.

Last year, I came across a recipe for Microwave Toffee and gave it a try.  Wow, the recipe was super simple, made little mess, required no candy thermometer and tasted great. So, I started my holiday baking by making that recipe again this year.

Microwave English Toffee

Makes: approximately 2 pounds
Calories: TMTC

1 cup butter

2 cups sugar
1/4 cup Light Karo Syrup
1 teaspoon Baking Soda
3/4 cup chopped almonds
1 1/2 cup chocolate chips

In an eight-cup mixing bowl, microwave the butter and sugar on high for 1 minute.
     Note: you really do need this size bowl – the mixture bubbles a lot!
Remove the bowl from microwave and stir to blend. Add syrup and stir again.
Return the bowl to the microwave and cook on high until the color turns the color of a brown paper bag (approximately 8-10 minutes).
While cooking, measure out the baking soda and 1/2 cup of nuts.  Also line a baking sheet with parchment paper.
Remove the mix from the microwave.  Quickly stir in the  baking soda and nuts (be careful not to over stir or your candy will start to setup too quickly).
Spread the candy mix over the parchment paper in the pan.
Wait 1 minute and then sprinkle the chocolate chips over the mix.
Wait another minute, then spread the chocolate.  Sprinkle with the remaining almonds.
Cool.  Break into pieces.  Store in an airtight container.
Enjoy.

I cannot remember where I say the toffee recipe.  But, there are now many sources on the internet. Having found the toffee easy to make, I sought out a recipe for making peanut brittle the same way.  King Arthur Flour has a really nice recipe that I tried and was equally surprised with the outcome.

Microwave Peanut Brittle

Makes: approximately 2 pounds
Calories: TMTC

1 cup sugar

1/2 cup Light Karo Syrup
1 1/2 cups salted peanuts
1 Tbsp Butter
1 tsp Baking Soda
1 tsp Vanilla extract

In an eight-cup mixing bowl, mix the sugar and syrup until combined.
Microwave on high for 5 minutes.
Remove the bowl from microwave and stir in the peanuts and butter.
Return the bowl to the microwave and cook on high until caramel colored (approximately 4 minutes).
While cooking, measure out the baking soda and vanilla.  Also line a baking sheet with parchment paper.
Remove the mix from the microwave.  Quickly stir in the  baking soda and vanilla.
Spread the candy mix over the parchment paper in the pan.
Cool.  Break into pieces.  Store in an airtight container.
Enjoy.

Crochet Along Blocks – Center Heart and Catalina Squares

Two more  crochet blocks completed.  

“Center Heart”

Designer: Ginger Badger

“Catalina”

Designer: Julie Yeager

Pattern: $3.99 at Ravelry

There are many beautiful color combinations shown for the pattern as well.

These are really nice!

Christmas Decorating

It’s the day after Thanksgiving.  While many people are out shopping, I prefer to avoid the stores on this day.  Over the years, our family tradition has been to decorate the house instead.  So, today, the boxes came out and the Christmas decorations went up.  To add to the festive atmosphere, a few inches of snow fell yesterday.  So, the evergreens on the front step are dusted with some fluffy white.

The stockings are hung, the garlands are strung and the tree is lit.  All I have left to do is put the ornaments on.

Just in time for the holiday decorating, I finished up a Christmas Bed Runner.  It is made with a pineapple block and scraps of red and green fabrics.