Bed Runners

My machine quilting adventure began in 2007.  While helping my husband pick up his car from an auto body shop, I drove past a store called Quilt Yourself.  Assuming it was a regular quilt shop, I dropped off my husband and went back to do some shopping.  What I found was not a place to buy more fabric, but a place to rent time on a long-arm machine.  Fascinated, I signed up for a lesson and was immediately hooked!  I now had a means to complete more quilts than I could by hand quilting.


Soon after, I started designing quilt tops with the quilting in mind.  Eventually, I designed a “whole cloth” quilt.  However, I quickly realized that to complete the quilt with the detail I wanted, I would need to spend many hours (if not days) on their machine, all at a fee of $25 per hour and a 45 minute drive each way to get to their location.

When I added up the cost of the rental time on their machine, I figured that it would cost about half the price of the actual machine.  Thus, I started thinking about purchasing my own long arm machine.  I did eventually purchase a BabyLock Jewel and it was time to make my whole cloth quilt – a design I called Cream and Sugar.  After 32 bobbins of thread and an undetermined number of hours quilting, one of my friends told me I should actually name it Obsessive and Compulsive.

The quilt turned our very nice and has actually won a few awards.


To add some color to the bed, I decided to make a bed runner.  Bed runners can pack a big impact in a small package.  They are widely used in hotels to add color to a room. While they may warm your toes on a cool night, they would be more worthwhile if they had other uses.  As pointed out by one of my sons, “why can’t you sew two of them together?”  His statement sparked an idea – a folded seasonal bed runner. Folded, the runner displays the current season. Unfolded, the runner can be used as a thin coverlet when taking a nap or  just relaxing on you bed.

If you are interested in making one for yourself – I have a pattern on PatternSpot. Enjoy!

Mashed Potato Donut Balls

It’s National Donut Day.  Here is a “healthier” donut ball recipe that my boys really enjoy:

Mashed Potato Donut Balls

Makes 40 donut balls
Calories: 25 per donut

1/3 cup potato flakes
1/2 cup milk
1/2 cup sour cream
1/4 cup sugar
1 eggs
1/2 teaspoon vanilla extract
1/2 teaspoon Baking Powder
1/2 teaspoon Baking Soda
1 cup flour
1/4 teaspoon Nutmeg (optional)

Peanut Oil for frying
Powdered sugar
Cinnamon Sugar

Preheat oil to 350 degrees.  Mix all ingredients together.  Drop by spoonful in to preheated oil and cook until browned on each side.  Remove from oil and roll in cinnamon sugar or powdered sugar.
This batter will usually “self-flip”.  So, if you have been frustrated when making donut holes or donut balls before because they would not stay flipped and the donut would over cook on one side, but under-cook on the other – this recipe will make you happy.

I prefer to use plain, nonfat yogurt instead of the sour cream.  Ricotta cheese is another alternative fat to use.  Instead of the sugar, I substitute 2T of honey and 2 T applesauce to cut down on calories. Enjoy!

Dye Resists

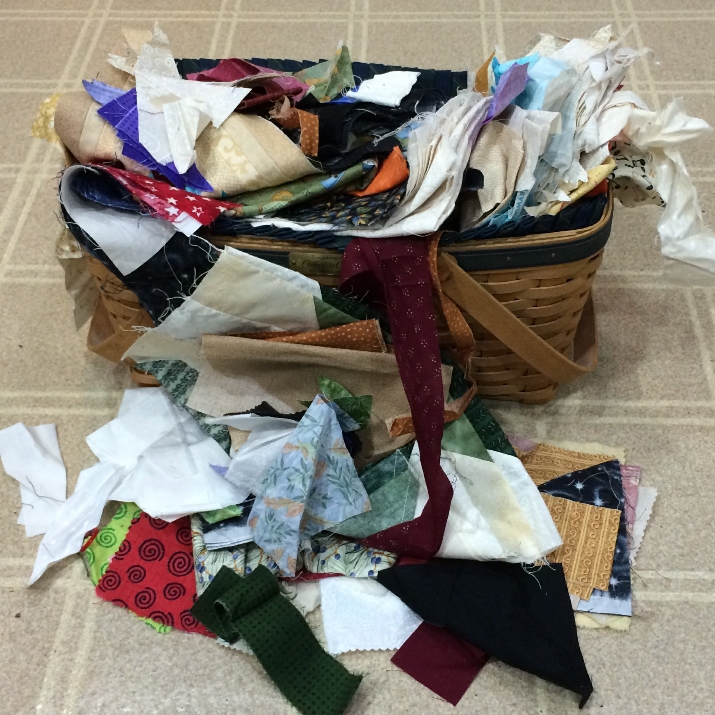
When learning to dye fabrics, I recalled my teenage years when tie-dye was so popular.  Tie-dye is probably the best known form of a type of dyeing called resist-dyeing. So, I decided to investigate this category of techniques. What I found was fascinating to me.

Resist dyeing refers to traditional methods of dyeing fabrics to create patterns and has been widely used since antiquity.  The oldest example of resist dyeing was pieces of linen from Egyptian mummies and dates to the fourth century. The cloth was soaked in wax, scratched with a sharp tool, dyed with a mixture of blood and ashes, and then washed with hot water to remove the wax. The technique was also used in China during the T’ang dynasty as well as India, Japan and Africa.

These methods are used to “resist” or prevent the dye from reaching all of the cloth, thereby creating a unique pattern.  Common resists include wax, starch paste, tying or stitching.  The most well-known varieties are tie-dye and batik.

Traditional Batik:

The first technique I tried was traditional batik.  I love the look of batik fabrics and wanted to try to make my own.  But, after trying the technique, I think I will leave this form of resist dyeing to the wonderful craftsmen in Indonesia.  For a really good video on the process of batik – check out this Indonesian Batik Process video.
I found was that the tradition wax had a disagreeable odor, was difficult to get to melt properly for the intricate designs that I wanted to make and was very messy to remove from the fabric.  Perhaps I was too critical of my results, but I really wanted to find an easier way. Some day I may try low temperature Soy Wax for batik.

So, moving on to other techniques. ProChemical and Dharma Trading sell several starch resist – Potato Dextrin and Corn Dextrin amongst them.
Note: Potato and Corn Dextrin are not intended for immersion dye baths, as they are water soluble.

Potato Dextrin:

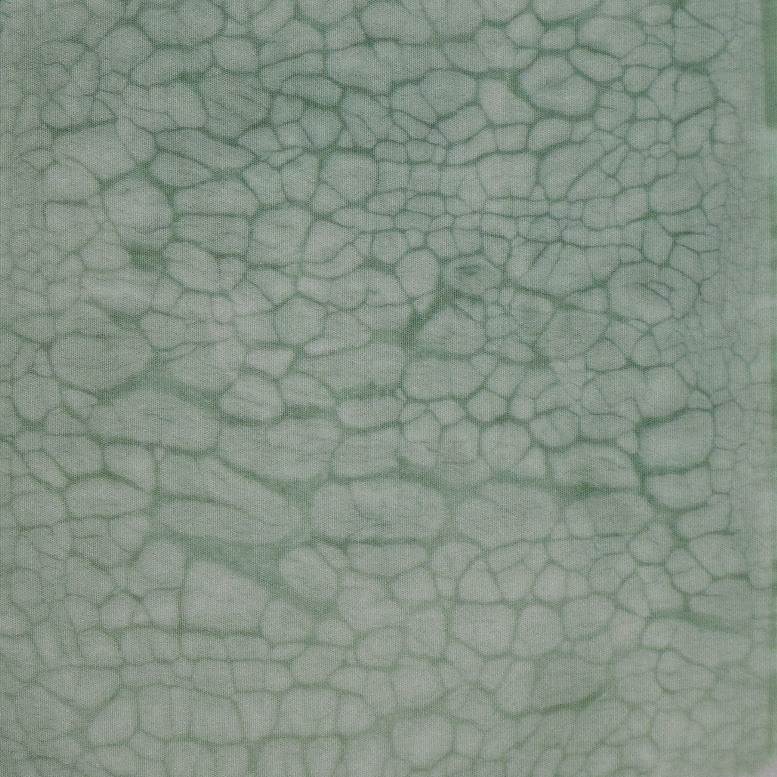
Potato Dextrin produces lace-like patterns and crackle lines, similar to batik.
Steps:

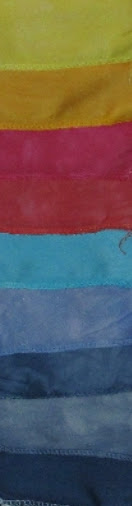
Combed Cotton, Potato Dextrin Resist, Green Dye

1) Potato Dextrin Paste.  Manufacturer’s directions state to bring 1 cup of water to boiling, slowly whisk in 1.25 cups of dextrin into the water and cool to about 80 degrees. Anyone who does much cooking knows that adding any type of starch to hot  water is very difficult – it simply clumps up too easily.  My first several attempts followed the manufacturer’s directions with successful results but plenty of frustration making the paste. So, I actually add the dextrin to cold water and then microwave for one minute.
2) Stretch fabric on a hard surface, which is covered with a thin piece of plastic. Tape fabric or secure with pins every ½ inch.
3) Squeegee a smooth layer of paste on the fabric. The paste thickness determines the amount of crackle. In general, the thinner the paste, the finer the crackle; the thicker the paste – the larger the crackle.
4) Allow the cloth to dry completely while it is still stretched. The fabric needs to stay very tight. Crackling takes place as the fabric dries. Depending upon the thickness, this can take up to two days. 5) Apply dye with a paint brush.
6) Cover the fabric loosely with plastic and batch for 24 hours.
7)  Rinse, wash with Blue Dawn and dry.

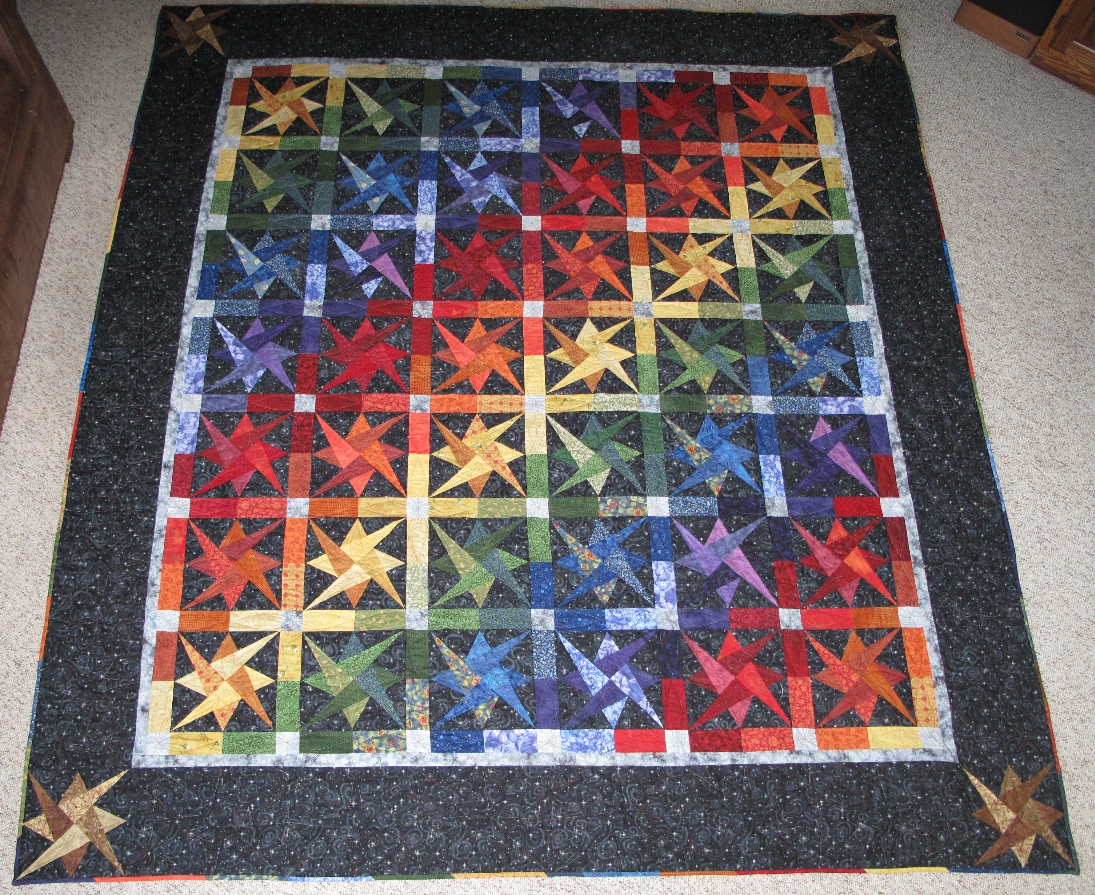
I used this technique to make some of the fabric for my Dyed Fabric quilt.  If you look closely, you can see that the small white squares between each of the blocks is actually white fabric with black crackle. And, the appliqued ribbon in the border of the quilt is the same crackle fabric.

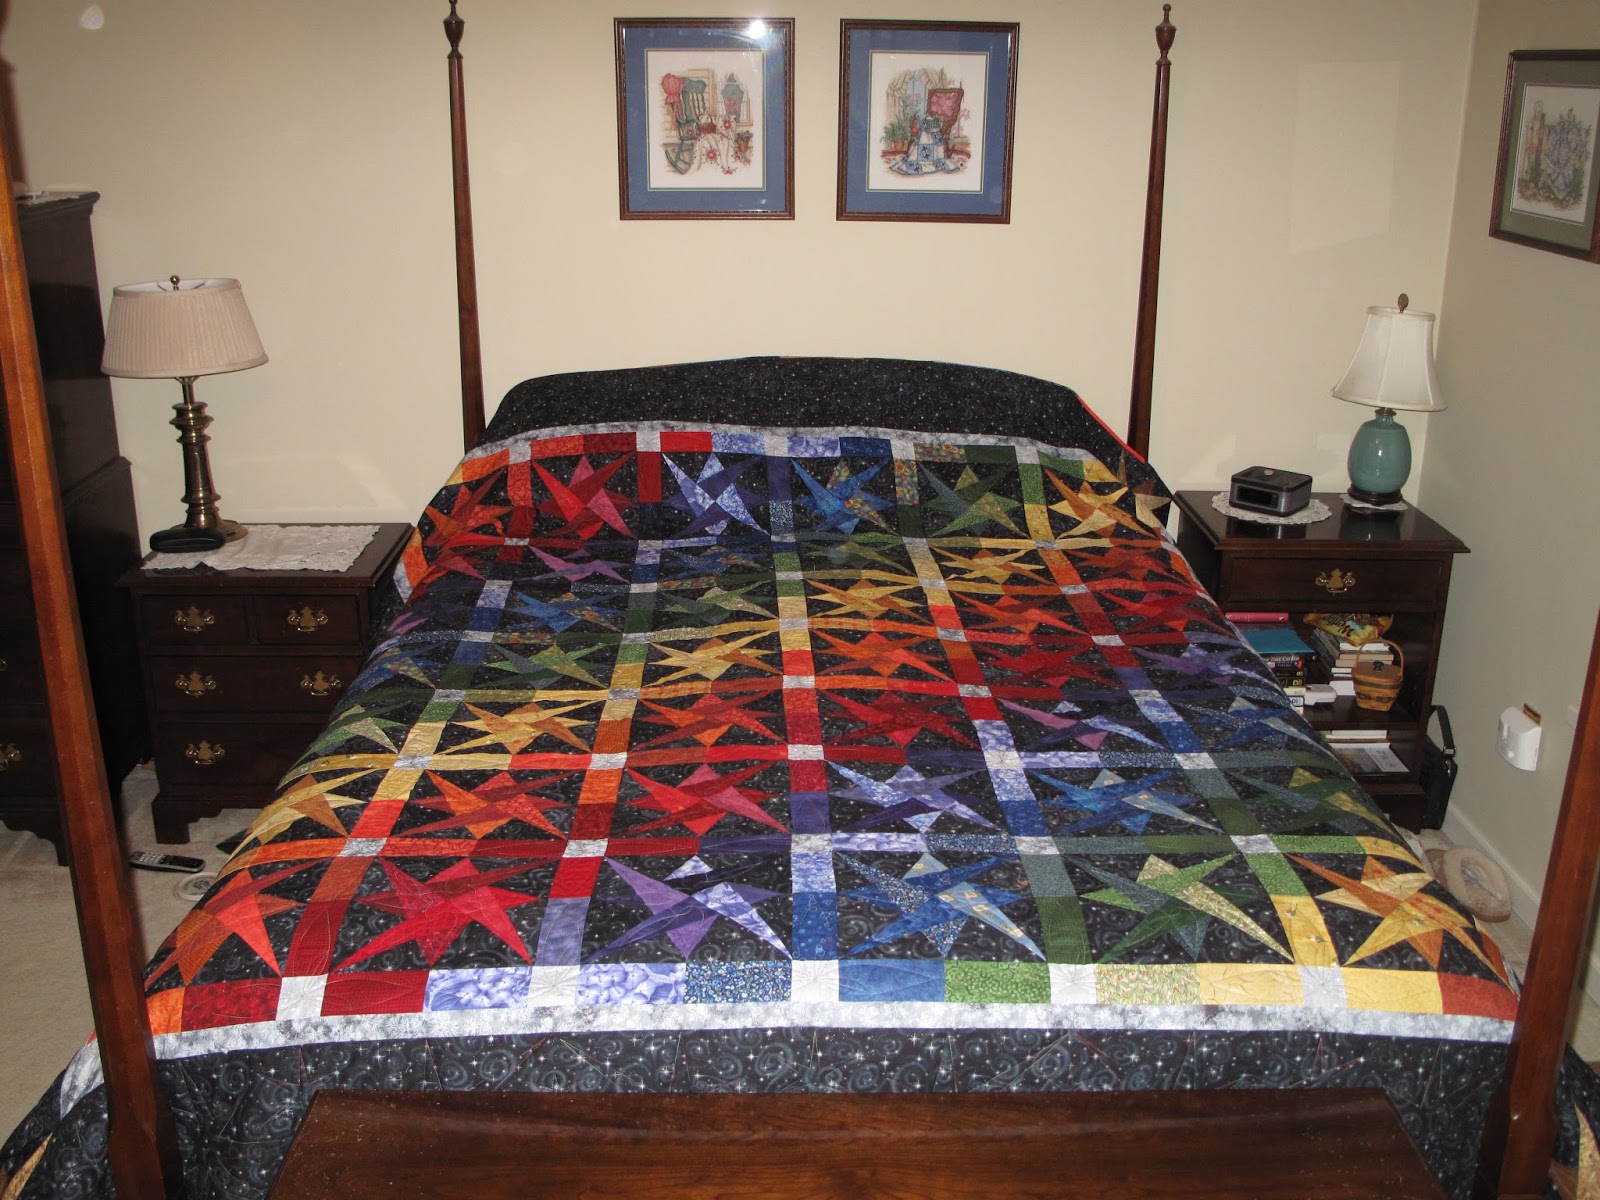
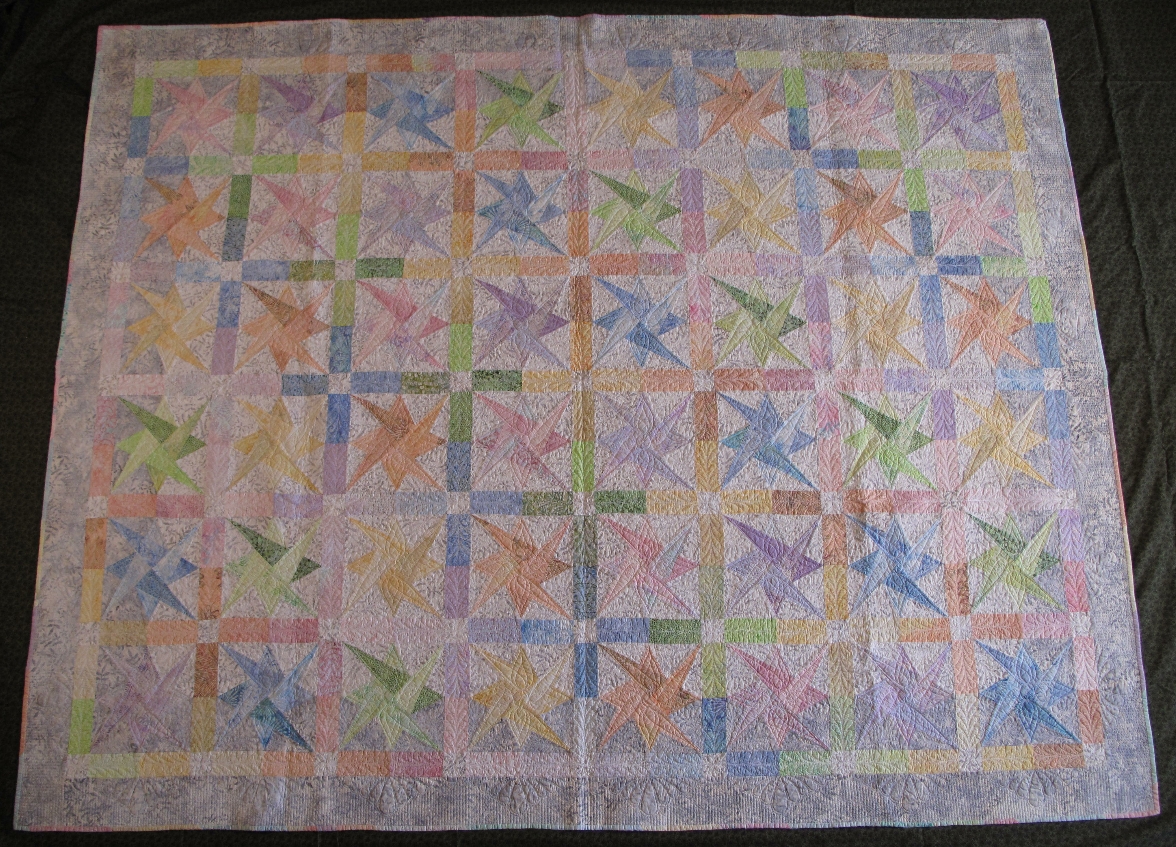
Mini Quilt made to match my Dyed Fabric Quilt
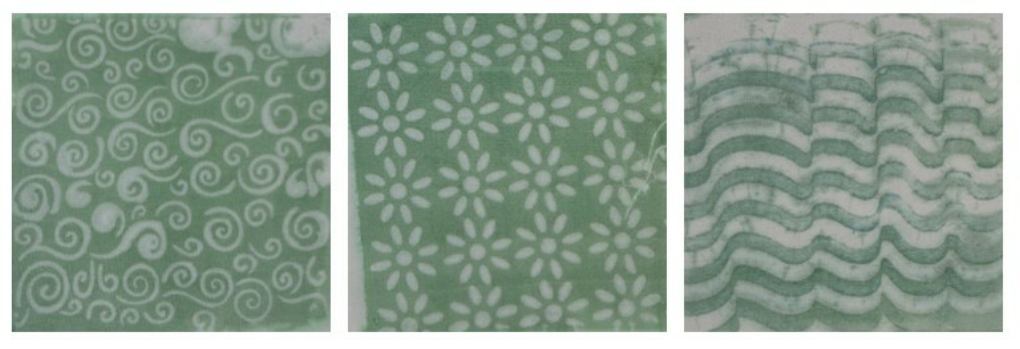


Corn Dextrin:

Corn Dextrin is best for solid areas and lines. Many cool designs can be made by applying the corn dextrin with a squeegee, rubber stamps, stencils, spatulas, or drawing with a squeeze bottle.

1) Corn Dextrin Paste.  Similar to potato dextrin, I mix 1.5 cups of dextrin cold water, heat in the microwave for one minute and allow to cool to about 80 degrees.
2) Tape fabric to a hard surface covered with a thin piece of plastic.
3) Place a stencil on the fabric.  To stabilize the stencil and keep it from moving around I run a glue stick around the edge of the stencil before placing on the fabric.
4) Squeegee a smooth layer of paste onto the the stencil and fabric.
5) Remove the stencil.
6) Allow the cloth to dry completely while it is still stretched.
7) Apply dye with a paint brush or spray bottle
8) Cover the fabric loosely with plastic and batch for 24 hours.
7)  Rinse, wash with Blue Dawn and dry.


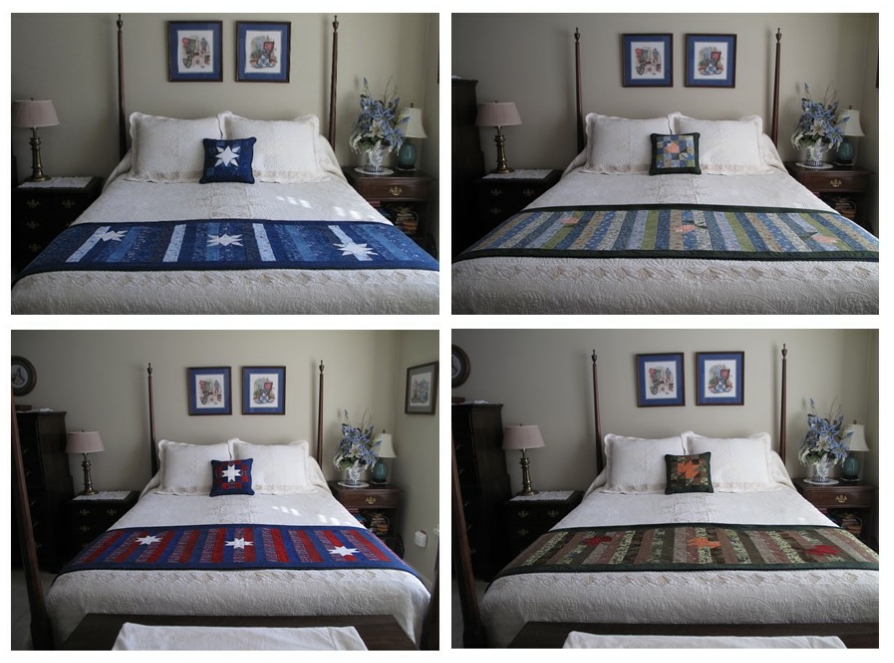
I have plans to use these fabrics in a bed runner.  But, it may be a while before I finish making all the fabrics for that.

National Oatmeal Day

It’s National Oatmeal Day.  So, I thought I would try a something new for breakfast. Altering an oatmeal cookie recipe, I came up with something really tasty:

Oatmeal Breakfast Cannoli

1/3 cup butter, melted
1/3 cup brown sugar
2 eggs
1 teaspoon vanilla extract
1 teaspoon Baking Powder
1/2 cup flour
3/4 cup oatmeal

1/2 cup whipped cream cheese
1/4 cup carmel sauce
Apple, thinly sliced

Cuisinart Crepe/Pizzelle Press

While preheating the Pizzelle Press, mix together the first seven ingredients to make the cannoli batter.  Place one Tablespoon of batter on each spot of the Pizzelle plate of a baker. Close the cover and cook for 2 minutes. When done, remove the the pizzelle from the press with a heatproof spatula.  Immediately wrap around a dowel to form the cannoli shells.  Allow to cool.  Meanwhile, mix the cream cheese and caramel sauce.  Spoon sauce inside each shell.  Add apple slices and enjoy!

Dyeing Silk Fabric

Silk — elegant, versatile and washable. Yes, washable! Sewing and dyeing silk was something I wanted to try.
Silk is a natural protein fiber (like wool) that is taken from the cocoon of the silkworm. Most animal protein fibers require acidic dyes which are different than the alkaline dyes that plant fibers like cotton require. However, silk is less sensitive to high pH than other animal fibers, which makes it the most versatile of all fibers for dyeing.
Silk can be dyed with acid dyes (specifically made for animal fibers), but it can also be dyed with fiber reactive dyes (such as Procion dyes).
Looking over the many approaches for dyeing silk, I decided I did not want to invest in yet another set of dye powders.  So, I looked for directions that used the Procion MX dyes I already had.  I found two different dyeing methods to try.

Soda Ash Dyeing

Similar to dyeing cotton, silk can be dyed using the soda ash method.  With this method, the soda ash acts as a mordant to bind the dye to the fabric. The only drawback to this method is that the soda ash is alkaline and thus will make the silk slightly less shiny and not as crisp. While others may find the loss of the crisp silk texture a disadvantage, I actually prefer softer fabrics for making quilts, garments and other household items.
Steps:
1) Soda Ash Solution – 1 teaspoon salt, 1 teaspoon soda ash in one cup distilled water.
2) Make Dye solution by diluting 100 mg of powdered dye in 50 ml Soda Ash Solution.  Mix well.
3) Add 5″ x 5″ fabric square.
4) Cover and store at RT for 3 hours.
5) Rinse, wash with Blue Dawn and dry.

Vinegar Dyeing

To avoid the loss of shine, fabric can be exposed to an alkaline solution for only a short period of time.  Thus to dye the fabric, an acidic dye solution is needed. Vinegar contains 5% acetic acid and as an acid it will bind the dye to the fabric. But, to lock the dye, the fabric requires heat.
Steps:
1) Soak 5″ x 5″ fabric square in Distilled White Vinegar for 10 minutes.
2) Make Dye solution by diluting 100 mg of powdered dye in 50 ml Vinegar.  Mix well.
3) Place fabric and dye in microwave safe container and cover with plastic wrap.
     Note: do not use dyeing containers for food preparation
4) Microwave for 30 seconds, wait two minutes, and microwave 30 seconds again.
5) Cool for 5 minutes.
6) Rinse, wash with Blue Dawn and dry.

Gradation Dyeing

I liked this second method – its fast and creates beautiful colors.  Here are the samples created using 2 mg/ml and 0.2 mg/ml dye solutions.

Now I need to figure out what to make with these truly beautiful pieces of silk fabric I have dyed!

Vinegar Dyeing of Cotton?

I liked the vinegar method for dyeing silk because it was really fast.  So, if it works for silk – will it work for cotton?  Sadly, the answer is No.  The results show that the dye intensity is only about 10 percent of the intensity created with the soda ash solution.  This should not have surprised me since cotton is a plant fiber not a protein fiber.  But, it was worth a try.

Crochet Along – Crown Jewels and Eight-Pointed Flower

Two more  crochet blocks completed.  
“Crown Jewels”
Designer: Melinda Miller
“Eight Pointed Star”
Designer: Julie Yeager
Pattern: $3.99 at Ravelry
There are many beautiful color combinations shown for the pattern.

Scrap Quilts


I love fabrics and hate to waste even a small piece.  So when I make a quilt,  I keep my scraps – you never know when you may need a small piece of lime green fabric!  When I am working on a project, any small piece of fabric goes in a basket to save for future projects. Well, that basket is over flowing again.  

So, it’s time to think about doing another scrap quilt. An idea came to me while looking at commercial fabrics for cushions at my dental office. One of the fabrics was called “Bounce” and my staff thought it would be a nice quilt idea.  This quilt should be fun (think balls bouncing out of a ball pit), but it will be a while before I can work on it.  Until then, I thought I would post some pictures of previous scrap quilts I have made. 


A few years ago, my eldest son asked if I would make him a new quilt from some of my scraps.  He looked through the many ideas for quilts that I had designed using EQ7 but not sewn.  He selected one I called “Rainbow Stars” which was a variation of the Starry Path Block.  I sorted through my scraps and found that I had enough to complete the quilt.  All I needed to purchase was the black background fabric. The angles in this  quilt are not your typical quilting angles.  I found it easier to make the quilt using paper piecing. Luckily, EQ7 allows for printing templates for paper piecing.  

I changed the order of the colors and switched the corner blocks to brown.  But, the resulting quilt was remarkable similar to the design.


I enjoyed making this quilt so much, that I thought – what would it look like in lighter fabrics, Batik pastels, perhaps?  So, I went back to EQ7, changed the colors, liked what I saw and decided to make another. I didn’t have any pastel batiks in my stash, so, I purchased a jelly roll of pastel batiks. This proved useful. The points of the stars fit nicely in the 2.5″ strips.  

Again, this quilt looks very similar to the design.               


A trip to the Minnesota State Fair showed the quilt sporting a lovely blue ribbon!

With a bit of extra fabric, I decided to make some accessories.  
-a doll quilt
-a pillow sham in grey and white
– a decorative pillow

After requests from friends for directions for making this quilt, I decided to type up a pattern.  If you are interested in the pattern, go to PatternSpot to purchase.

Today is International Coffee Day

On Tuesday, we celebrated National Coffee Day. I didn’t find any place to get a free cup of coffee. So, I just made some at home.  Today, the International Coffee Growers Organization has named as the first official International Coffee Day.  The day is meant to promote and celebrate coffee as a beverage and to promote fair trade coffee.

Finland tops the list for coffee consumption per capita,  with an average of 21.8 pounds of coffee per year.  The other Scandinavian countries, including Sweden, are also in the top five.  The United States only ranks 25th in coffee consumption with a per capita consumption of 6.8 pounds. So, I guess that means my husband is more Swedish than he is American – at least in coffee consumption.

So, to honor these two days, I thought I would post a few of my favorite Coffeecake recipes:

http://www.kingarthurflour.com/recipes/sour-cream-coffeecake-recipe

Swedish Puff Coffee Cake Recipe

Swedish Puff Coffee Cake

Enjoy!

Crochet Along – Join In, It’s Gonna Be Fun

When I was a teenager, I learned how to knit and crochet – nothing fancy, just basic stitches. Granny Square afghans were the only crochet pattern I had learned.  Being busy with classes, I gave up on knitting and crocheting when I was in college. Now, years later, I have decided to take up crocheting again. Along with several friends, also new to crocheting, we have compiled a collection of several patterns (actually about 42 of them) for a Crochet-Along. The plan is to crochet two blocks each month and eventually put them together into an afghan (yes this project will take a while to complete).

For this project, I am using Fingering weight Bamboo-Cotton (70/30 blend) yarn. Specialty dyed yarns sell for $8-25 per skein. I found white yarn on Amazon for $2.40 a skein and decided to try dyeing the yarn.  A trial skein showed that the yarn dyes similar to cotton fabric. Thus the supplies needed were the same as I described in my last posting. Yeah – no need to purchase anything new, just the yarn!

Be advised, synthetic fibers, such as acrylic will not dye with Procion dyes. 

Air trapped between fibers of the yarn will hinder the penetration of the color.  Therefore, prior to dyeing, each skein of yarn must be immersed in dye solution (water with salt and soda ash) to prepare the fibers to accept the color.  For variegated yarn, the skein can be rewound into a larger circle and secured with scrap yarn.

For this project, each skein of yarn was soaked in 1/2 cup of hot dye solution.  The excess solution was squeezed out to leave the yarn damp prior to adding the dye. The desired dye was added, either as a total immersion (for a single color skein), or syringed on (for variegated yarn).  The yarn was then batched for 6 hours. Excess dye was removed by rinsing with cold water, followed by washing in hot water with Dawn dish soap.   Since the washing machine is the easiest way the wash out excess dye from fabric, I wanted to find a way to wash yarn without the yarn becoming tangled.  Tied yarn does tangle very easily when washed in a washing machine (believe me, I tried it and spent about two hours untangling my first skein).  I thought about using a lingerie bag, but worried that the skein may still tangle.  So, instead, I tied the skein in an old nylon – worked great.


Below is a sample of the yarn colors I created:
Variegated Colors:
     Mixing Blue and Custom Green, 20 ml of each color syringed in sections
           One skein using dye mixed at a concentration of 5 mg/ml
           Another skein at a concentration of 2 mg/ml
Solid Colors:
     Golden Yellow, 0.2 mg/ml in 50 ml
     Mixing Blue, 5 mg/ml in 50 ml
     Mixing Blue, 0.2 mg/ml in 50 ml
     Custom Green, 5 mg/ml in 50 ml
     Custom Green, 0.2 mg/ml in 50 ml

Crochet Along Square #1 – Granny Square – pictured above
Crochet Along Square #2 – Big Flower Square designed by Julie Yeager (Ravelry.com)
This pattern does have a fee, but there are many other patterns on Ravelry that are free.  

My plan is to post two squares each month. I will include information about the patterns. So, if you want to crochet along, please join me.  If you do, I would love to see what you create.