Creating a Legacy though the things I love – Fiber Arts, Flora, Food, Faith and Fun
Author: Erickson's Heirlooms
I am a retired pediatric dentist. While I enjoyed working with my young patients, I am really enjoying the freedom of retirement. With my varied hobbies, I hope to leave a legacy by the things I do and say.
I hope to have an impact through:
Fiber arts (quilting, sewing, knitting and crocheting)
Flora (flowers and gardening)
Food (cooking and baking)
Faith
Fun
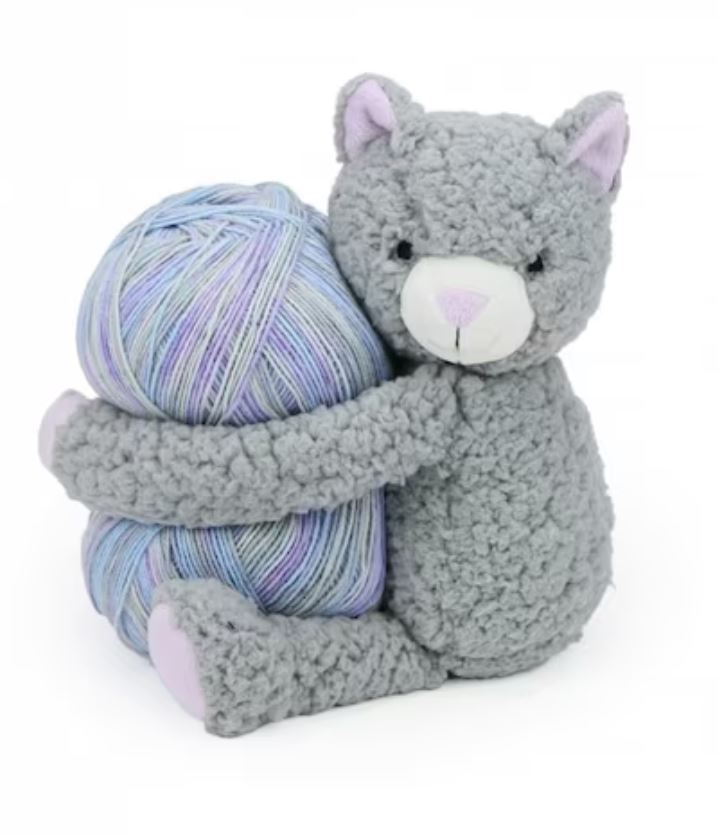
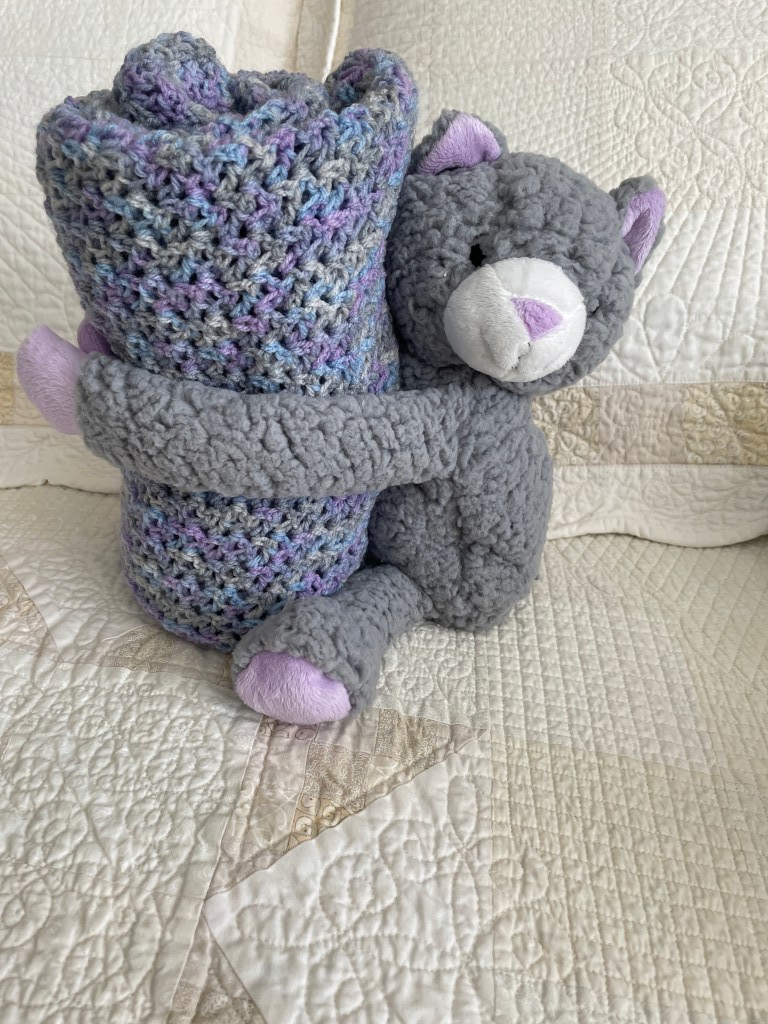
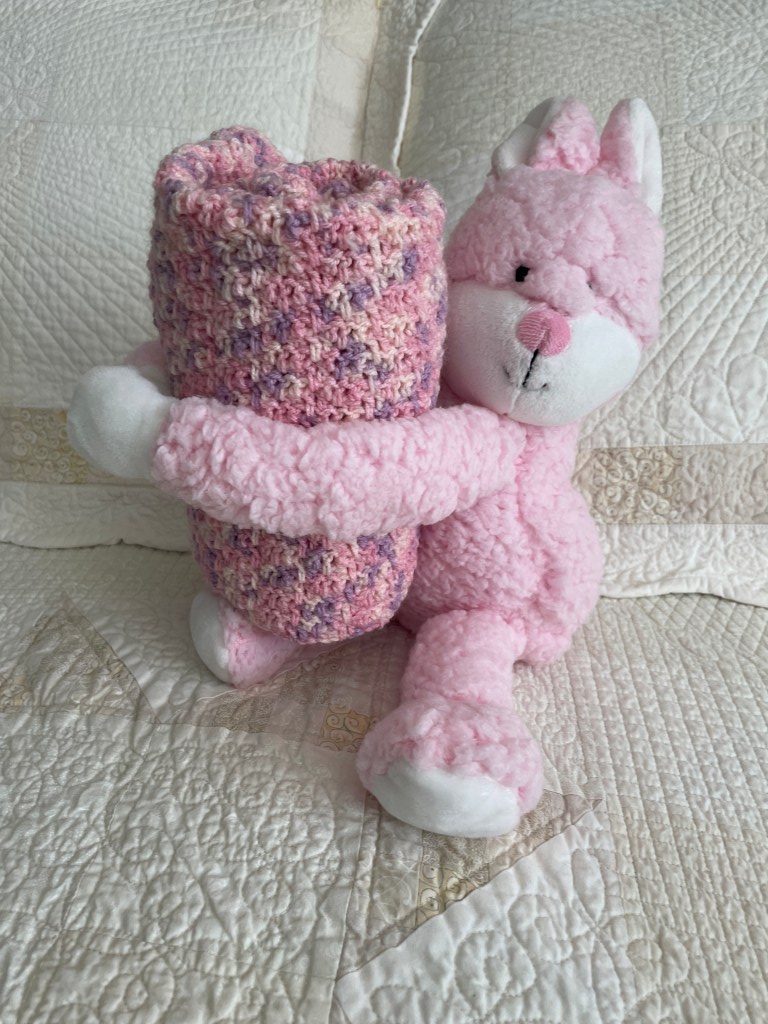
A couple years ago, one of my son’s friends gave me a DMC Hug This Kitten Kit. The kit included a fluffy plush grey cat toy hugging a skein of size 2 fine weight yarn in variegated blue, pink and white. The size of the skein was just right for making a baby blanket which when finished could be rolled up and tucked into the arms of the kitten.
Most of the patterns associated with the kit were knitting patterns. Preferring crochet, I checked the website for other patterns associated with the kit. There was one crochet pattern that was based upon the Cross Stitch crochet stitch.
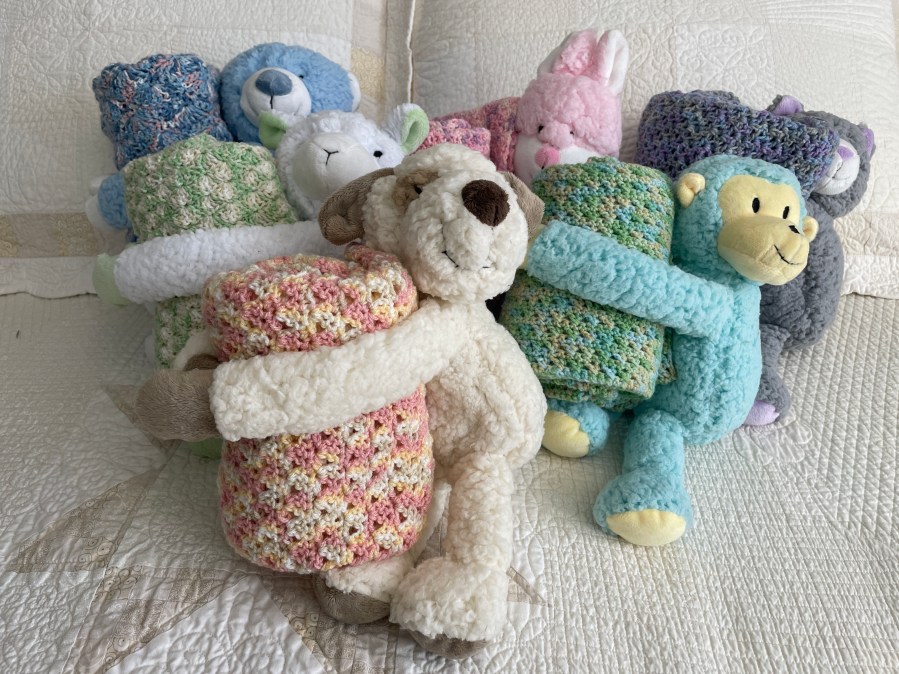
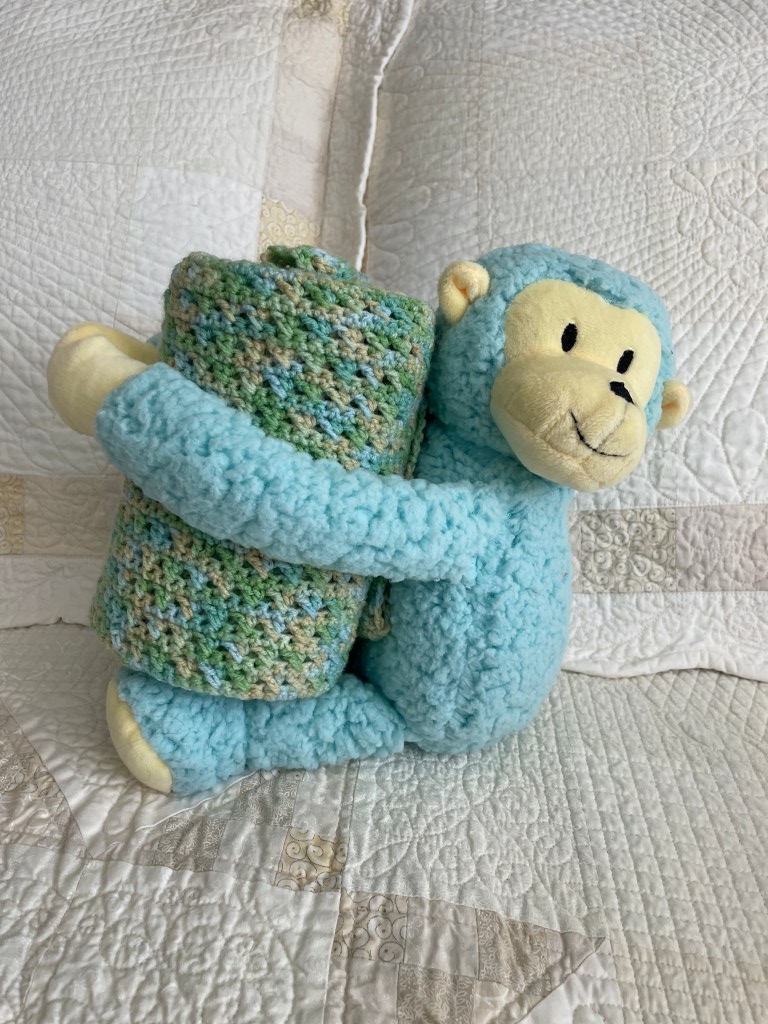
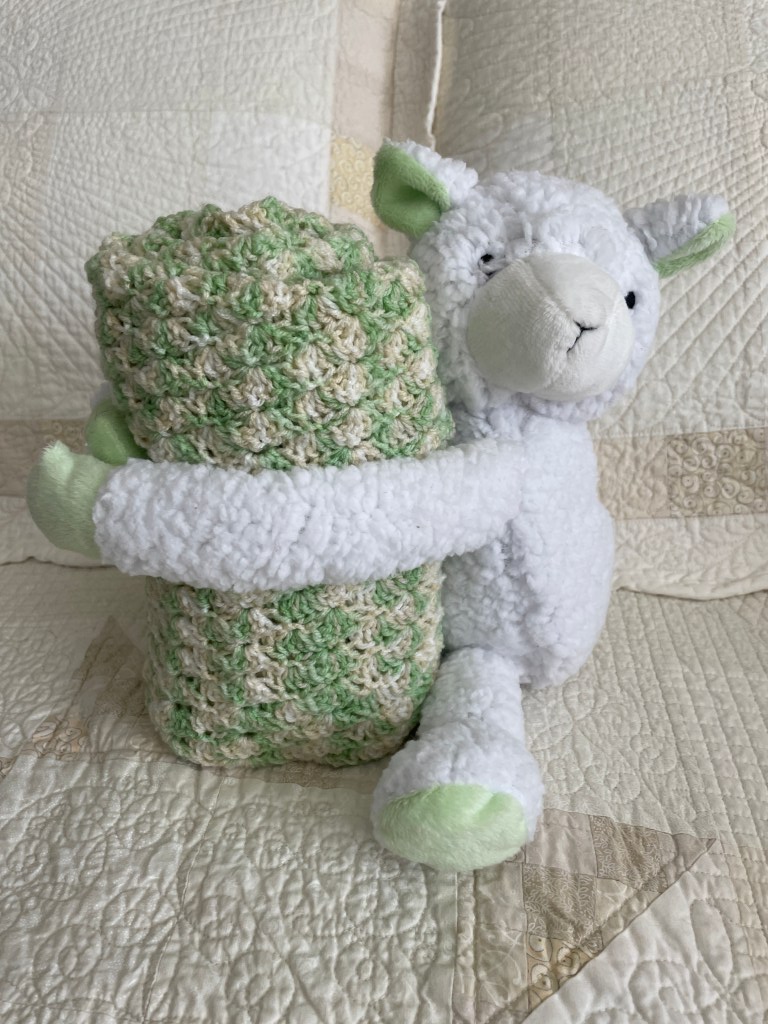
There were five other kits in the Hug This group. In addition to the kitten, these kits included a monkey, a dog, a rabbit, a lamb and a teddy bear.
About a year ago, I received an email about the kits being discontinued and each kit was available for $5 each, with free shipping for orders over $25. Since I thought they were so cute, and the price was right, I decided to purchase the five animals that I did not have and have since made additional baby blankets.
It’s that time of year again where people look forward to the year ahead and make plans for things that they want to accomplish and/or change in the upcoming year. Once again, I am looking back over my year and trying to focus on the good things of the year. As with everyone, there have been some not so good times this past year. I could criticize myself for my failures this year. And, there have been many. Here are some fun examples:
But, there have also been many wonderful times this year. So, instead of focusing on my failures, I will focus on my successes.
While another year of listening to “The Bible in a Year” has come to an end, I will be continuing this daily activity. This past year, I added a couple of reference books to look up information about the readings. If you haven’t checked out Father Mike’s podcast, I would strongly recommend it. He has a great way of making biblical readings very relevant to today’s world.
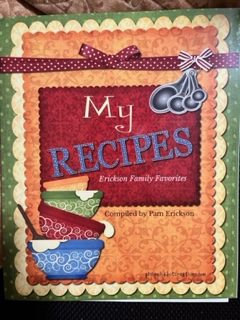
At the beginning of the year, I sorted through my family recipes and put together a list of recipes that I thought my adult sons would enjoy having. Throughout the year, I made each of the recipes and took photos of the result. Then, using the Create My Cookbook website, I had professionally printed cookbooks made for each of my sons. These cookbooks turned out very nice and I hope the boys will enjoy them for many years to come.
I have made many crafts this year, and have taken photographs with the intent of writing a blog about each of them. I’ve probably got about 20 posts that I should have already written up, but have not yet done. I have, however, completed 26 blog postings this year. So, that works out to one every other week and I am happy with that.
My original intent with this blog was to provide a means for my mother, who lives out of state, to follow along with my crafting activities. Unfortunately her eyesight has deteriorated and she no longer reads my blog. Over the past year I have thought about giving up on blogging and just doing my crafts. But, then I will receive a really lovely email from someone, I do not know, who has read a post and was thankful for the details that I included. That makes me realize that perhaps someone is benefiting from what I write about. Hopefully this year I will get some more of my projects written up. If not, I will still enjoy making my crafts and trying new techniques.
I have continued to keep a journal of my daily accomplishments. I expanded upon this a bit this year by adding notes about things I have read and including ideas about crafts that I am thinking about. This has been a tremendous resource. I have all my ideas in one place. When I actually start to work on a new project, I can pull out my journal and review my notes. So, now I have my accomplishments as well as my ideas recorded. Looking back over the year, I realize that it’s been a productive year and I thank God for my family, my health and my happiness.
As we start 2023, I pray that each of you will have a happy and healthy year and that you will continue to find the glory in God’s creation and the joy in his marvelous love.
One year ago today, I had to say goodbye to the best quilting buddy I could have ever wanted. My cat, Onyx, had been my constant companion for over thirteen years and I have missed having her around.
When the weather was warm, her favorite place to sit was looking at my flower garden through the screen of our front door. Unfortunately, I never thought to take a picture of her sitting there while she was alive. So, this summer, I decided to make a wall quilt that depicted the scene.
After sketching out my idea, I hand painted fabric dye onto a piece of white fabric. The gold color on the fabric below is a dye blocker to keep some areas from dyeing.
Next, I quilted the fabric, stitching out the sun, clouds, tree, flowers and brick garden edging.
Using Inktense Dye pencils, I then colored in the leaves, tree trunk, flowers and bricks.
I then secured some nylon mesh over the “door” section of the scene using MistyFuse Ultraviolet. I selected this type of fusible web because it is very sheer and is treated to prevent discoloration and aging when exposed to UV light. I used a strip of shiny organza to create the “sidelights” of the scene, cutting out the diamonds where our sidelights have clear glass.
The leading of the sidelights was created using a tight zigzag stitch.
To replicate the umbrella basket next to the door, I used 1/8″ leather strips woven into the shape of a basket and hand stitched onto the quilt. The umbrellas were hand dyed silk fabrics stitched onto wires that were attached to a heavy wire. The heavy wire was bent and the end covered with polymer clay to create handles. These umbrellas actually open like real umbrellas.
To replicate the ceramic vase near our front door, I embroidered a design onto another piece of hand dyed silk fabric, shaped it into a vase form and hand stitched the vase onto the quilt. The Eucalyptus branches were made by hand painting fabric dye onto Lutrador Mixed Media Fabric. The painted fabric was folded over, glued to copper wire, cut into small circles and twisted into branches to go inside the vase.
I used more polymer clay to make the hinges and knob for the door.
Onyx was made from hand dyed heavy wool fabric, washed to cause felting and stitched onto the quilt. Her eyes were made using fused glass.
I am very happy with the result. I may not have Onyx to keep me company when sewing, but I do have a reminder of her on my wall.
And, while we are now a pet-free home, we have had several other furry friends in our household. So, this fall I decided to add them to the wall as well. Using some photos taken of these pets, I created paper pieced 6″ x 6″ tiles of Striker (German Shorthair Pointer), Squigglez (Orange Tabby), Comet (Orange Tabby) and Duke (Yorkshire Terrier).
Mounted above and below the Onyx quilt, the pets finish off the décor of one wall in my sewing room very nicely.
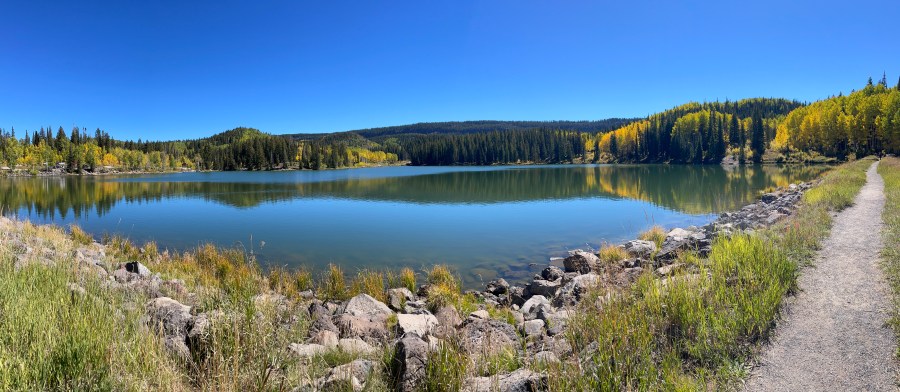
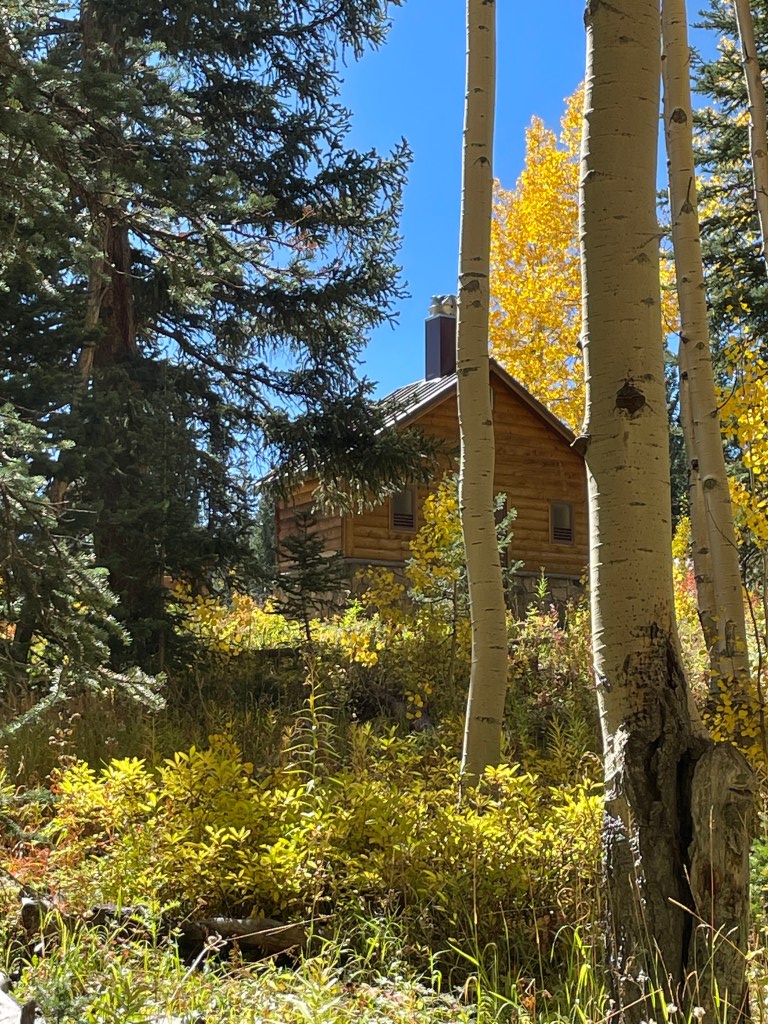
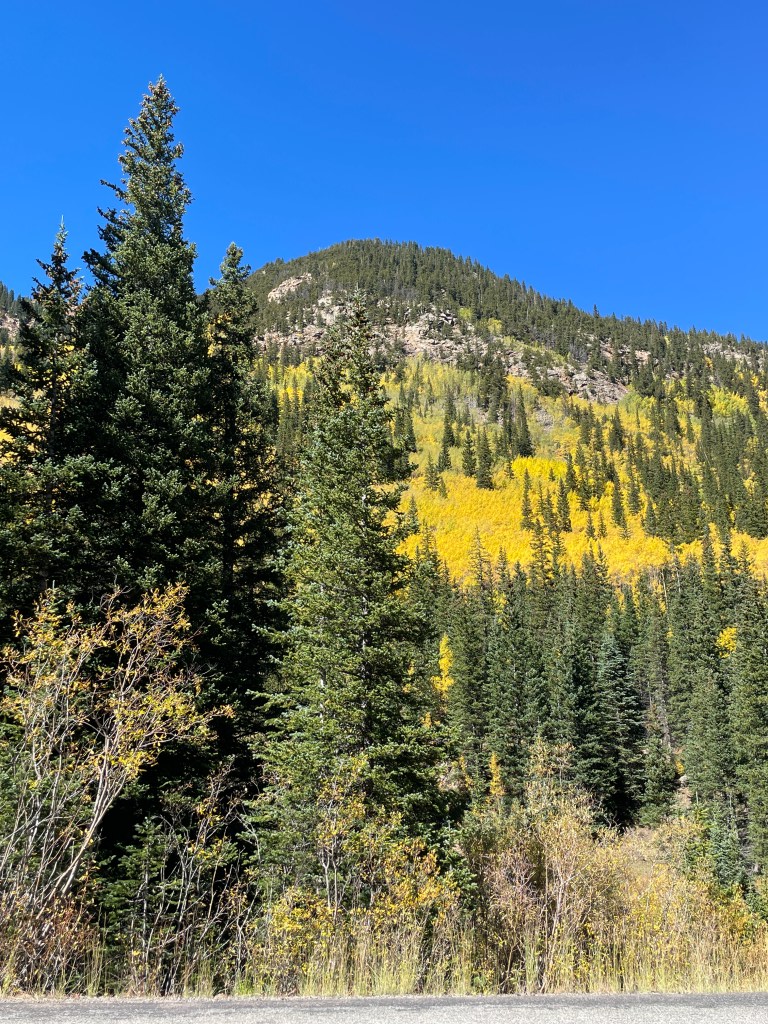
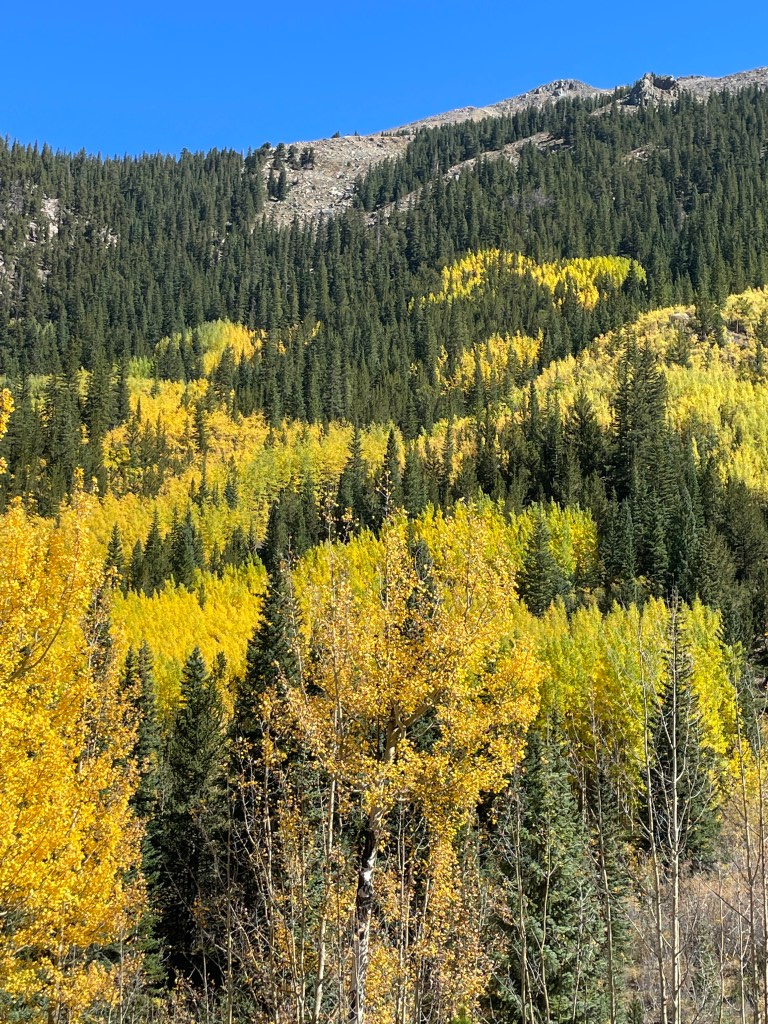
Last year, I took a trip to Colorado to see the fall colors in the Rocky Mountains with one of my sons. Unfortunately, we were about a week too late – while the scenery was still beautiful, we dealt with snow and cold.
This year we decided to do our fall color drive about ten days earlier. The fall colors were lovely, as was the weather. The day that I arrived in CO was cold and rainy, so after having a tasty dinner at Sauce on the Blue in Silverthorne, we drove to our villa in Vail. The next day, after waiting for the weather to clear, we left around noon and drove Buffalo Pass through the Medicine Bow and Routt National Forests. On day two, we drove the Top of the Rockies National Scenic Byway. This drive took us from Leadville, over Independence Pass to Aspen for a late lunch. On our third day, we drove the Grand Mesa Scenic Byway and continued south to Ouray, CO. Here we found the Box Canon Park, a mineral hot springs that is tapped and piped to the city pool. On our last day, leaving the mountains, we drove Guanella Pass before I needed to head to the airport and return home to MN. It was a lovely trip enjoying time with my son and God’s wonderful creation.
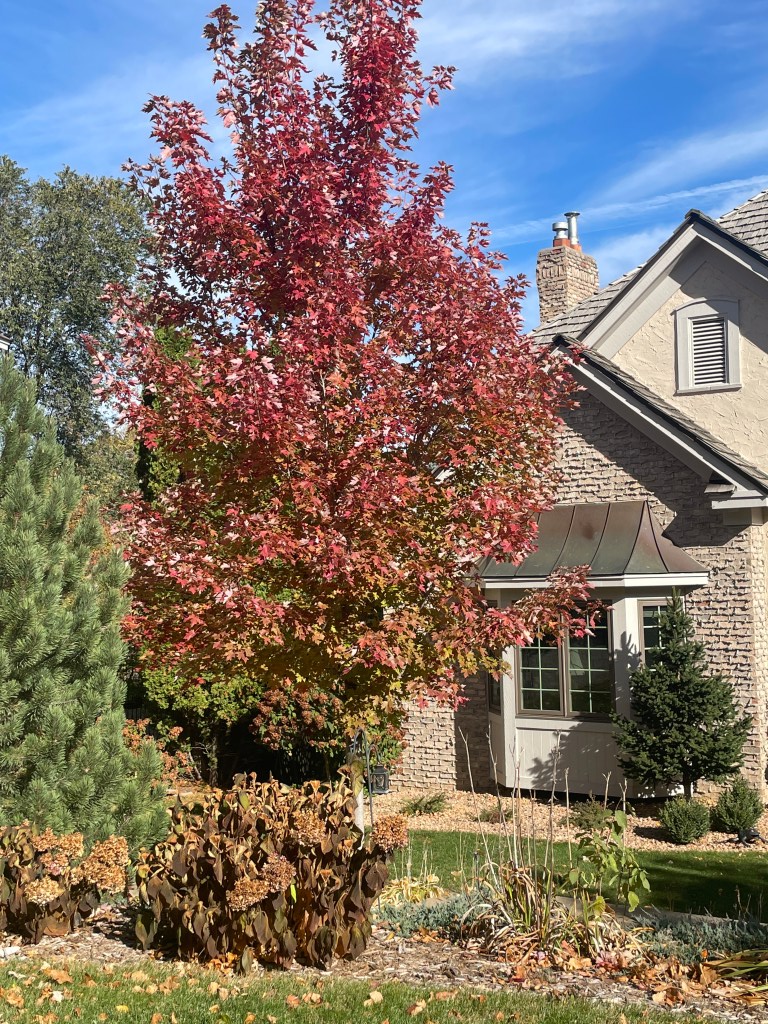
Last Friday, October 14th, we awoke to snow falling in MN. While it was lovely to see, I was not quite ready for “winter” weather.
Later that day, I left for a weekend getaway to Gull Lake with a few friends. What a wonderful time of conversation (and CE) we had.
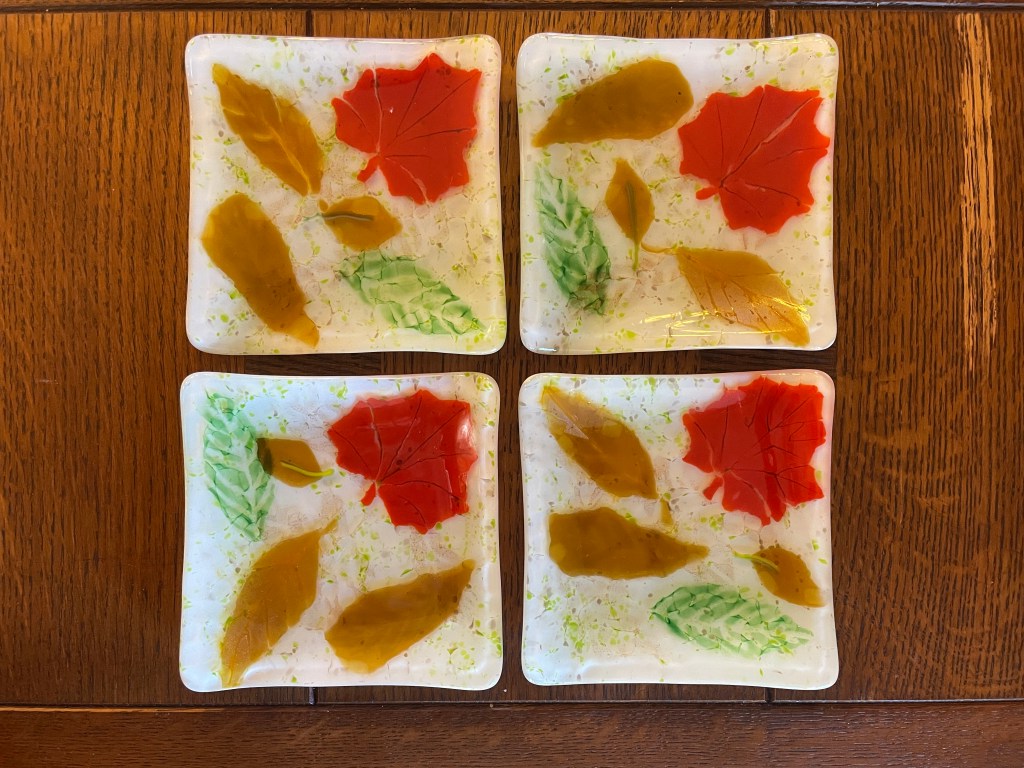
Since I am writing about fall, I am including a couple glass projects that I completed this year.
Napkin Holder – made with twisted copper wire, sheet glass and leaf shaped murrini.
Dessert Plates – made with copper Mica, iridized glass cut into shapes of leaves and glass frit.
Tree Votive Holder – made with glass strips / coarse frit slumped over a metal votive form
Knowing that I love to quilt, various friends and family have gifted me with fabric for me to use. Usually this happens when they are moving to a new home, or downsizing in anticipation of a move. When I receive larger pieces of fabric, I wash each piece and add them to my fabric stash.
This summer, after moving my mother into assisted living, I returned with even more fabric. Running out of space to store my fabric, it was time to use up some of the fabric. Having seen some really simple quilt ideas, I decided to make some quick quilts. These will all be donated. And, by doing large quilt blocks, I could use up fabric rather quickly.
Using the Tri-Recs tool, I made a pair of matching quilts with large 6″ blocks and two different color schemes. These quilts used about a half yard of each color in the gradients.
The next two quilts were made with some larger pieces of fabric that I had been given. The pink quilt started with a floral fabric that was pink, purple and yellow. I had a large piece of yellow fabric, but no large pieces of pink or purple in my fabric stash. I did, however, have a piece of pink fabric that I had originally dyed to use as backing for a baby quilt. Since this matched the floral fabric, I decided to use that.
The teal and yellow floral in the second quilt was some that I have had in my stash for a while. While packing up my mom’s excess craft supplies to be donated, I noticed the teal polka dotted fabric and thought it would match nicely, so I added it to the box of things that I was taking home with me. It matched the floral fabric nicely.
I’ve had this avocado green fabric for several years. Being an unusual color of green with a rather large print, I really was unsure how to use it. And, I had several yards of it. I chose a simple tumbling blocks pattern with a beige contrast fabric.
A split four patch design used up large pieces of three other fabrics that were in my stash.
My mother had a lot of scrap Christmas fabrics, which she would no longer be able to use, that I also took home with me. From these a made a Christmas Cats sofa quilt. I really like how this one turned out and may make a twin sized cats quilt out of some more of my larger scraps.
After completing these, and other quilts that I made this year, my scraps baskets and buckets were again over flowing. On my fabric shelves, I only store fabric that is larger than a quarter yard. Mid-sized pieces of fabric, larger than 6″ x 6″ but smaller than a quarter yard, are placed in either a plastic bucket. And, smaller pieces are placed in some decorative Longaberger baskets. Because these were over flowing, I sorted out the fabrics and made a few scrap quilts.
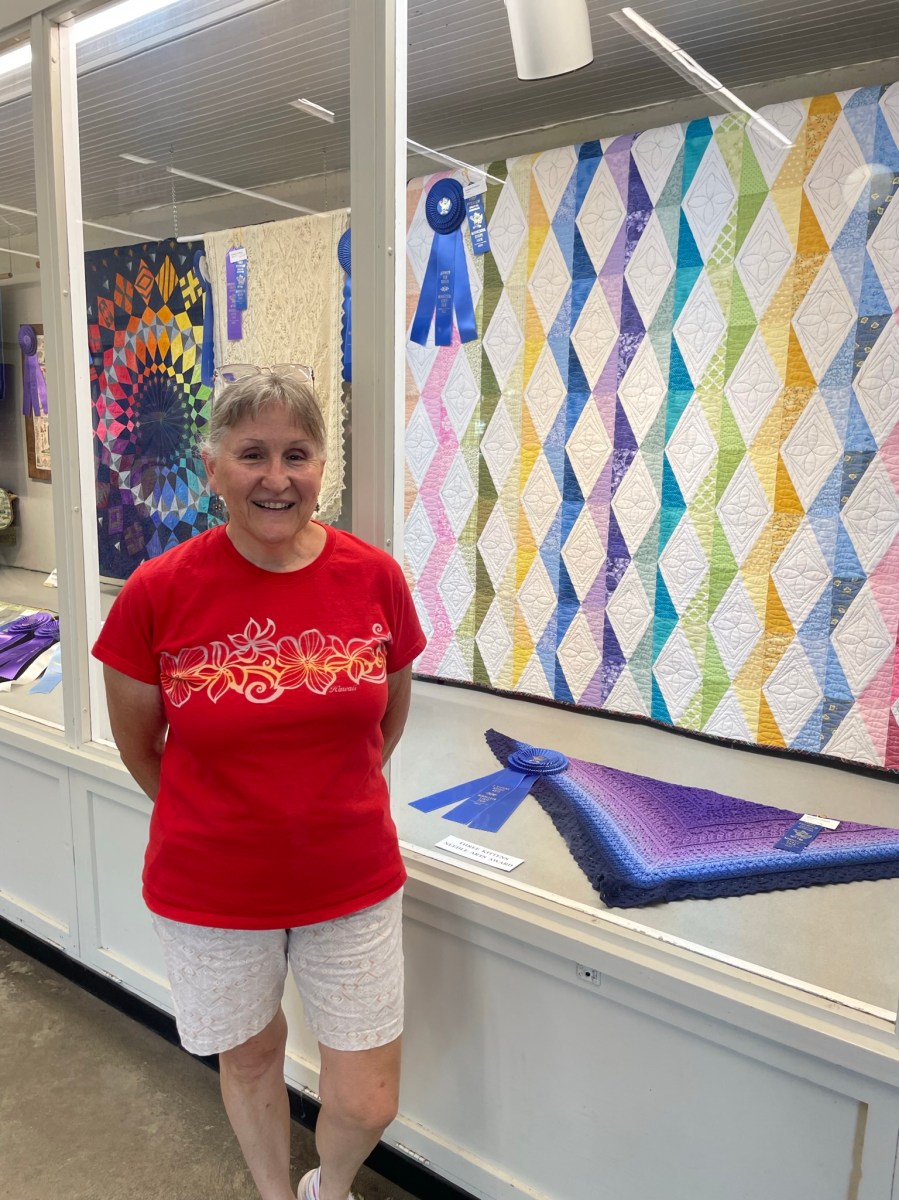
I started out making the black quilt. When cutting the colored fabric, I mistakenly cut too many pieces of each fabric. So, I realized that I would need to make a second quilt. For the second quilt, I decided to change it a bit. I used white as the background color, changed the order of the colors to highlight the zigzag effect of the pattern, and added another column to remove the need for a large border.
The white quilt came together nicely, so I entered it in the MN State Fair scrap quilt category, where it received a blue ribbon. I was surprised to see it prominently displayed at the fair. This quilt was donated to the MN Dental Foundation. At the One Smile Gala on Friday, the quilt was successfully bid on by a couple people and raised funds to support the dental outreach programs in the state. I hope the person who purchased the quilt enjoys owning it!
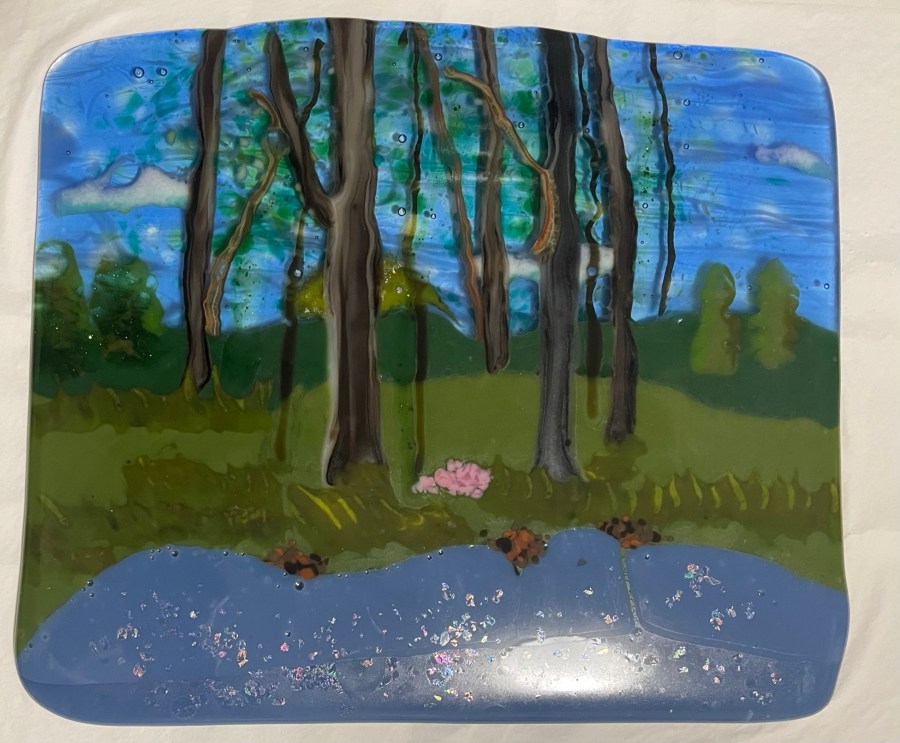
Landscapes are something that I enjoy – the beauty and incredible details of God’s creation! While I have made a few quilted landscapes, I had not yet tried to make a landscape out of fused glass.
A few months ago, I was cleaning and rearranging the supplies in the room where I do my fused glass work. When I moved a large organizer box, I discovered a picture taped to the wall that had been there for a really long time. This picture was drawn by one of my sons when he was about eight years old and was my inspiration for an attempt at a fused glass landscape.
For the background glass, I used some Heads & Tails glass, a type of glass that I recently discovered at a local glass supply store. H&T glass is the rough uneven sides of the sheets of glass cut off during the manufacture into sheets.
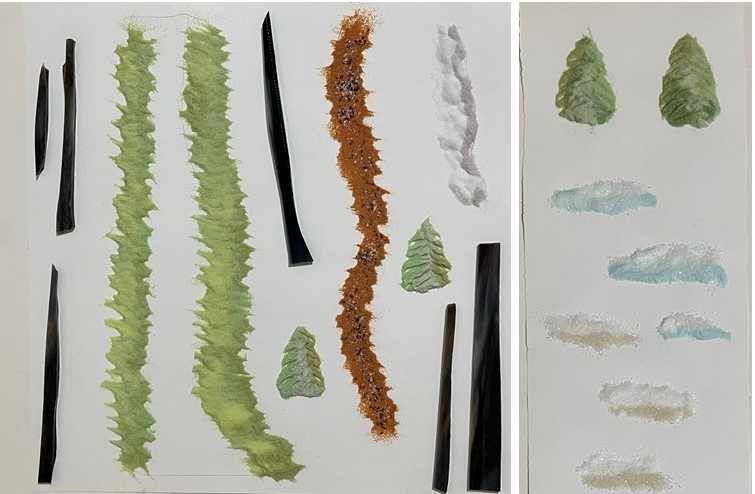
For some of the details, I used opaque frit powder and fine glass. This glass was shaped into clouds, grass, trees, etc and then tack fused.
These glass elements were then combined to replicate the inspiration drawing. Glass frit and stringer were used to create the trees and the entire piece was full fused.
I was pleased with the result.
After trimming the edges, additional frit was added to create detail for the trees, rocks and flowers.
I especially like how the landscape looks back-lite.
For my first attempt at a glass landscape, I am pleased with the result. I learned a lot while doing this and may try to replicate some pictures taken during vacations.
My father-in-law, Bruce, was a wonderful improvisational piano player. I have fond memories of his visits to our home or our visits to his home, where he would sit at the piano and play some of the classic old hymns at all times of the day. While he did take piano lessons and did learn to read music, he realized early on that he preferred to play pieces “his way”. As an adult, he did not use sheet music, but rather, he would play by ear.
Even though Bruce passed away over ten years ago, we are fortunate that he gifted each of the family members with a CD of him playing the piano. Listening to this CD brings back memories that seem like they were just yesterday.
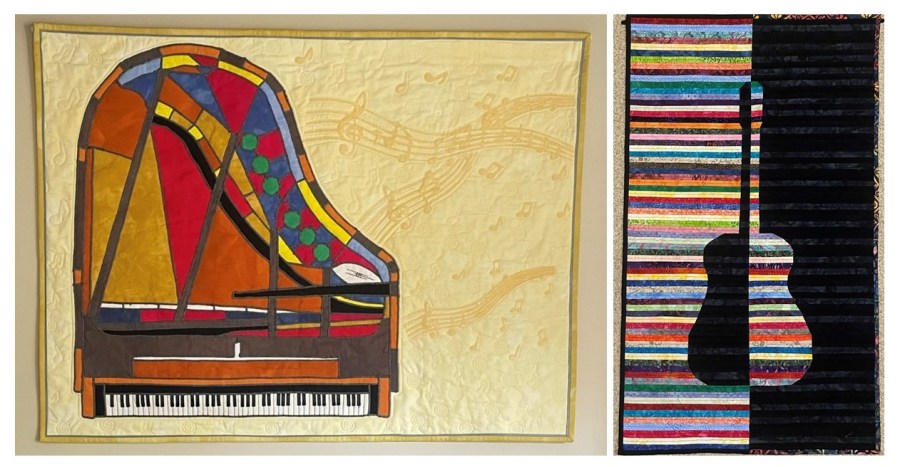
When my youngest son moved into his own apartment last year, I was left with a room with blank walls. What art should I put up in this additional guest room? I played with many ideas in my head. None seemed to “strike a cord” with me until this spring when I was listening to some classical music. Since I hadn’t listened to Bruce’s CD in a while, I pulled it out to play. While looking at the cover, I realized that the cover work would make a beautiful wall quilt that I could hang above the bed. And, since the bed in this new guest room was covered with a guitar quilt that I made years ago, a piano wall quilt would go well in the room.
I played around with the design for a while. And, once I had something that looked good on my computer, I projected the image onto the wall above the bed to see if I liked it – I did.
For the background, I cut an adhesive stencil featuring with some music from the song that Bruce wrote for my wedding, and a few stray notes (because life always have moments that don’t “follow the path”). The stencil was filled with Color Magnet and the fabric was dyed with Antique Gold dye.
All of the fabrics were custom dyed cotton to match the colors of the graphic, and the pieces appliqued with needle-turn technique. For the “leading” of the stained glass image, I considered several ideas. I finally settled upon couching with a hand dyed wool yarn dyed grey to give the illusion of leading that I was looking for. Machine quilting and a piped binding then finished off the quilt. The result matched my design very well.
To fill the space on another blank wall in the room, I made a strip guitar quilt using scraps of batik in my stash. I do have one more blank wall to add some art to – perhaps a pine needle weaving art piece.
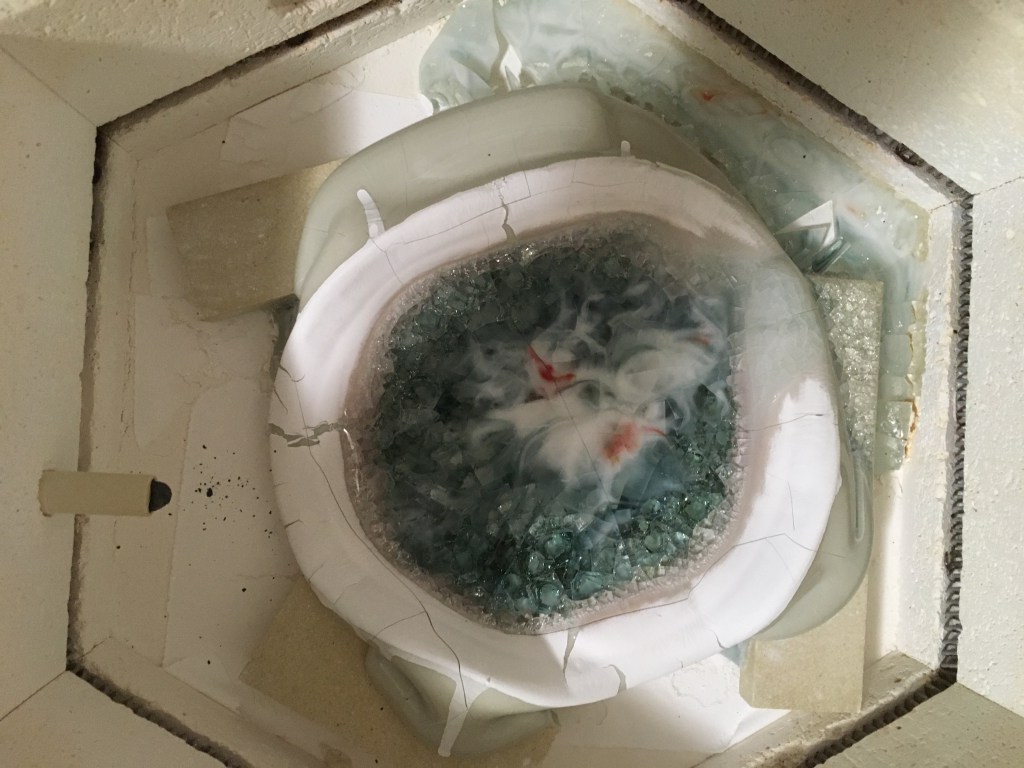
Recently, I have been “playing” in my glass studio each morning trying out some new ideas. By doing this in the mornings, it allows me to set up something in the kiln to fire during the day. The next morning, I get to see the results of my previous day’s efforts. It gives me something nice to see (as well as a few surprises) when I open the kiln.
Lately, I’ve been playing around with how the placement of the glass can create optical changes after being fired.
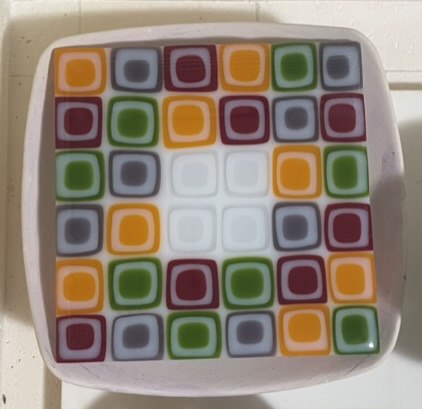
Stenciling with Frit Glass.
For this project, I placed a couple 6″ stencils on kiln shelf paper and sifted some fine glass frit over the stencils. I then carefully removed the stencil and fired the glass using a Tack Fuse Schedule (max temp 1325 degrees, no hold time). This schedule resulted in the glass lightly fusing together without dramatically changing the size. I selected fine frit for two reasons (1) I have lots of it that I don’t use in other projects and thought this would be a good way to use it, and (2) I wanted the image to be more abstract and thought that powdered frit would be too exact for what I wanted to accomplish. This two thin wafers of frit were aligned, sandwiched between a piece of opaque white and a piece of clear glass, full fused and slumped into a shallow dish mold. The result was lovely. By placing the transparent orange wafer on top of the opaque red glass wafer, I achieved a color gradient that would have been difficult to achieve. I really like the look of the bubbles that were trapped around the frit as it melted into the sheets of glass.
Glass Displacement.
For this project, I wanted to see what would happen if I stacked various sized squares of opaque and transparent glass and full fused. Since glass naturally wants to achieve a 6mm thickness (1/4inch), the glass in the stacks should cause the lower glass to shift outward as the top glass settles down to the natural height. I used a 6″ piece of opaque white glass as the base. On top of this, I placed stacks with 3/4″ transparent (in various colors), 5/8″ opaque white and 3/8″ transparent. The area of the three pieces of glass in each stack was 0.56″, 0.39″ and 0.14″, which added up to 1.09″. By placing the stacks in a six by six grid, the glass should settle evenly on the base glass. However, to keep the edges straight, I did use a 6″ stainless steel form. After full fusing (max temp 1475 degrees, 30 minute hold), the edges were smoothed on my flat grinder and the glass was slumped into a shallow dish mold. The result gives the illusion of depth to the piece.
Frit Displacement.
For this project, I wanted to see if glass displacement would be visible using frit sifted over stacked glass. The thinking behind this idea was that the glass powder would settle onto the horizontal surfaces, but would not stick to the vertical surfaces. Then, as the glass melted and spread, the untreated vertical glass would displace some of the adjacent horizontal glass. My initial test of this idea worked well (sorry, I forgot to take pictures). I applied the idea to make another small dish. For the base layers, I used a 6″ piece of clear glass was placed on to of a 6″ piece of red frit and stringer glass. On top of this, clear glass pieces, 0.75″ were placed in a 5 x 5 grid. Over this, I sifted transparent blue powder. And, to add some variety, I placed a couple 0.375″ red transparent square.
Another Frit Displacement.
Could this technique be used to create slight shadowing around cut pieces of glass? To test out this idea, I created a design that matched a quilt block I had recently made. Powdered glass in a bronze color was sifted over this design and accent glass added. For the bottom of the base layer, I also created a design using glass with different white textures. This turned out lovely, but I think the frit displacement technique works best when the color of frit is more intense.