A couple years ago, I was asked to proof read and test out a quilting pattern for another designer. The pattern was a fun, playful design – paper airplanes – great for a child.
The pattern is available from Blueseum Quilting out of Australia.
When testing out the pattern, I used the colors as described in her design, a bright palette of primary and secondary colors.
My test quilt was one of the quilts that I have donated to Sleep in Heavenly Peace. So, hopefully there is a young child enjoying his/her quilt.
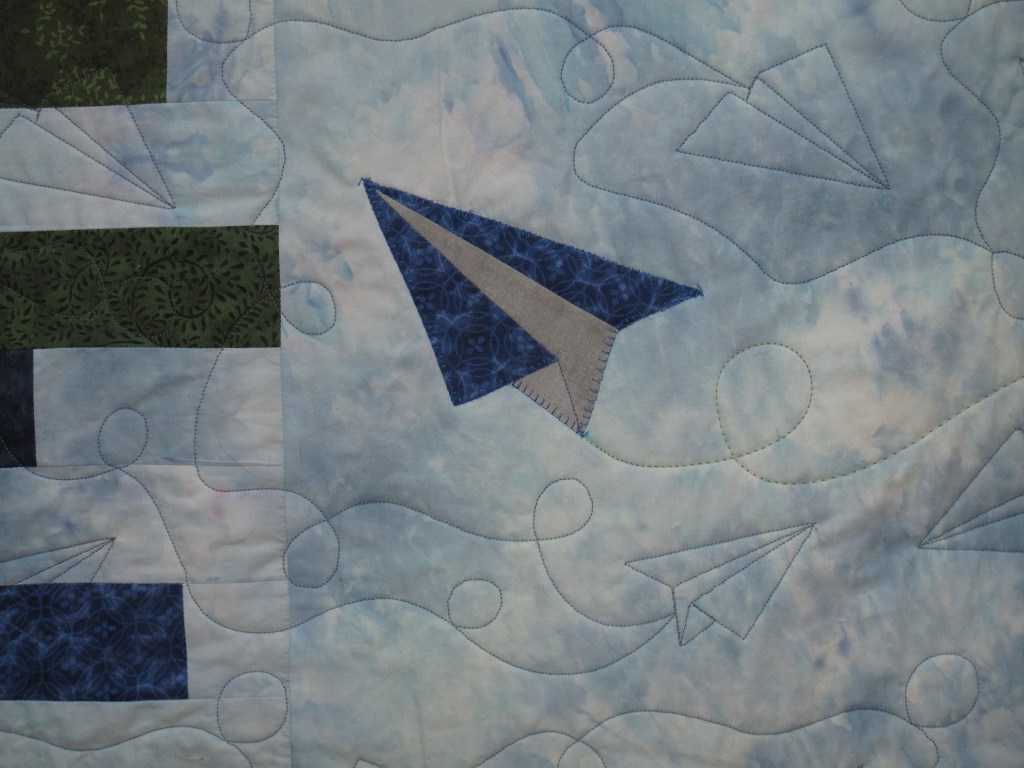
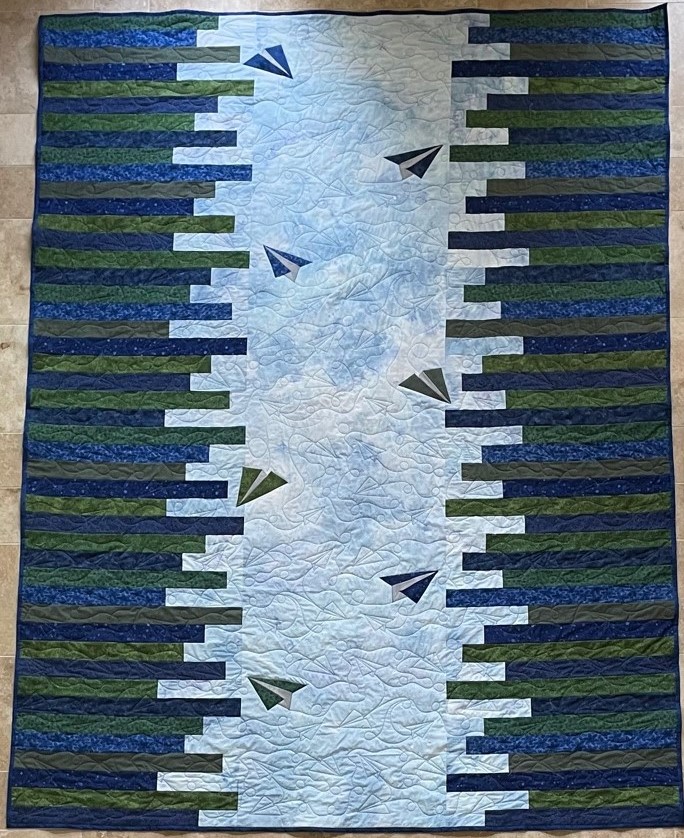
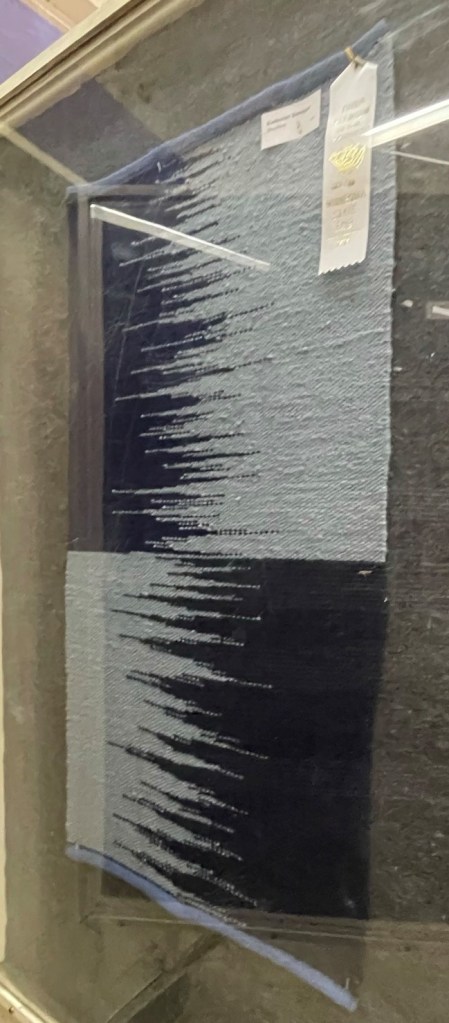
After making the test quilt, I really wanted to make one with sky colors. For the center section, I snow dyed white cotton fabric with dyes in various shades of blue.
For the quilting, I used PatternCAD to create a couple paper airplanes with jet streams surrounding these planes.
For the side color, I sorted through my fabric stash and selected four blue and four green fabrics for the design. This quilt was really fun to make, and was sold prior to Christmas to someone whose business logo includes paper airplanes.
A little over a year ago, while traveling through North and South Carolina, I visited a couple quilt shops. While there, I purchased some sale fabrics. Granted, I really didn’t need any new fabric, but it was hard to pass up a good deal.
These fabrics were panels, one with cats and the other with mandalas. Recently, I finally had time to use these in a couple quilts.
Mandala Quilt
The fabric panels were cut apart, and combined with coordinating fabrics of orange, teal, yellow and black.
Cat-i-tude Panel Cats Quilt
This quilt was really fun to make. The original panel included six different cats in three colors with some metallic paisley accents.
These panels were also cut apart and combined with coordinating fabrics of pink, purple, teal and black. The paisley border of the original fabric was handy when deciding how to manage the outer edge of sashing triangles.
A tangram is a Chinese puzzle that consists of seven polygons, which are put together to form shapes. Found in puzzle books, the objective is to replicate a pattern, given only an outline, using the seven pieces without overlap. There are countless possibilities of combinations.
Tangrams are believed to have originated from China during the Song Dynasty (960-1279) and were not introduced to the Western world until the 19th century when they were brought to Europe by trading ships. They are used when teaching spatial visualization/spatial reasoning. And, they are a great way to exercise your brain.
Earlier this year, I saw an image of a tangram cats quilt and thought it would be nice to try to make one myself. Using my Powerpoint program, I designed a quilt with 20 cats. Originally, I thought these would be easy blocks to sew – they are just different sized triangles, a square, and a parallelogram. However, once I started sewing, I realized that the designs involved a lot of Y-seams. To help with the piecing accuracy, I printed out each design and used a modified paper piecing approach to making the blocks. Each of the blocks are 14″ square and pieced with a 2″ sashing. (Photo has some streaks of sun from the light shining through the window when I was taking the photos).
While I was piecing the cats quilt, I was looking up information on other tangram puzzles. I saw some boats that I thought would be fun to make. So, of course, another quilt needed to be made.
These quilts were really fun to make. And, the fabrics were already in my stash, so I did not need to purchase any additional.
Scrap quilts often bring to mind the image of a resourceful pioneer woman cutting up worn clothing to create bedcovers for her family. But the truth is that scrap quilting didn’t become as commonplace as we think until the Great Depression when hard-pressed seamstresses were forced to use every bit of fabric they had on hand. Along with feed sacks, these women also used bits of old clothing, worn-out bed linens, and anything else they could get their hands on. Thus, scrap quilting is probably one of the first examples of “upcycling”.
When I made my Kaleidoscope quilt earlier this year, I did a lot of “fussy cutting”. With fussy cutting, the fabric pieces are cut in such a way as to emphasize a particular pattern or design within the printed fabric. This was necessary to create the repeating design of each hexagon shape that this quilt included.
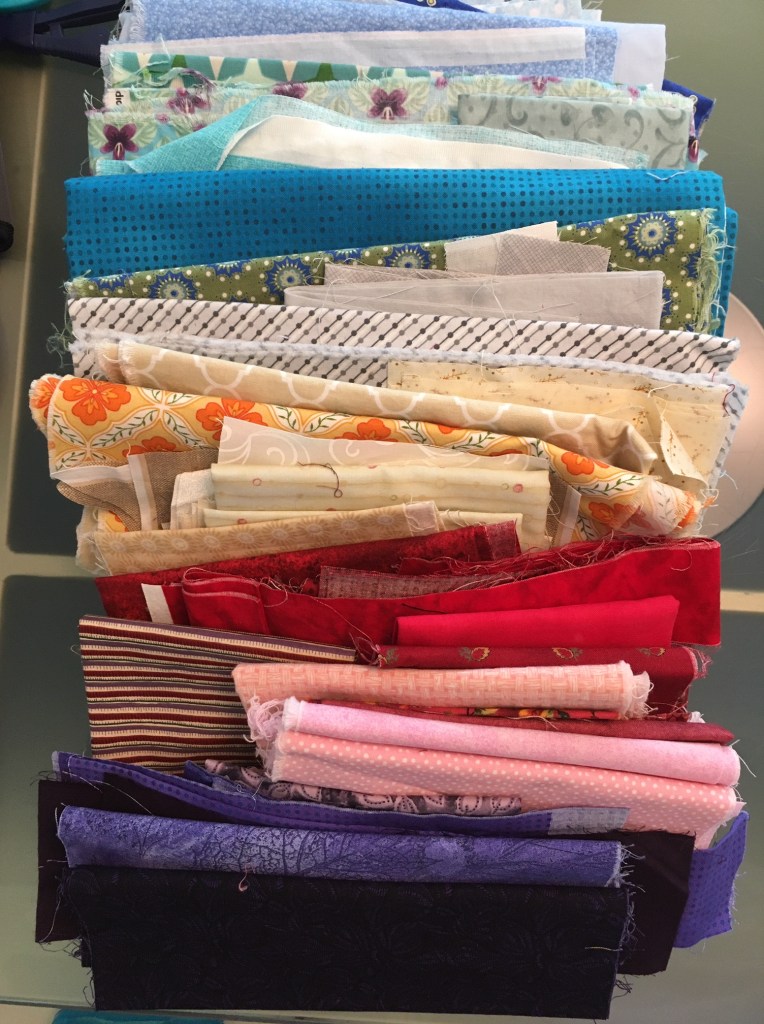
By doing this I ended up with a lot of leftover bits of fabrics. I hate to throw away any fabric – it costs money. So, these bits were added to the other scraps that were accumulating in my sewing room. When quilting, any piece bigger than 10″ x 10″ is sorted and stored on shelves according to the main color of the fabric. Anything smaller than 10″ x 10″ and bigger than 1″ x 1″ gets put into a wicker basket for future use.
Saving scraps allows me to to get the most out of my fabric purchases. And, when using these scraps, I get to make beautiful one-of-a-kind quilts. This summer, my basket of scraps was over flowing. It was time to do something with these bits and pieced.
When first looking at the basket, it was a bit daunting as to where to start. First, I sorted the fabrics into two piles, batik scraps and printed cotton. Then I sorted each of these fabric piles by color and size of the design on the fabric.
Once sorted, I needed to pick a couple quilt designs to use. Having dozens of quilt designs on my computer that I had created in Electric Quilts, I selected several that would work well for scrap quilts.
To avoid having a design that appeared cluttered, I used a few design guidelines. In some quilts, I focused on a specific color to tie the fabrics together. In another quilt, I used the negative space to offset the chaos of the scrap pieces. And, in still other quilts, I used a design that called for larger pieces of fabric. These quilt designs were used for prints that were large to make the quilt seen less busy overall and thus allow for the prints to be highlighted rather than being lost in a bunch of small pieces. And, sometimes you just gotta have fun and forget any design rules.
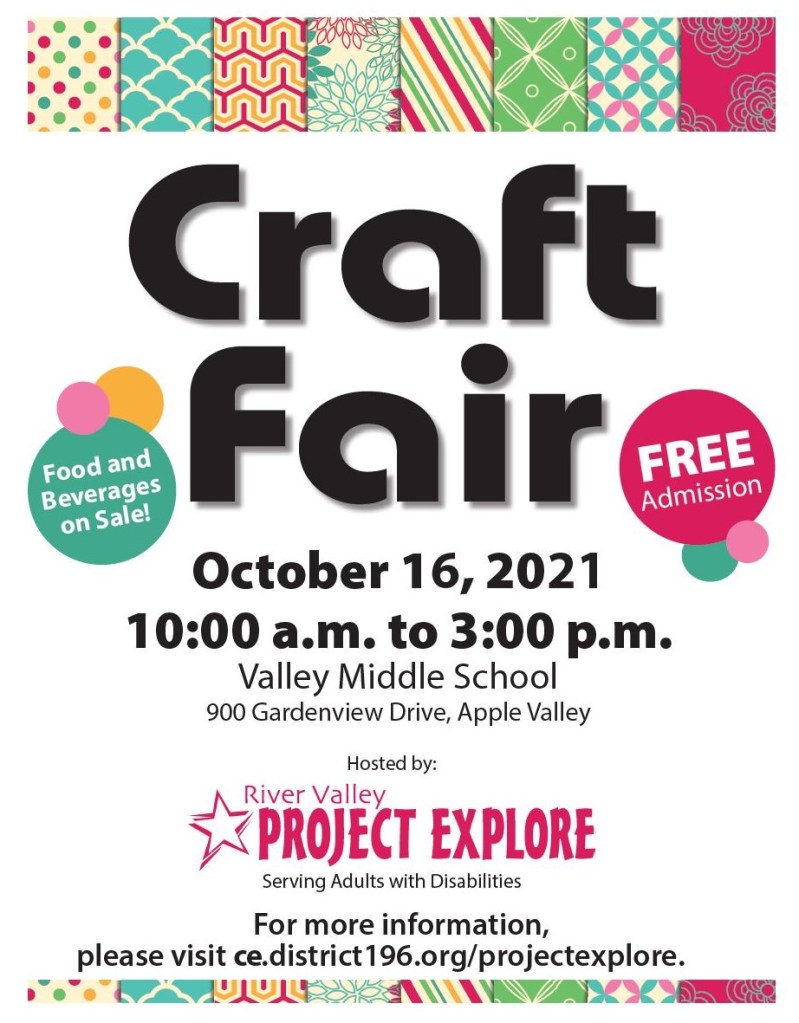
This Saturday, October 16th, I will be selling some bed quilts, seasonal table runners, hat/scarf sets and various other crafts at the Project Explore Craft Fair on Saturday. The craft fair supports District 196 programs for special needs adults. Please come by and see what crafts are available.
I will also be participating in the Maple Grove Women of Today Fall Craft Show on Saturday, October 23, 2021. It will be held at Osseo Middle School.
All profits from my sales will go to support various non-profit organizations (Sleep in Heavenly Peace, Hats & Mittens Minnesota, Project Explore and World Vision).
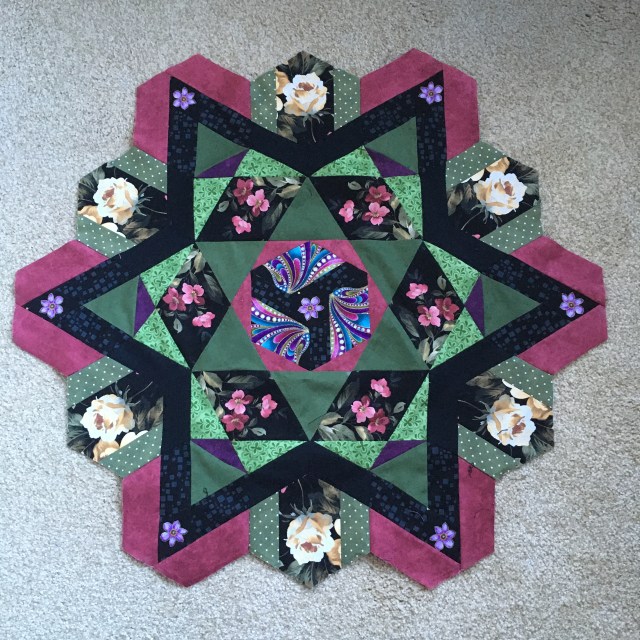
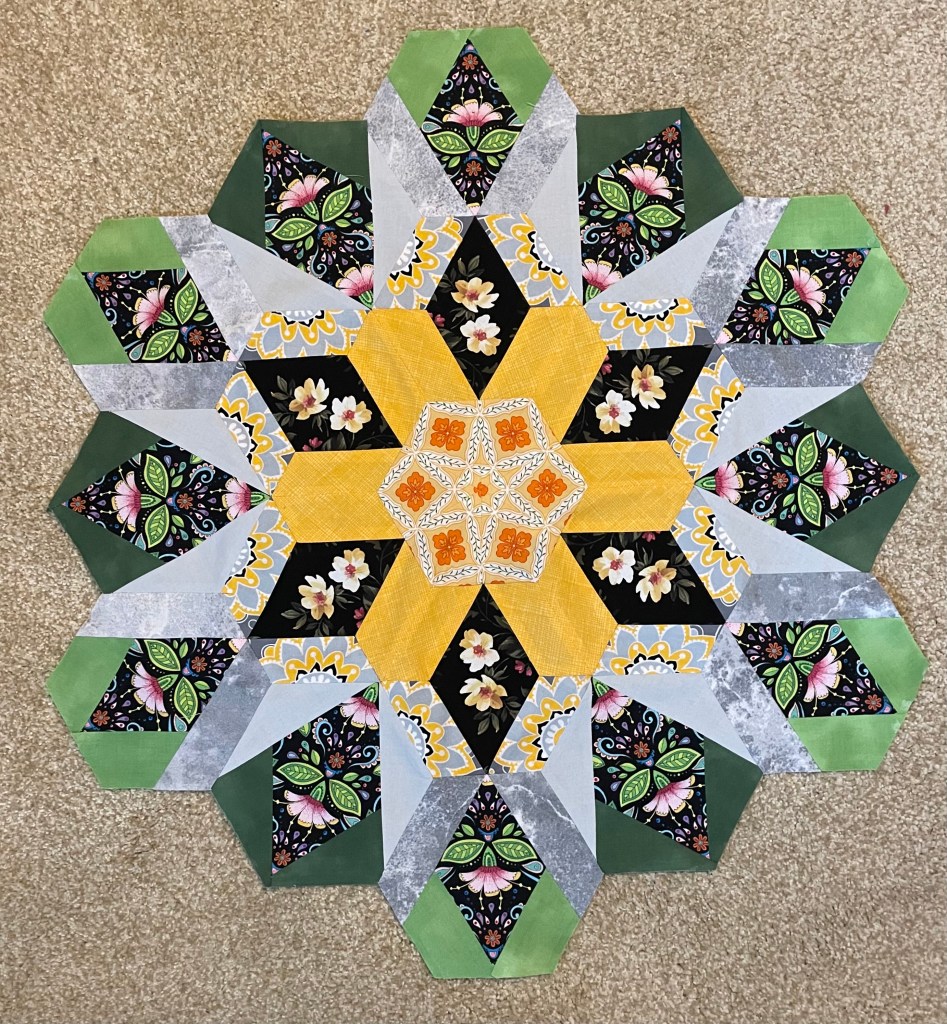
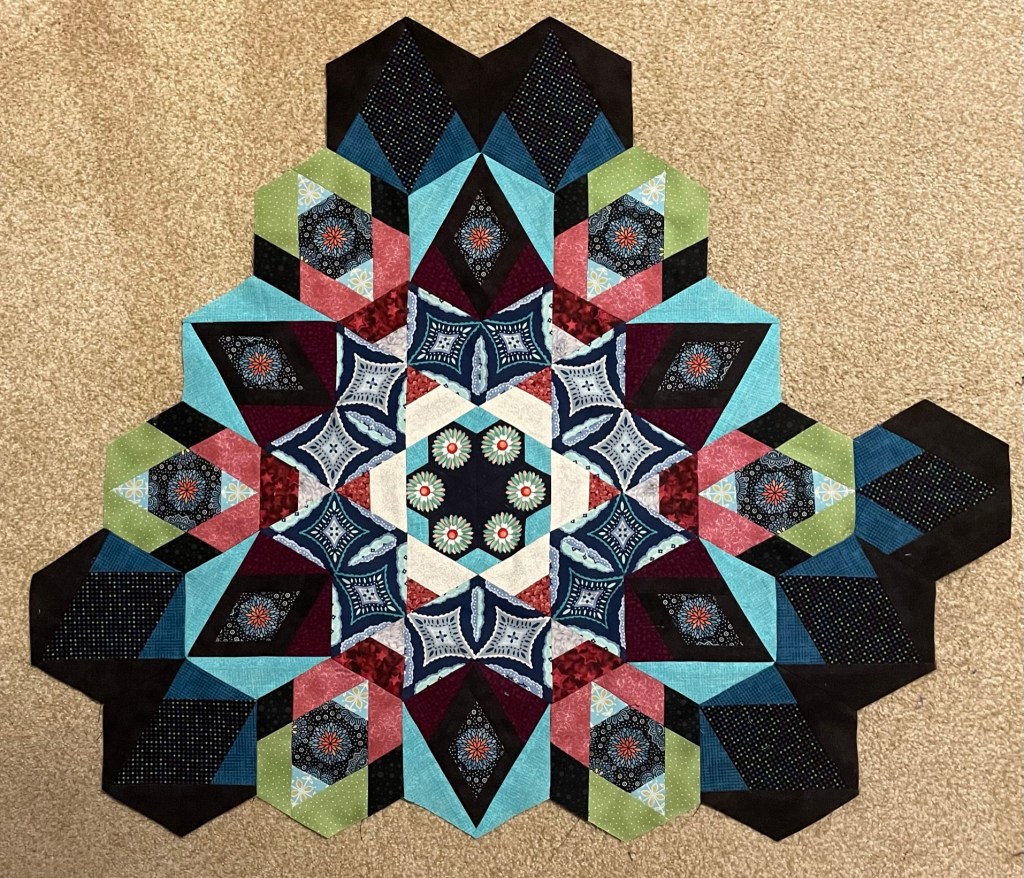
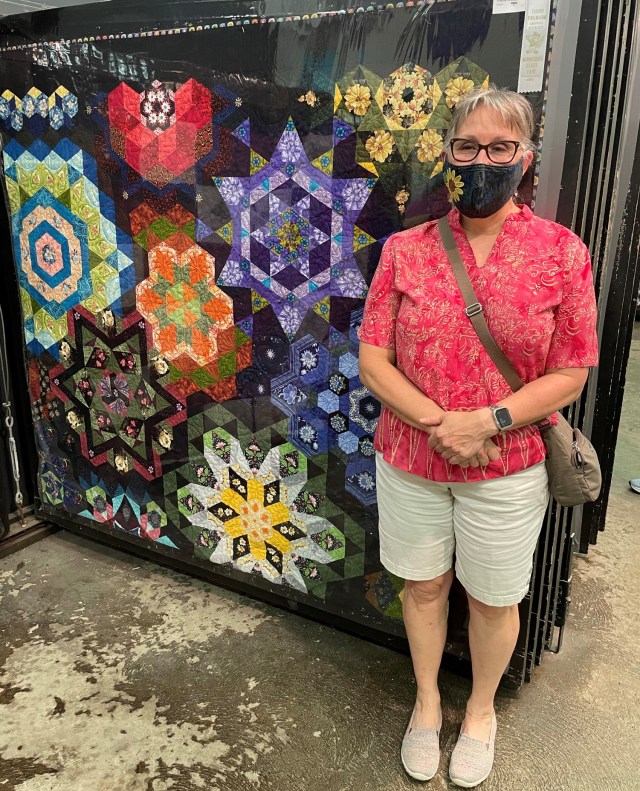
Yesterday, I was able to pick up my quilts from the MN State Fair. One of those quilts was a kaleidoscope quilt that I have alluded to in a couple previous postings. Today, I thought I would give some more details of the construction of this quilt.
I started this quilt while on a vacation last November. I packed up a box of fabric scraps in a variety of colors and heading to South Carolina. When not enjoying the lovely beaches, I planned to spend time cutting and sewing.
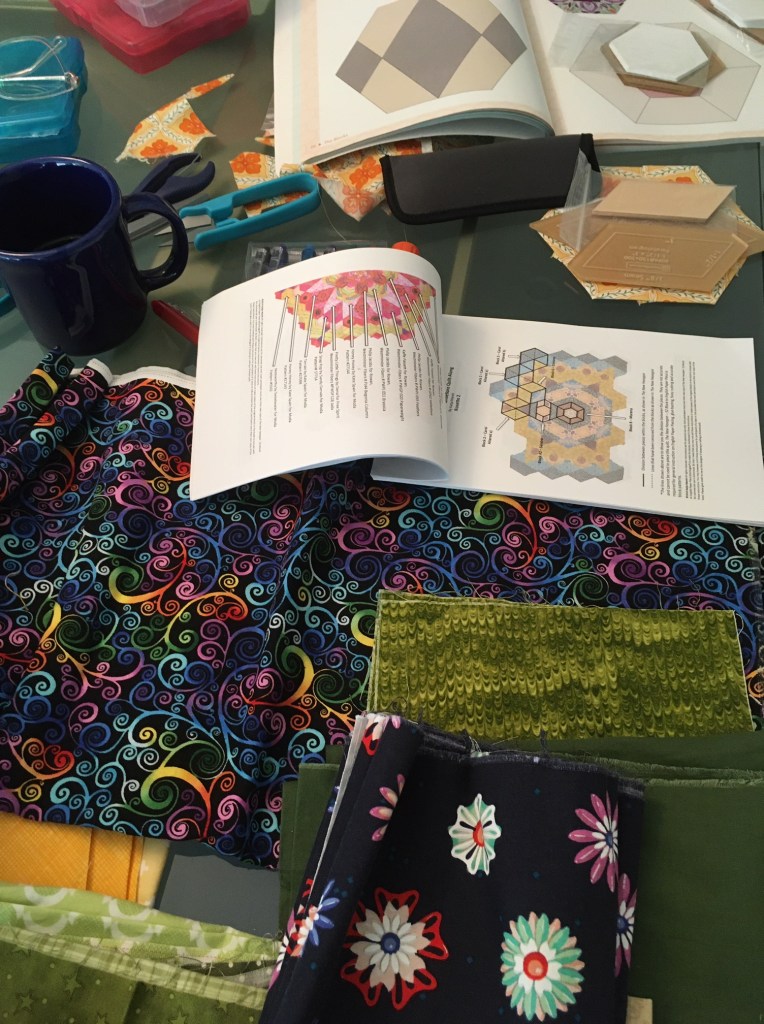
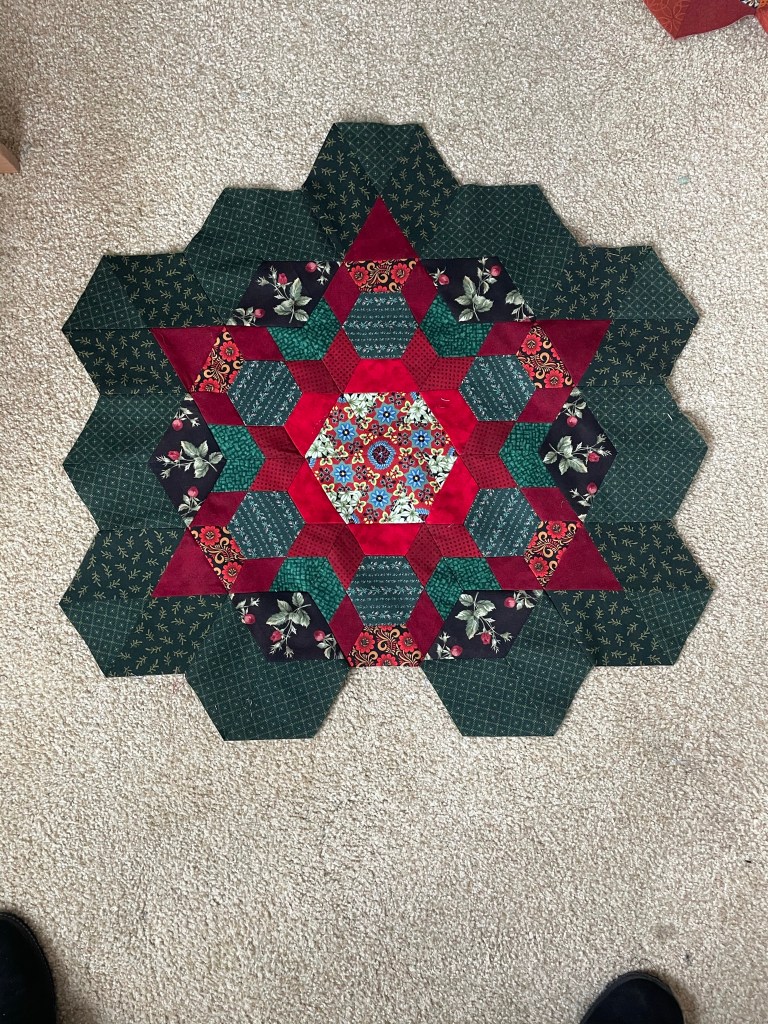
Originally, I planned to hand piece the quilt using English Paper Piecing as described in the book “The New Hexagon”. Using a graphics program, I printed some sheets of paper with the number of hexagons that I intended to use to make the quilt the size that I wanted. Next, I sketched out the location of medallions that I thought would look nice and decided on the color placement. However, like most projects, I did change the color locations as I worked on the quilt.
The first medallion that I worked on was the one I intended for the center of the quilt. After a lot of “fussy cutting” to make create the symmetry of the hexagons, I started hand stitching.
Three days later, after sewing the seams of this section by hand, I was concerned that my stitched seams may not hold up to normal usage on a bed. So, I stopped stitching and focused on more fussy cutting. When I returned home, I reinforced my hand sewn seams by sewing them on my domestic sewing machine. For the rest of the quilt, the seams were sewn by machine. Being hexagons, this was not a simple task – way too many Y seams!!
But, it was fun to watch the different sections come together.
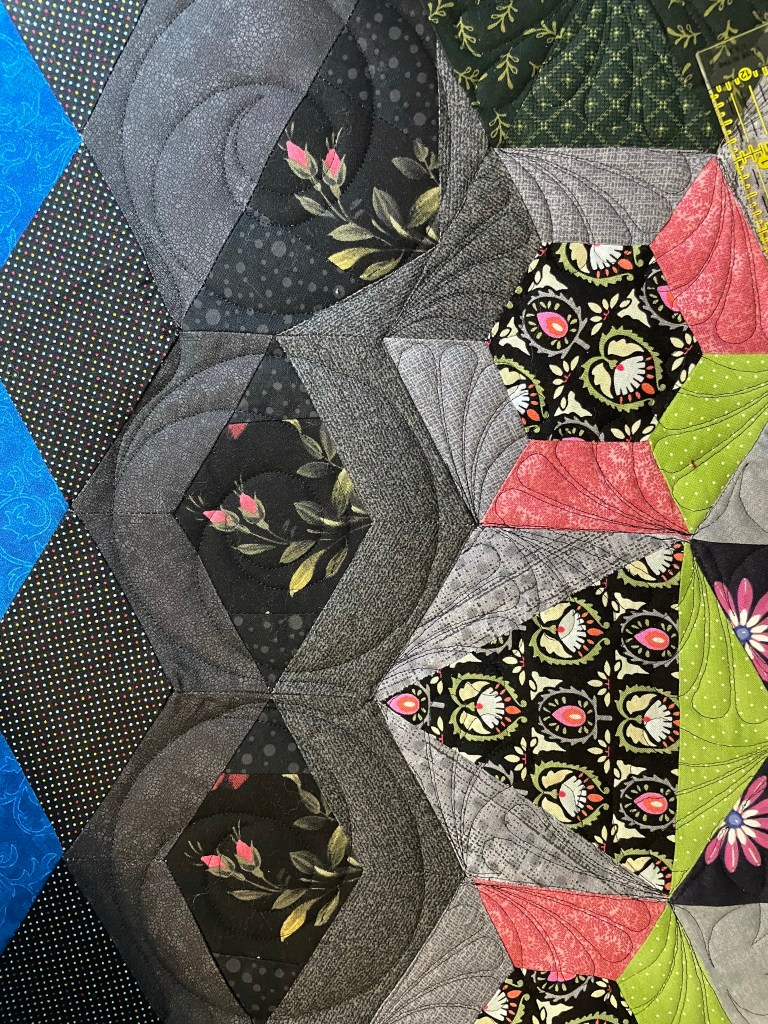
After all the sections were pieced, they were then sewn together into the final design and black hexagons were sewn on the edge to create a black border. The pieced quilt top was quilted on my long-arm machine. Each of the medallions were quilted the same with designs selected for each row of hexagons for the medallions.
Quilting of the Center and Row 1 of HexagonsQuilting of Rows 2 and 3 of Hexagons
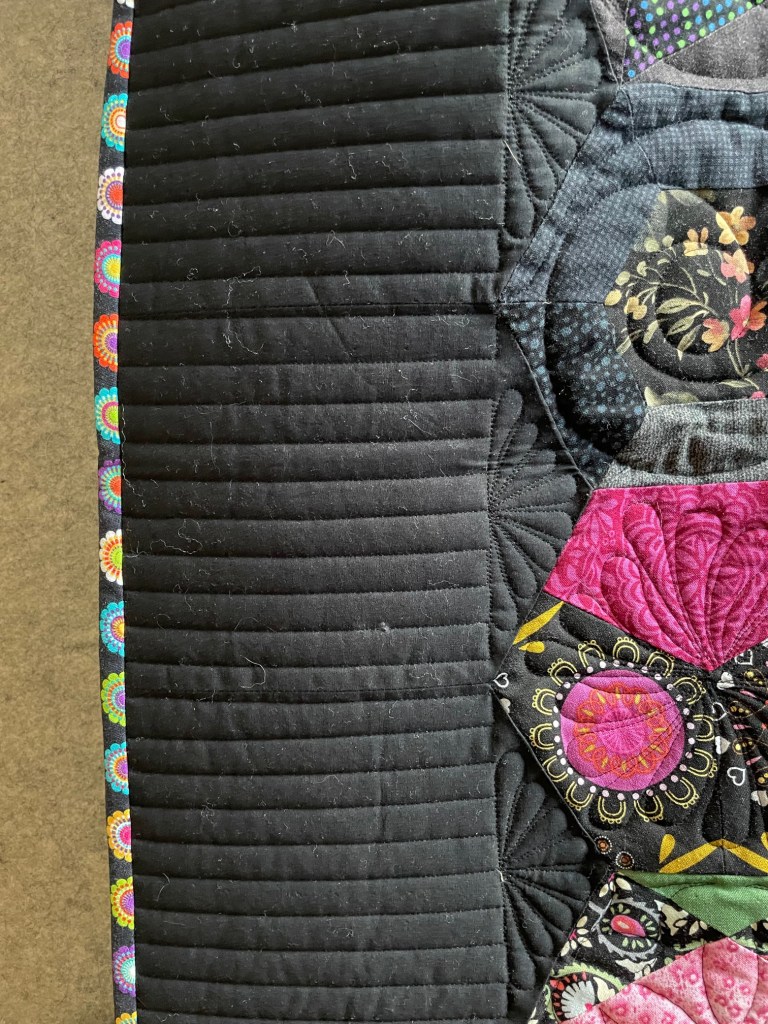
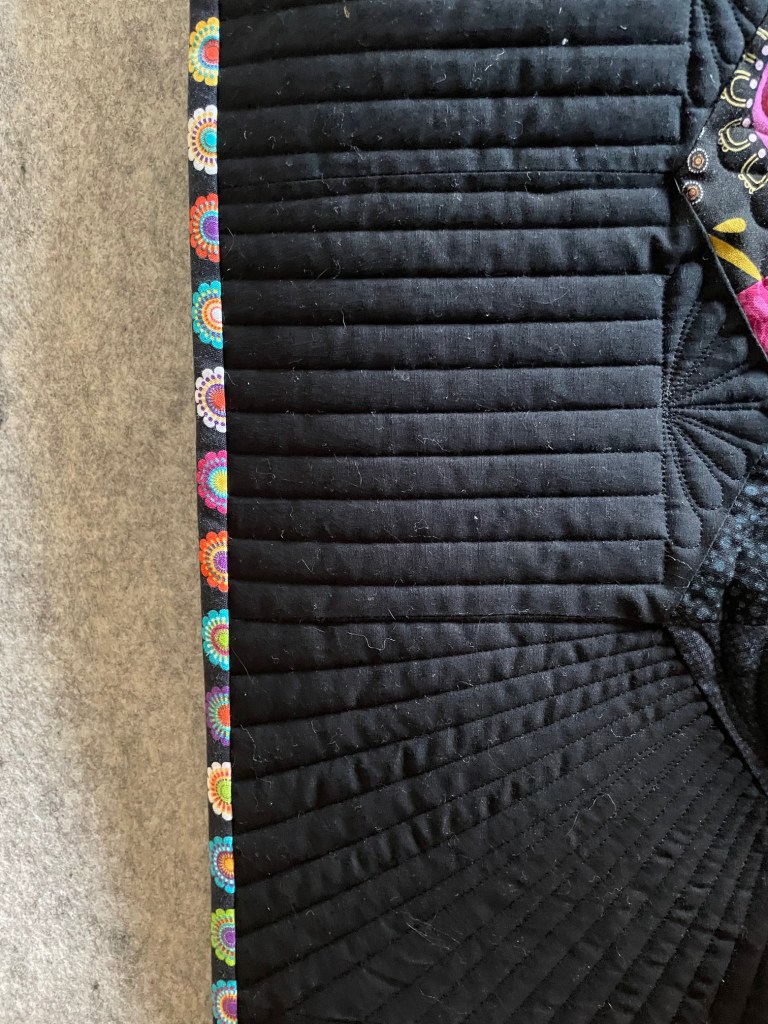
For the backing fabric, I found this really fun fabric.
And, for the binding, I was really excited to find some fun fabric that when folded matched the quilt really well.
This was probably the most difficult quilt I have pieced together. However, it was really fun to make!
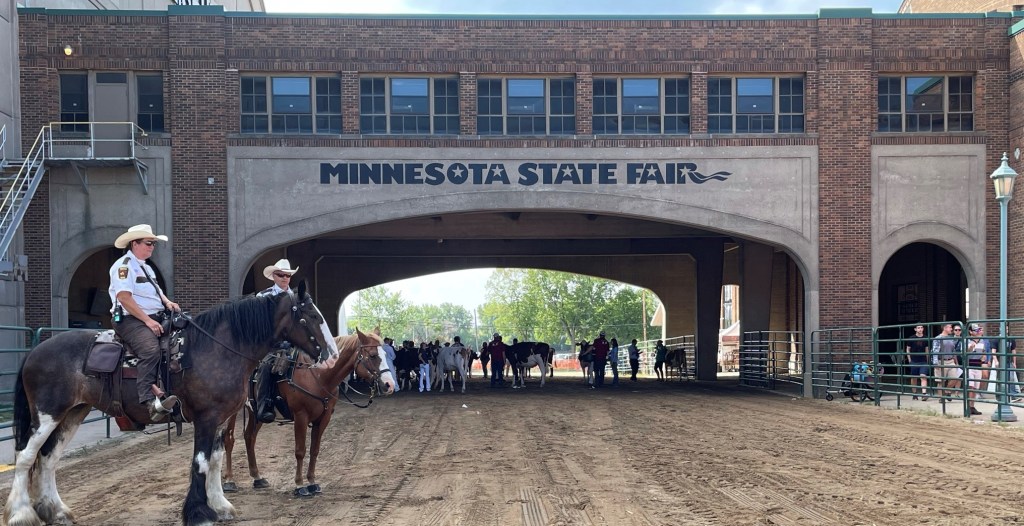
Each year, I enjoy going the the Minnesota State Fair, viewing the artistry of the creative activities entries, as well as entering a couple quilts in the competition. In 2020, I was disappointed when the fair was cancelled.
This year, I had originally thought that I would not be able to enter any quilts in the competition. Having a trip to Colorado scheduled during the drop off days for the creative activities, I was at first unsure how I would be able to enter. About a week prior to our trip, I learned that I could drop off entries at the fair office during early drop off days before leaving on our trip.
After entering, I was still hesitant to attend the fair due to the increase in Covid cases. However, with the attendance numbers on previous days being down, I decided to go this morning. Being there from 8 to 11am, the number of people that were there was pretty small. The weather was cool and it was an enjoyable morning.
Things that I did not do:
Utilize a Park & Ride bus – to avoid the crowds of people on the buses, I left home early morning and was able to find parking in a lots across the street from one of the fair entrances.
Eat Fair Food – I usually avoid the fair food, so this was nothing new for me.
Ride any amusement in the Mighty Midway
Do any shopping in the Market areas.
Things that I did do:
Wore a mask and avoided crowds
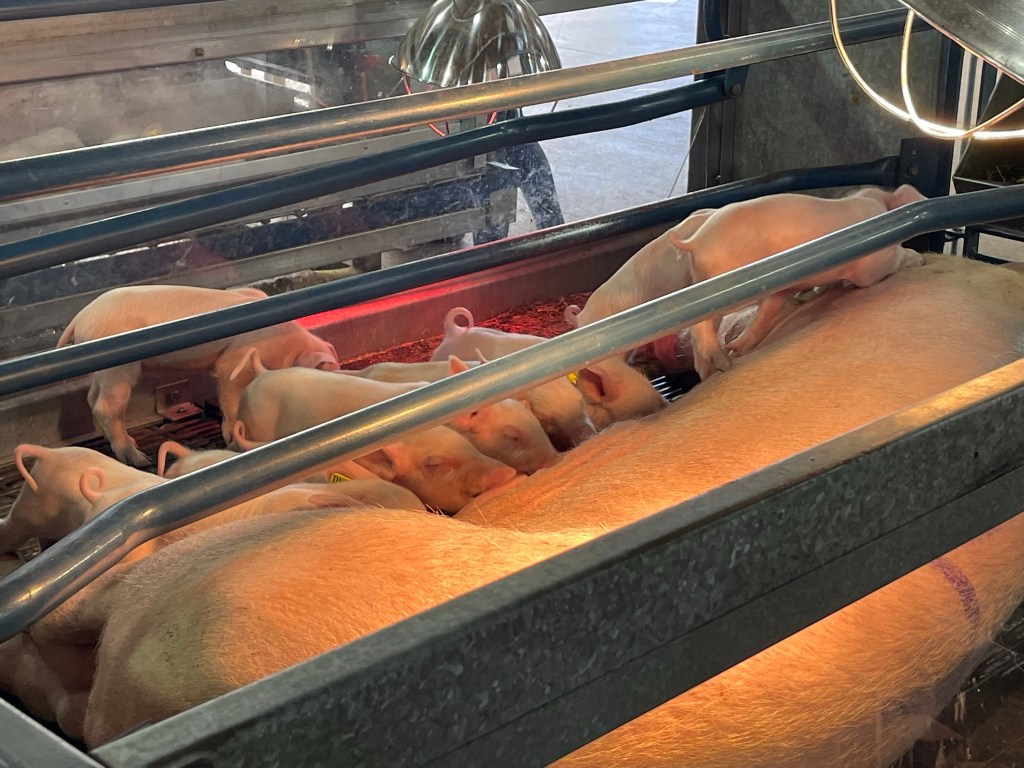
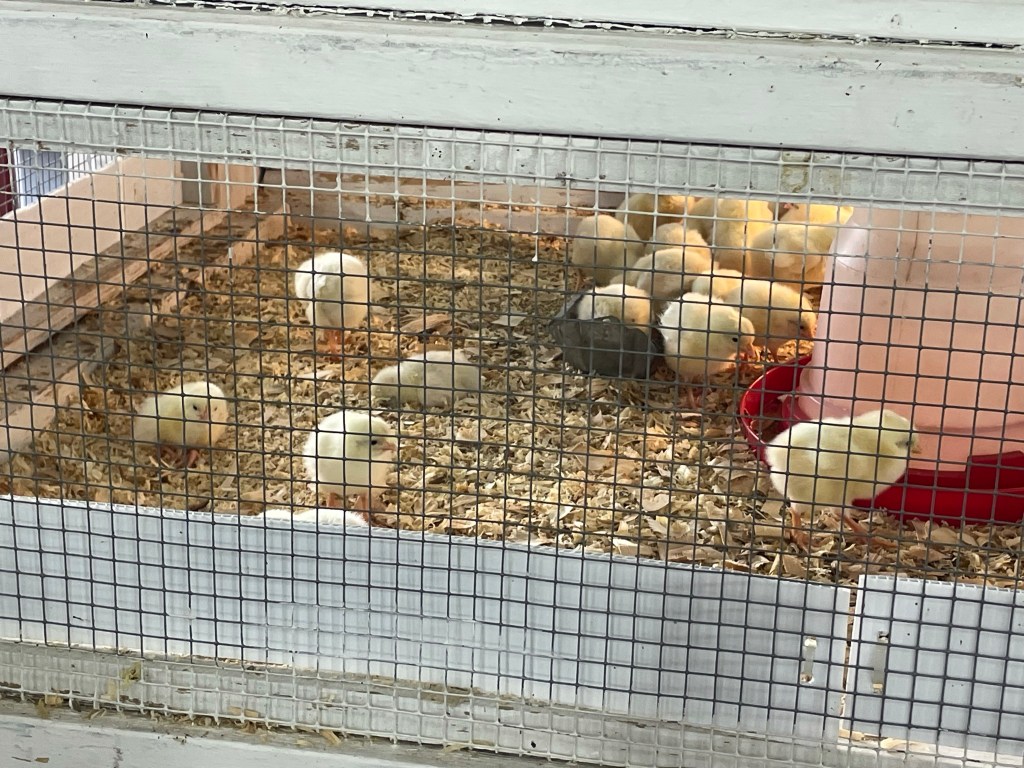
Arriving early, I walked through several of the animal and 4H exhibits prior to the other buildings opening
Enjoyed the artistry in the Creative Activities building, including quilting, weaving, crochet and woodworking
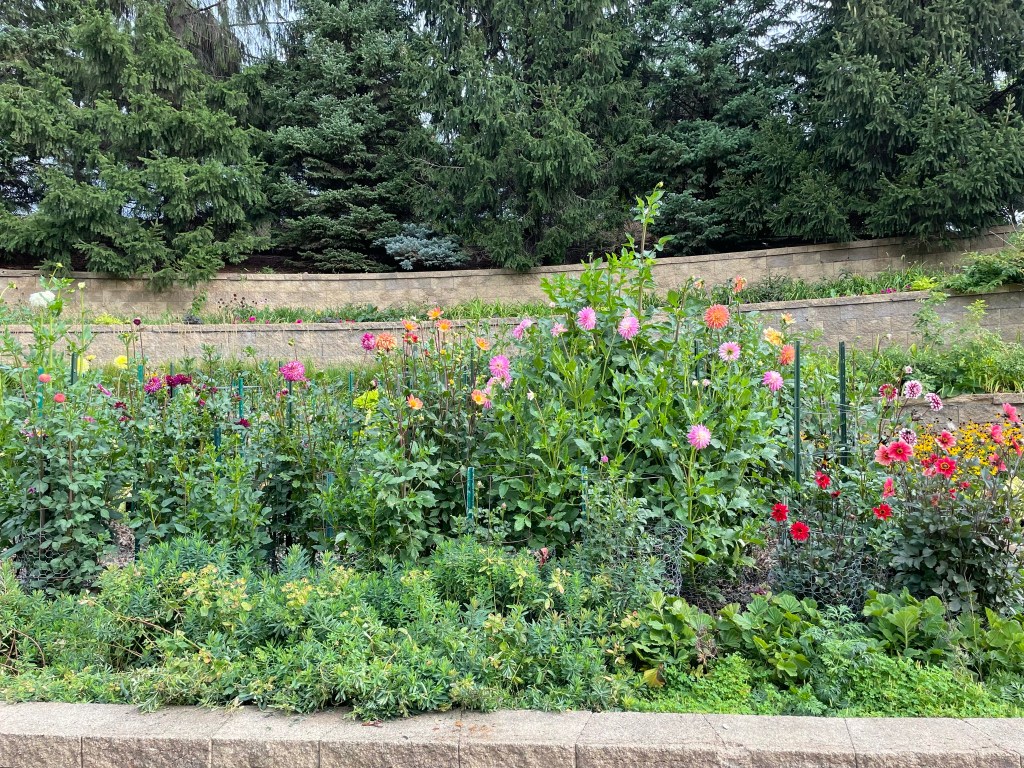
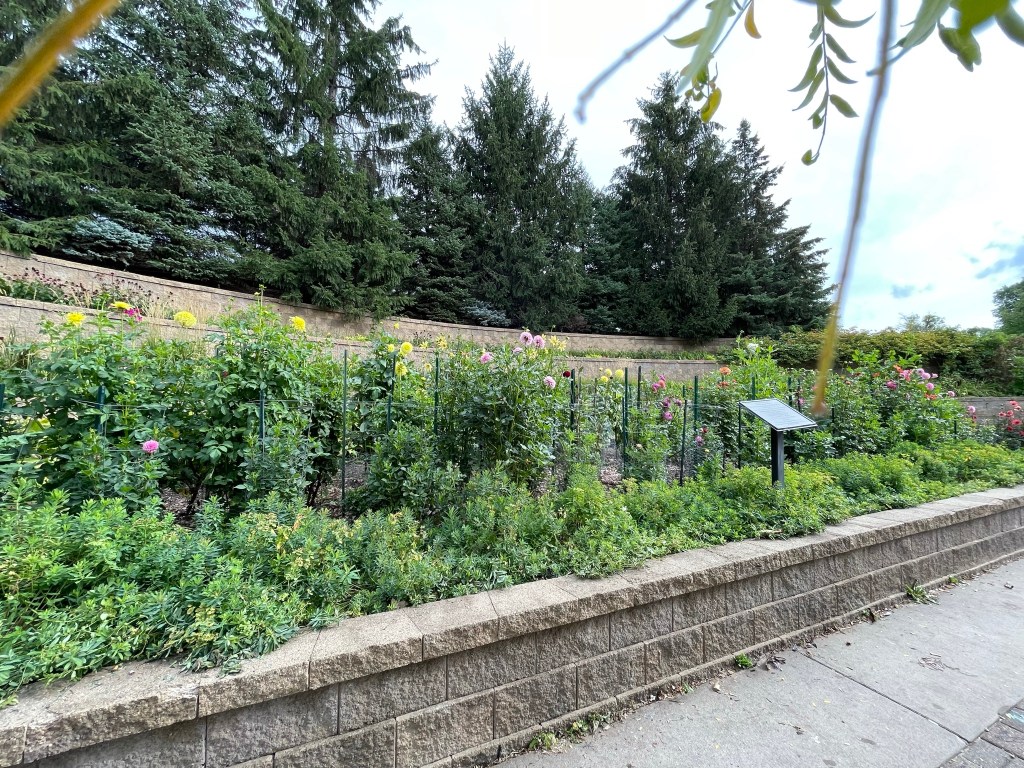
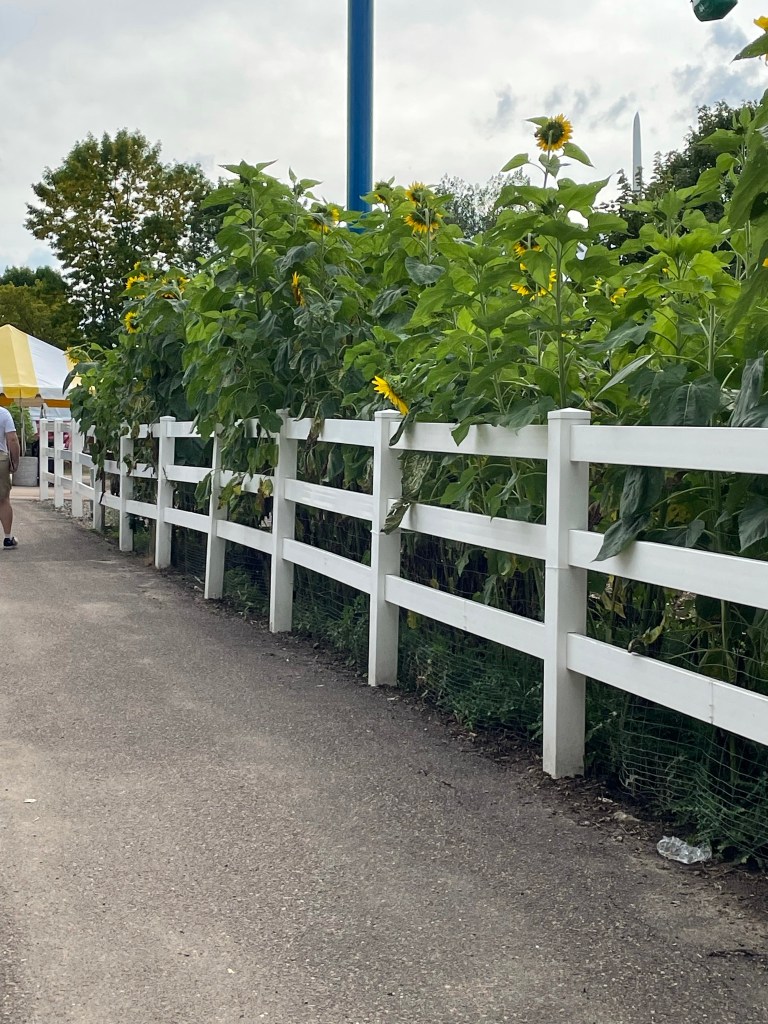
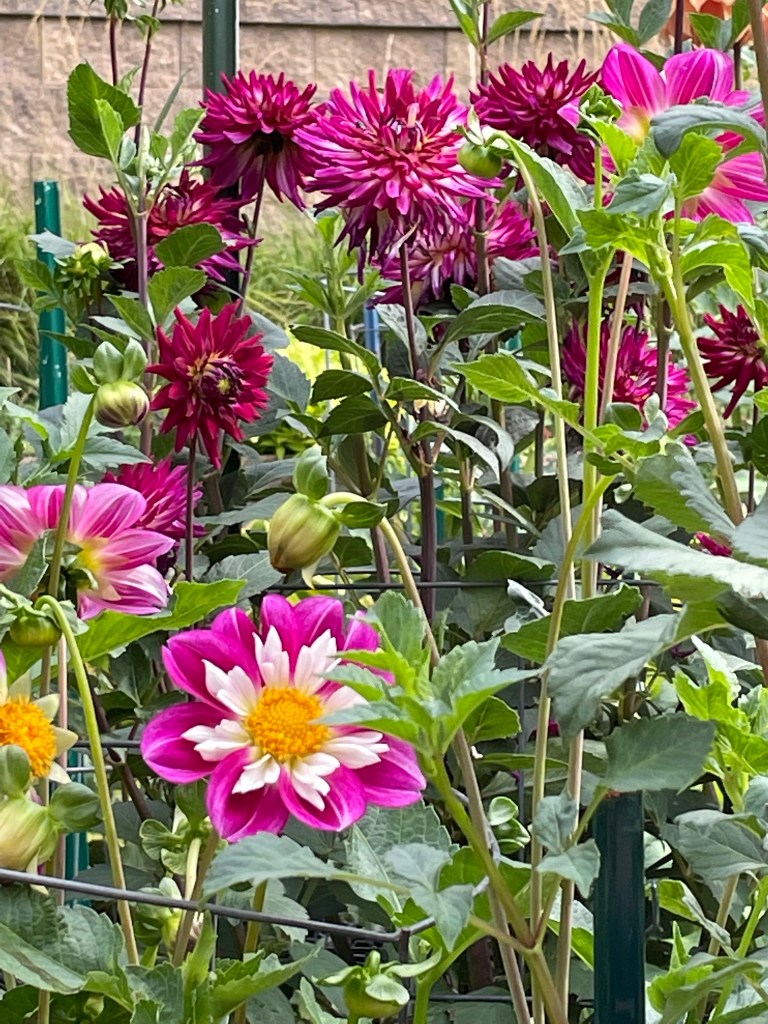
Enjoyed the flora of the fair, a much overlooked aspect of the fairgrounds
Animals:
Creative Activities – My entries:
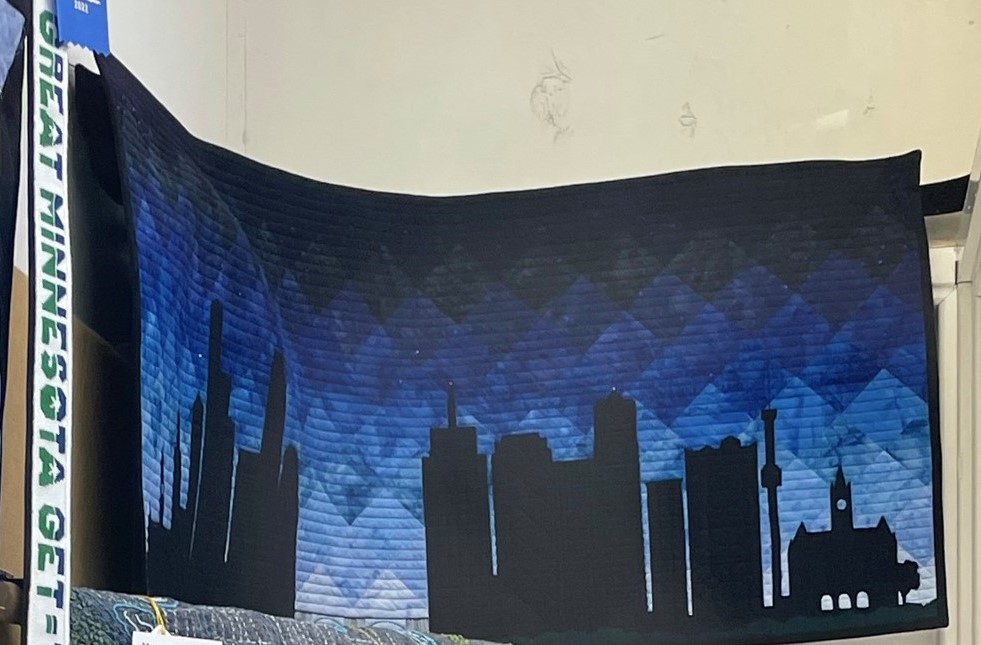
My hexagon quilt received a third place ribbon. The quality of the entries this year was amazing. So, I am pleased with a third place finish. My miniature doll quilt, made with hand dyed fabrics received a second place ribbon. This was a huge surprise to me. I only entered this quilt as a whim at the last minute, the quilt was never intended to be entered into a competition. The Twin Cities Skyline wall quilt that I made for a friend did not place. However, it is displayed in a very prominent location at the entrance to the Creative Activities Building. I will be interested to read the comments from the judge when I pick it up next week.
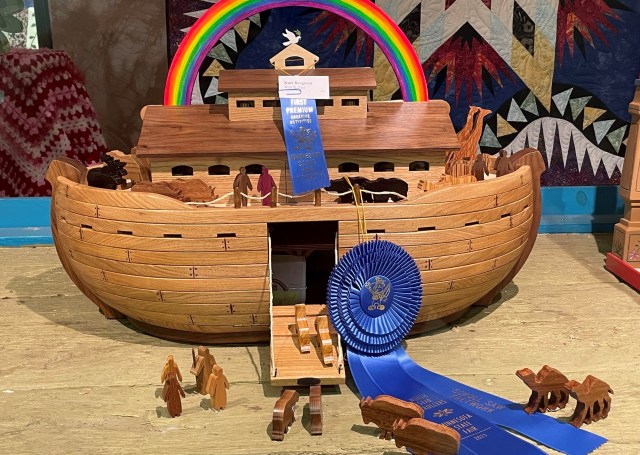
Creative Activities – Noah’s Ark: My absolute favorite of all of the creative activities entries that I saw today!
Retirement has given me more time this summer to take a couple trips, two of them to Colorado.
In July, I took a road trip to Denver. The purpose of this trip was to bring several boxes that my eldest son was storing at our house. While a long drive, it passed quickly thanks to a good book to listen to on Audible.
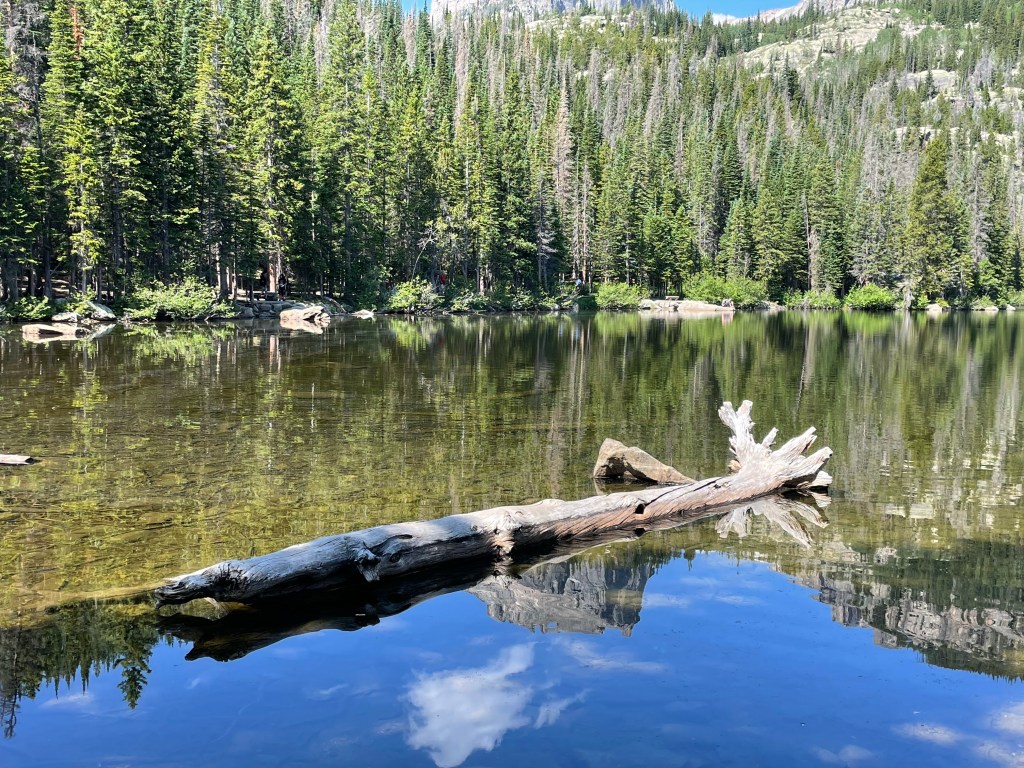
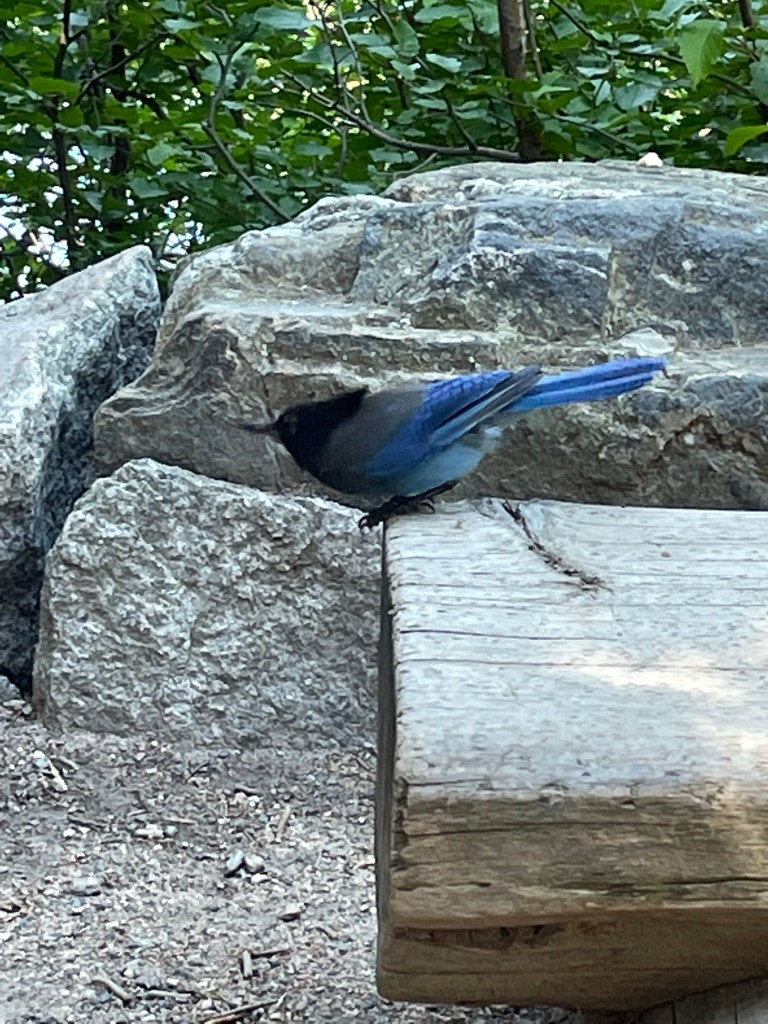
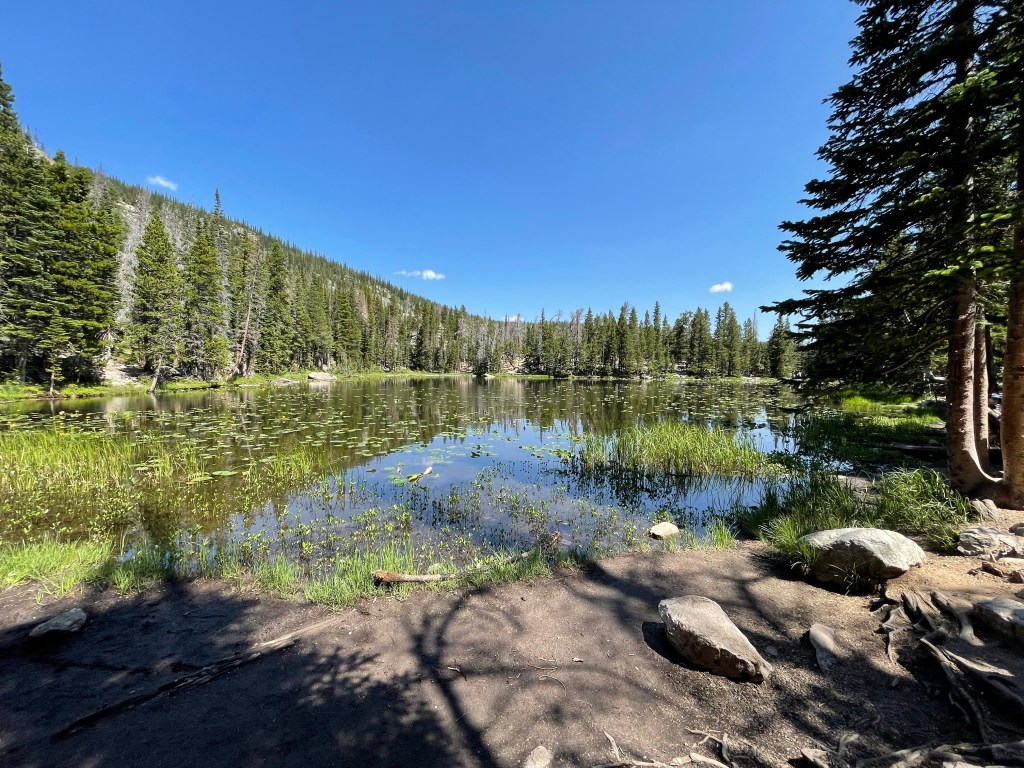
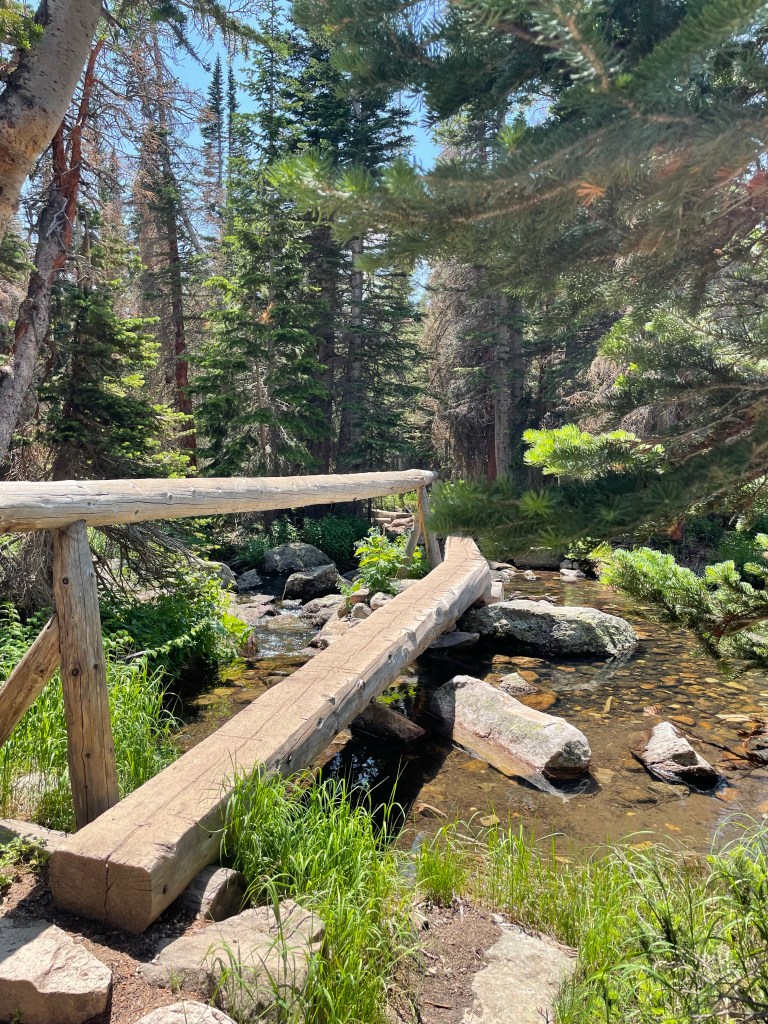
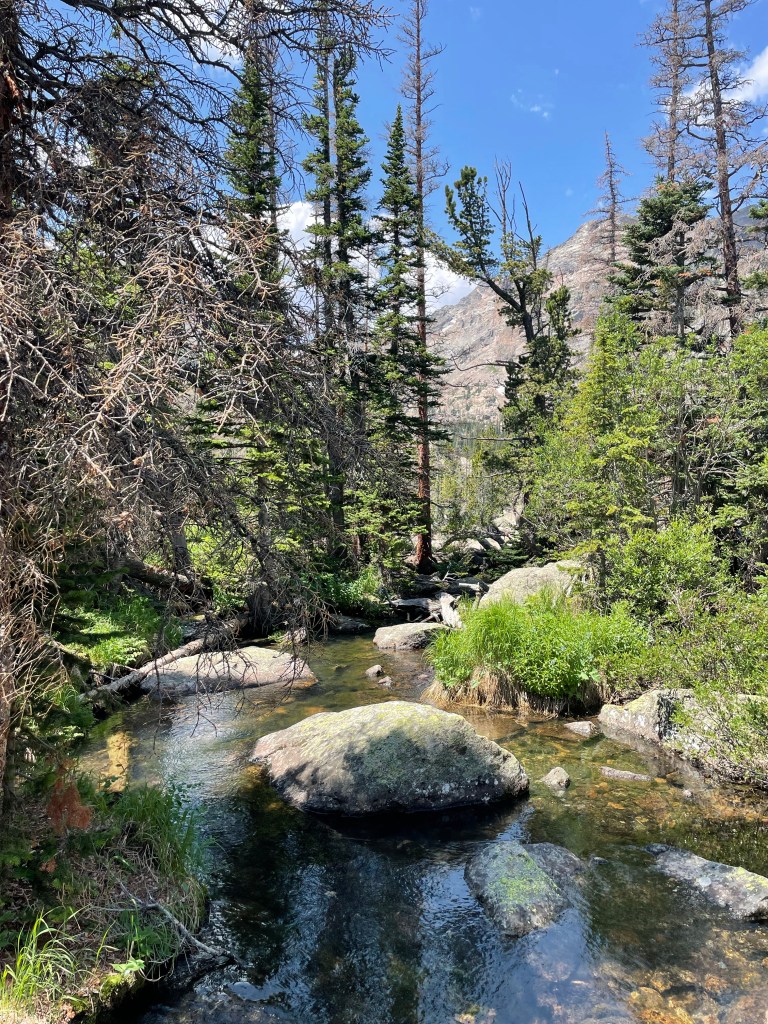
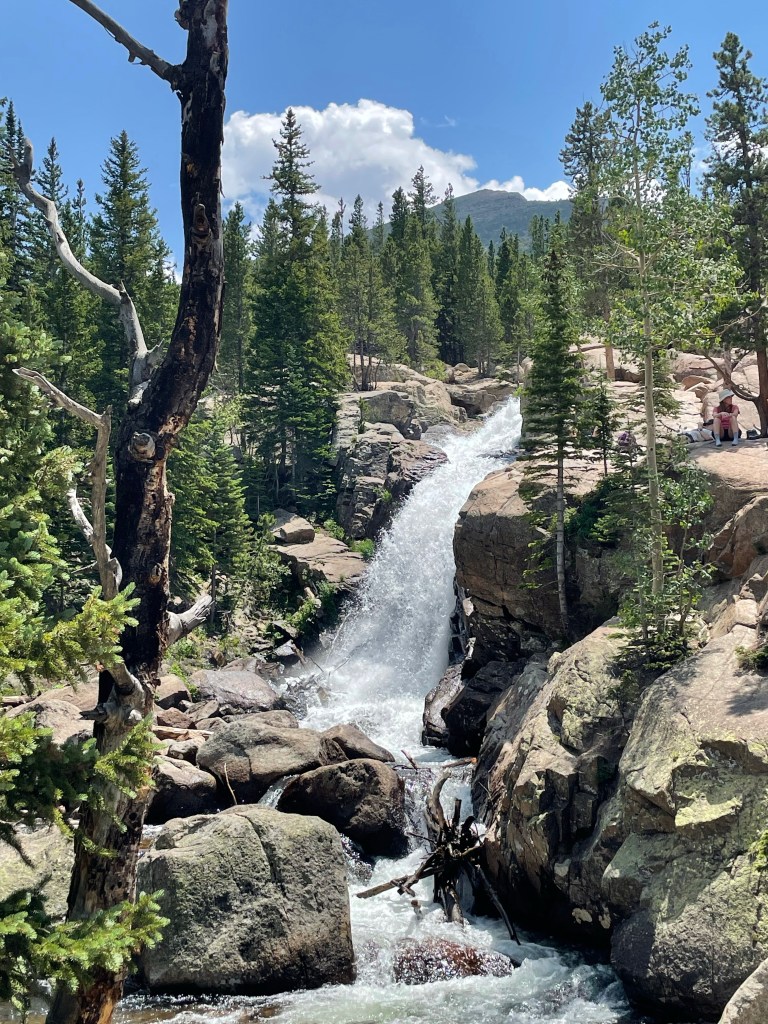
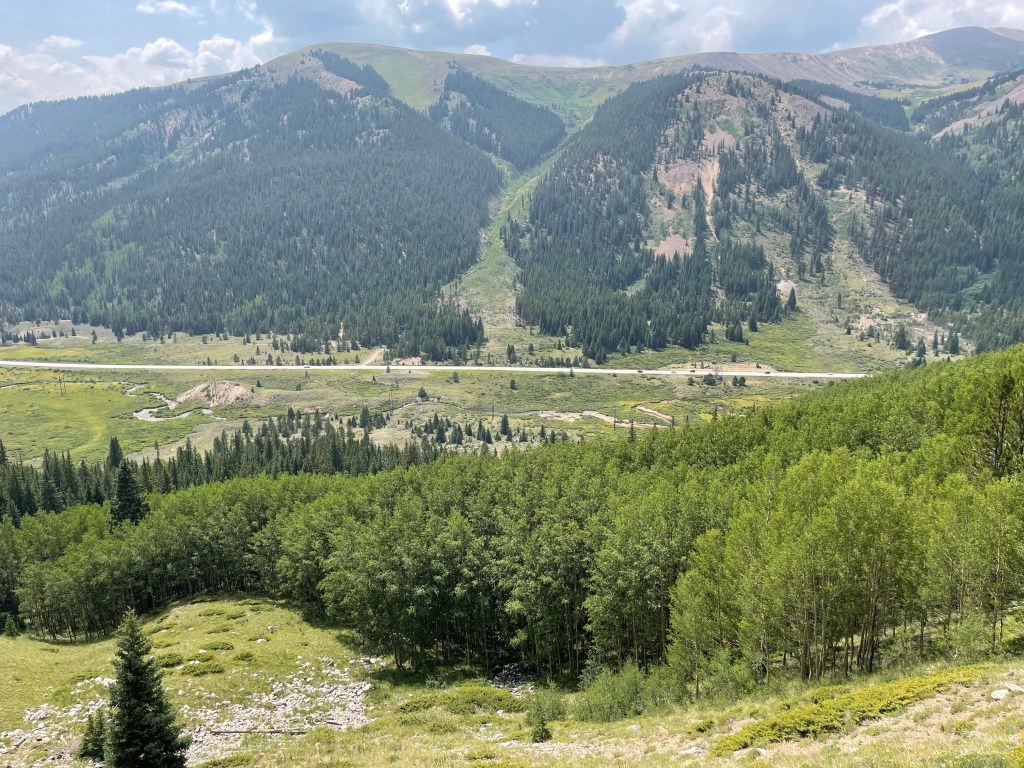
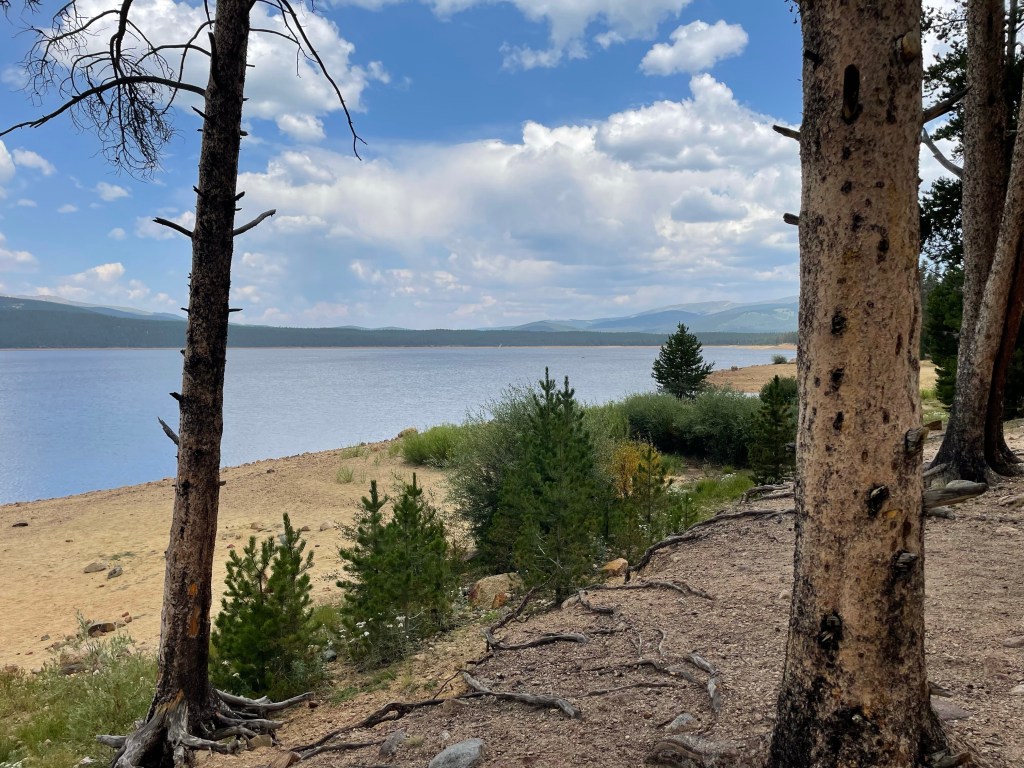
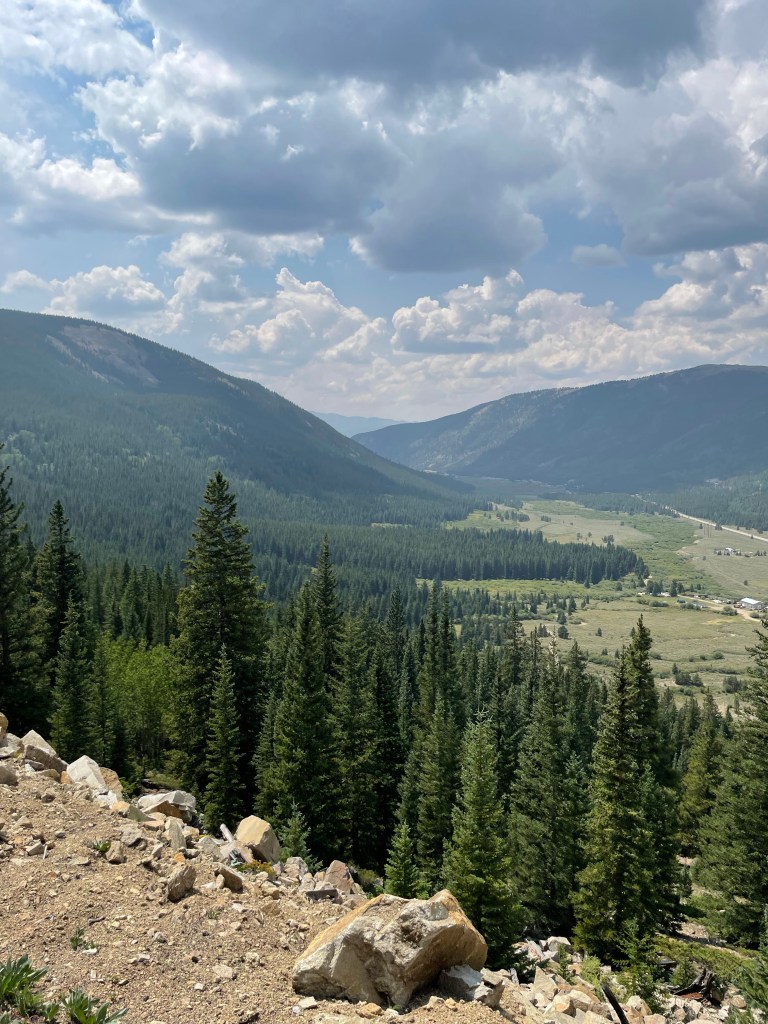
Besides helping him settle in to his new apartment, we also took a drive to Rocky Mountain National Park. Photo intense!
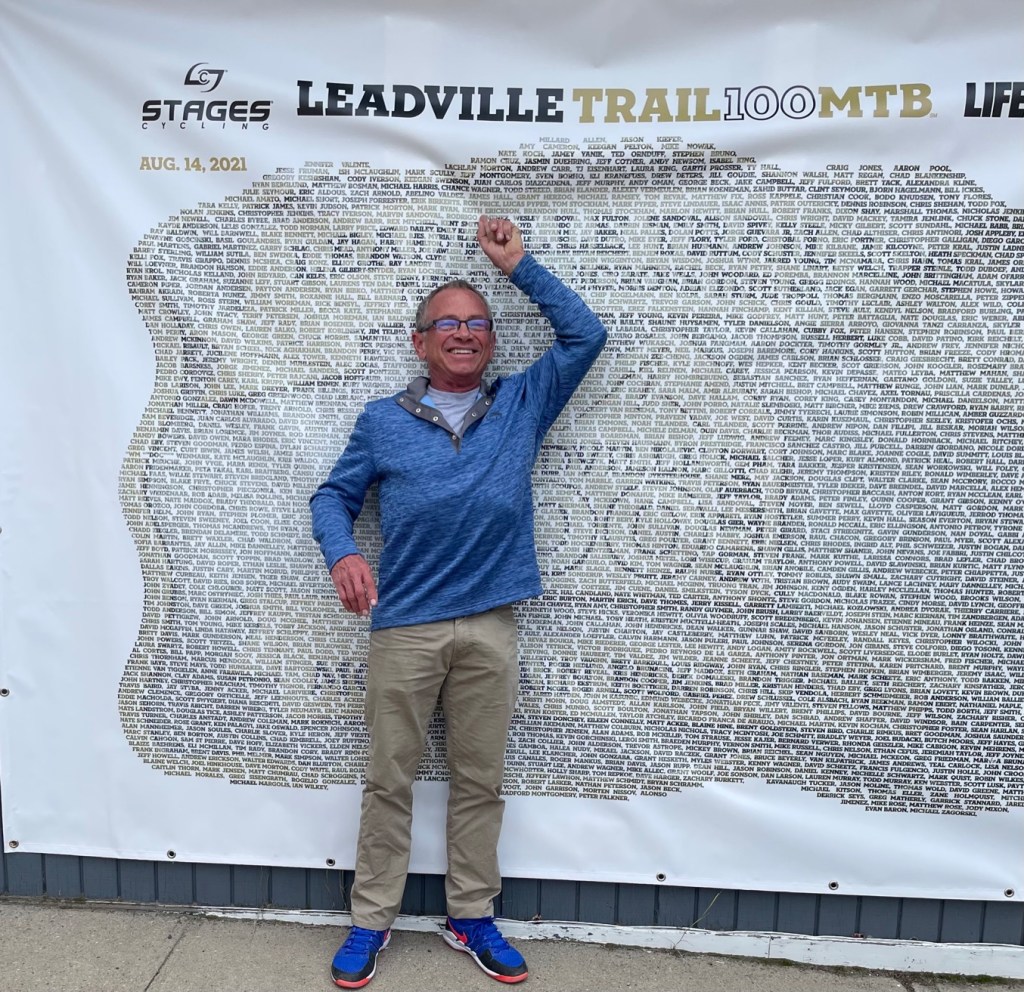
My second trip to Colorado was to serve as crew for my husband as he participated in the Leadville 100 mountain bike race.
A few weeks prior, Keith had participated in the Leadville Stages race, but I did not accompany him for that trip. The weather for this race was comfortable, but the race was still intense.
While there, he stayed with a family from Minnesota that have a second home in Leadville.
To thank them for their hospitality, I mailed them a bike quilt that I had made in 2020 when my office was closed.
For the MBT100 race, I really didn’t do much, just cheered him on when I was able to see him and help him switch out his water and food supplies mid-race.
It was, however, an intense day for him. The race started at 6:30 am with the morning temperature around 40 degrees. Unfortunately for the riders, the temperature rose higher than anticipated. By 2pm the temperature was 87 degrees with a fairly strong wind blowing.
He did finish, albeit slower that he had hoped.
However, given the conditions, I am very proud of him. This is something that I personally would never ever consider doing.
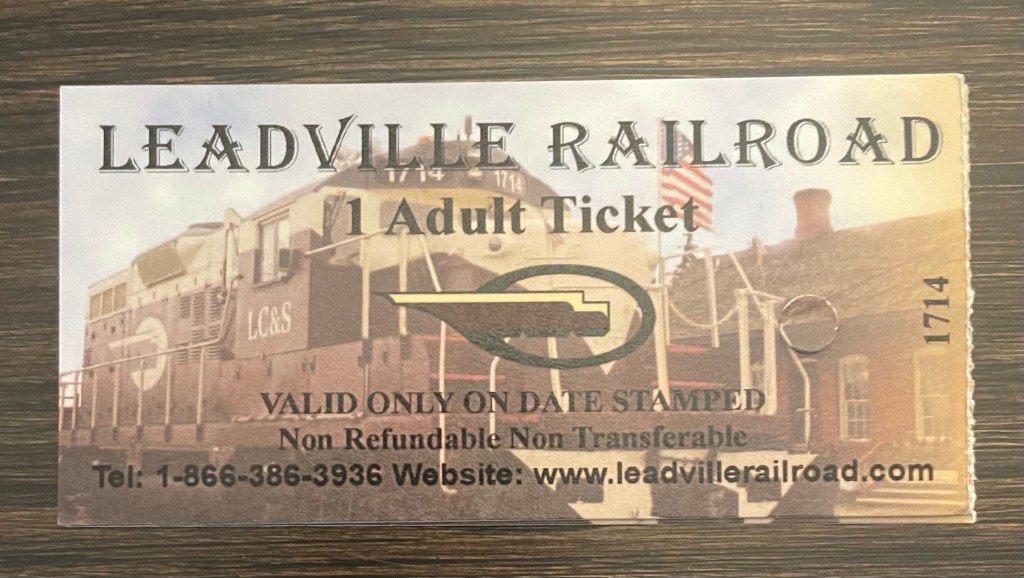
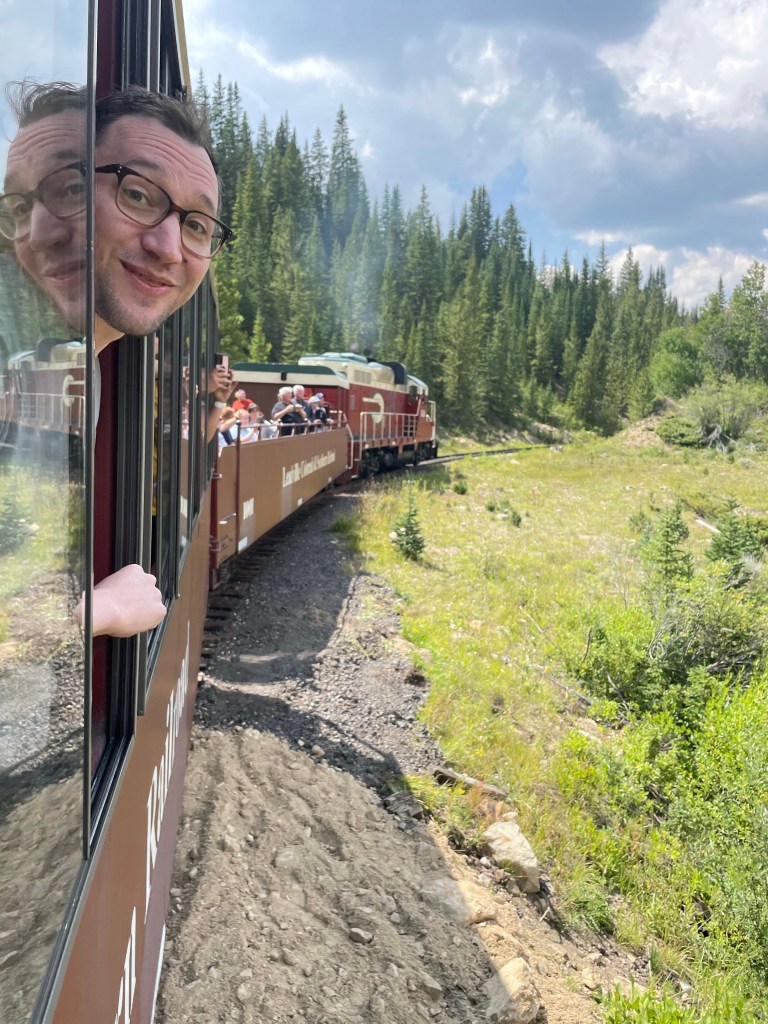
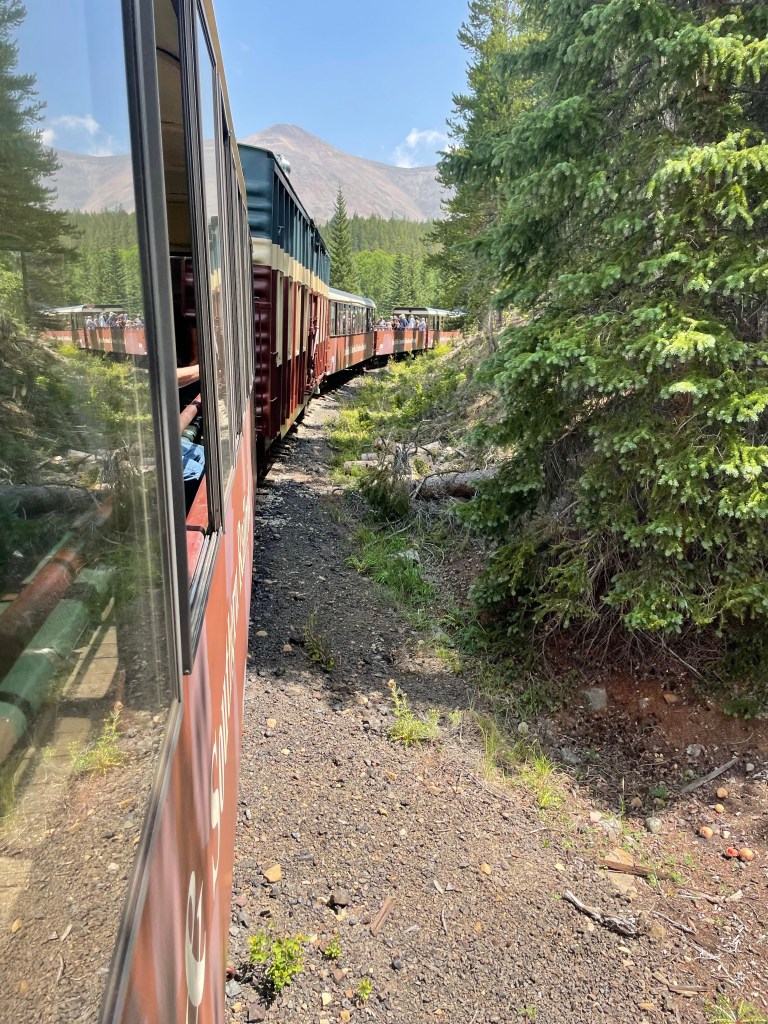
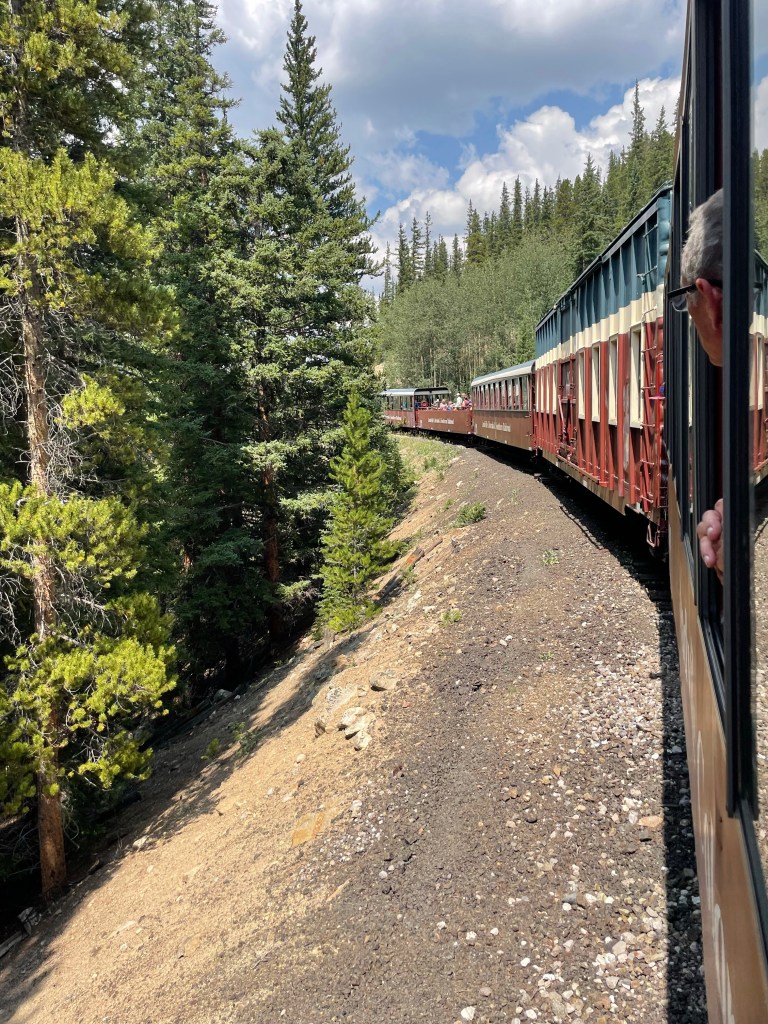
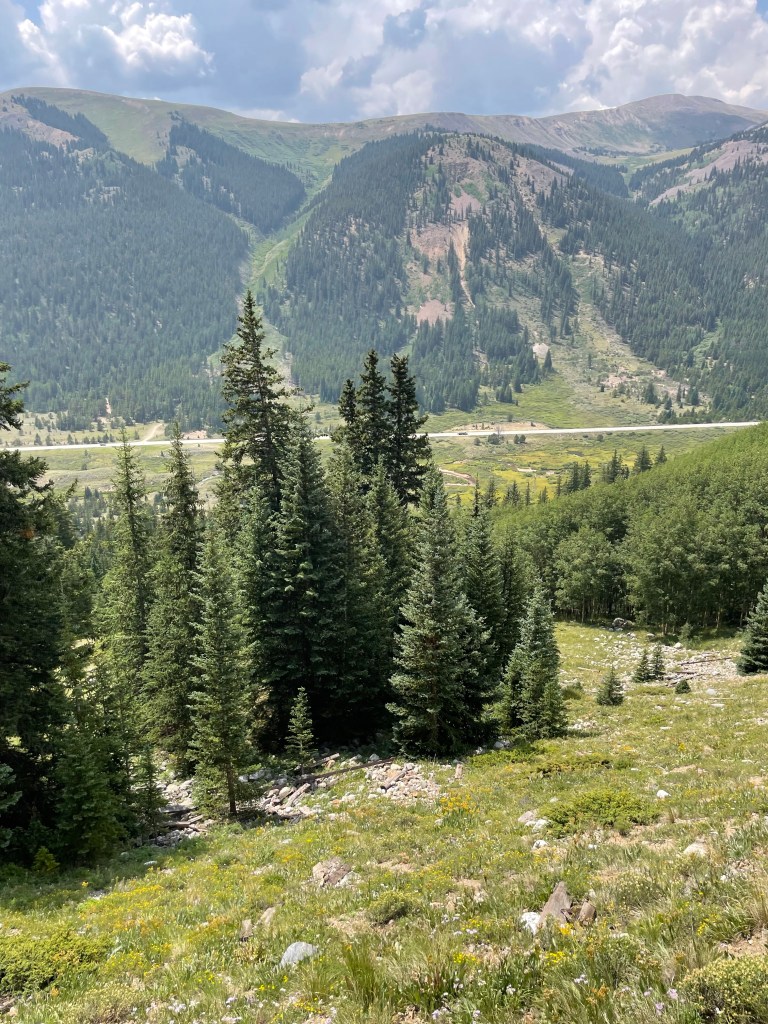
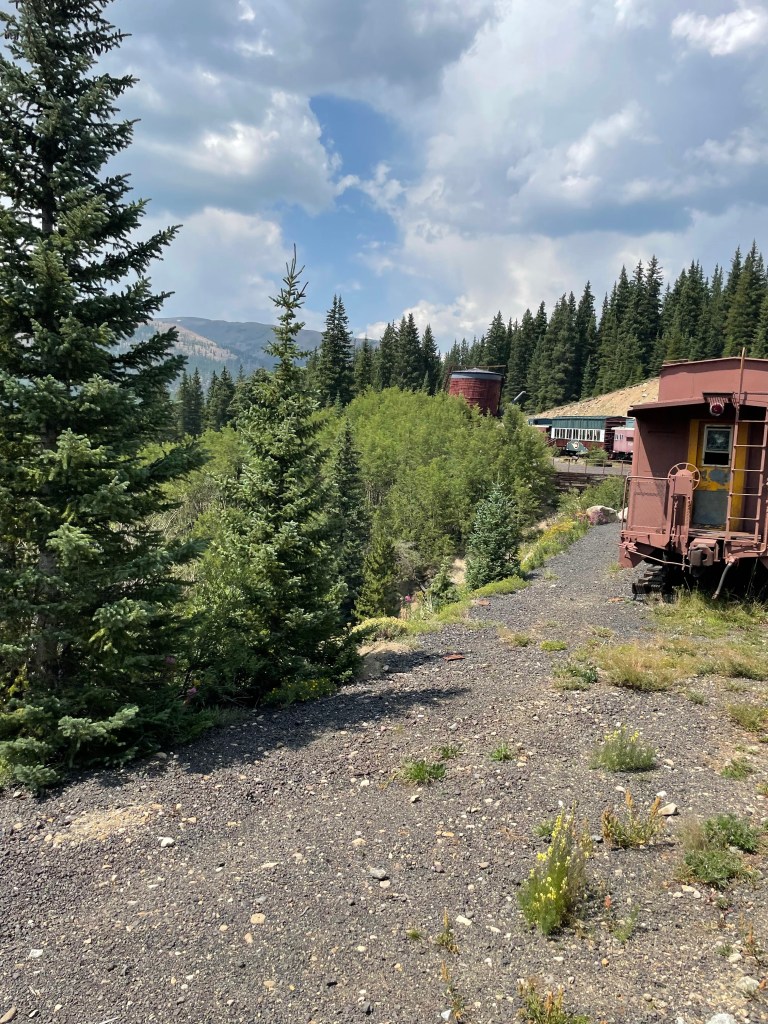
While in the area and after some time for Keith to recover, we took a ride on the Leadville Colorado and Southern railroad. An enjoyable and scenic ride. Also, photo intense.
Fifteen months ago, after attending a professional meeting in San Francisco, my eldest son (who lived in SF at the time) and I visited the San Francisco Botanical Garden in Golden Gate Park. One of the plants I saw there was a very unique and absolutely gorgeous orchid, Miltoniopsis Lennart Karl Gottling also called ‘Hula Skirt’ Orchid.
After seeing it, I search the internet for a source to purchase one, but was unsuccessful. This particular orchid was “out of stock” everywhere. One of the growers did have the ability to indicate if you would like to be notified when the orchid was in stock again. At the time, I filled out the request. But, since then, I had accepted the fact that I would be unable to obtain a plant for myself and thus totally forgot about my search.
Well, on Monday, I received an email from Orchid Web notifying me that the orchid was in stock. Needless to say, I was surprised by the notification and immediately went to their site to order one. When placing the order, I discovered that the store is located in Plymouth, Minnesota, just a few miles from a friend’s dental office. This was fortunate because I could pick the plant up in person, avoid paying shipping, and avoid potential damage to the plant during transit.
Since I would be driving to Plymouth, I sent my friend a message to see if she would like to get together and whether I could bring her lunch when I came. She responded with an even better offer. For a holiday celebration, she was treating her staff to a catered meal from “Gardens of Salonica”, a Greek restaurant and invited me to join them at her office. This was an offer I could not pass up.
I had a nice lunch comprised of good conversation with an amazing friend and some truly great Greek food!!
Being a member of my professional study club, I had also made her a table/wall quilt over the summer, which she received a few weeks ago.
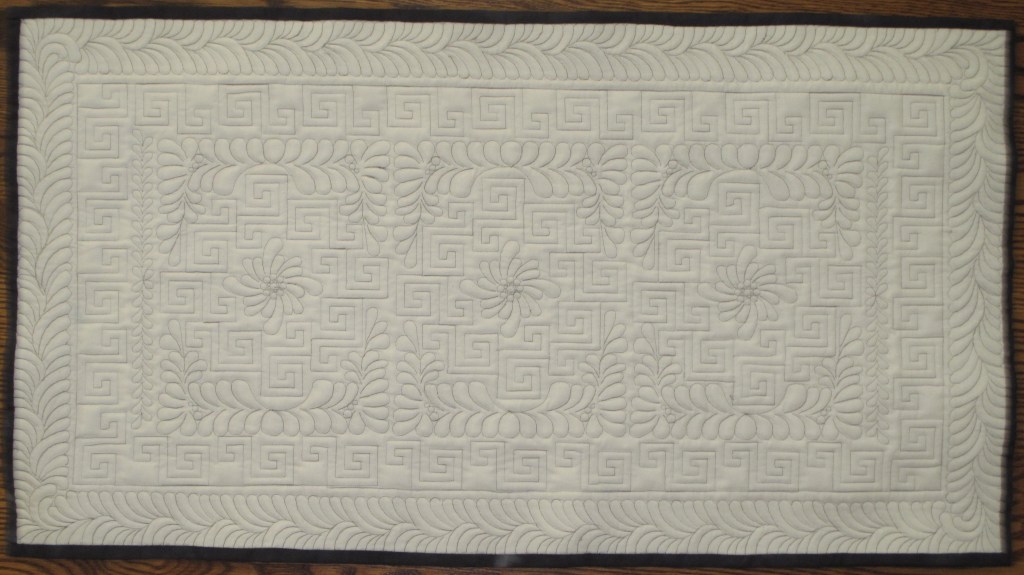
While she is several years younger than me and will likely not retire for a while, she does have her “pre-retirement” quilt. This quilt was made utilizing the Greek Key quilt pattern. I picked this pattern for several reasons. The obvious one is that she is Greek. But, more importantly, the Greek Key is a symbol for infinity or eternity. This is very fitting because she is a constant friend who is always there for me.
My photo of the front of the quilt is a bit out of focus. But, the photo of the back does highlight the quilting that was done. In particular, quilting clearly shows the continuity of the Greek Keys in the piecing and in the quilting.
These eternal rings symbolic of the eternal love and support we have as friends. And, also a symbol of the love we celebrate this time of year at the birth of our Lord.
We have five members in my professional study club, and I have previously written about two of the quilts I made for these friends. Continuing with quilts for my other study club friends (who actually don’t retire for a few more years), I needed to come up with two additional designs.
The parents of one of the other friends is originally from England. So, I decided that her wall quilt would be a good opportunity to try English Paper Piecing.
EPP involves placing a paper template onto the wrong side of the fabric, folding the fabric over the paper template, tacking the fabric to the template with water soluble glue and then hand stitching the various shapes together. It’s almost like a fabric form of Tetris!
Five years ago, while attending the Minnesota Quilt Show, I purchased a book “The New Hexagon – 52 Blocks to English Paper Piece” by Katja Marek. The beautiful blocks really caught my eye and since it was 52 blocks, I originally thought I would just try to make one each week for a year. Well, unfortunately, other projects always came up and the book sat on my shelf unopened.
Then, last year, while browsing various quilting sites on-line, I saw a posting by the same author about a Millefiore Quilt Along. This quilt along was completed a few years earlier, and the pictures were stunning.
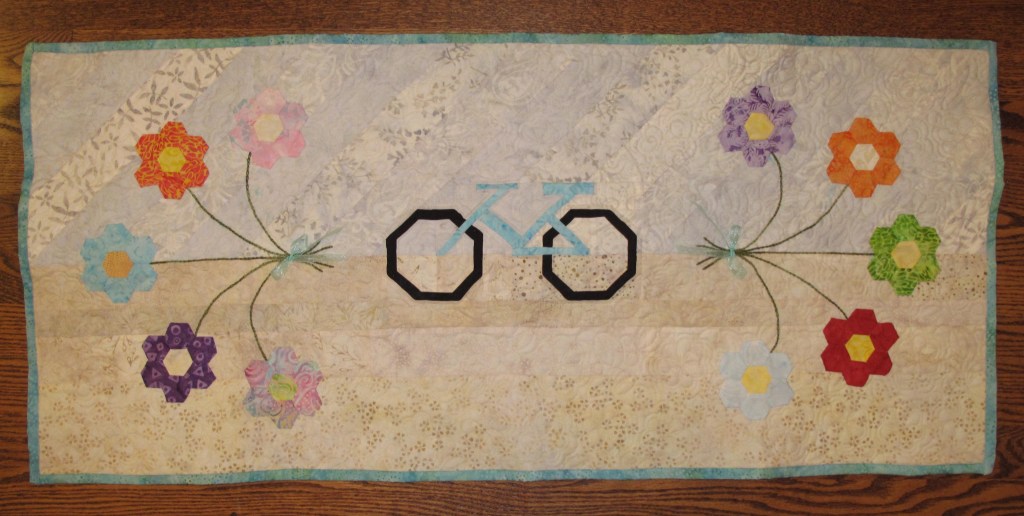
Because the technique involves hand stitching the pieces together, I thought that a wall quilt would be a good place to start to learn the technique. This project would not be too large and intimidating, and would be easily carried in a bag to work on when I was not at home.
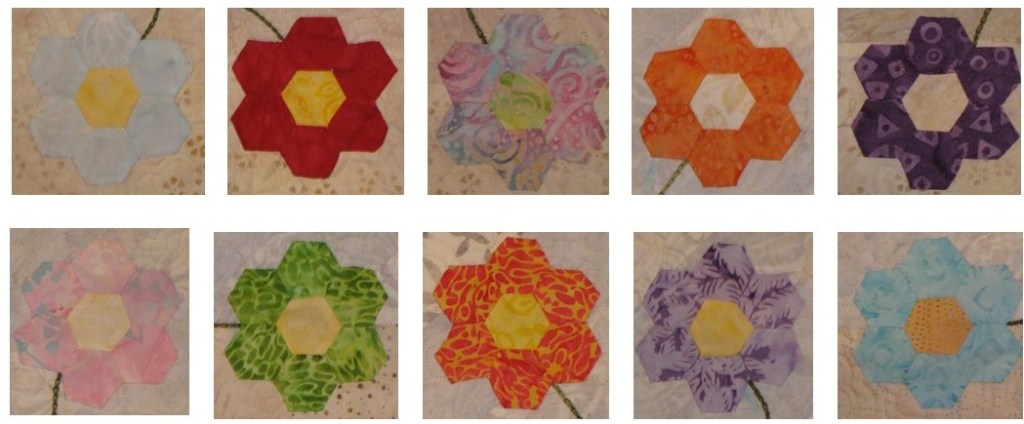
Since this particular friend has beautiful flower gardens at her home, I started out by doing some simple flowers. Many of my quilting friends will already know that hexagon flowers are commonly made using paper piecing.
Unbeknownst to my friend, I was stitching the flower pieces together when we were working in the same office on several occasions. I’m not sure she realized after receiving the quilt that I had been sewing the pieces together right in front of her!!
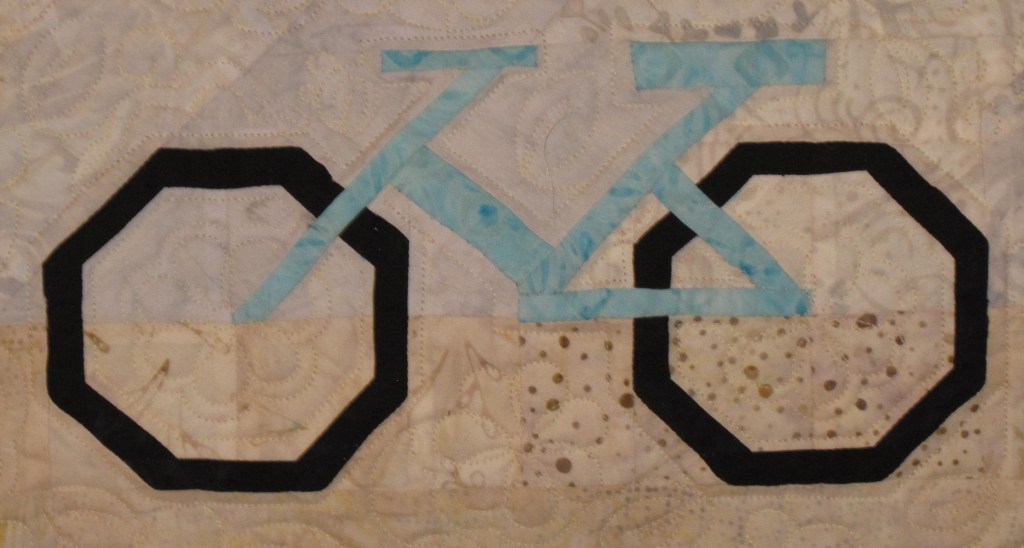
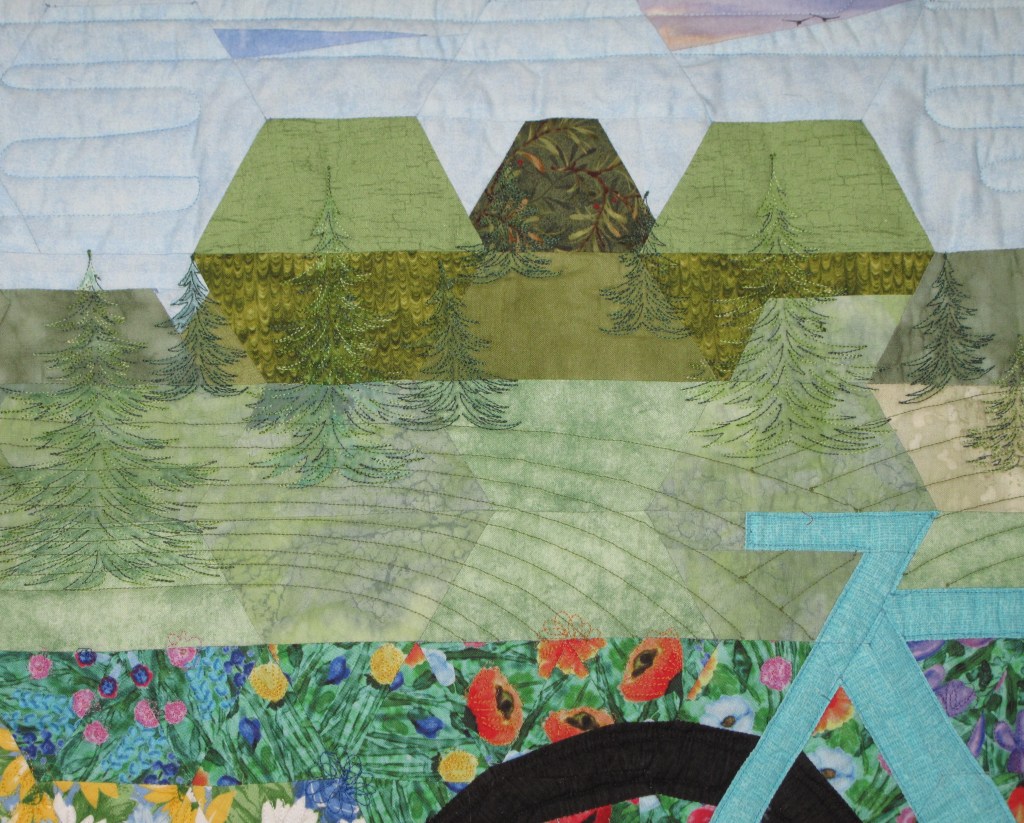
Once I had a few hexagon flowers sewn, I needed to figure out the rest of the quilt design. To personalize the quilt for my friend, I played around with creating my own paper piecing designs. She is an avid biker, so with the help of her husband, I found a photo of the type of bike she rides. Using Electric Quilts, I created the paper piecing design to make a bike for the center of the quilt.
With the bike designed, I next needed to figure out what to do for the background of the quilt. After playing around with a couple ideas, I decided to make it look like the bike was on a trail. The flowers would then be stitched into groupings on either side of the bike.
Hand sewing the pieces of the bike together was time consuming. And, the background was going to be larger pieces with straight seams. Thus, I settled for machine sewing the rest of the background around the bike and the flowers. After machine quilting, I added some hand embroidered stems for the flowers and some ribbons.
I enjoyed learning this new technique, it is much more “portable” than machine quilting.
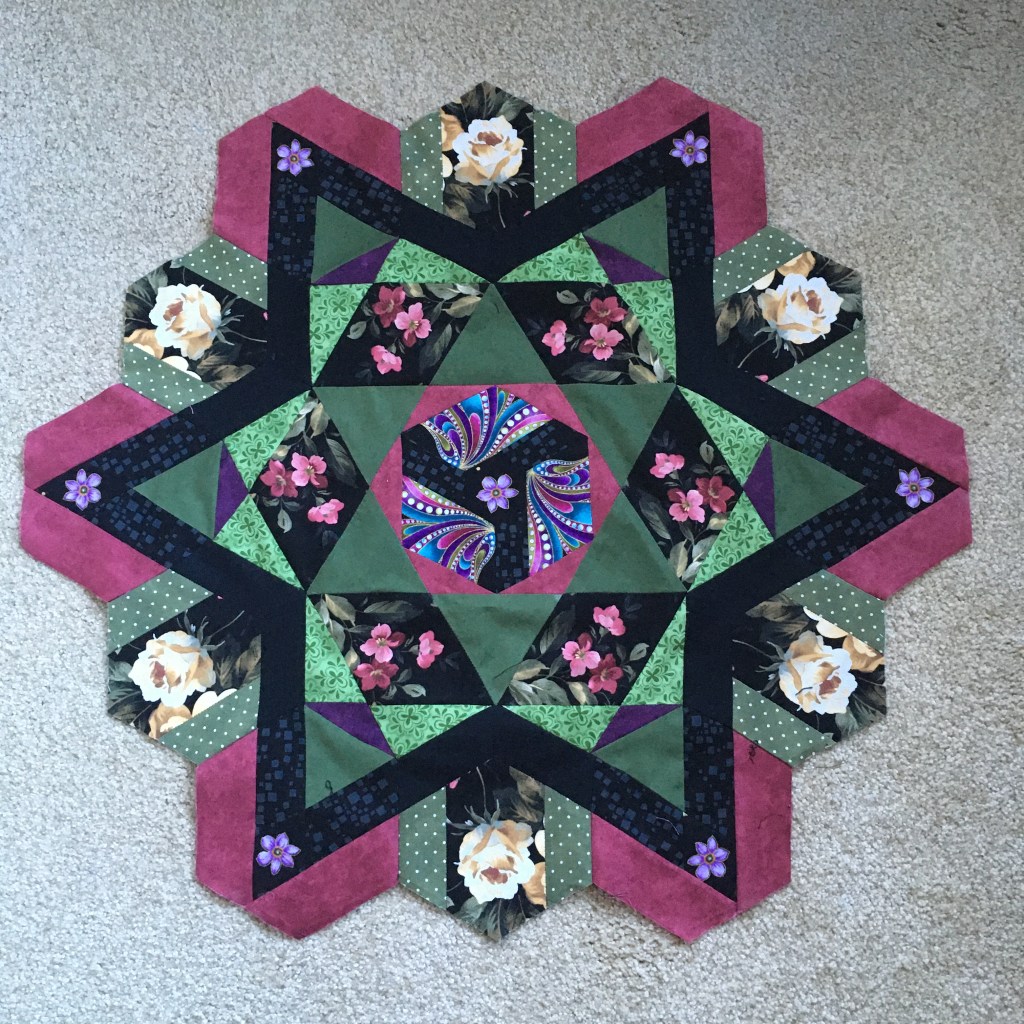
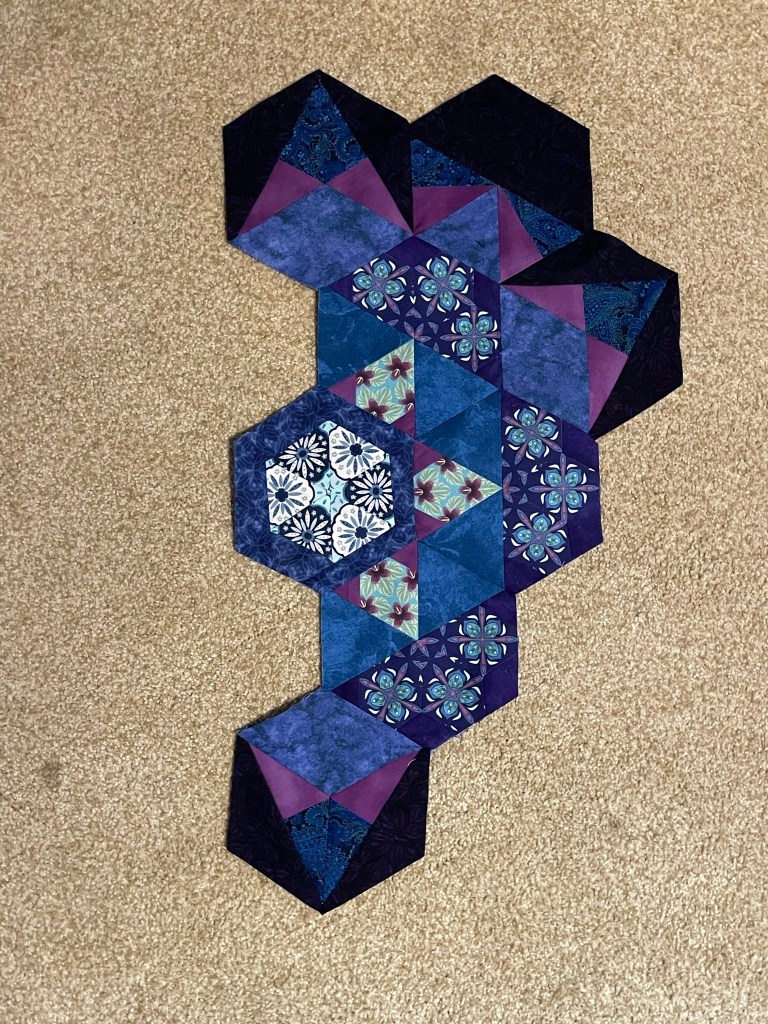
After this project was completed, I thought about what paper piecing project I could try next. Since the millefiori quilt idea really stuck with me. I spent some time designing my own take on a Millefiori quilt. Early November, with two weeks off of work and I started out with great intention of creating a full sized quilt using English Paper Piecing.
However, I quickly realized that I am not a fan of hand piecing quilts. The amount of time needed to cut out the paper templates, glue them to the fabric and then hand sew the pieces together was overwhelming. And, I really wondered how durable my hand stitching would be. I certainly didn’t want to spend hours and hours sewing together a quilt that would easily pull apart at the seams.
Thus after finishing one section of the quilt (the center section in my hand drawing), I decided that the rest of this quilt would be sewn by machine.
There will be many difficult seam junctions to line up when sewing this design by machine. But, I am much happier with the way the rest of the quilt is coming together (more on that in a couple weeks). And, while I enjoyed learning English Paper Piecing, I am also happy that I learned that this is not something I will use for designing larger quilts.


![The New Hexagon: 52 Blocks to English Paper Piece by [Katja Marek]](https://m.media-amazon.com/images/I/61HrIG3qcvL.jpg)