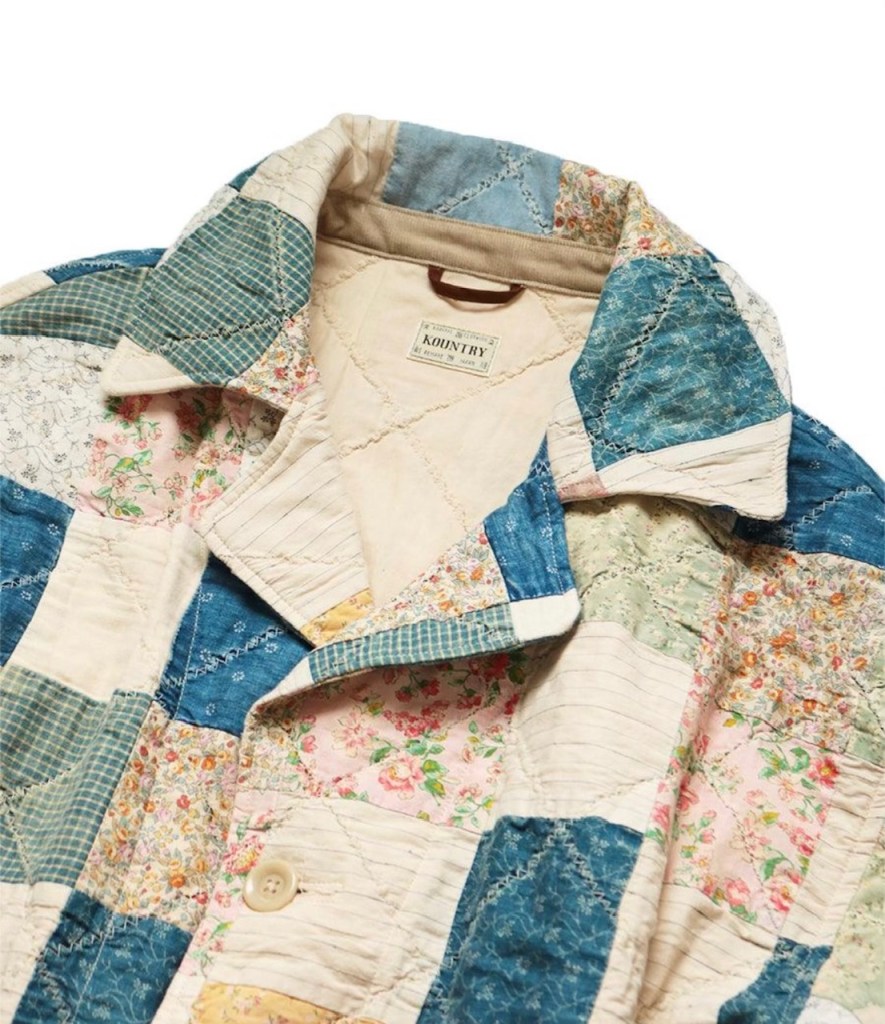
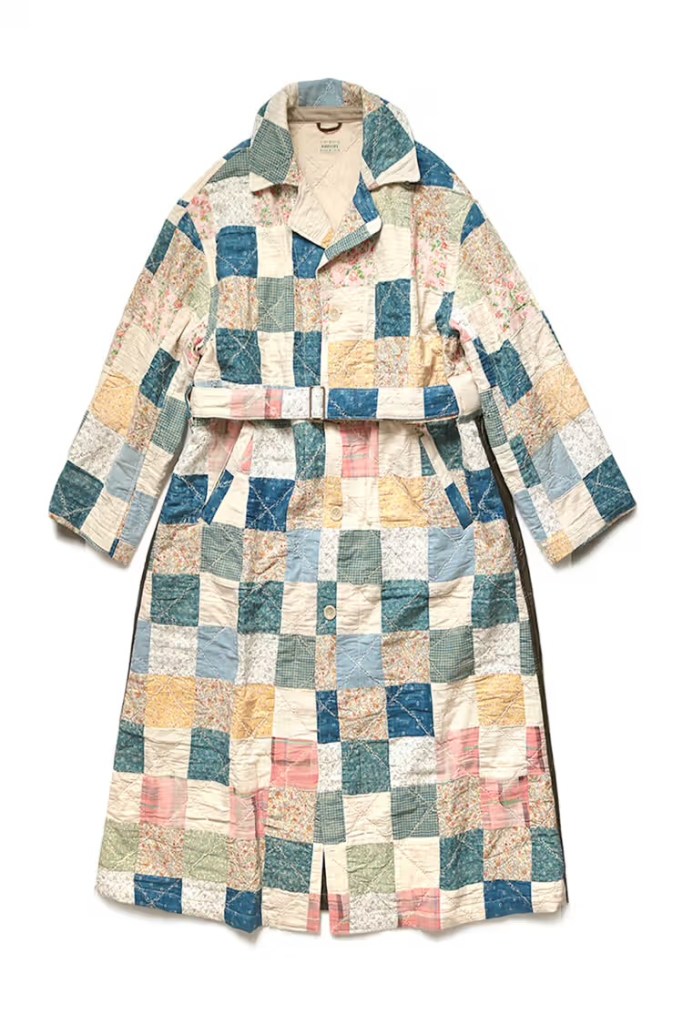
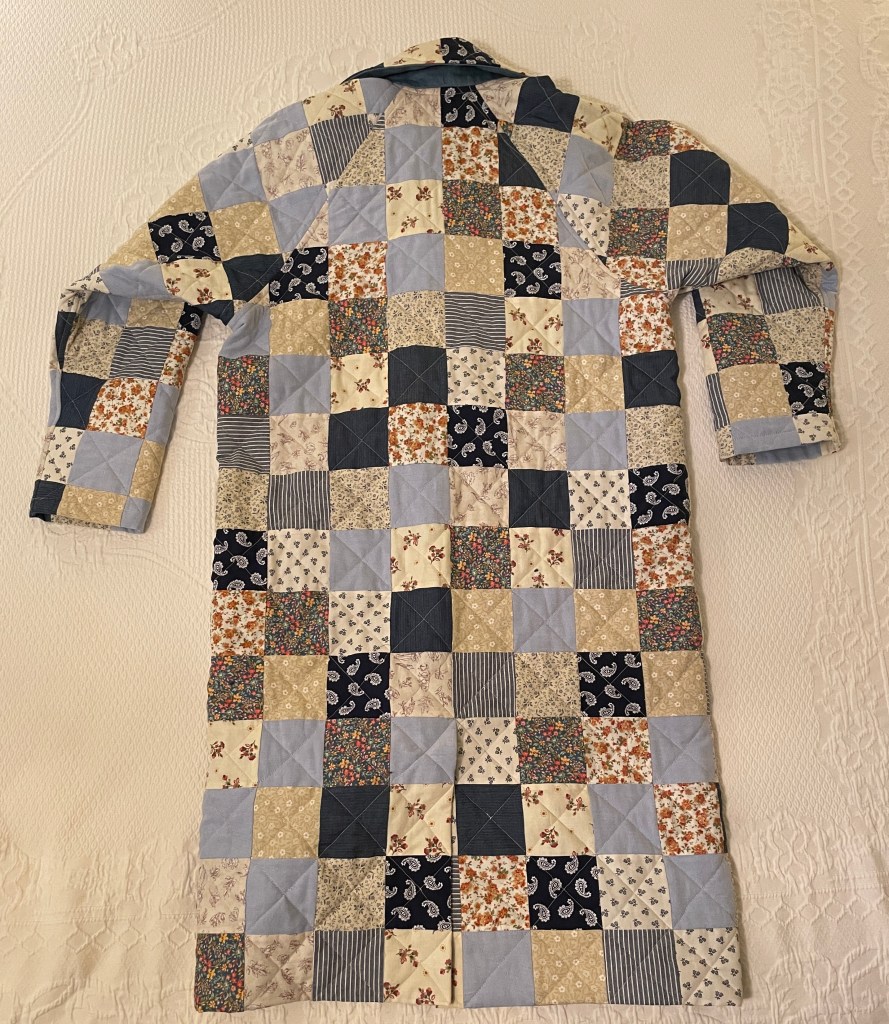
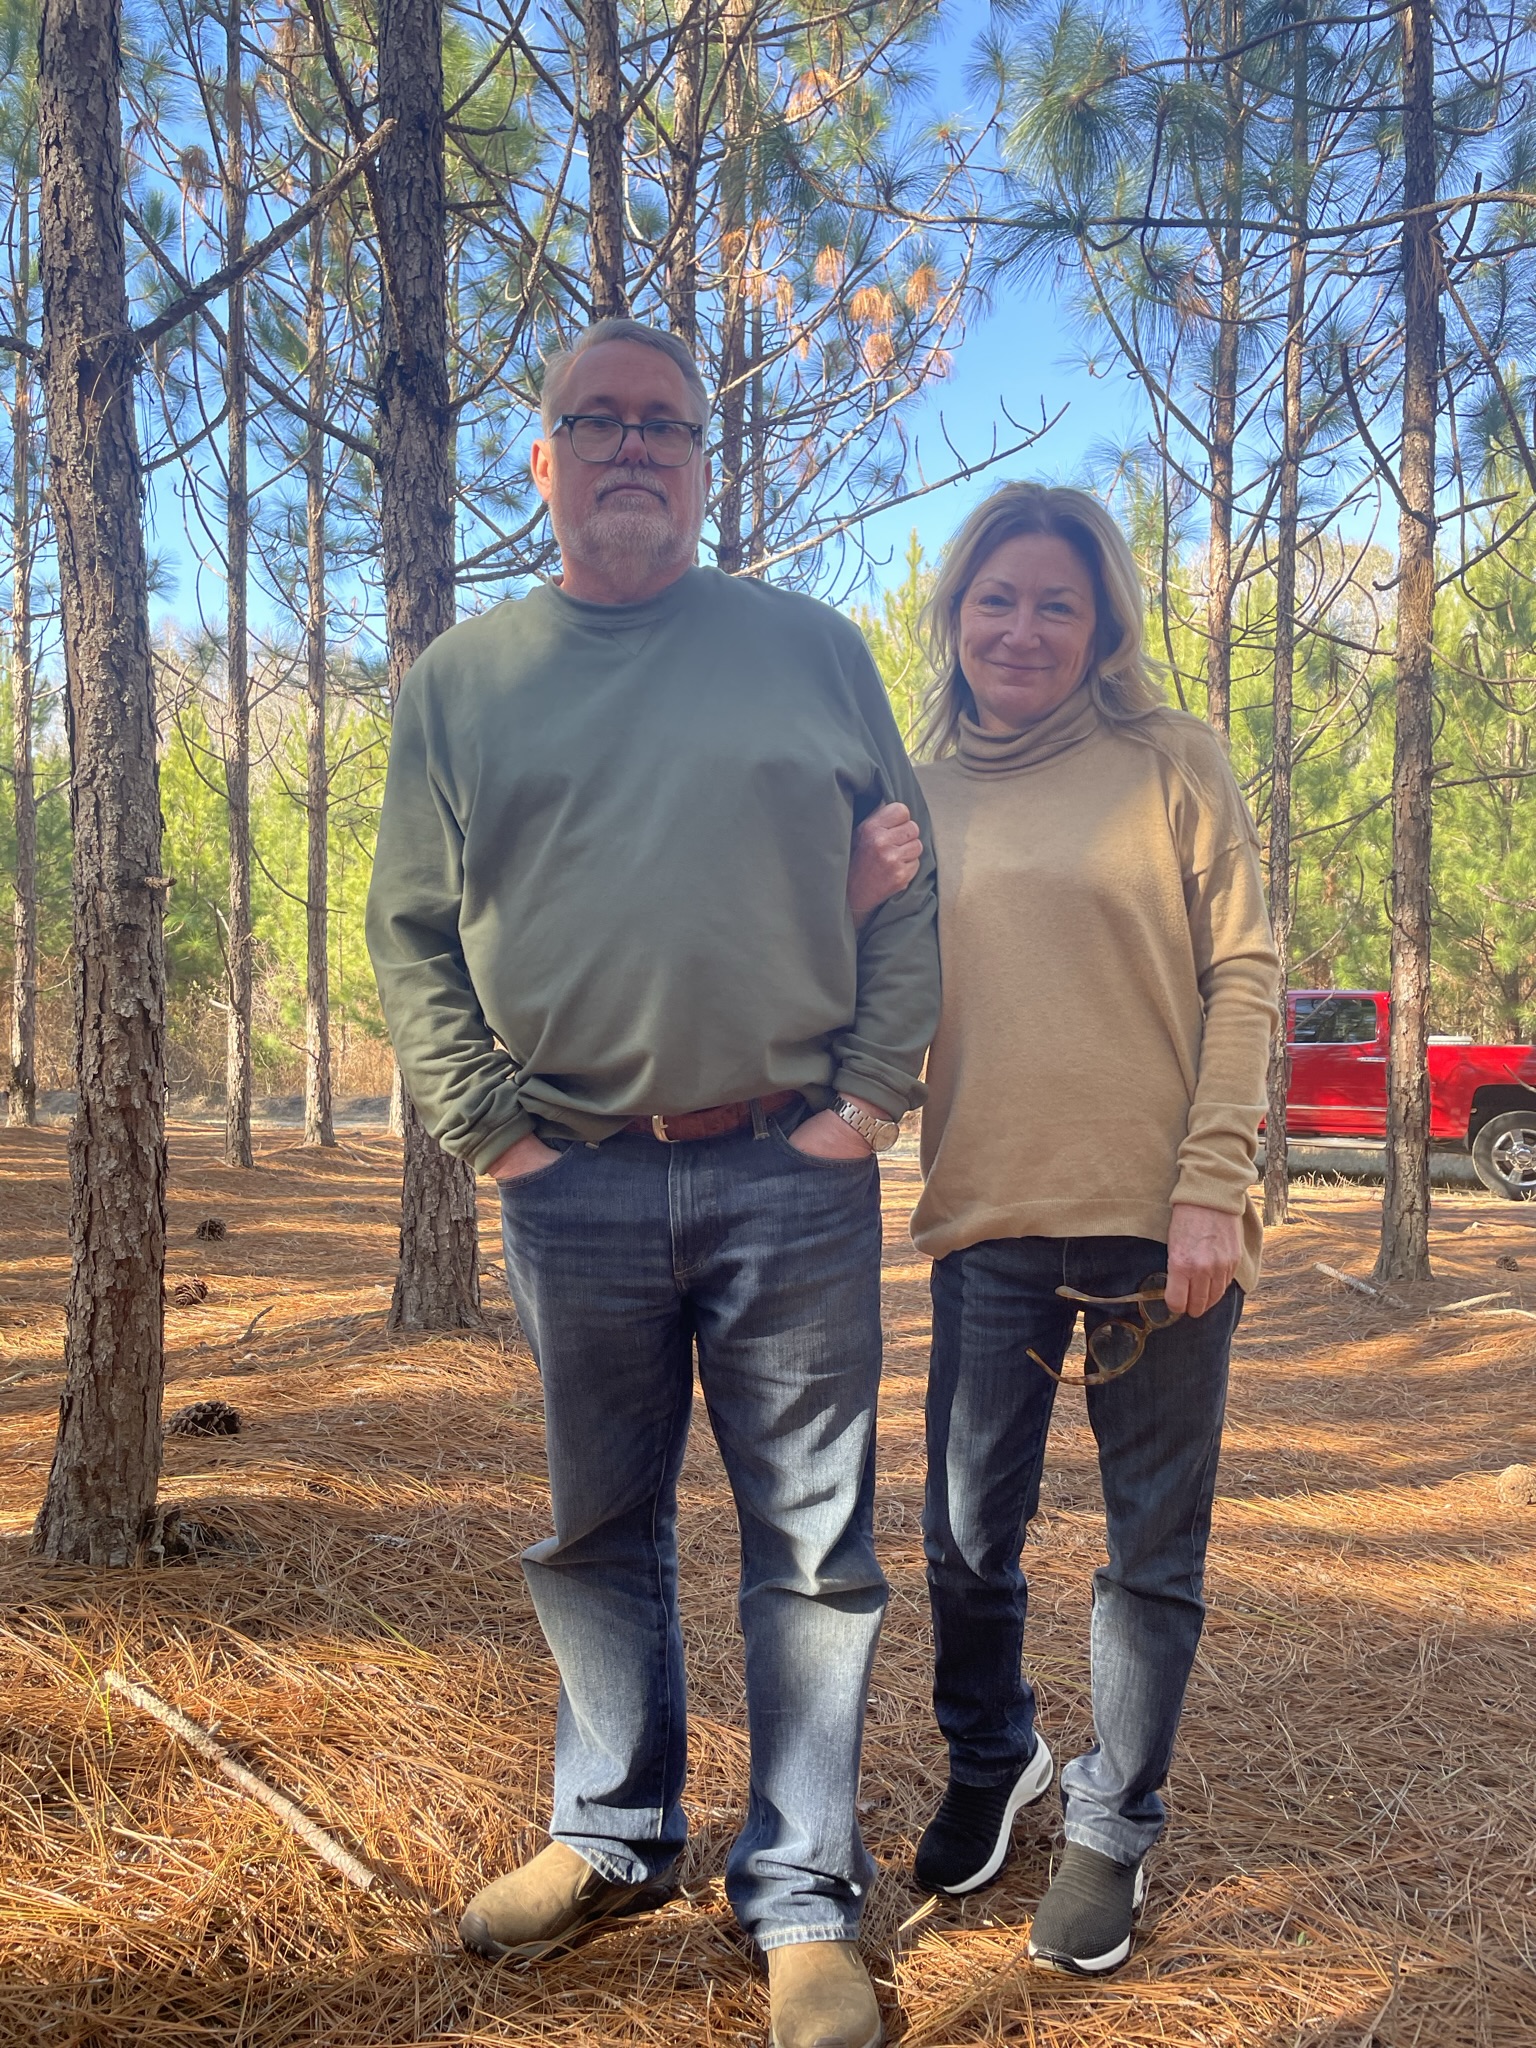
A year ago, when one of my son’s was home for Thanksgiving, he showed me a picture of a quilted trench coat and asked if I could make something similar. The coat was made by a Japanese designer and would have cost nearly $2K to purchase.
So, while he was home, we found a Burda pattern that he thought would best match how he wanted the trench coat to fit and quarter yard of several cotton fabrics as well as some lining fabric.
After taking his measurements, I used some scrap fabric to make a mock up of the coat for him to try on when he came home at Christmas – no lining, no pockets, just the basic coat.
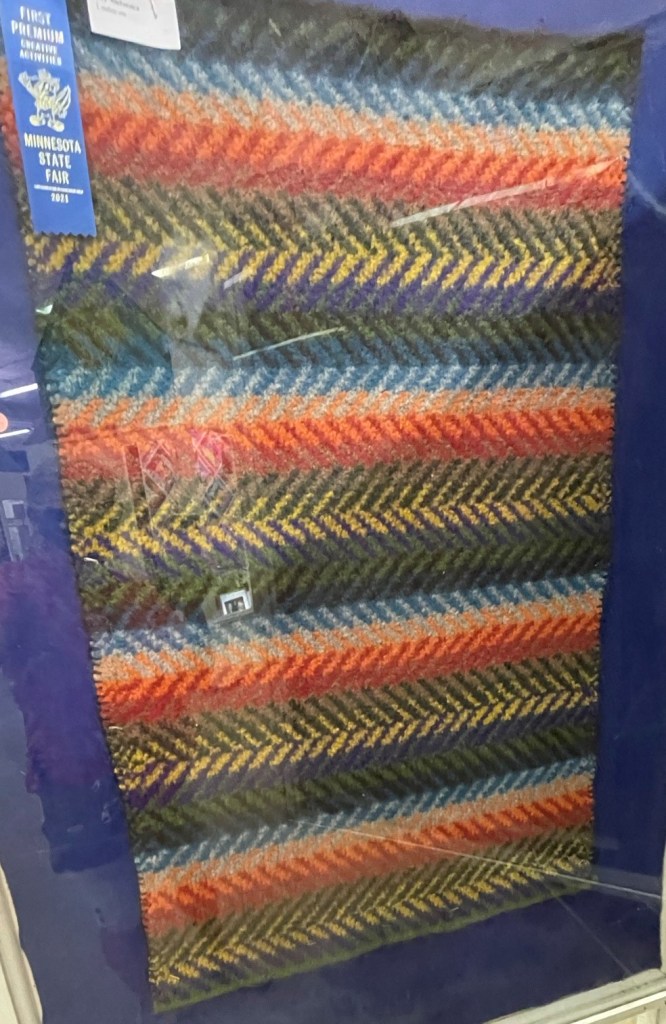
With some adjustments to the pattern, I got to work. This quilted part included 3″ squares arranged alternating print fabric with a shade of blue, 16 squares x 37 squares, quilted in a corner to corner straight line pattern.
The coat was then cut out and sewn together, using my serger machine on the seams to keep them from raveling.
I even added pockets that were matched to the patchwork so that they are somewhat hidden on the front of the coat.
The coat turned out nice and I entered in the MN State Fair this past August, where it received a blue ribbon and medallion.
I kept the ribbon, but the coat was shipped to New York for my son to enjoy when the weather dips this winter.
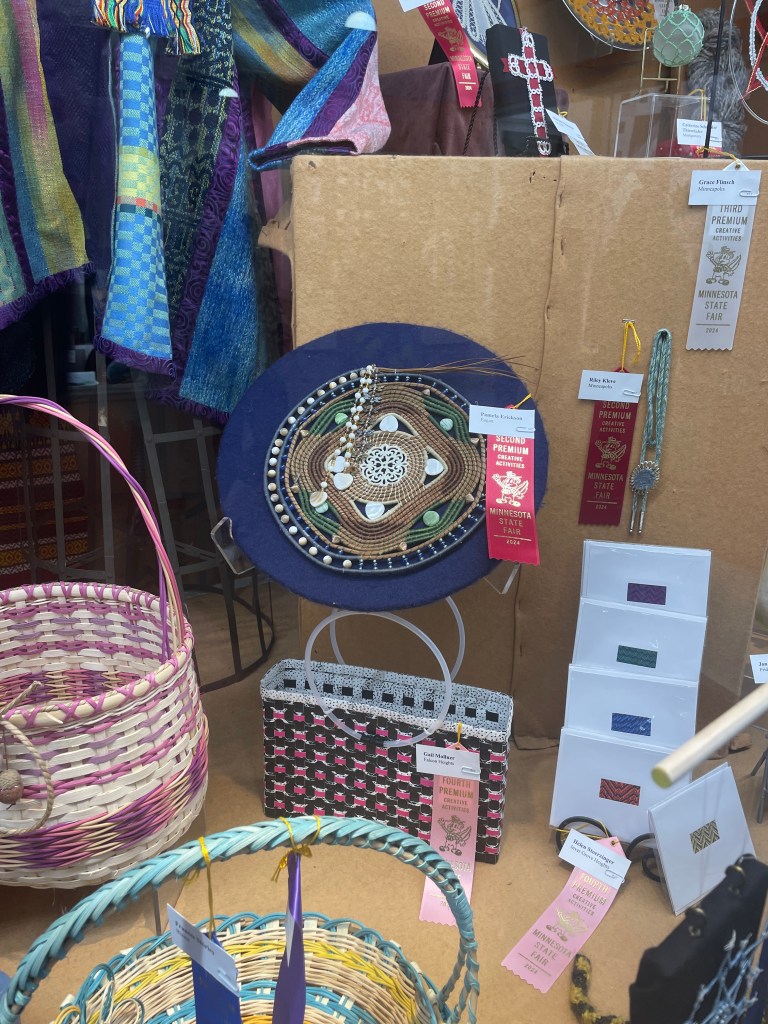
I also entered a few other items in the MN State Fair this year. I received a second place ribbon for a Pine Needle Woven Dream Catcher, a third place ribbon for a Woven V Shawl and a fourth place ribbon for a Crocheted Child’s Jumper.
Earlier this spring, I spent some time learning how to dye some of the pine needles that I brought home from South Carolina.
Not wanting to purchase more crafting supplies, I thought I would first try using the Procion MX dyes that I have used for dyeing fabrics. Because I wanted an intense color, I mixed MX Deep Purple dye with soda ash solution warmed to 200 degrees. To this, I added one bundle of pine needles and allowed them to batch for 4 hours. After rinsing, I was very disappointed to find very little (if any) color uptake.
Most of the on-line information about dyeing recommends basic dyes. So, I then tried the vinegar technique that worked well for dyeing silk fabrics. For this, the MX dye was dissolved in vinegar, the pine needles added and then microwaved the same as for dyeing silk. Unfortunately, this was also disappointing.
Next, I tried Rit dye because I found several on-line tutorials for using this dye with pine needles. While the Rit dye worked for creating color in the pine needles, the color was not what I was wanting and definitely not the color on the dye bottle.
Lastly, I purchased a set of Basic Dye from Jacquard. The dye (7 grams) was dissolved in a vinegar bath (2 liters water with 30 ml vinegar). The needles were added, weighted down with a baking rack and baked in a 350 degree oven for 30 minutes. The rack was removed and allowed to cool. The dye was removed and the needles were soaked in another vinegar solution (this time with no dye) for an additional 30 minutes. The needles were then rinsed well and allowed to dry overnight.
I was extremely pleased with how well the needles took up the dye using this technique. The purple color was very intense. In the picture, you can see the results of the dye attempts. While the Rit dye did create color, it was more of a green color rather than purple.
Untreated needles, MX dye, Vinegar dye, Rit dye, Basic dye
The basic dye worked so well, that I decided to dye more colors. I achieved some really lovely colors!
Needles treated with Basic Dye: Green, Red, Yellow, Untreated, Blue, Purple, Black
A few weeks later, I pulled out some of the needles and started working on a basket idea I had. After getting a short start to my weaving, I set it aside (wrapped in a damp towel to keep the needles flexible) because it was spring planting and I was drawn outside to work in my gardens.
Last week, I had time to work on my project again. Unfortunately, when I opened the bag with the damp towel and pine needles I found that the moisture had cause mold to form on the pine needles. So, the start of the project was tossed into the garbage. Lesson learned – store all pine needle dry and only moisten the ones that will be used within a short amount of time!
After starting over, I continued to work on the basket for several days to avoid the problem of mold growing on the second attempt.
My design idea was to make a basket that (sort of) looked like a flower. The center was three rows of plain needles wrapped in yellow surrounded by three rows of the Ti stitch to make the center of the flower.
For the colors designating the flower, I started with a single row of needles wrapped in red. By wrapping the needles, I could transition to red dyed needles for the next section. The next row was the Ti stitch on red needles with radiating points filled with the Faggot stitch. The next three rows were red needles and the Ti stitch in purple. The last section of the flower was a row of radiating purple wrapped needles that allowed me to transition to green needles.
The outer section of the basket was to look like the plant of the flower and the air/sky surrounding it. To achieve this, I did three rows of simple stitch in green on green needles and then a row of wrapped needles to transition back to plain needles. Five rows of plain needles with the V stitch and a final row was a wrapped row. I plan to hang this on the wall in my craft room
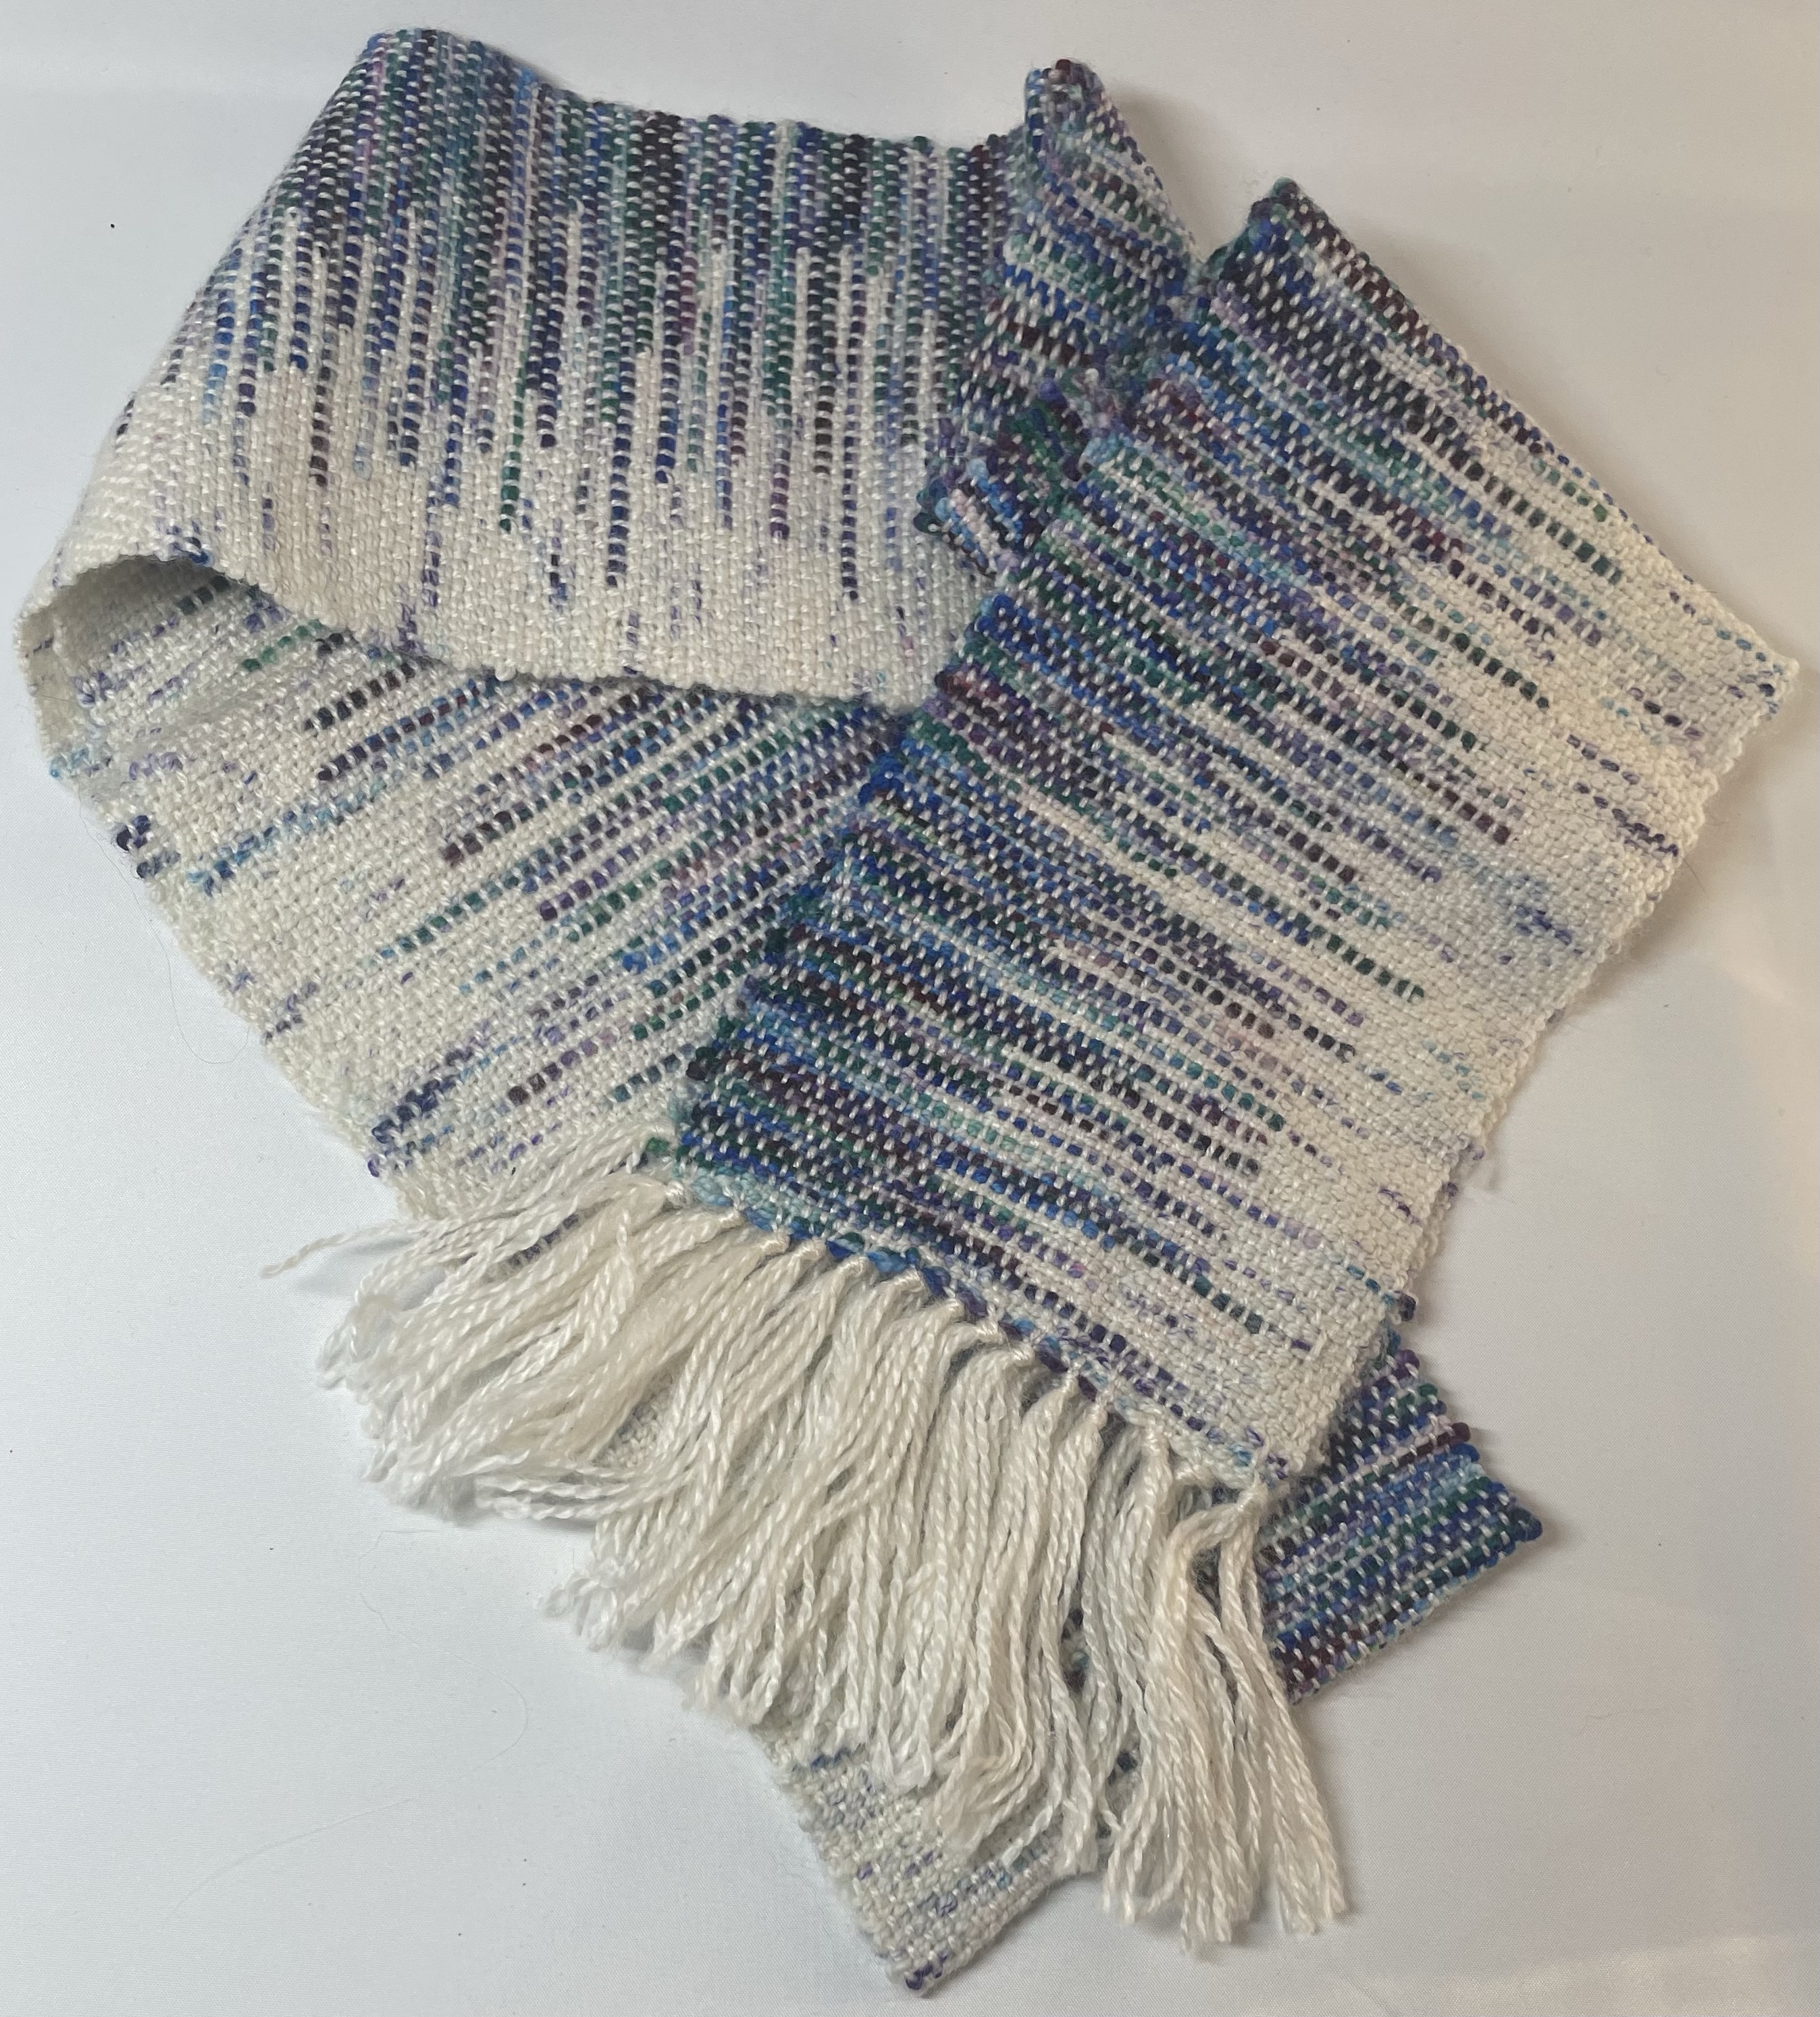
This morning, while starting a new weaving project on my rigid heddle loom, I realized that I have neglected to write about some of my earlier projects. Over the past two years, I have woven dozens of scarves, most of which I have given as gifts or donated to various charities. For these scarves I generally used the plain weave technique. This is the technique that we all learned in school , the over one / under one weaving style. Made with fun yarns, this technique can make for a lovely scarf.
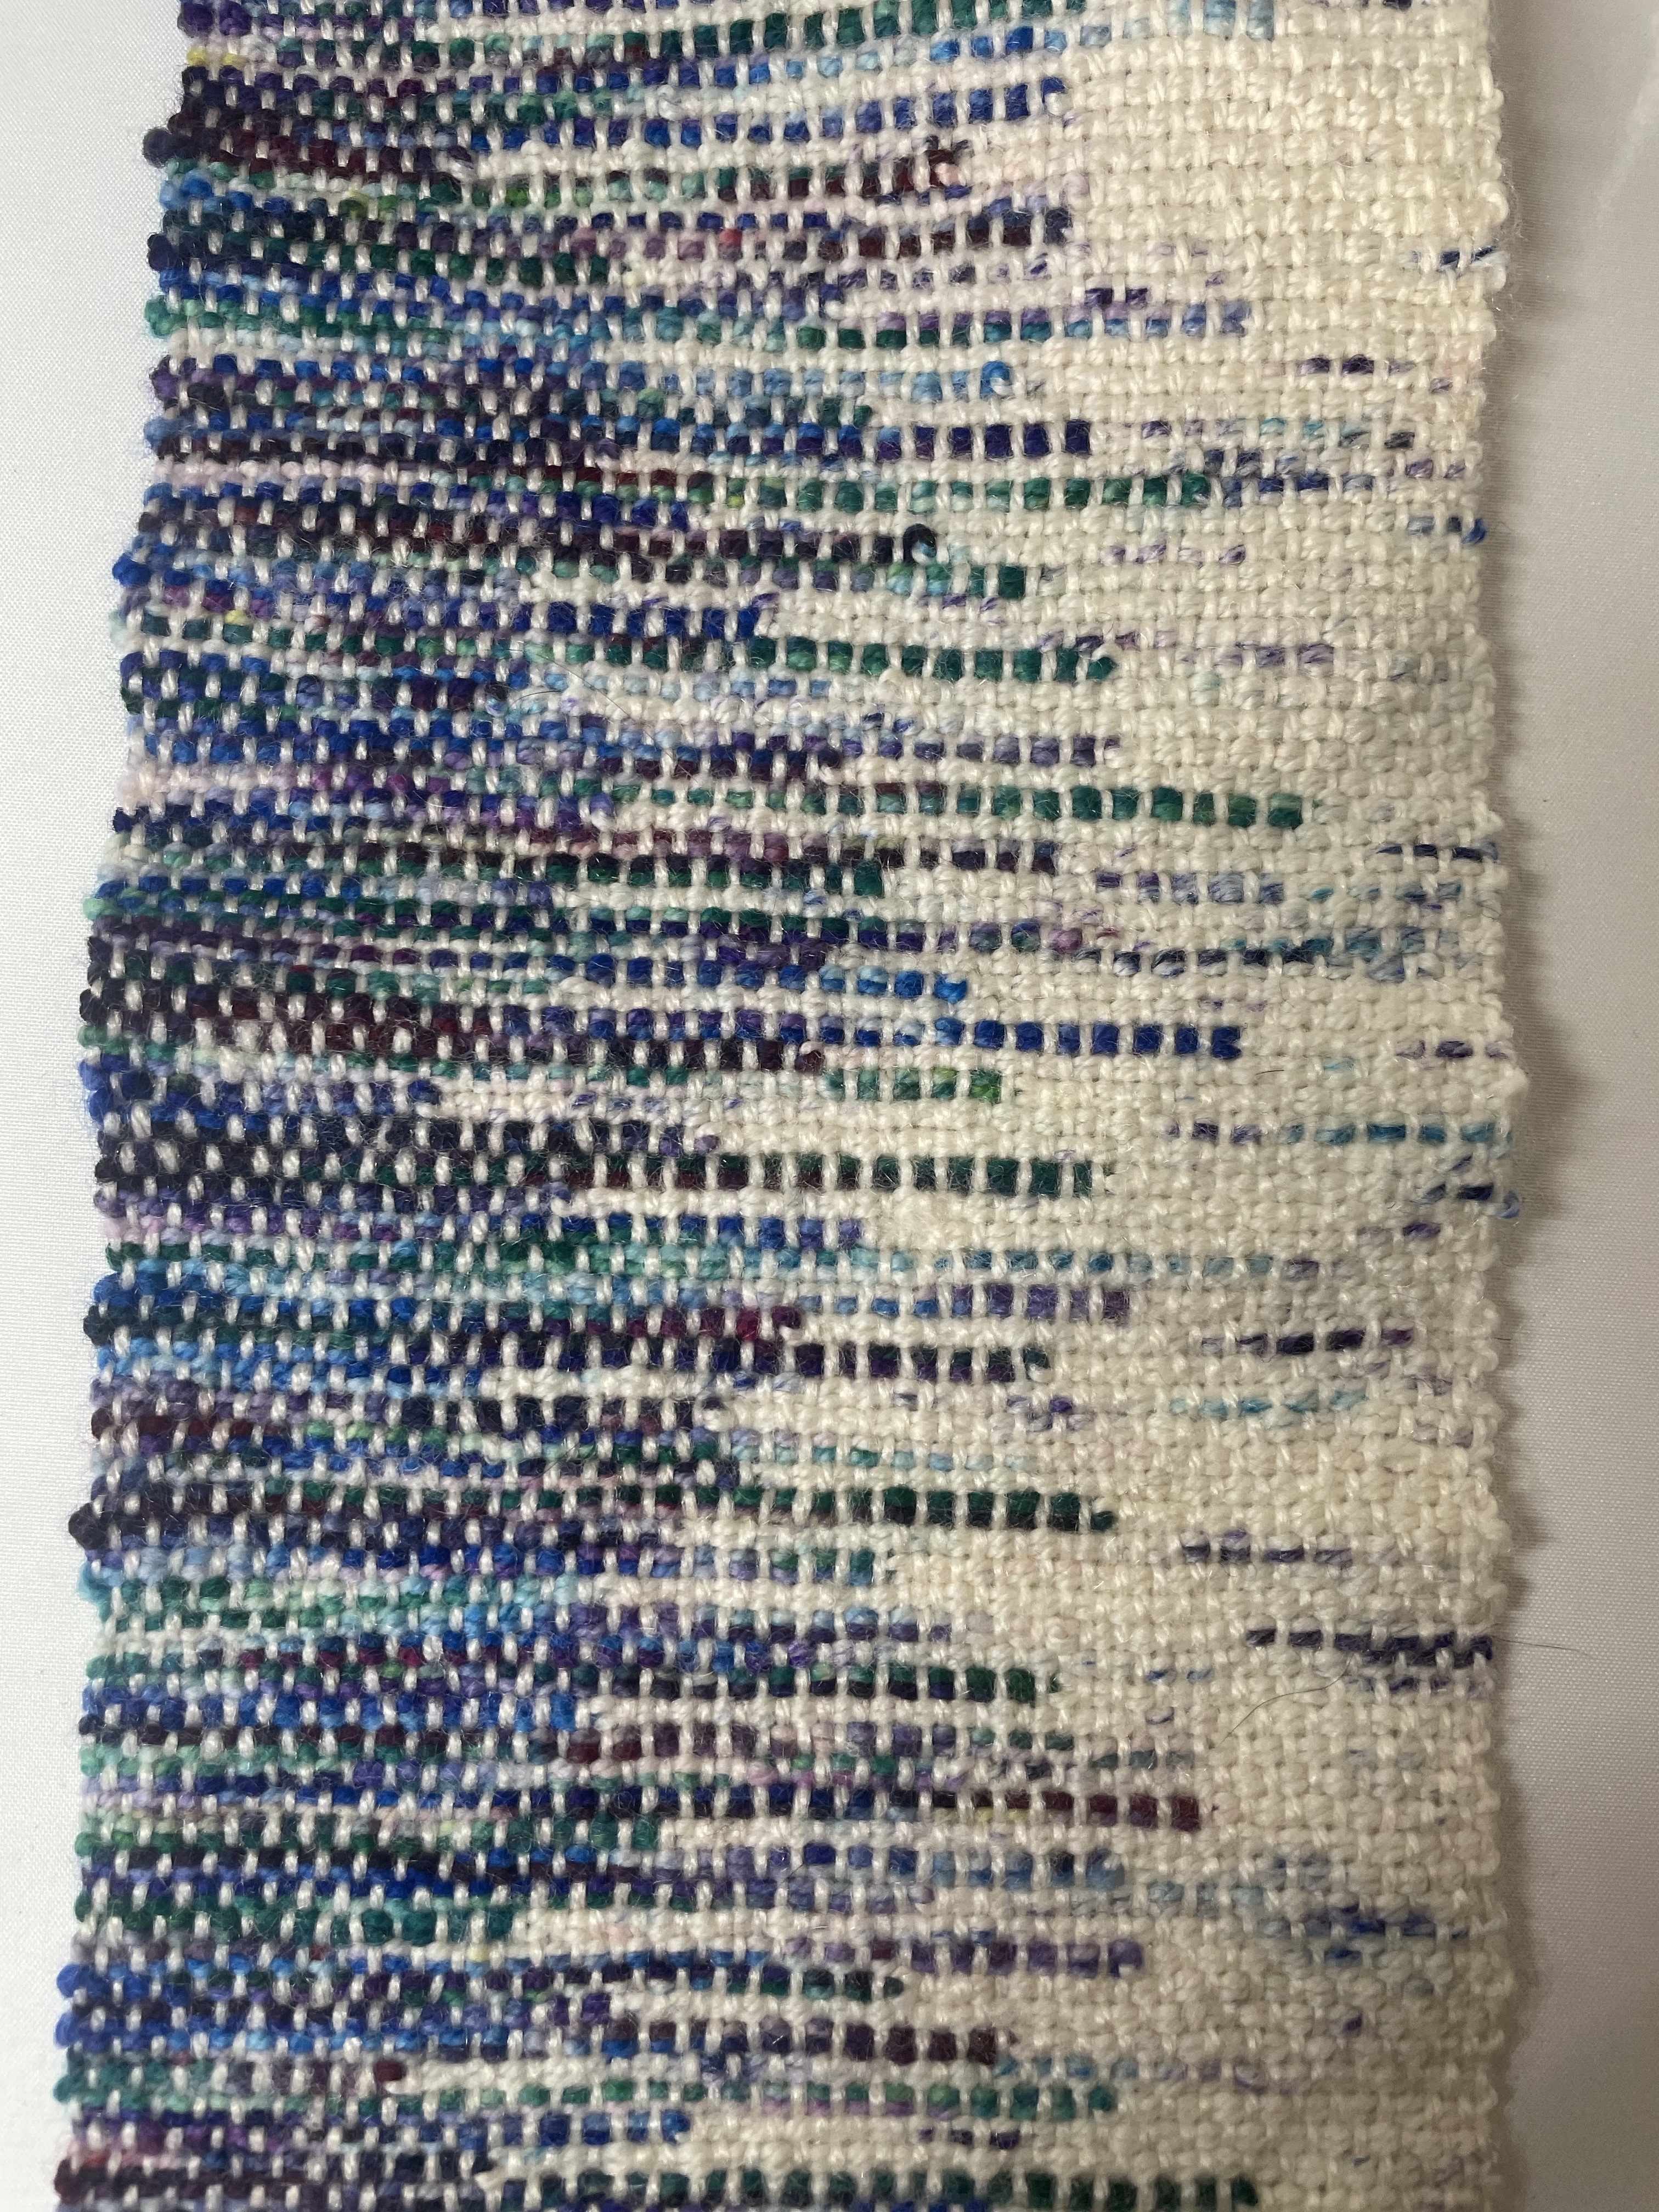
About a year ago, I tried out a new weaving technique that is really fun to do. Looking more complicated than it really is, clasped weft weaving utilizes the interlocking technique commonly used in tapestry weaving.
For those that do not weave, a brief description of terms. When weaving, there are two components to creating the cloth – warp and weft. The warp threads run lengthwise through the project and are held on the loom under tension during weaving. When woven on a loom, the weft threads run side to side and are inserted, or “thrown”, by the weaver. The resulting cloth is created by the interlacing of the warp and weft where both directions of threads are visible. When doing picture or landscape tapestry weaving the weft threads may change mid shed, the threads are wrapped around one another, or clasped, to avoid having a hole in the cloth.
On a loom, clasped weft technique involves two weft threads that are visually different. This can be two different colors, or shiny vs matte, etc. The basic idea is that one weft goes through the shed, wraps around the second weft and then pulls the second weft into the shed. This results in a weft that is doubled in each shed. The pattern created by the interlocking of the weft can be either planned out or random.
The picture above shows a wall hanging that I made for our guest room. This project was planned out to give an very even design in the clasped weft fabric.
This picture shows a scarf that I made that was a random interlock of the clasp weft. Combined with the variegated yarns, that complemented each other well, the result was a much more organic design.
This morning I started playing with an idea I had that involved a planned out pattern similar to the wall hanging. However, instead of just doing two colors, I opted to do alternating shed from either side to create an argyle looking design. Each shed included one weft yarn that was the same. I really like how it looks so far and look forward to finishing this scarf. After I finish this scarf, I think I will try another scarf where the colors of the sheds are all different to see what other fun designs will result.
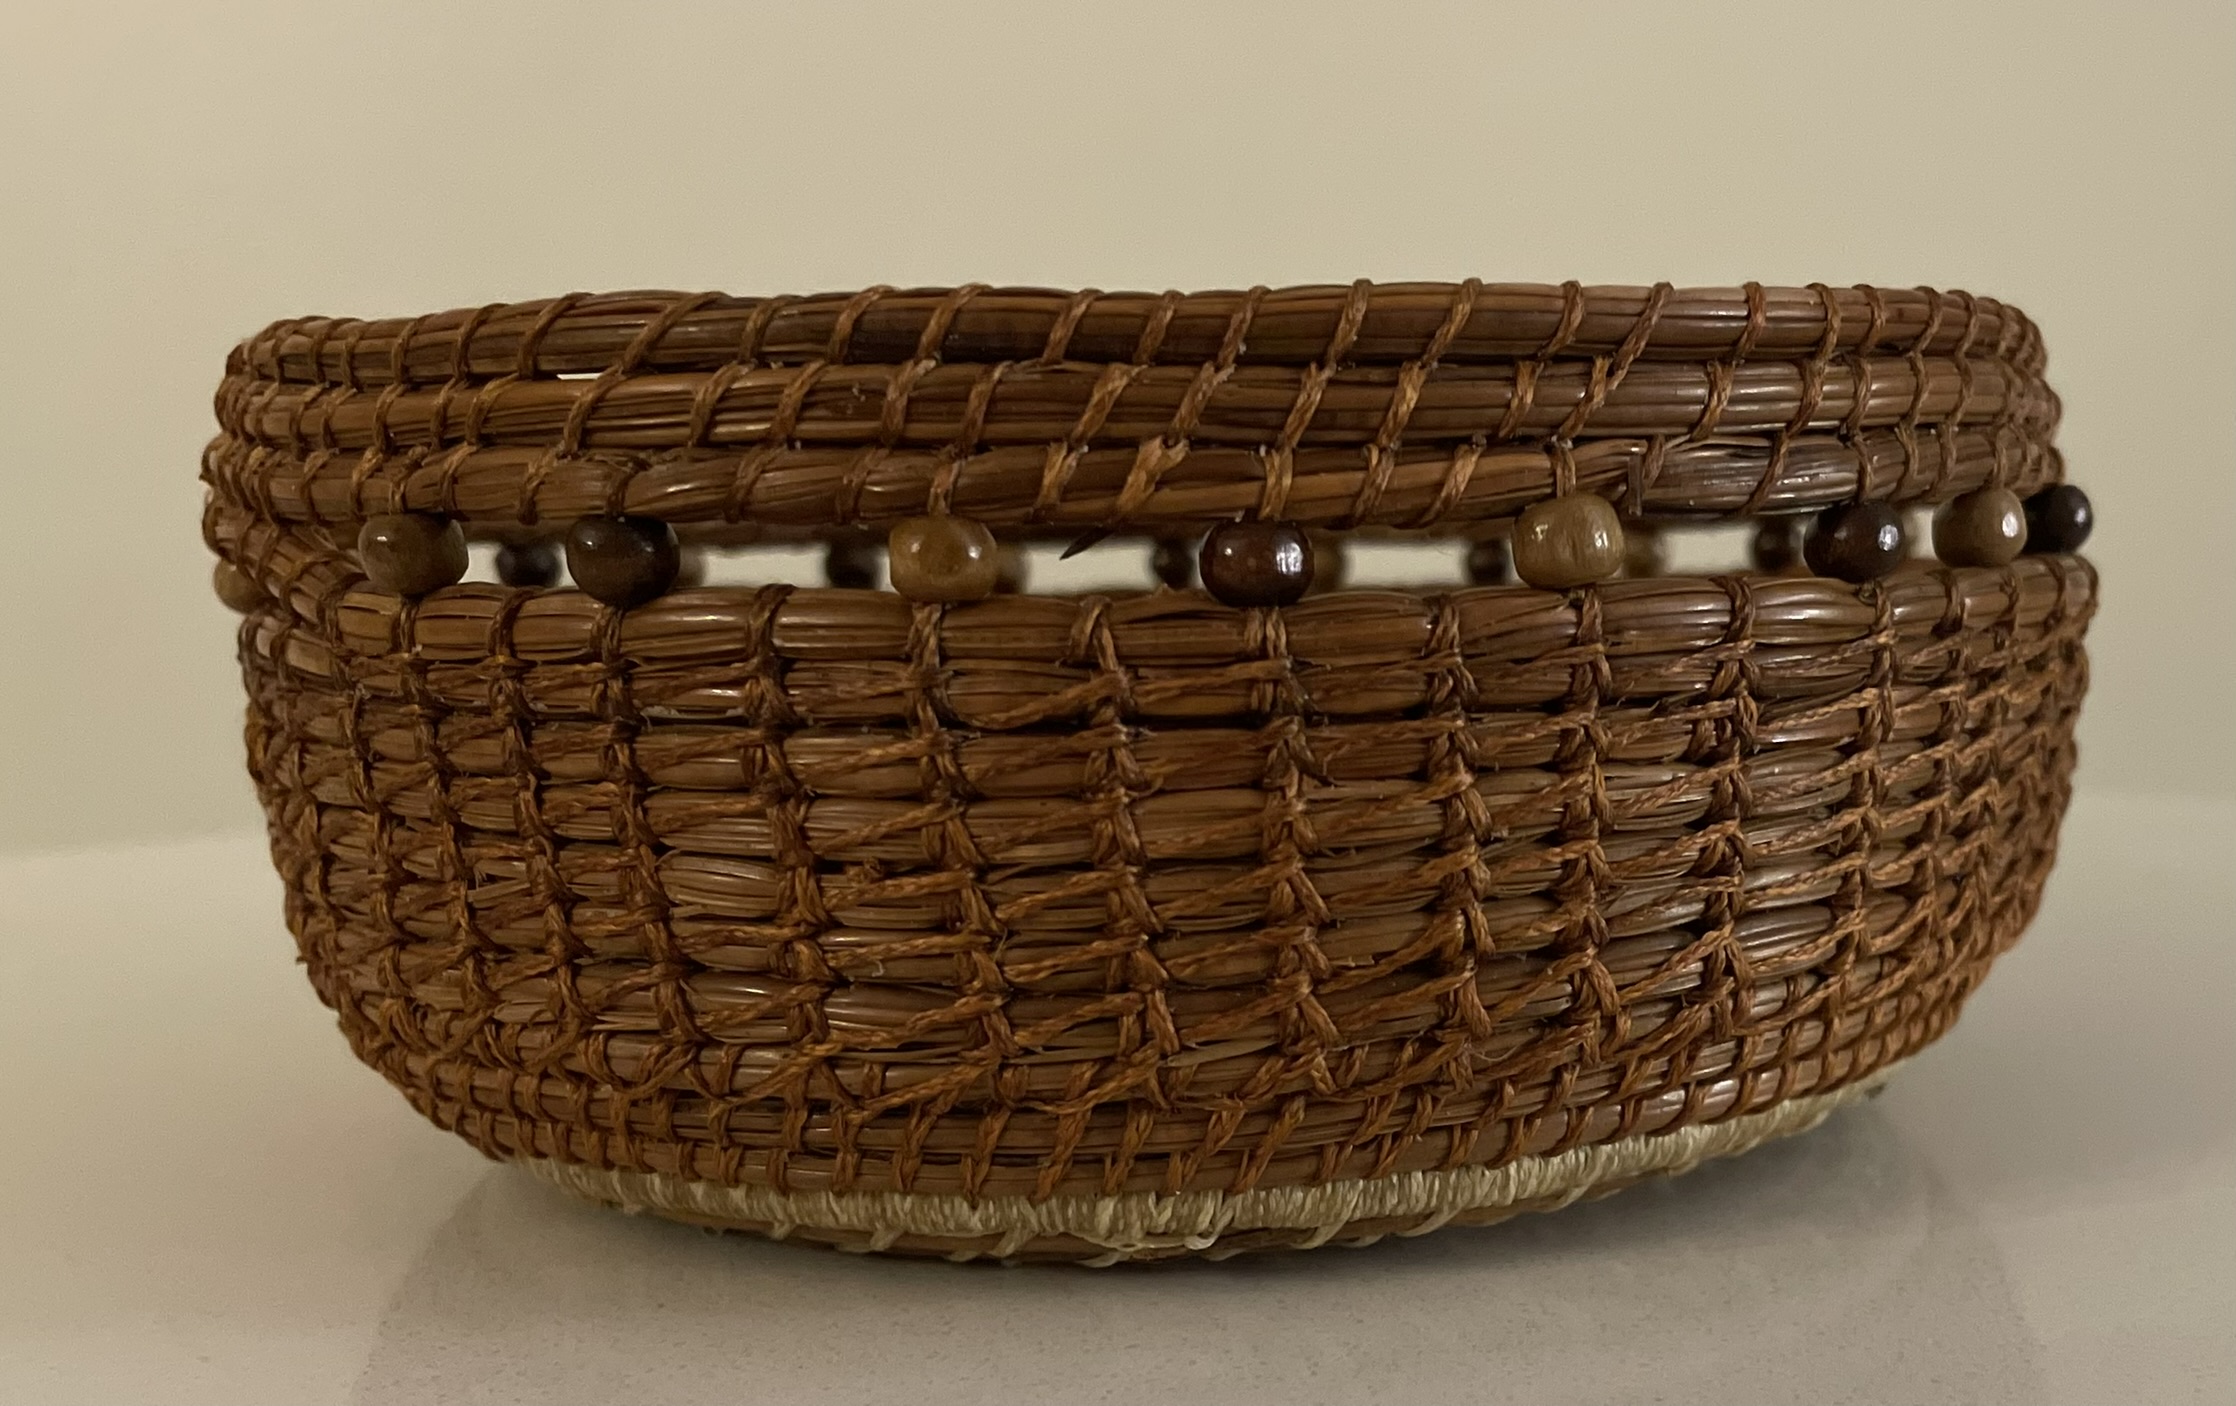
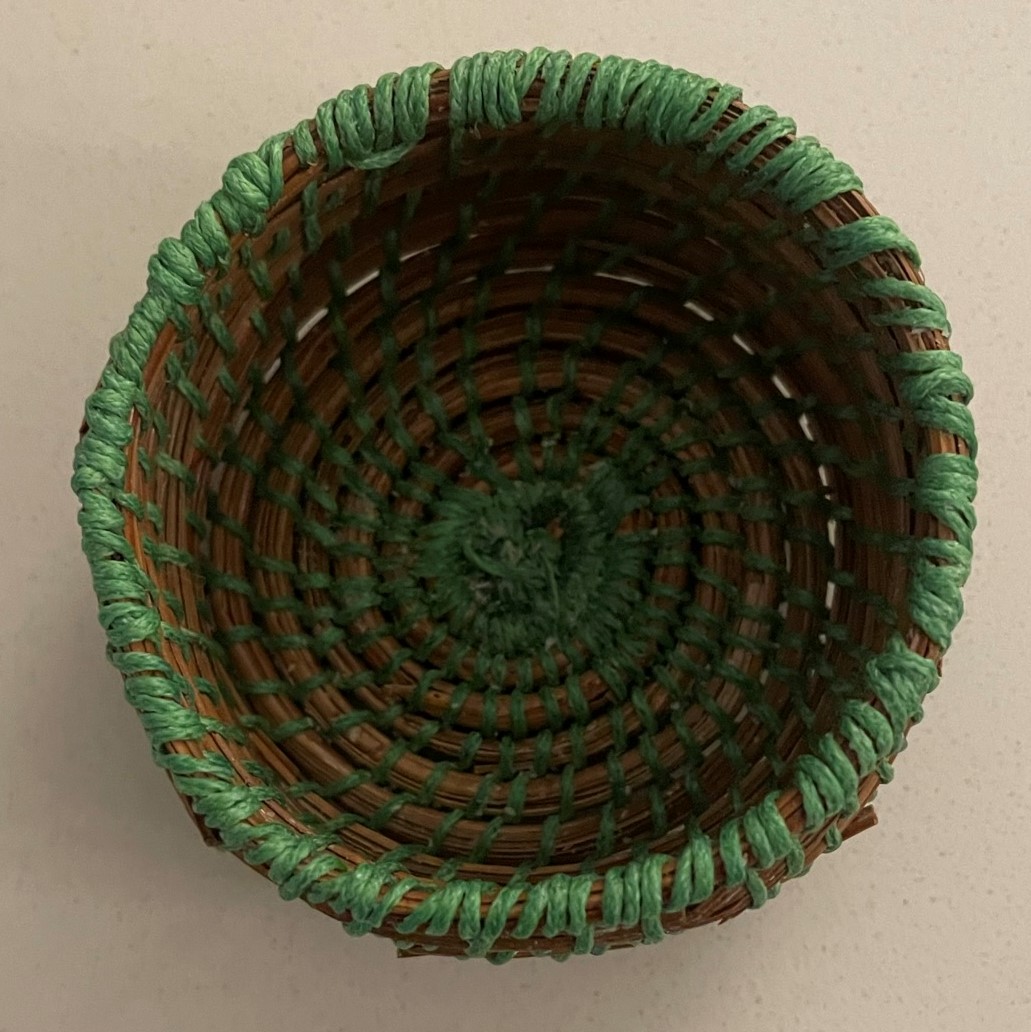
Having returned to Minnesota with a good supply of long leaf pine needles, I have been trying out some new techniques. In prior posts, I showed the baskets I made with the Simple Stitch, Wrapped Rows, Ti stitch and incorporating beads. So, here are a few more techniques I have been working on.
Back stitch and vase shaping. I started this project not really knowing what I was actually going to make, I just wanted to try some new stitches. The basket started out with a base of the basic stitch, followed by a row of wrapped needles. I then switched to the Ti stitch. I prefer this stitch because it is faster, easier, and stronger than the basic stitch. After completing the first half of the basket, I decided to make it into a vase shape. This would give me the opportunity to try some contour shaping of the basket. I also decided I would switch to a different stitch. I reasoned that using the Back Stitch would allow me better flexibility in the placement of each row of needles, thus making the shaping easier. The Back Stitch involves doing row of Simple Stitch. Then, once an entire row is completed, the sinew is wrapped the reverse direction around the circle using the same location of the original stitches. This results in what looks like diamonds on the outside of the basket. To finish the basket vase, I did two Wrapped Rows and added a couple metal charms and beads that I had in my craft supplies. I do need more practice in keeping my rows and stitches more evenly placed.
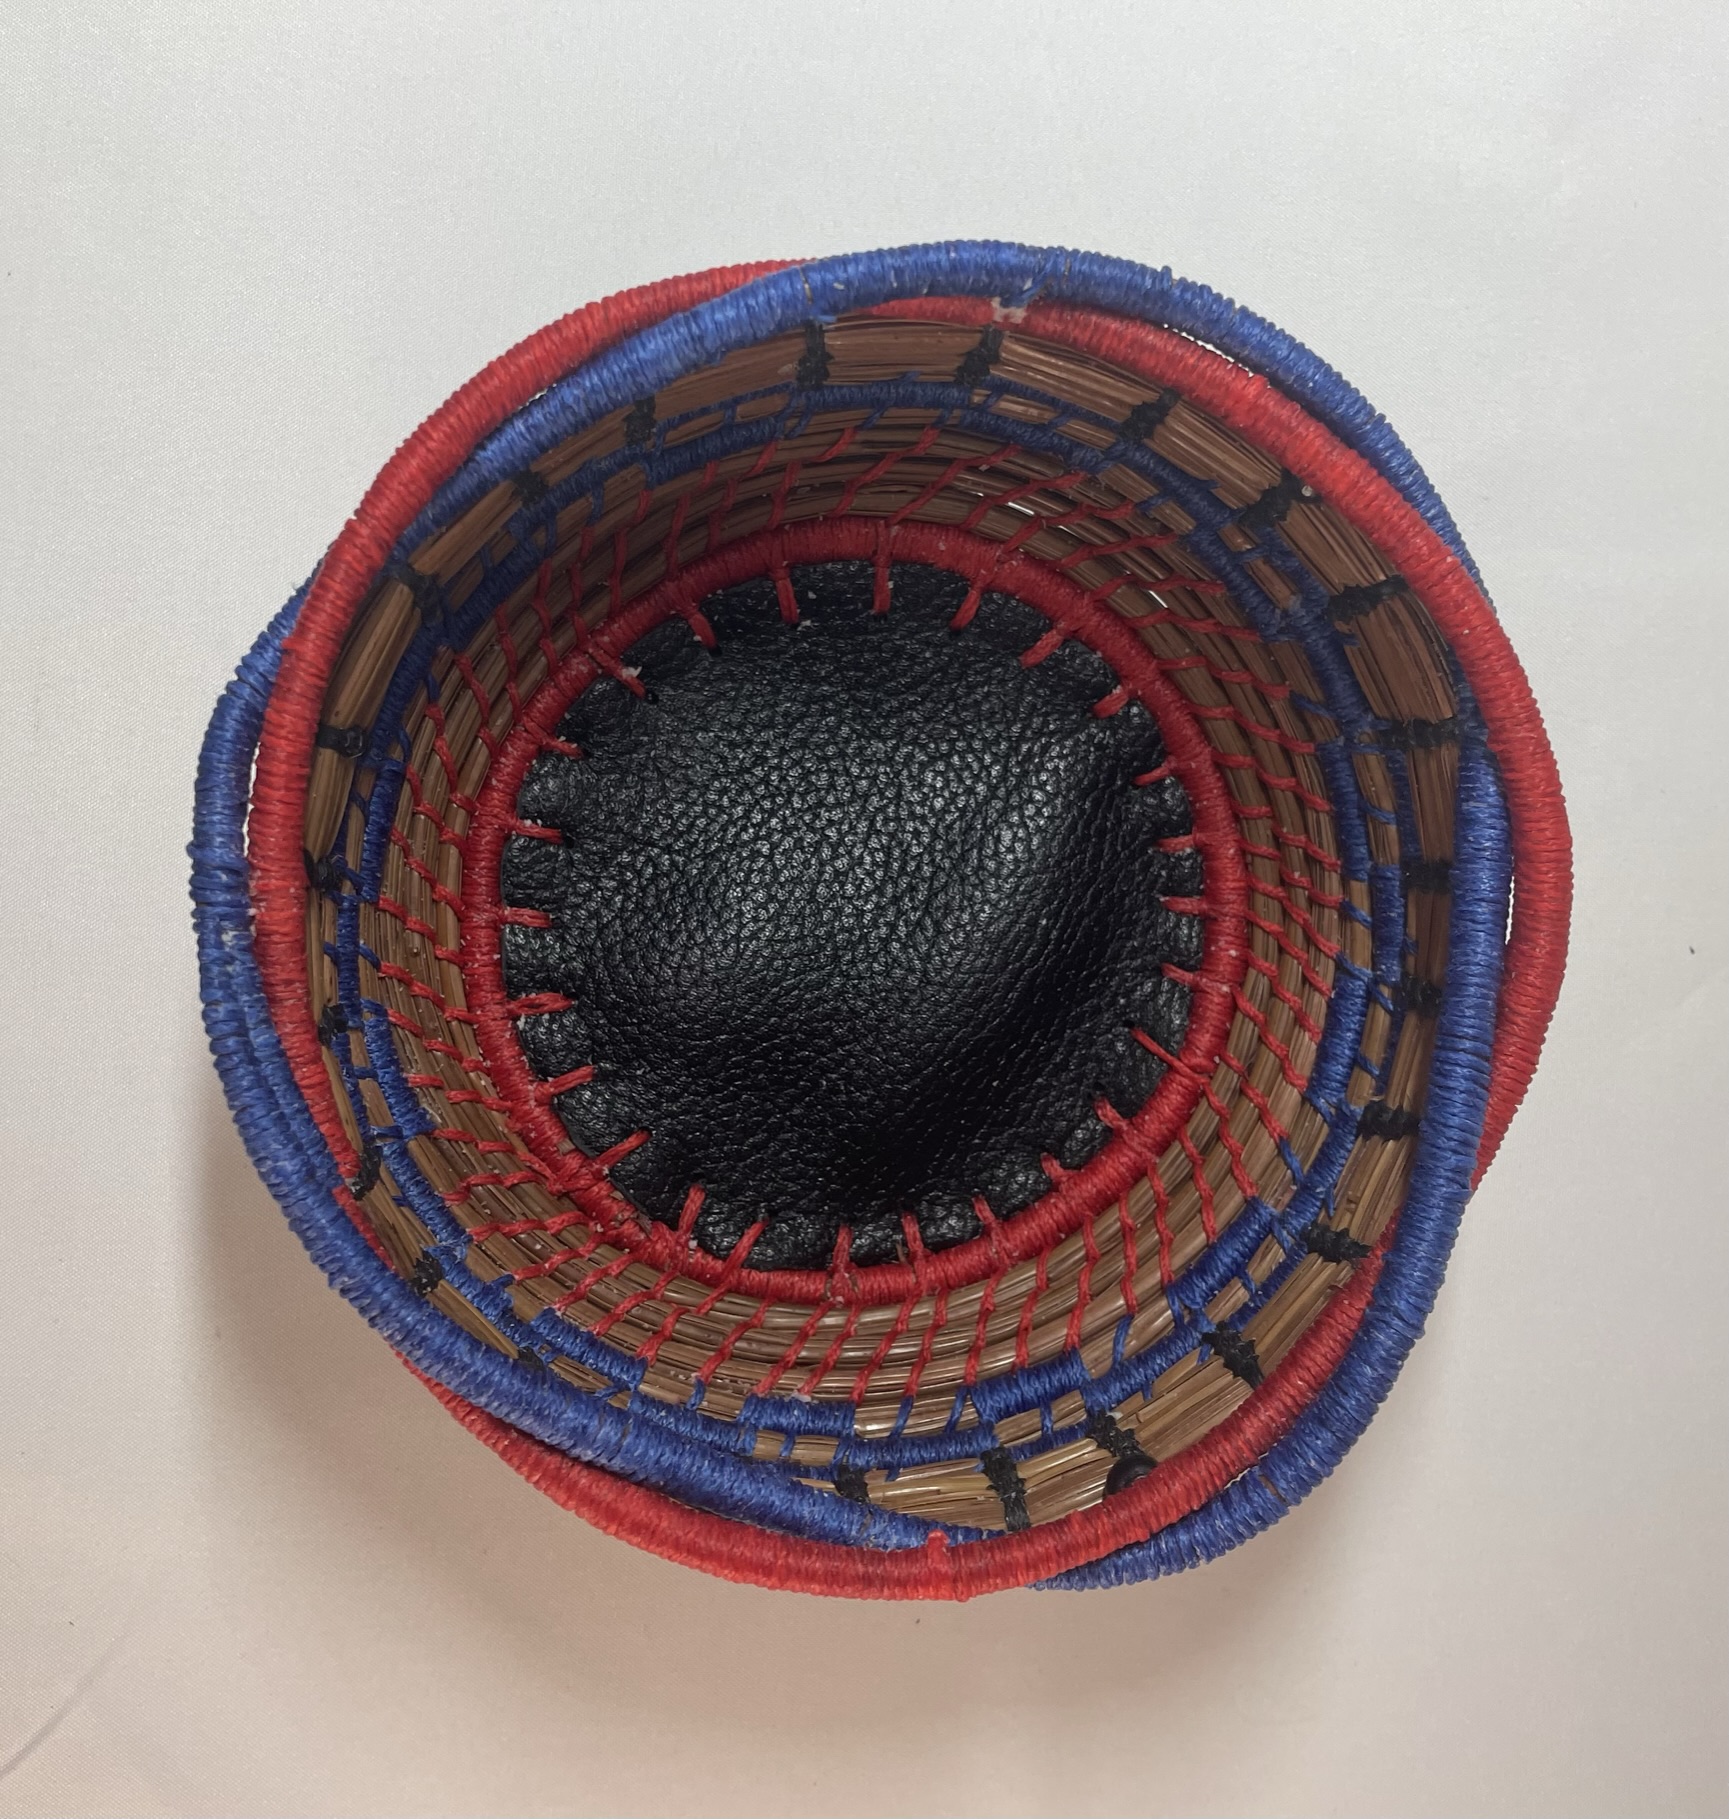
Leather Base and Twisted Rows. This project started with a circle of leather rather than initial rows of wrapped needles. Two matching circles of leather were cut, positioned wrong sides together and holes punched using a leather hole punch. A wrapped row of needles was then stitched to the outer edge of the leather. The weaving then included rows of basic stitch, alternating wrapped stitch sections and a couple rows of Ti stitch. To finish off the basket, I tried out making interlocking rows of wrapped stitches. The first row of an interlocking finish was similar to when beads are place and involved leaving long sections of wrapped needles not connected to the lower row. The second row, however was trickier than I expected. The wrapped needles tended to want to break when I was trying to push the bundle into the gaps of the previous row. I found that if I wrapped the needles in a wet (not just damp) towel over night, then the needles did not break. In this basket, my stitches were more evenly place, but I still need more practice.
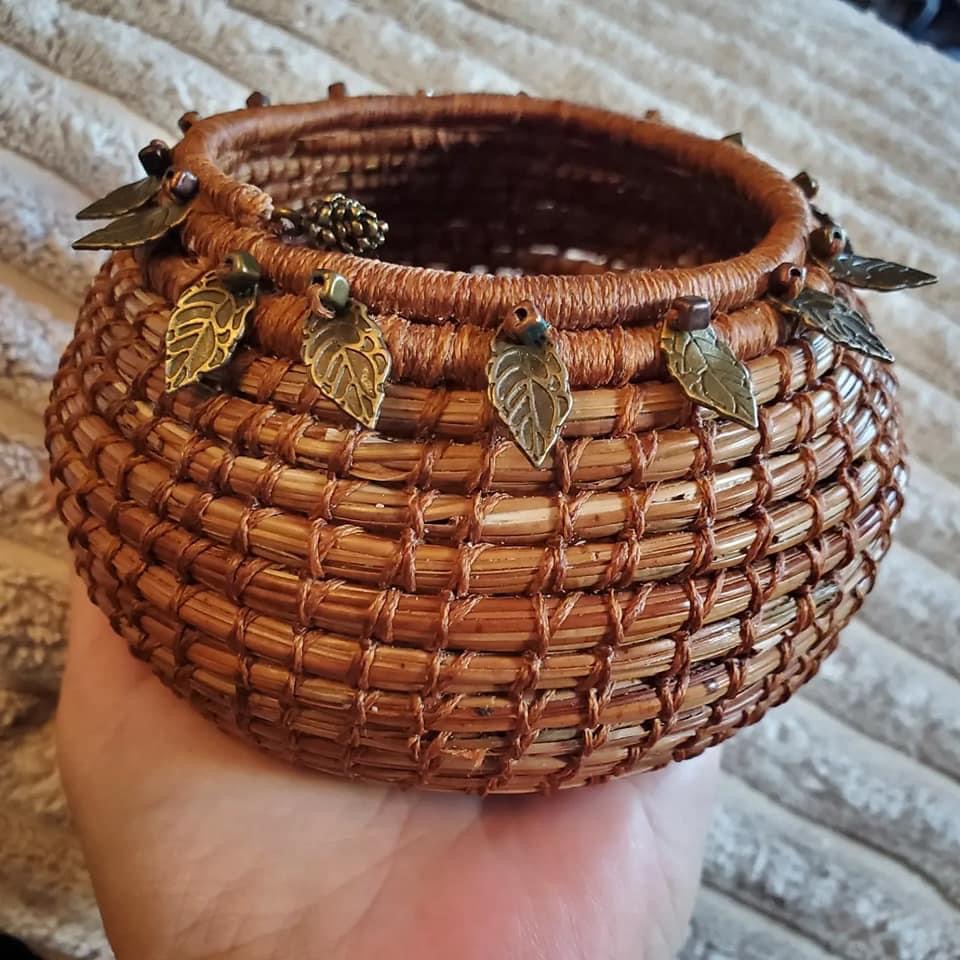
V stitch. My final project, I had only one real goal – making the rows and stitches more uniform and even. This project again started with a wrapped row center and a Simple Stitch base. The body of the basket was completed with the V stitch. The V stitch is made by placing two stitches in the same location. One stitch goes diagonal like the simple stitch. The second stitch goes straight up. To finish off the basket, I added some leaf charms and beads. When making this basket, I was successful in creating even rows. I do, however, need more practice on this new stitch.
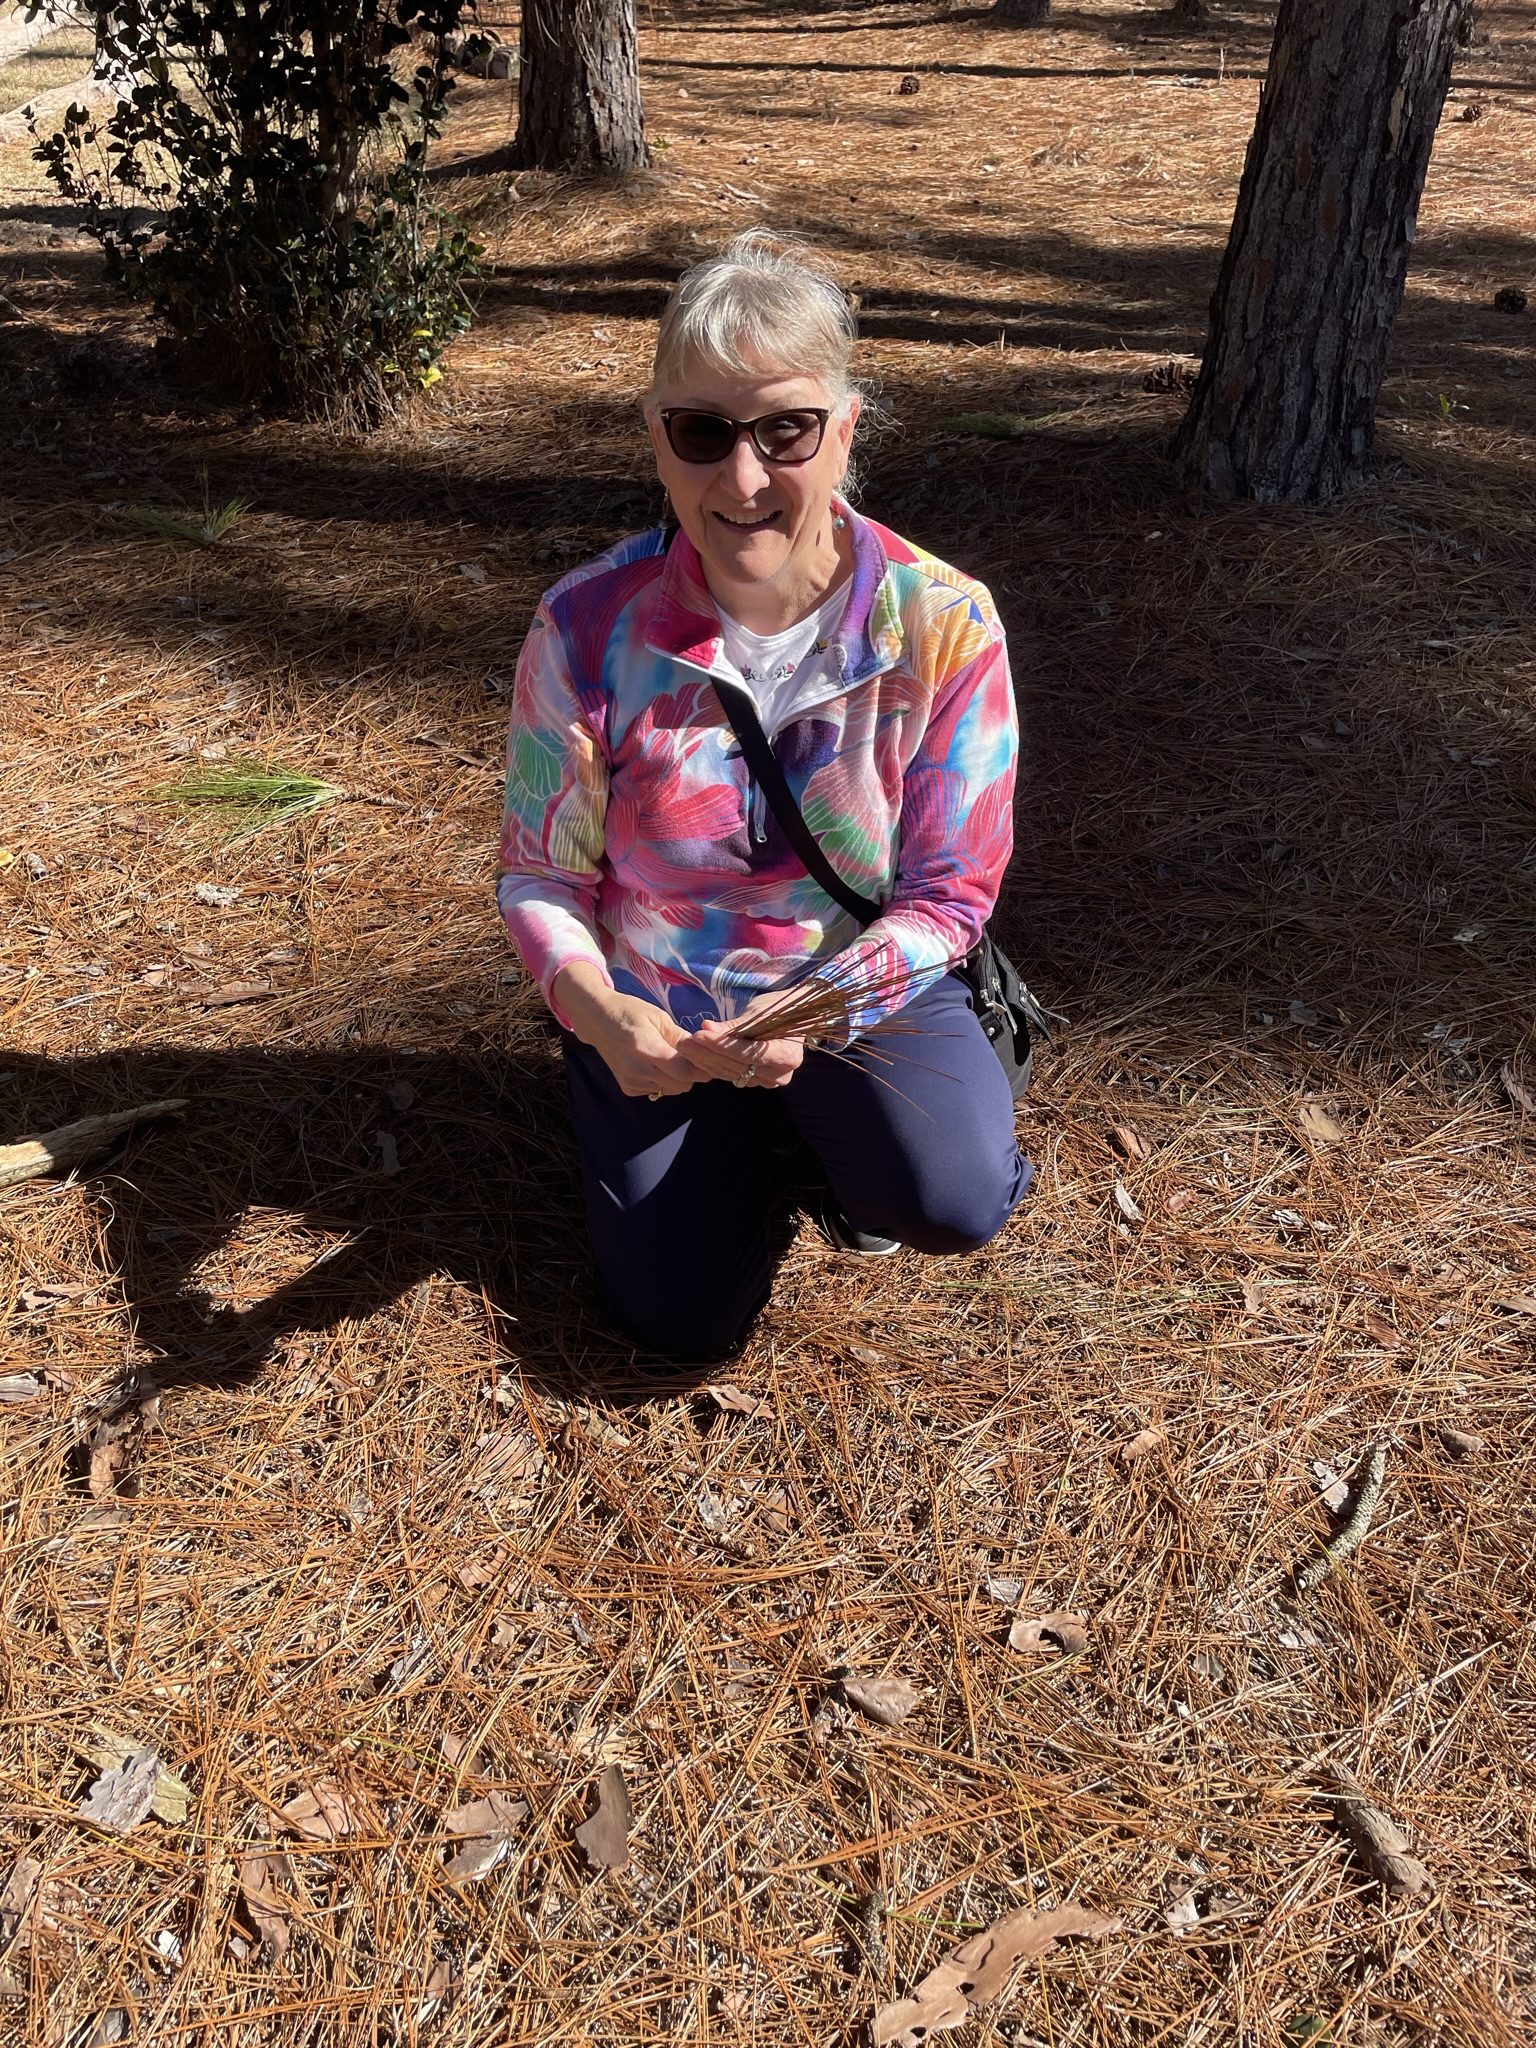
Discovering a new craft is always fun. And, learning more about the craft is even better. So, after making my first pine needle basket, I spent some time learning more about the craft. I was also curious to see if needles that were handled gently and harvested specifically for weaving were different than those harvested for landscape mulch. A quick on-line search yielded no results for places to purchase pine needles near Hilton Head Island. Etsy, however, proved more useful. Looking over the listing of shops that sold pine needles, I discovered a seller that lived in Lyons, GA (a two hour drive away). I sent the seller a message asking if I could visit their farm to purchase needles directly rather than ordering them. I was happy when I received a reply saying yes I could visit.
My visit turned out better than I could have imagined. I met the most delightful couple. Tash and Darrien kindly welcomed me to their home and showed me around their property. They then took me for a tour of their farm (over 300 acres of long needle pine trees grown for pine mulch) and allowed me to harvest pine needles for myself. I went to their farm intending to purchase needles, and instead I was able to take three garbage bags full of needles for free! Tash’s Etsy shop is called pineneedlesbyramsey.
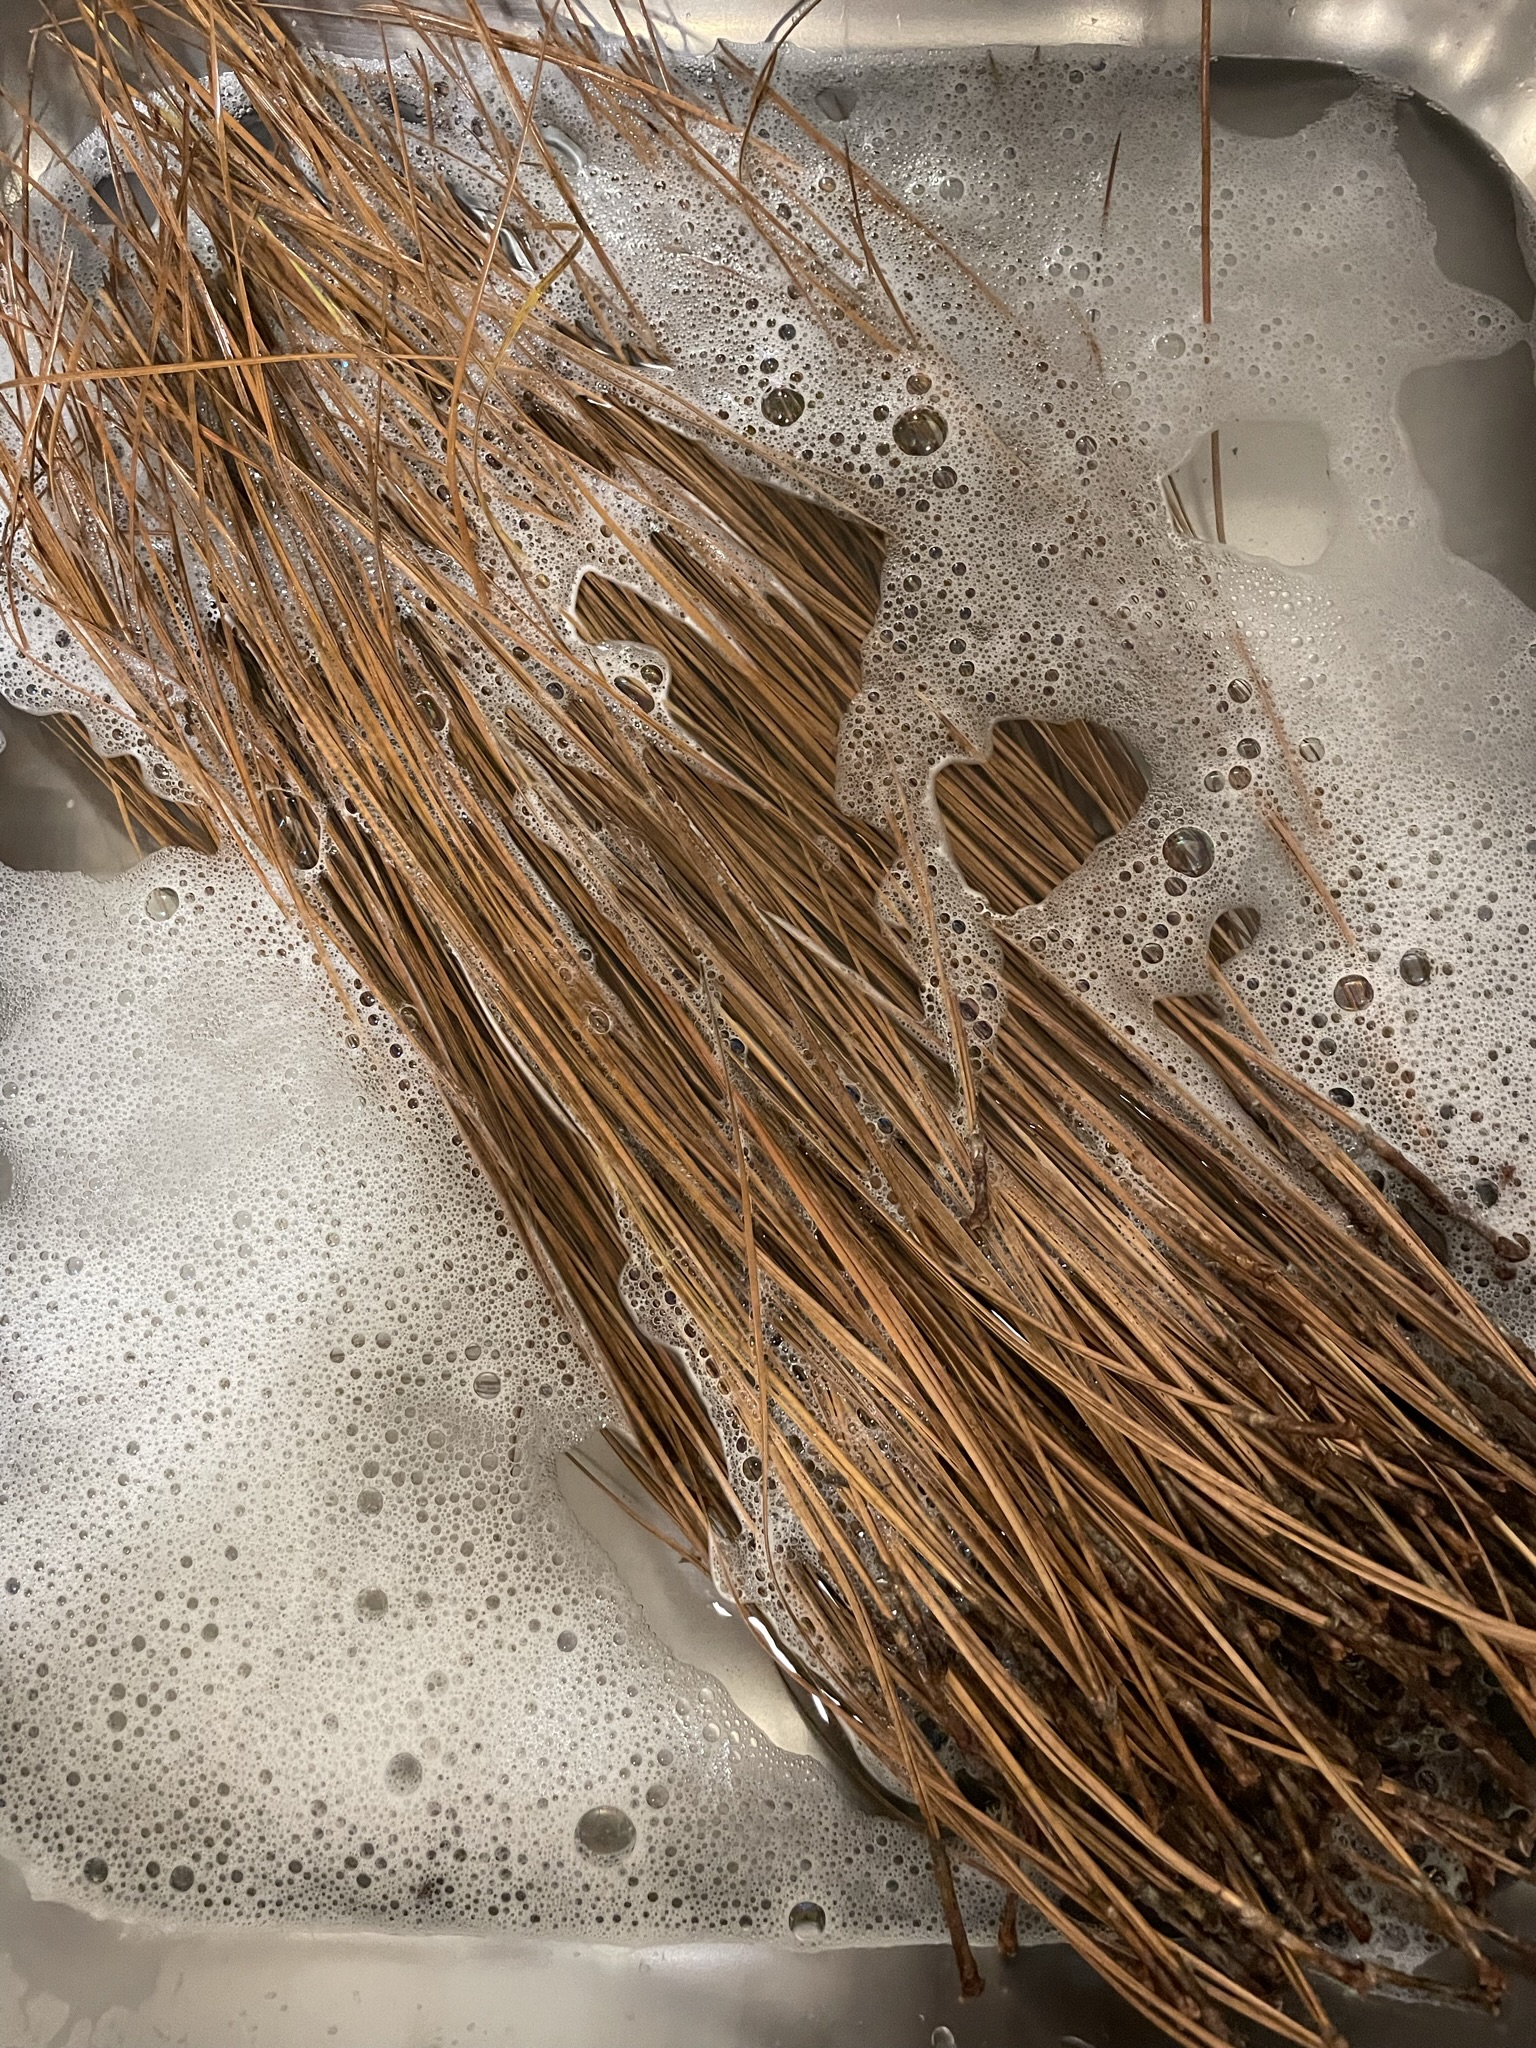
After returning to my villa, I set about the task of preparing the needles for use. First, I sorted them, discarding broken or short needles. Then, I washed the needles and soaked them in hot water for 30 minutes.
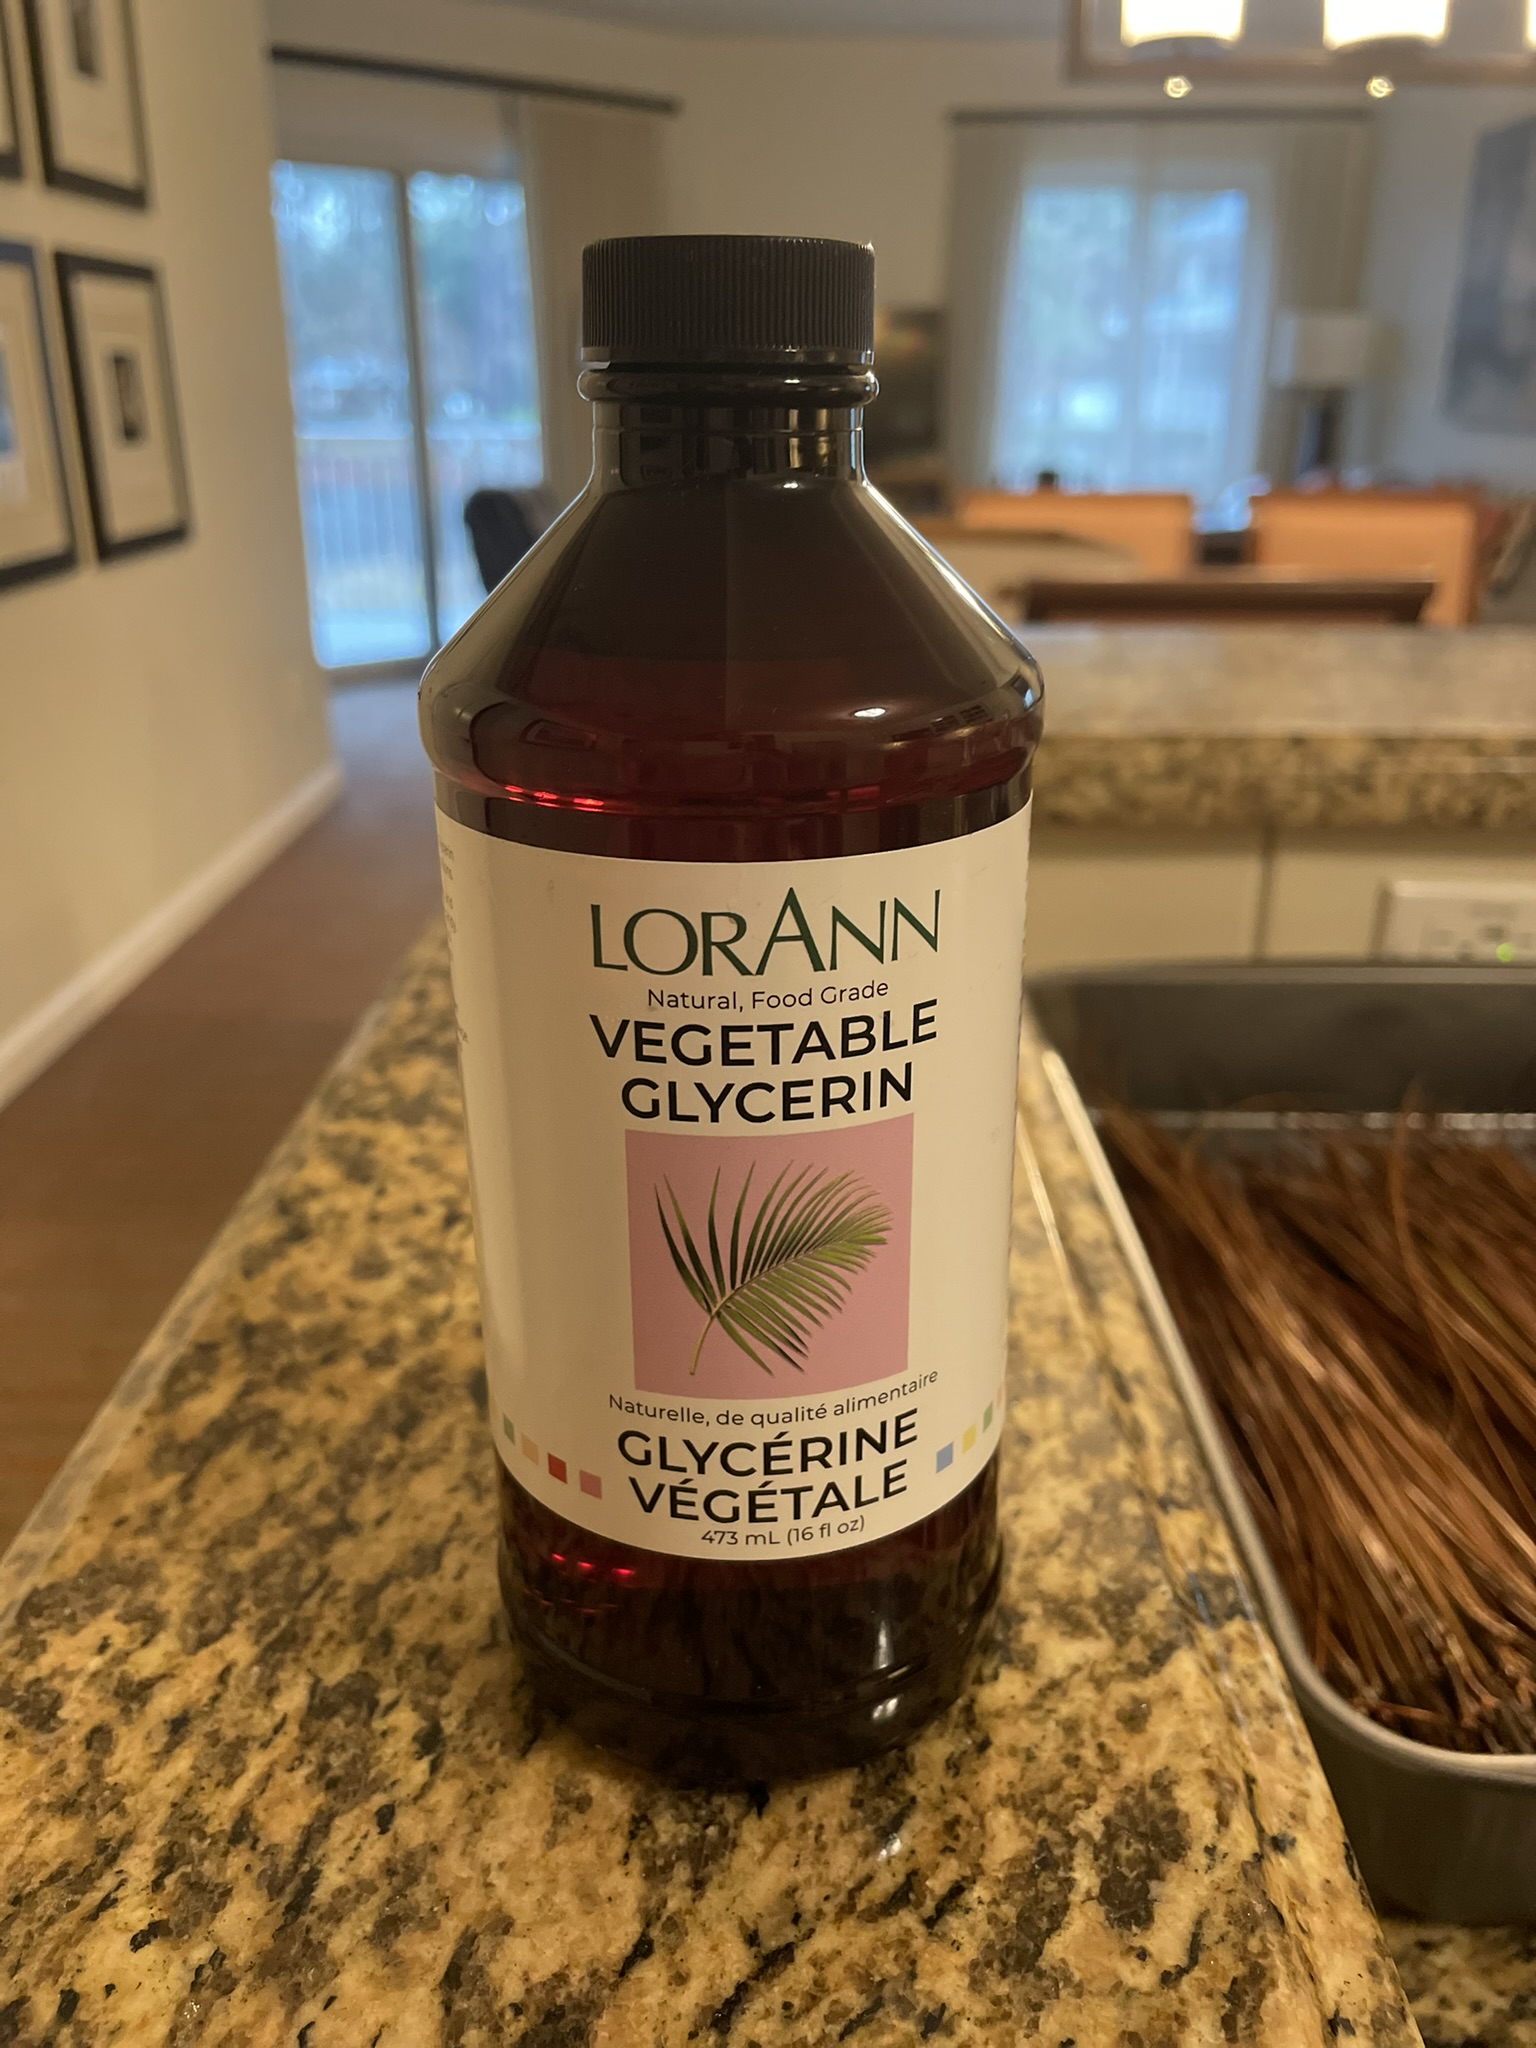
Having read that glycerin helps to make the needles flexible and more durable, I decided to try that. The on-line videos I had watched described using an electric roasting pan or a foil roasting pan for the glycerin treatment. Being away from home (and not wanting to too much), I originally planned to purchase a couple foil pans. However, when shopping I discovered some metal roasting pans that were the right size and only a dollar more than the foil pans. Being metal, they would last longer than foil pans and I could use them for other crafting activities.
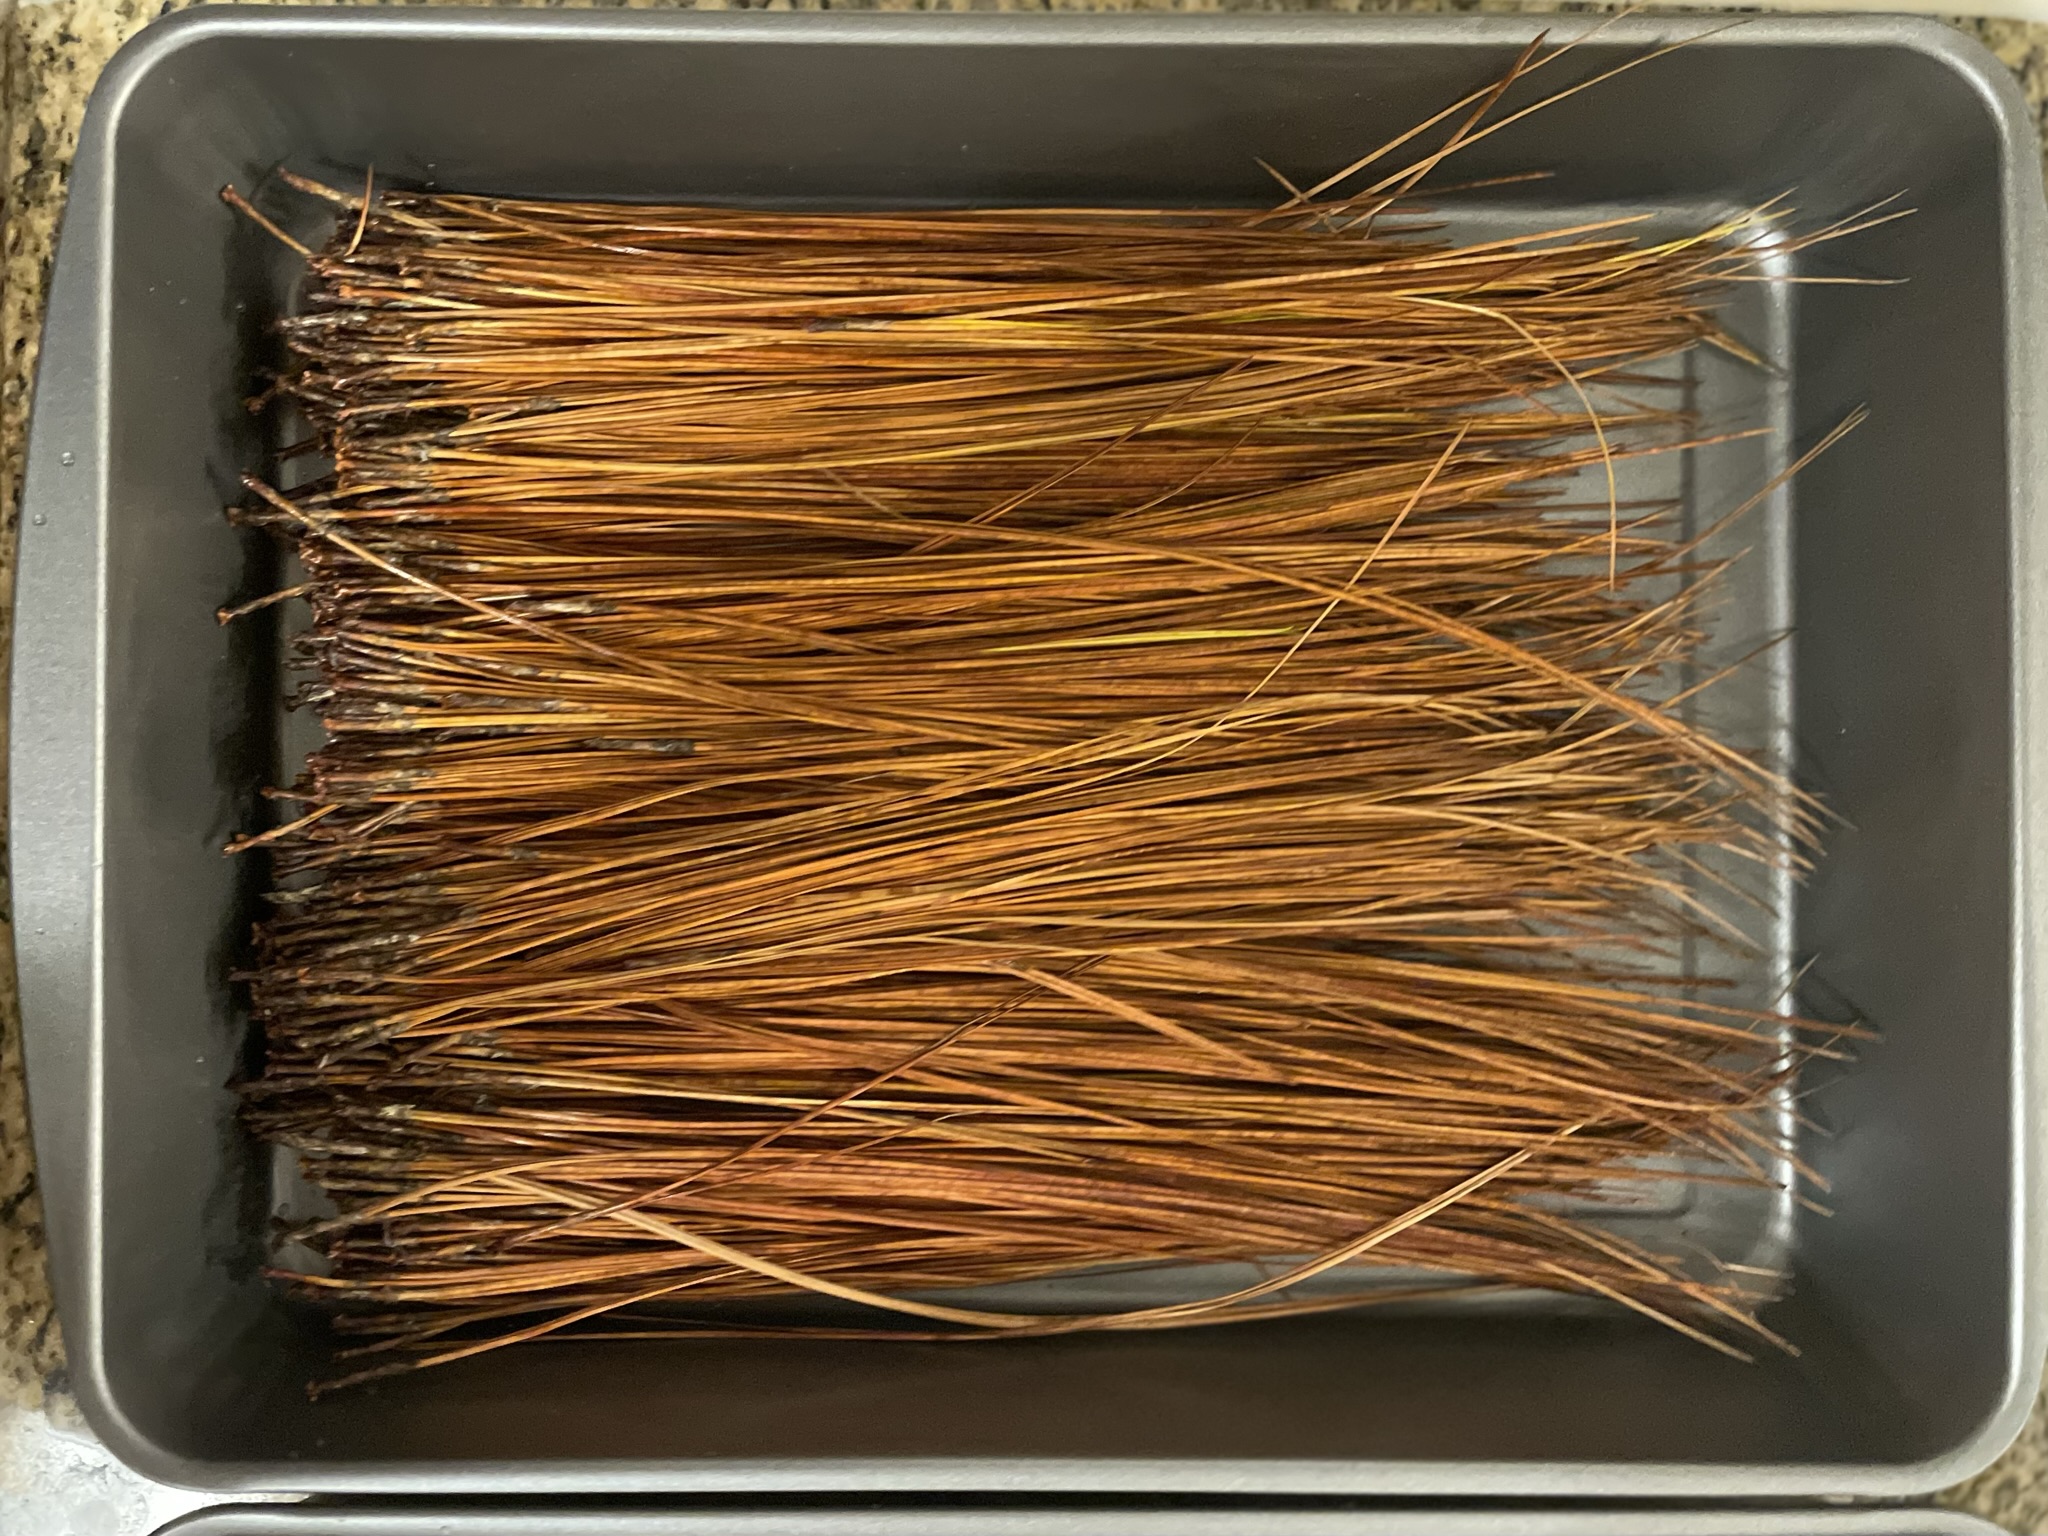
The needles were layered into these pans, covered with a dilute solution of glycerin (1:4 with water), placed in the oven at 250 degrees for three hours, rinsed well with warm water and placed on a towel to air dry.
After drying, I wrapped the needles into 4 ounce bundles to be able to take them back to Minnesota. I plan to try dyeing some needles with my Procion fabric dyes when I return home.
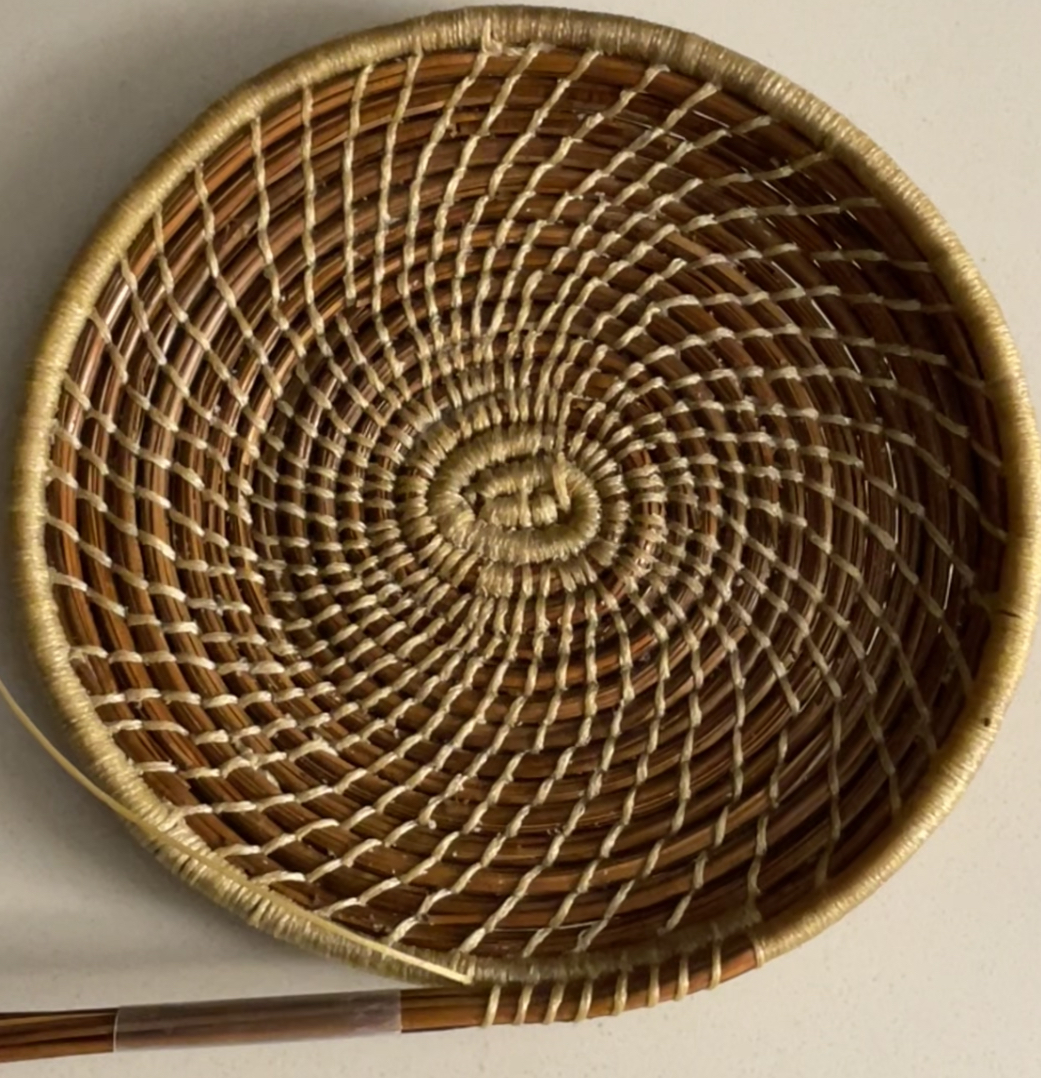
With my glycerin treated needles, I then made another basket. The glycerin really does make the needles more pliable. And, these weaving was quicker because the needles from the farm were about 15 inches long rather than 8 inches that I had used on my previous basket. When finished, this basket feels much stronger than my sample basket did. Because of this, I treated my little basket in a glycerin bath and it too feels stronger.
For my second basket, I used the traditional slanted stitch for the bottom of the basket. After doing a wrapped row, I transitioned to the Ti stitch. I really like this stitch much better – its more decorative and stronger. And, instead of having to split the waxed thread with each stitch, the thread is carried over two rows and the needle is inserted between the rows rather than in the stitching. This was much more “finger friendly” and require less force to do the stitching.
A row with beads, three rows of traditional stitch and my new basket was completed. I am really enjoying this new craft and look forward to making more baskets in the coming months.
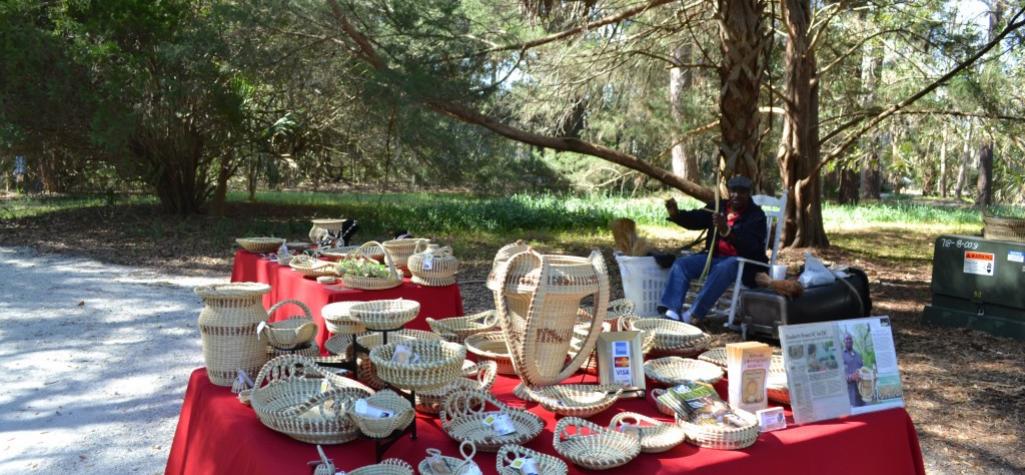
Fall of 2020, I took a much needed break from work and spent ten days in South Carolina. While on Hilton Head Island, I visited the Coastal Discovery Museum to learn more about the South Carolina Lowcountry. The museum was very interesting. However, even more interesting was watching some local craftsmen making baskets with sweetgrass. Their craftsmanship was amazing.
Now that I am retired, I made plans several months ago to escape the snow and cold of January in Minnesota. So, I am currently back on Hilton Head Island. When making plans for my travels, I looked into taking a class to learn how to weave baskets. Unfortunately, the only classes that I could find were extremely expensive. Not knowing if I would enjoy basket weaving, I didn’t want to spend a lot of money and decided to look for on-line videos instead. In my search, I came across videos on weaving baskets using pine needles rather than sweet grass. Remembering the abundance of pine needles near where I was planning to stay, I thought that this was a better type of weaving to try. After all, the materials would be nearly free.
Planning for my trip, I watched a few videos and packed supplies that I would need (waxed sinew, needles and a small plyers). Upon arrival in South Carolina, I collected a couple handfuls of pine needles. After washing them, I started my first basket.
After cleaning, the needles are stored in a damp towel to keep them pliable for weaving.
To weave pine needle baskets, long-leaf pine needles are needed. Unfortunately, the needles found in my home state of Minnesota would not work well because they are less than six inches in length. But, in South Carolina, the needles found in the landscaping mulch are about 10 inches long.
To begin weaving, the needles caps (dark end of bark that holds clusters of needles together) are removed and the individual needles (about 20) are held together in a bundle using a small piece of a plastic straw. There are metal coiling gauges available on-line. However, I like the clear straw pieces because I can see how the needle bundle looks inside the straw and verify that the ends are buried inside the bundle. So, I will stick with using straws for now.
Waxed sinew is wrapped around about two inches of pine needles. The wrapped bundle is then bent to create the center folds of the coil and a couple large stitches are taken through the fold to hold the two sections together. Needles are added to the bundle inside the straw continuously as you weave. More needles are wrapped and then tacked together with stitches. Once the beginning coil is made, the stitches are then spread out slightly so that some of the needles show through.
As the size of the weaving increases, the spacing of the stitches also increases.
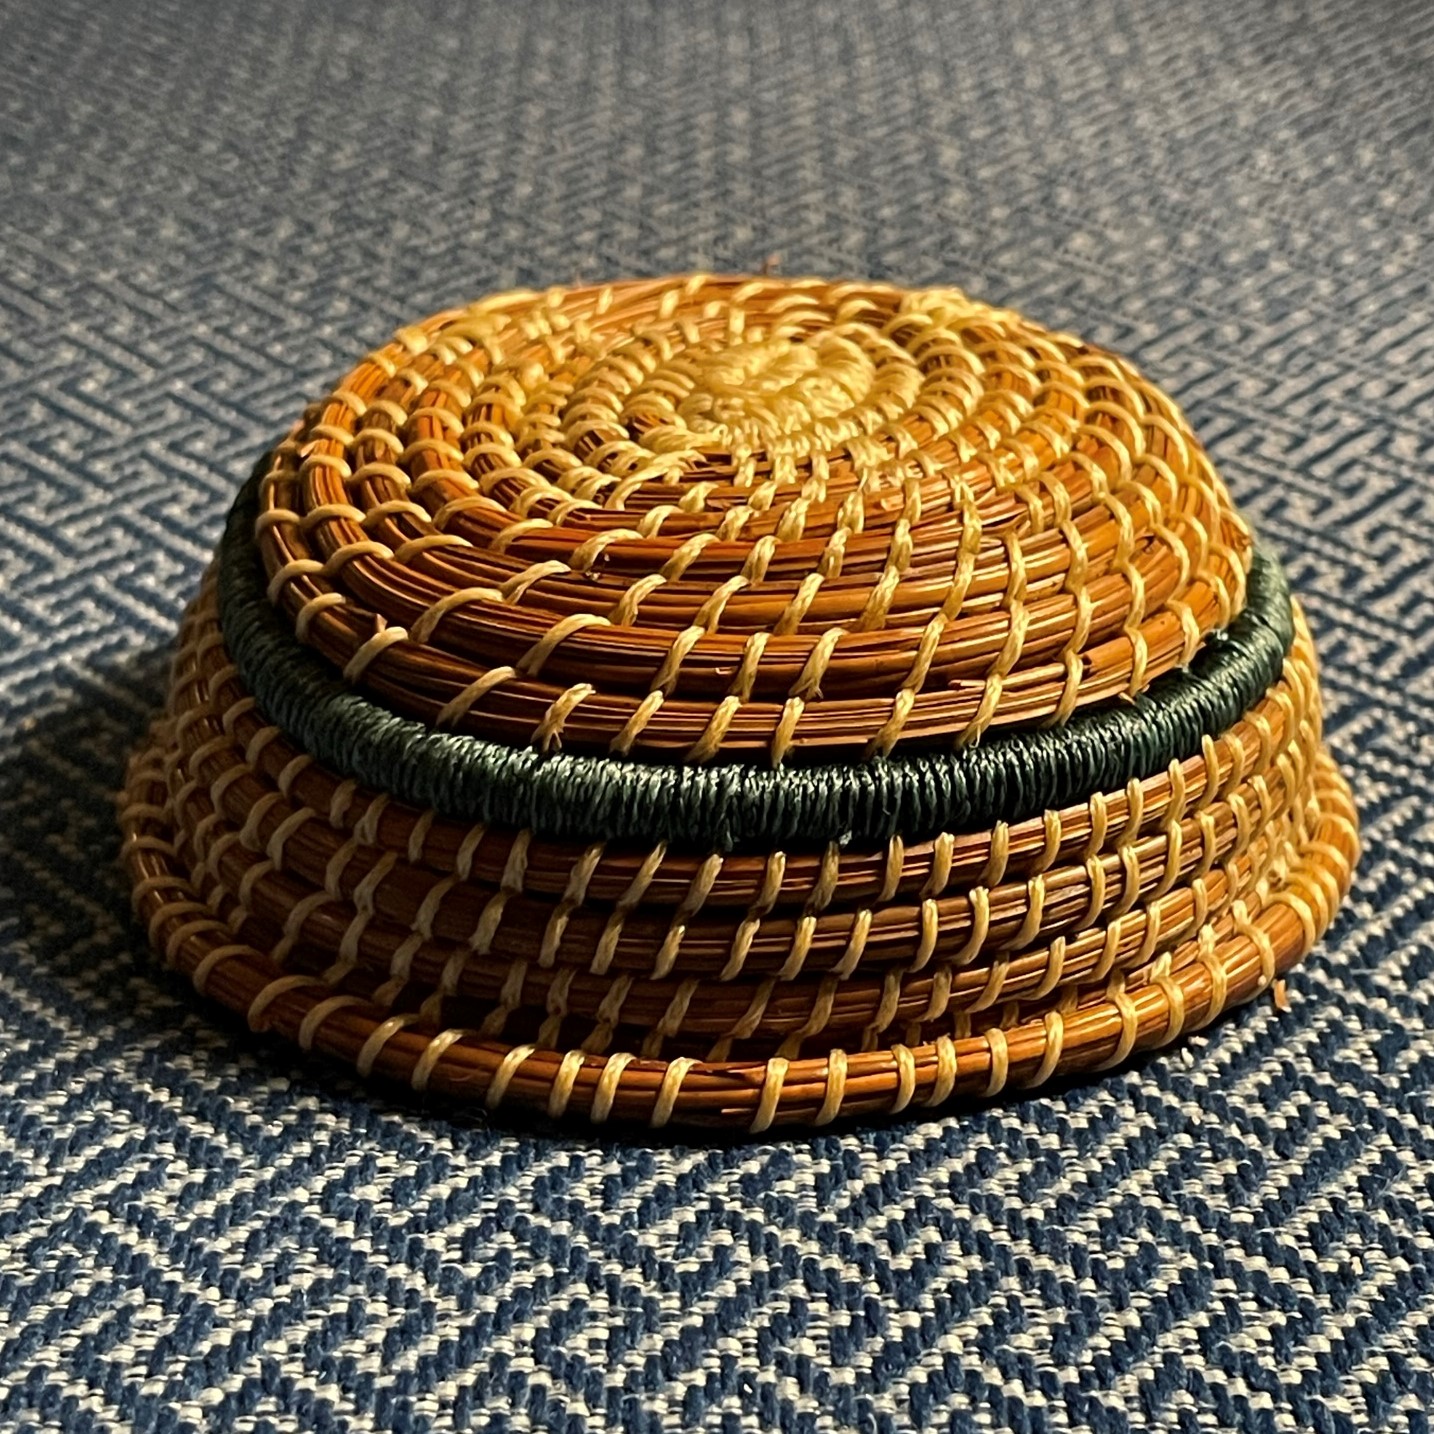
To add some interest, I included a wrapped row in a dark green sinew.
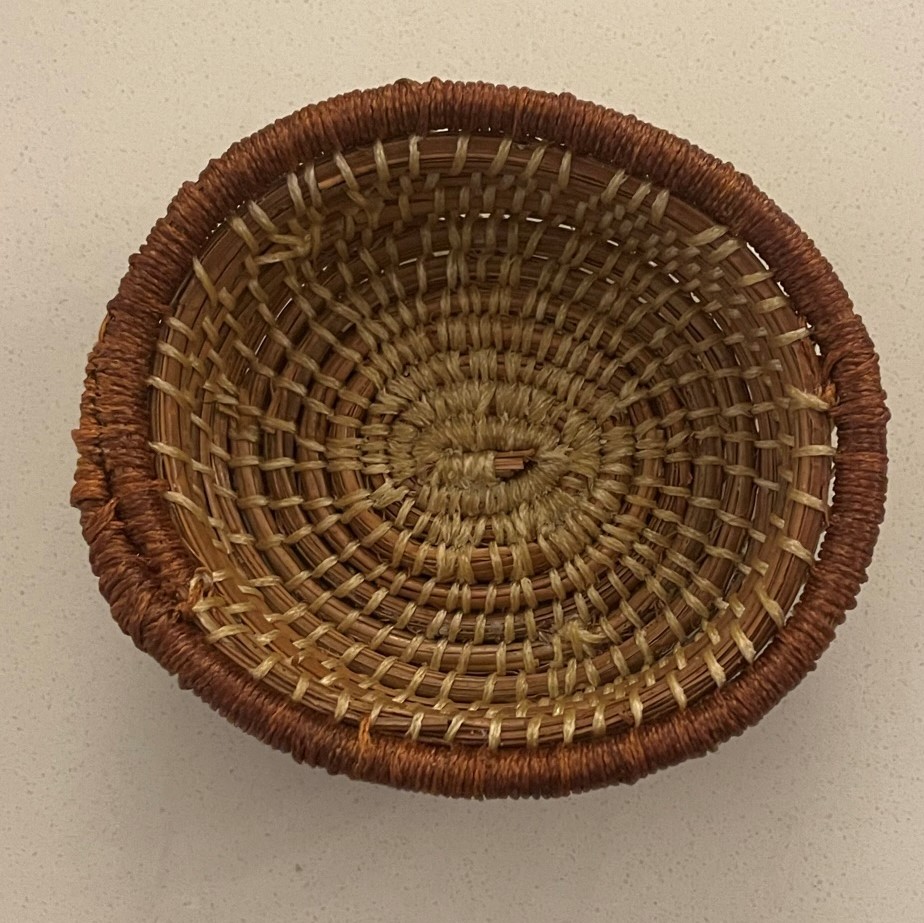
A few more rows of basic stitch, and my basket was done. While small, this was not too bad for my first attempt.
TopBottom
I had a couple friends visit for a long weekend and they wanted to try pine needle basket weaving as well. So, I gave them some lessons. Their baskets turned our very nice as well.
While I really did not need a new craft, this was a very relaxing hobby to learn. I plan to make more baskets with some creative stitches and beading.
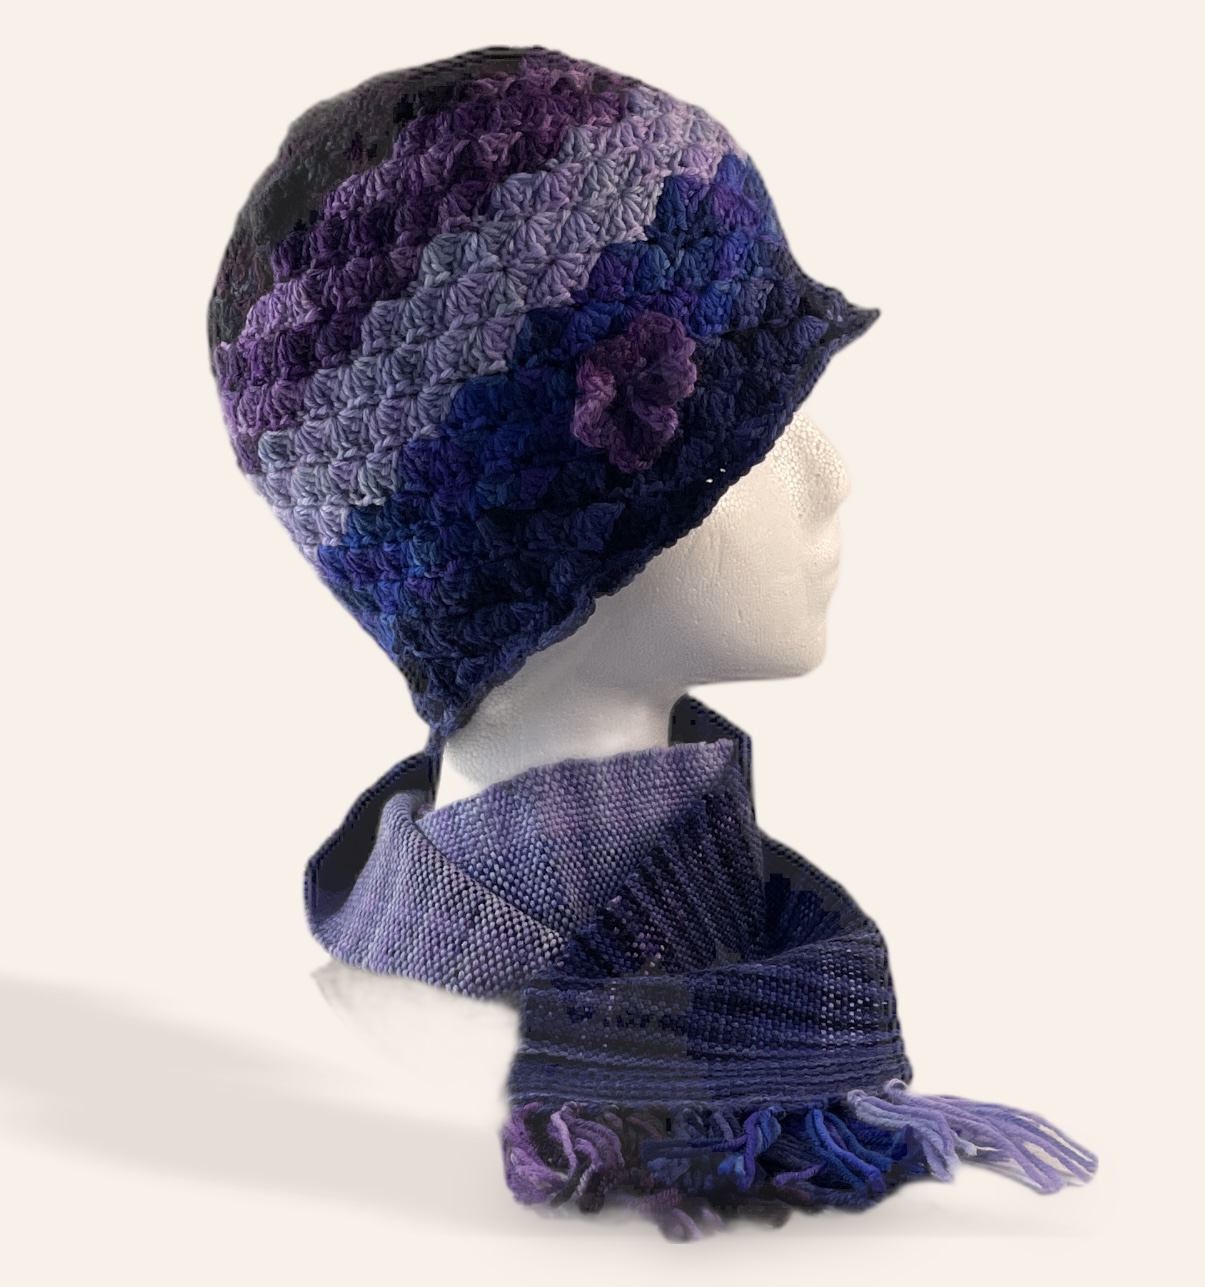
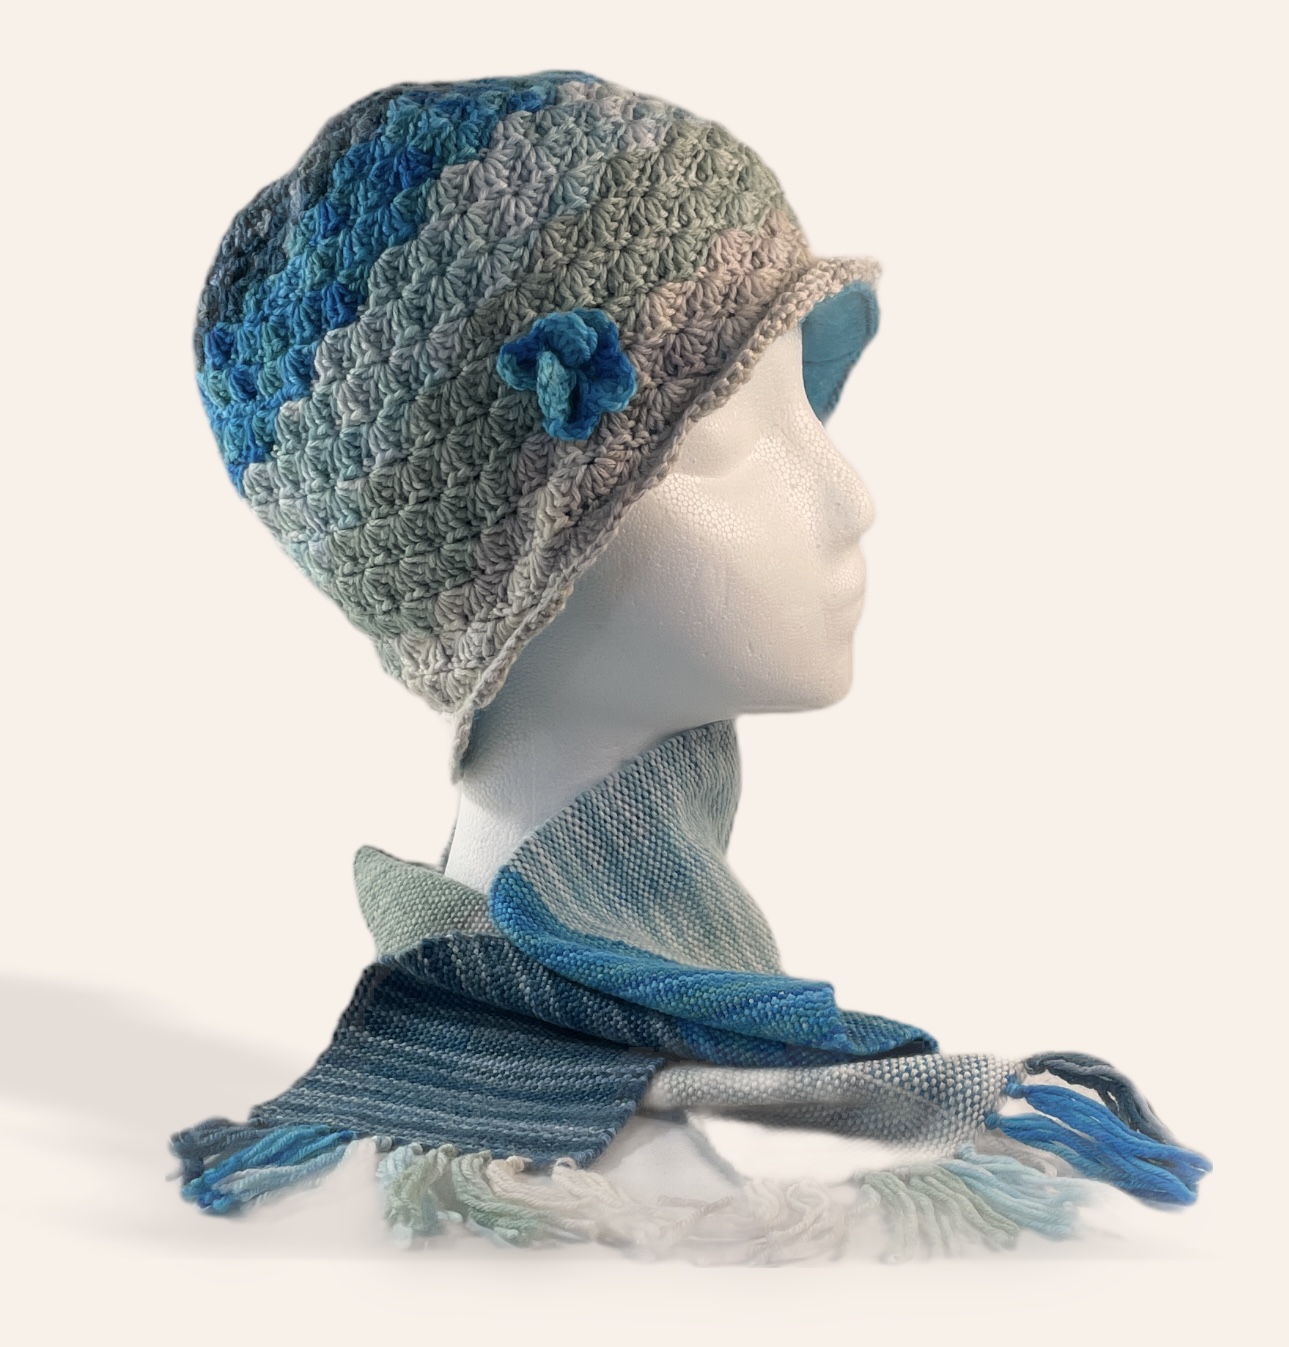
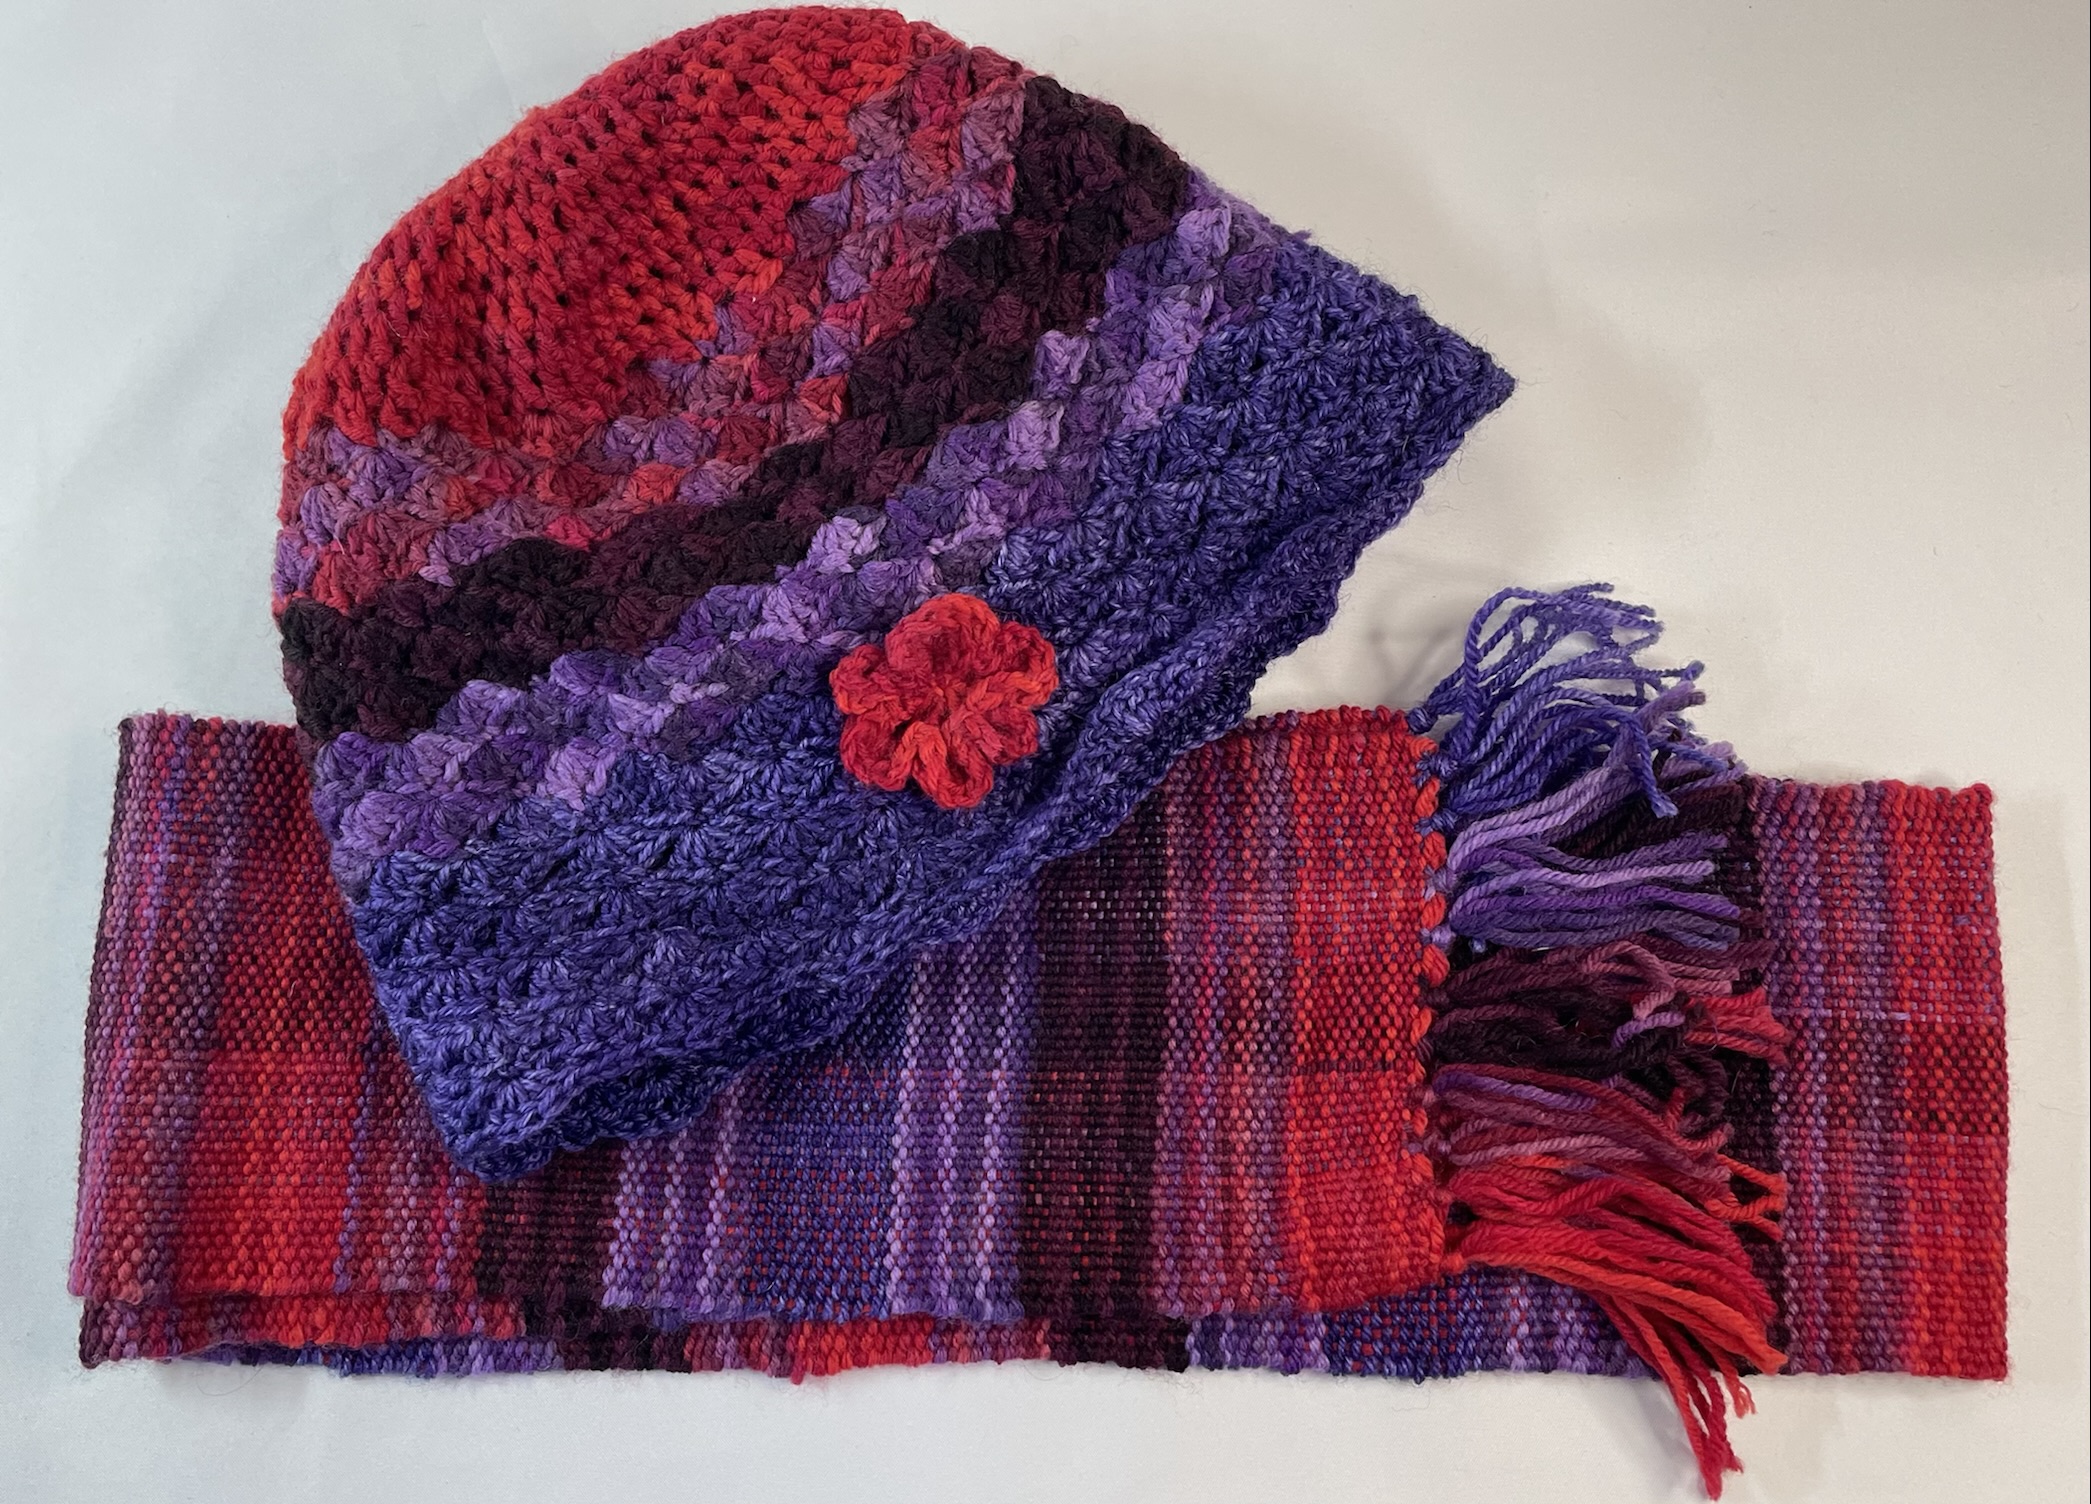
In a Minnesota winter, a hat is a necessary piece of clothing. But that doesn’t mean that it needs to be dull and boring. A hat can be a fashion accessory that helps define your personality. Adding a scarf also helps for warmth and is another way to accessorize your outerwear.
Over the past couple months, I have been busy making several hat and scarf sets. Some of these are listed for sale on this site. But, most have been donated to Minnesota Hats & Mittens organization. I use my own ideas for most of these projects. If you would like to duplicate them, I have included my patterns below each item.
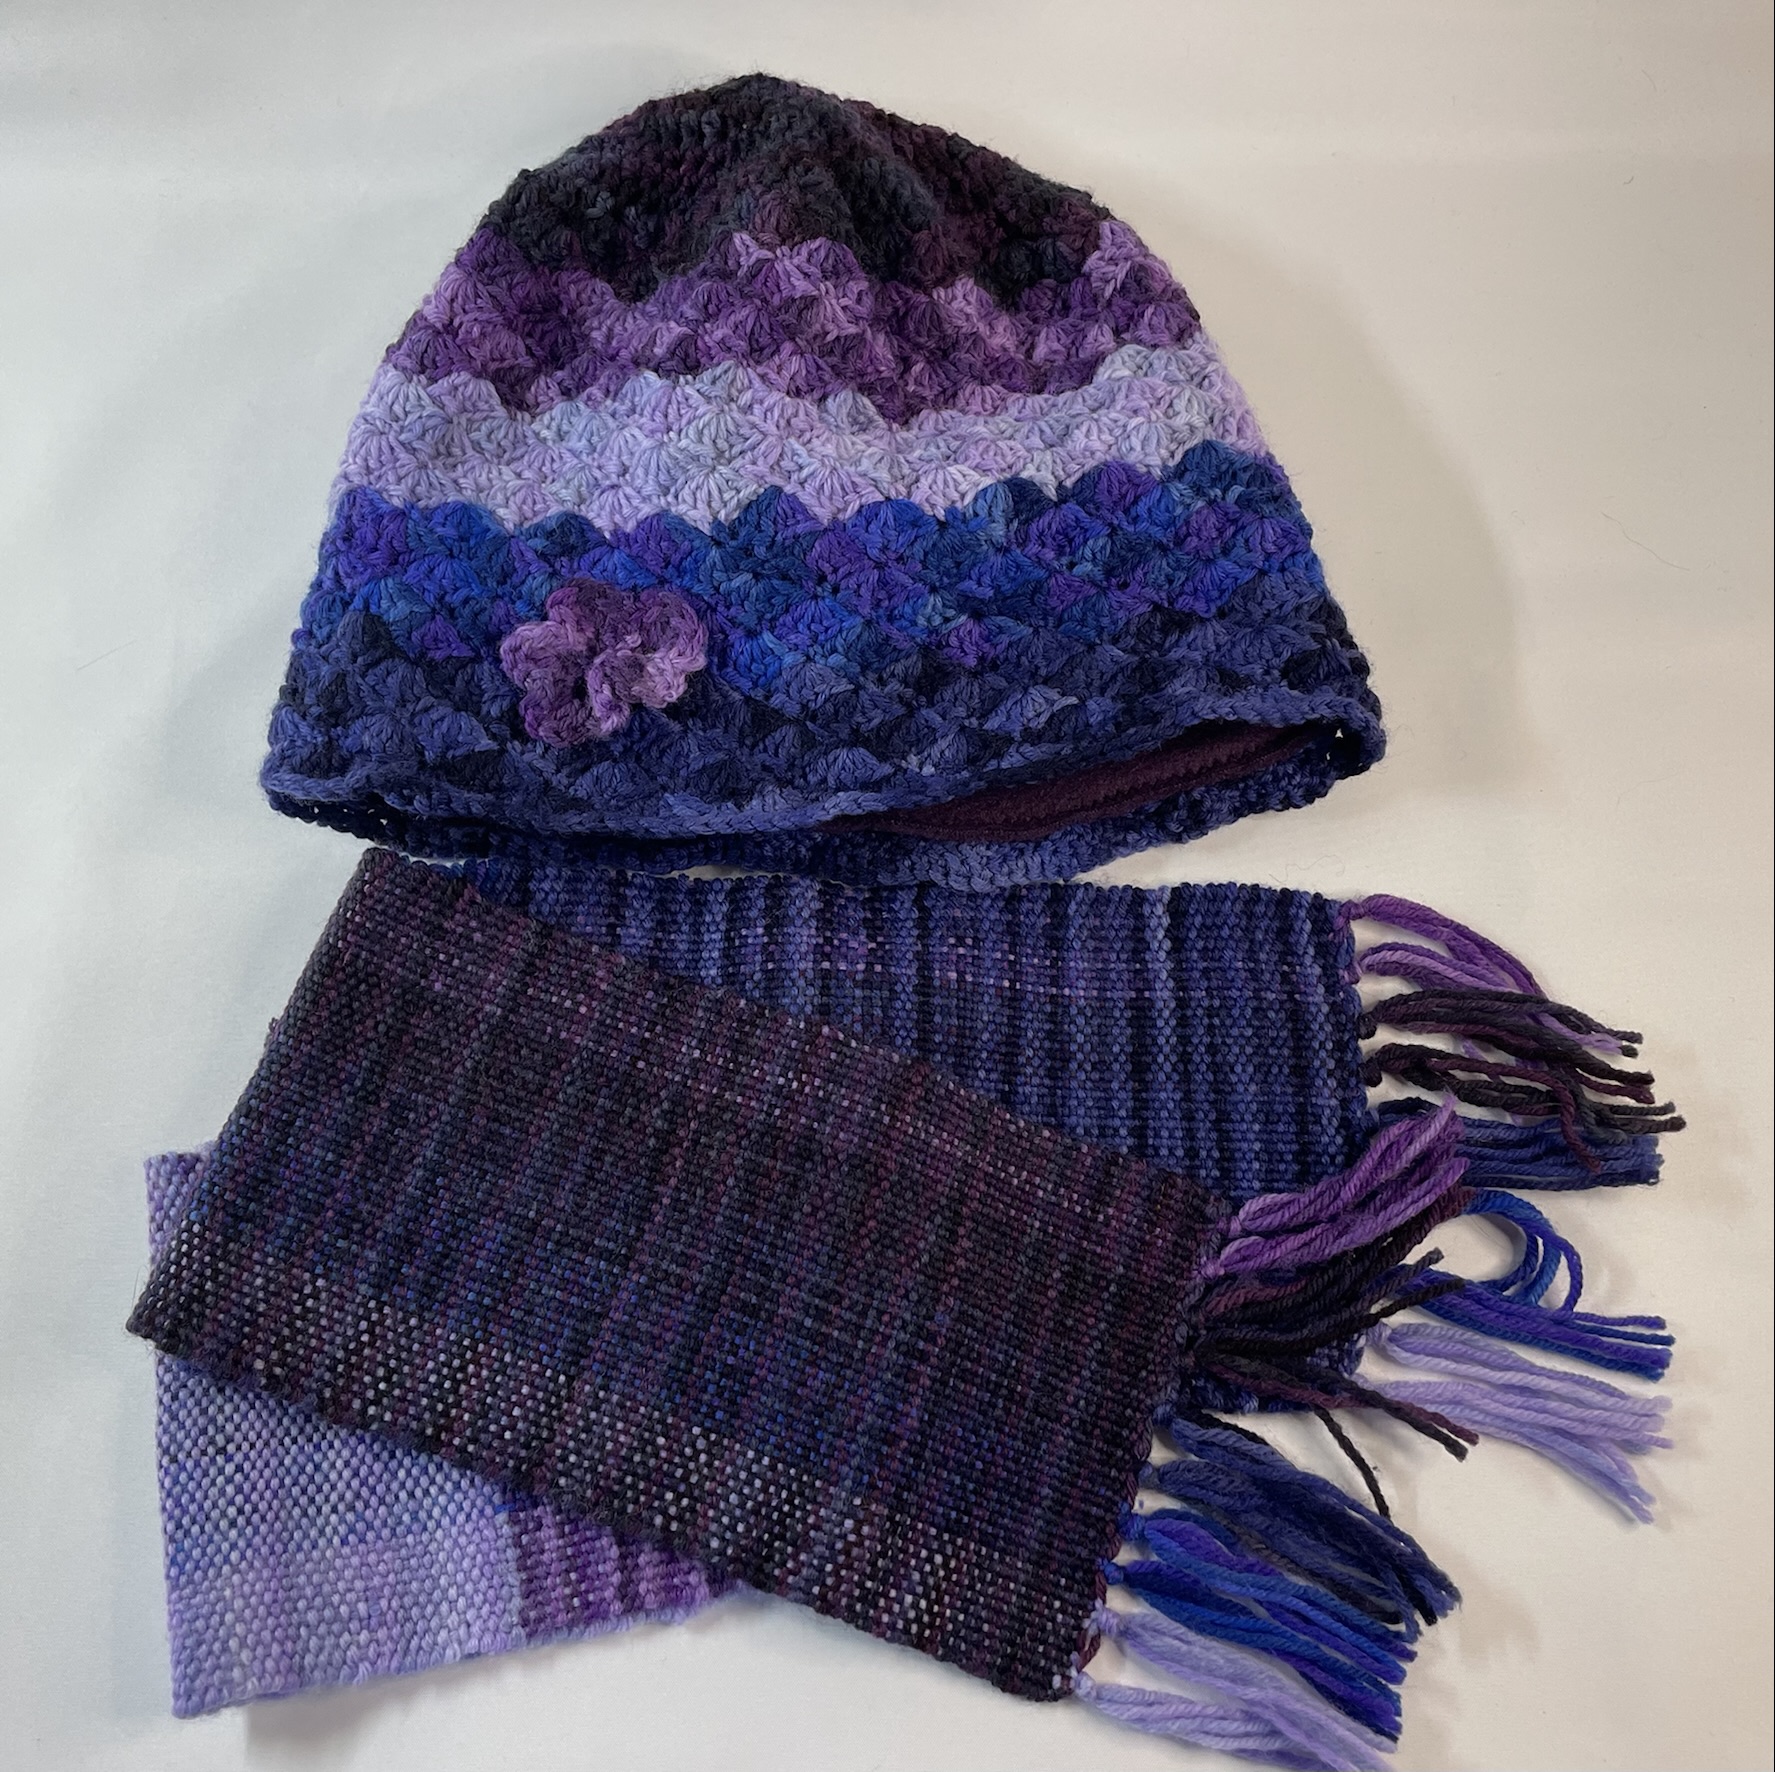
Gradation Hat and Scarf Sets
Hat Pattern: Fingering weight yarn, E crochet hook. R1 – MR, ch2, HDC x9 in ring, join with SS (10 st). R2 – work 2 HDC in each stitch around (20). R3 – DC in first stitch, 2 HDC in next stitch, repeat around (30). R4 – DC in first 2 stitches, 2 HDC in next stitch, repeat around (40). R5 – DC in first 3 stitches, 2 HDC in next stitch, repeat around (50). R6 – DC in first 4 stitches, 2 HDC in next stitch, repeat around (60). R7 – DC in first 5 stitches, 2 HDC in next stitch, repeat around (70). R8 – DC in first 6 stitches, 2 HDC in next stitch, repeat around (80). R9 – DC in first 7 stitches, 2 HDC in next stitch, repeat around (90). R10 – DC in first 8 stitches, 2 HDC in next stitch, repeat around (100). R11 – DC in first 9 stitches, 2 HDC in next stitch, repeat around (110). R12 – DC in first 10 stitches, 2 HDC in next stitch, repeat around (120). R13 – c1, *SC in first stitch, skip 2 stitches, work 5 shell in next stitch, skip 2 stitches*, repeat * around, SS to first stitch (20 shells). R14 – SS over 3 stitches to top of shell, *SC, skip 2 DC (of shell), work 5 shell in next SC, skip 2 DC (of shell)*, repeat * around, SS to first stitch (20 shells). R15-32 – Repeat rows 13 and 14 nine more times. R33 – SS over 3 stitches to top of shell, *SC, skip 2 DC (of shell), work 7 shell in next SC, skip 2 DC (of shell)*, repeat * around, SS to first stitch (20 shells). Finish off.
Hat Pattern: Fingering weight yarn, Size 8 circular knitting needle (20″ length). Using one strand Hygge yarn and one strand white cotton yarn together, Cast on 80 stitches. Join to work in the round, being careful not to twist the first row. Work in K1 P1 rib stitch for ten rows. Cut Hygge yarn and join with apricot cotton yarn. Knit around until hat measures 6″. Decrease row 1: K8, K2tog, around. Decrease row 2: K7, K2tog, around. Decrease row 3: K6, K2tog, around. Decrease row 4: K5, K2tog, around. Decrease row 5: K4, K2tog, around. Decrease row 6: K3, K2tog, around. Decrease row 7: K2, K2tog, around. Decrease row 8: K1, K2tog, around. Decrease row 9: K2tog, around. Finish off and draw end through last stitches, tighten to close ring. Bury threads.
Hat Pattern: Worsted weight yarn, G crochet hook. R1 – MR, ch2, HDC x7 in ring, join with SS (8 st). R2 – work 2 HDC in each stitch around (16). R3 – DC in first stitch, 2 HDC in next stitch, repeat around (24). R4 – DC in first 2 stitches, 2 HDC in next stitch, repeat around (32). R5 – DC in first 3 stitches, 2 HDC in next stitch, repeat around (40). R6 – DC in first 4 stitches, 2 HDC in next stitch, repeat around (48). R7 – DC in first 5 stitches, 2 HDC in next stitch, repeat around (56). R8 – DC in first 6 stitches, 2 HDC in next stitch, repeat around (64). R9 – DC in first 7 stitches, 2 HDC in next stitch, repeat around (72). R10 – DC in first 8 stitches, 2 HDC in next stitch, repeat around (80). R11 – DC in first 9 stitches, 2 HDC in next stitch, repeat around (88). R12 – DC in first 10 stitches, 2 HDC in next stitch, repeat around (96). R13 – c1, *SC in first stitch, skip 2 stitches, work 5 shell in next stitch, skip 2 stitches*, repeat * around, SS to first stitch (16 shells). R14 – SS over 3 stitches to top of shell, *SC, skip 2 DC (of shell), work 5 shell in next SC, skip 2 DC (of shell)*, repeat * around, SS to first stitch (16 shells). R15-22 – Repeat rows 13 and 14 four more times. R23 – SC in each stitch (96 SC). R24 – HDC in each stitch. R25 – *SC, skip 2 stitches, work 7 shell in next HDC, skip 2 DC*, repeat * around, SS to first stitch (16 shells). R26 – SS over 4 stitches to top of shell, *SC, skip 3 DC (of shell), work 7 shell in next SC, skip 3 DC (of shell)*, repeat * around, SS to first stitch (16 shells). R27 – Repeat row 26 one time. Finish off. R28 – attach eyelash yarn, SC in each stitch. Finish off.
Hat Pattern: Worsted weight yarn, Size 6 and 8 circular knitting needles (20″ length). Cast on 100 stitches. Join to work in the round, being careful not to twist the first row. Work in K1 P1 rib stitch for 2″. Change to size 8 needles and knit around until hat measures 9″. Transfer half of stitches to a separate needle. Seam by knitting one stitch from each needle together with cast off stitch. Tack down the tips of the hat to create the box pleat. Bury threads.
Varied Stitch Knit Hat and Scarf Set
Hat Pattern: Worsted weight yarn, Size 8 circular knitting needles (20″ length). Cast on 80 stitches. Join to work in the round, being careful not to twist the first row. Work in K2 P2 rib stitch for 16 rows. *Knit 2 rows. Purl 8 rows. Knit 2 rows. K2 P2 for 8 rows.* Repeat * * once. Decrease row 1: K8, K2tog, around. Decrease row 2: K7, K2tog, around. Decrease row 3: K6, K2tog, around. Decrease row 4: K5, K2tog, around. Decrease row 5: K4, K2tog, around. Decrease row 6: K3, K2tog, around. Decrease row 7: K2, K2tog, around. Decrease row 8: K1, K2tog, around. Decrease row 9: K2tog, around. Finish off and draw end through last stitches, tighten to close ring. Bury threads.
This Saturday, October 16th, I will be selling some bed quilts, seasonal table runners, hat/scarf sets and various other crafts at the Project Explore Craft Fair on Saturday. The craft fair supports District 196 programs for special needs adults. Please come by and see what crafts are available.
I will also be participating in the Maple Grove Women of Today Fall Craft Show on Saturday, October 23, 2021. It will be held at Osseo Middle School.
All profits from my sales will go to support various non-profit organizations (Sleep in Heavenly Peace, Hats & Mittens Minnesota, Project Explore and World Vision).
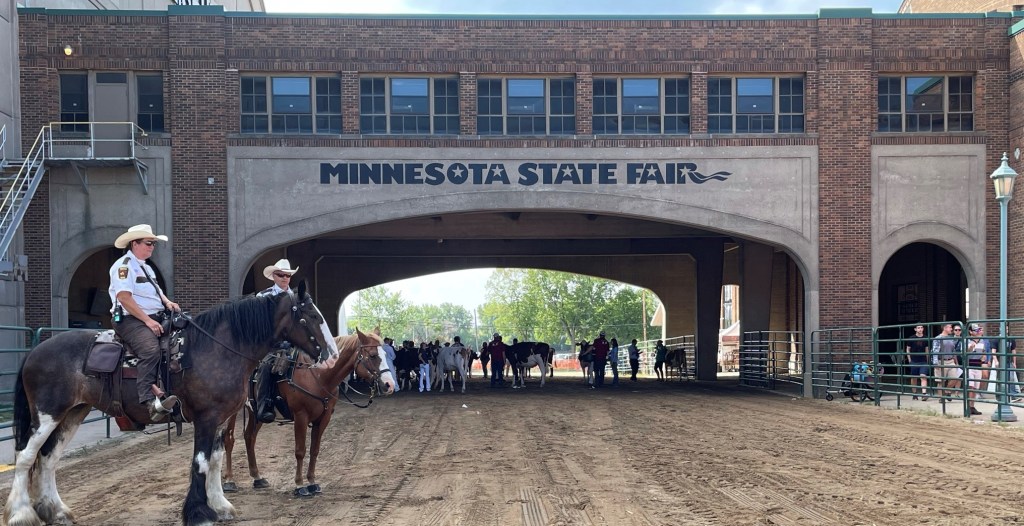
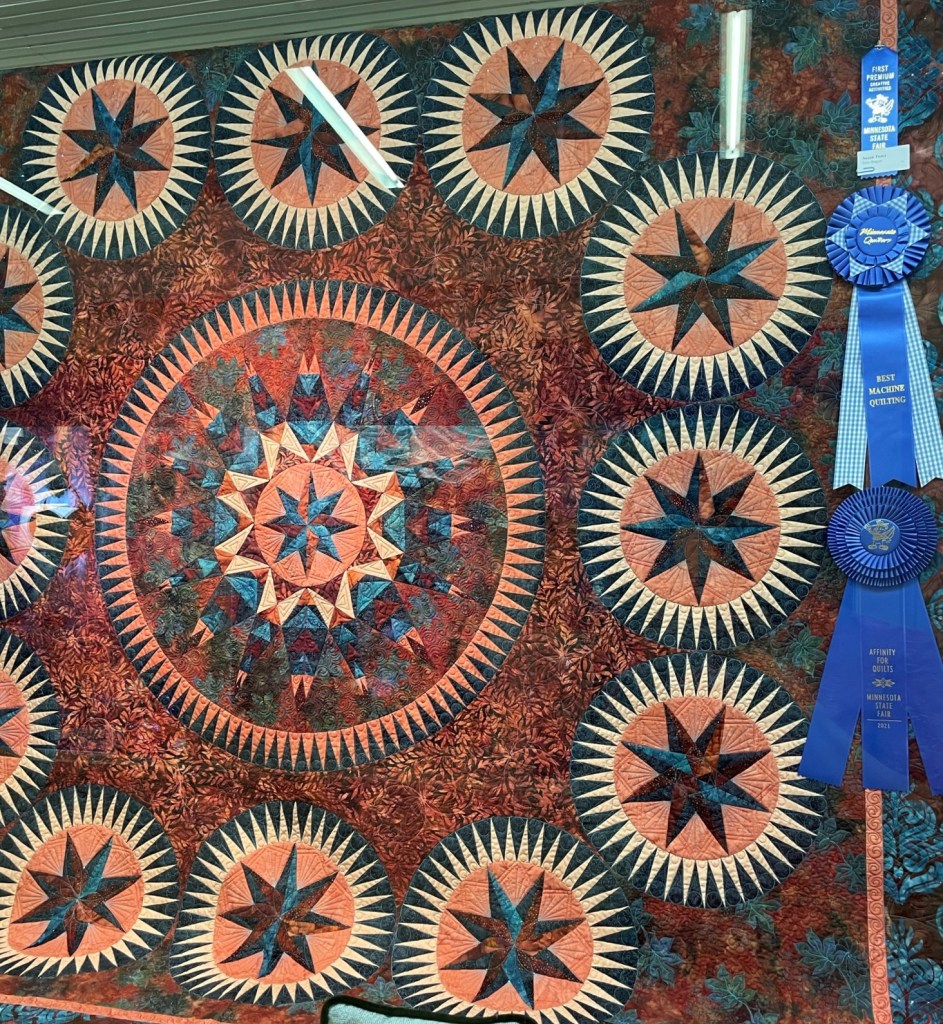
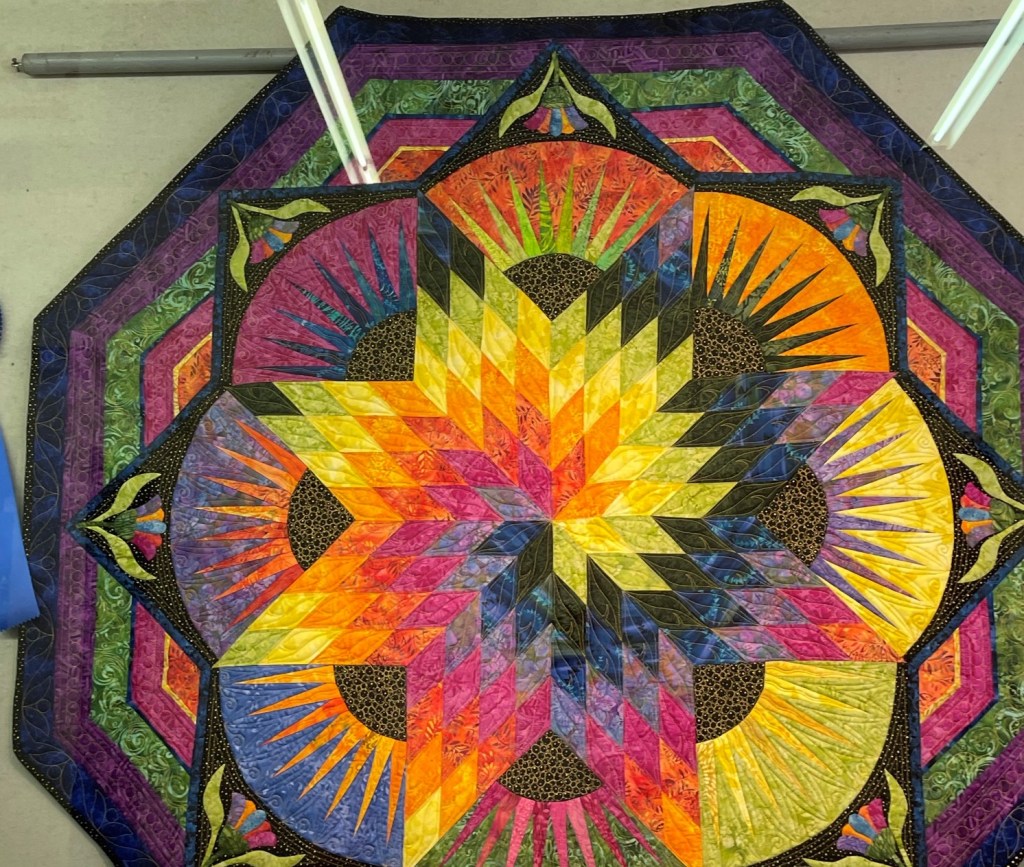
Each year, I enjoy going the the Minnesota State Fair, viewing the artistry of the creative activities entries, as well as entering a couple quilts in the competition. In 2020, I was disappointed when the fair was cancelled.
This year, I had originally thought that I would not be able to enter any quilts in the competition. Having a trip to Colorado scheduled during the drop off days for the creative activities, I was at first unsure how I would be able to enter. About a week prior to our trip, I learned that I could drop off entries at the fair office during early drop off days before leaving on our trip.
After entering, I was still hesitant to attend the fair due to the increase in Covid cases. However, with the attendance numbers on previous days being down, I decided to go this morning. Being there from 8 to 11am, the number of people that were there was pretty small. The weather was cool and it was an enjoyable morning.
Things that I did not do:
Utilize a Park & Ride bus – to avoid the crowds of people on the buses, I left home early morning and was able to find parking in a lots across the street from one of the fair entrances.
Eat Fair Food – I usually avoid the fair food, so this was nothing new for me.
Ride any amusement in the Mighty Midway
Do any shopping in the Market areas.
Things that I did do:
Wore a mask and avoided crowds
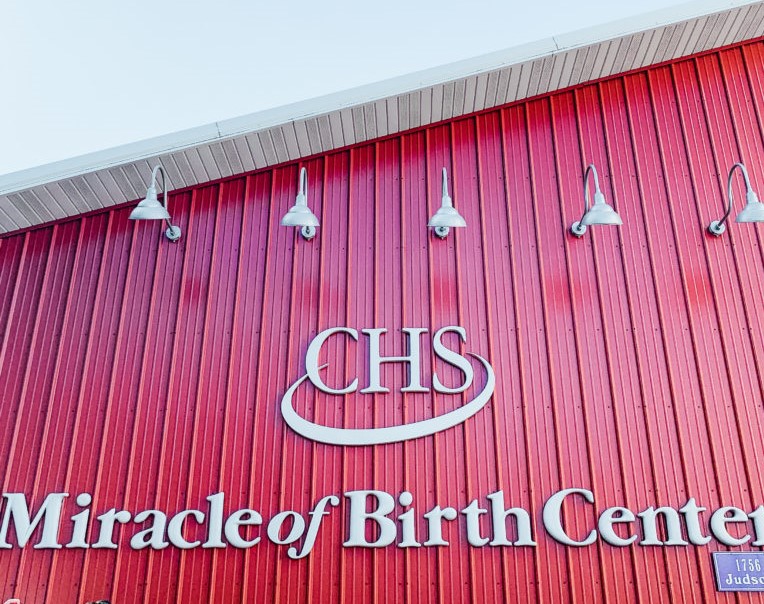
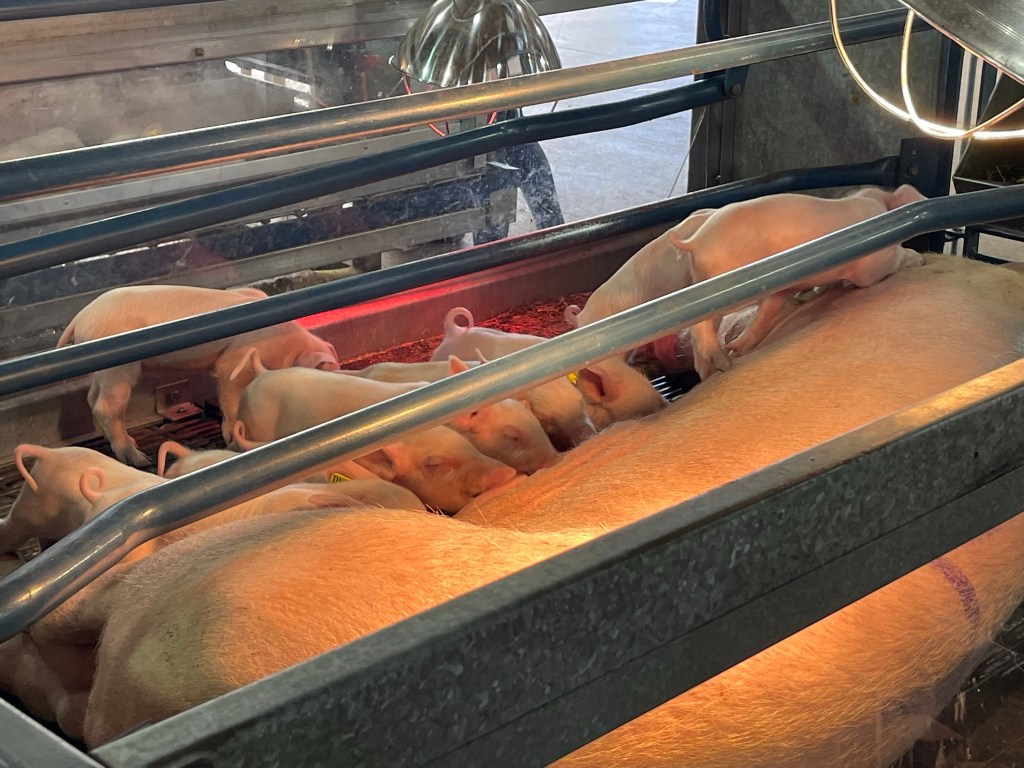
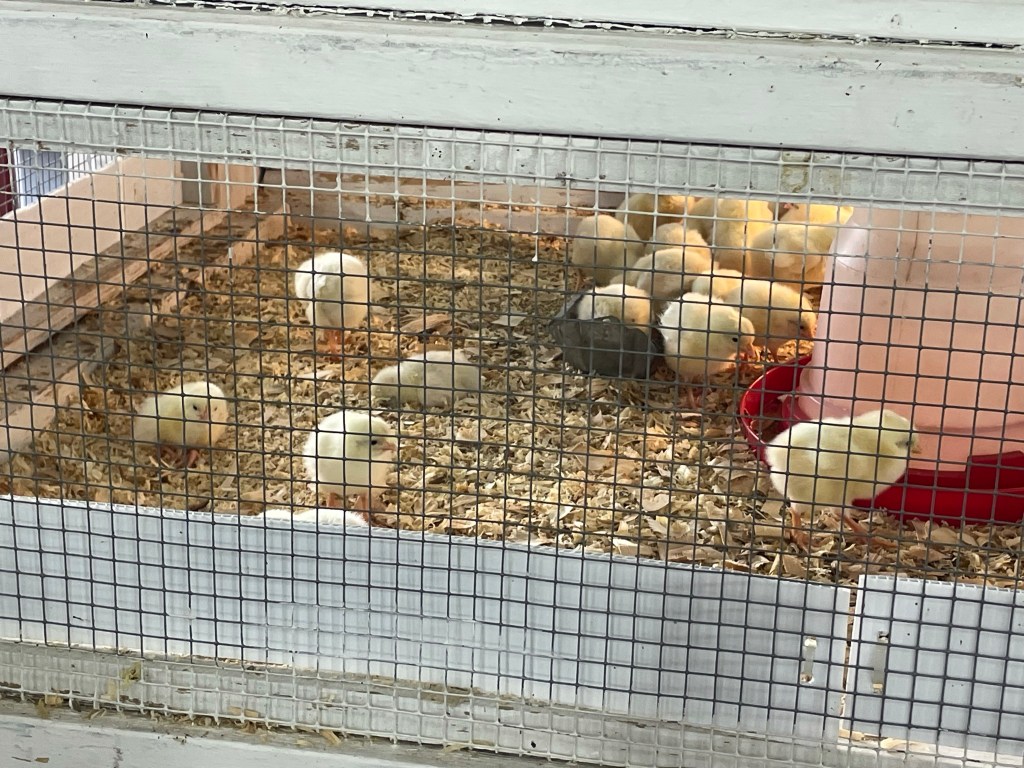
Arriving early, I walked through several of the animal and 4H exhibits prior to the other buildings opening
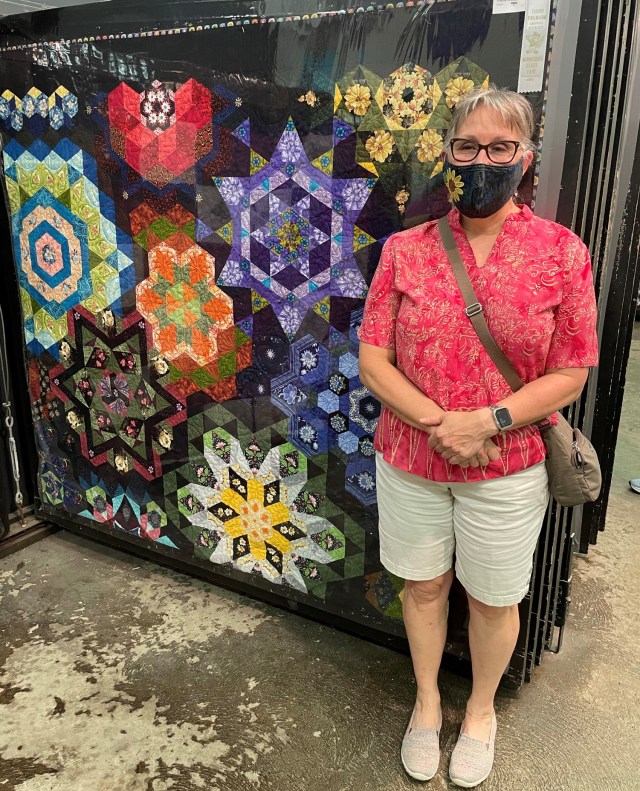
Enjoyed the artistry in the Creative Activities building, including quilting, weaving, crochet and woodworking
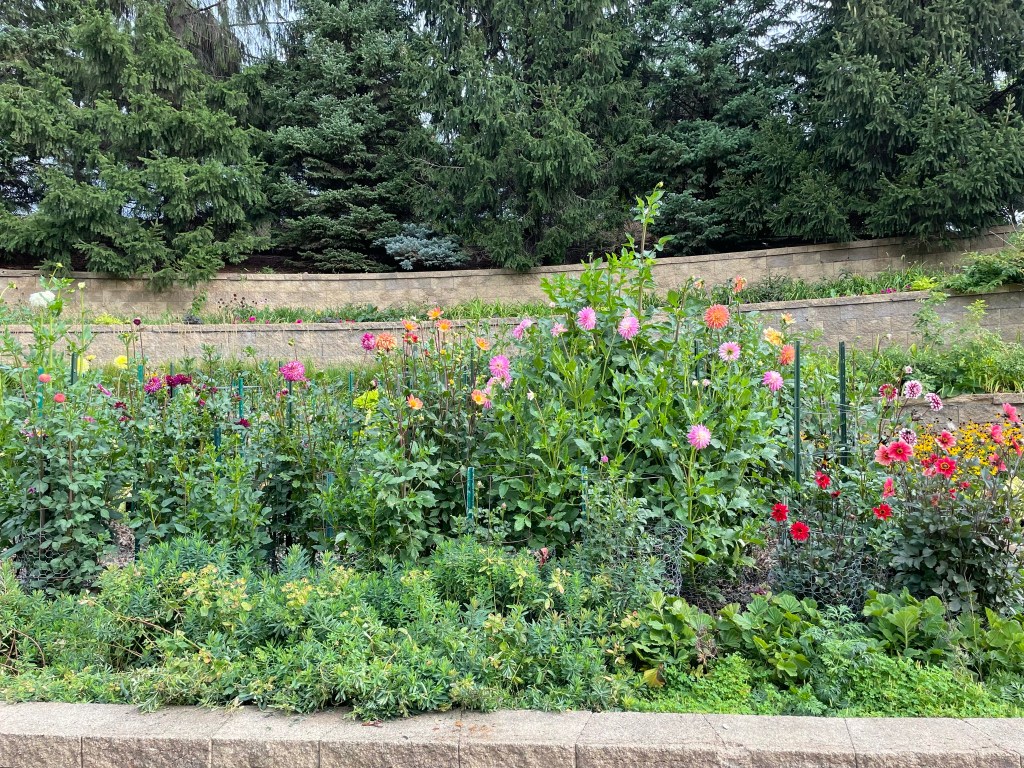
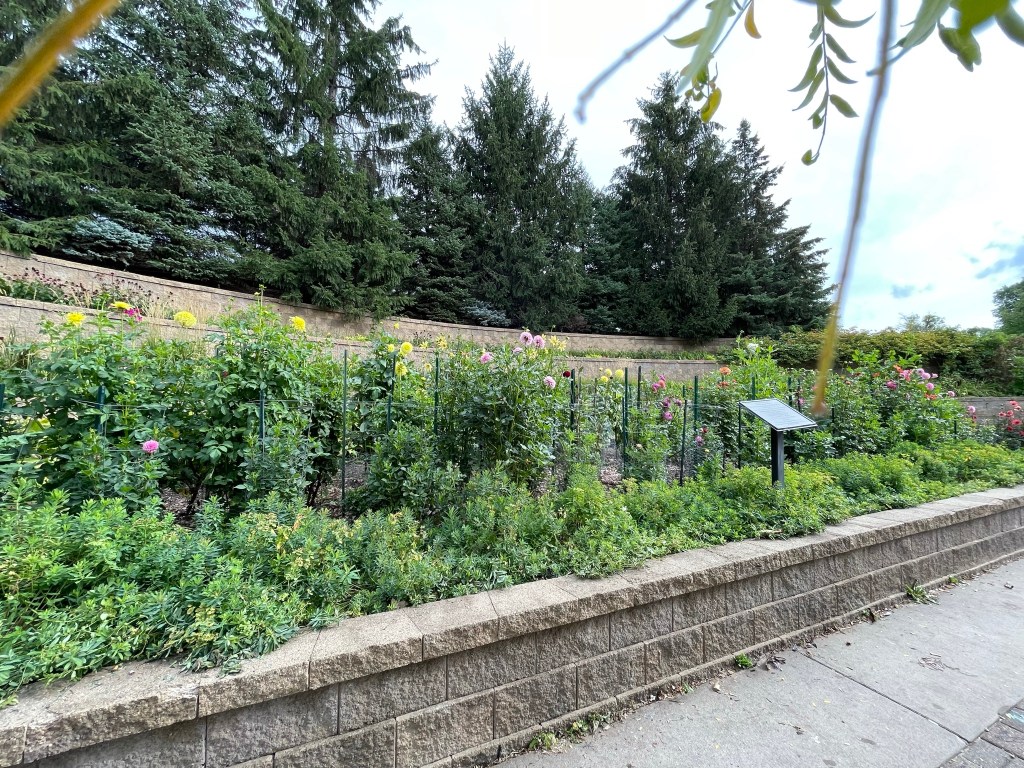
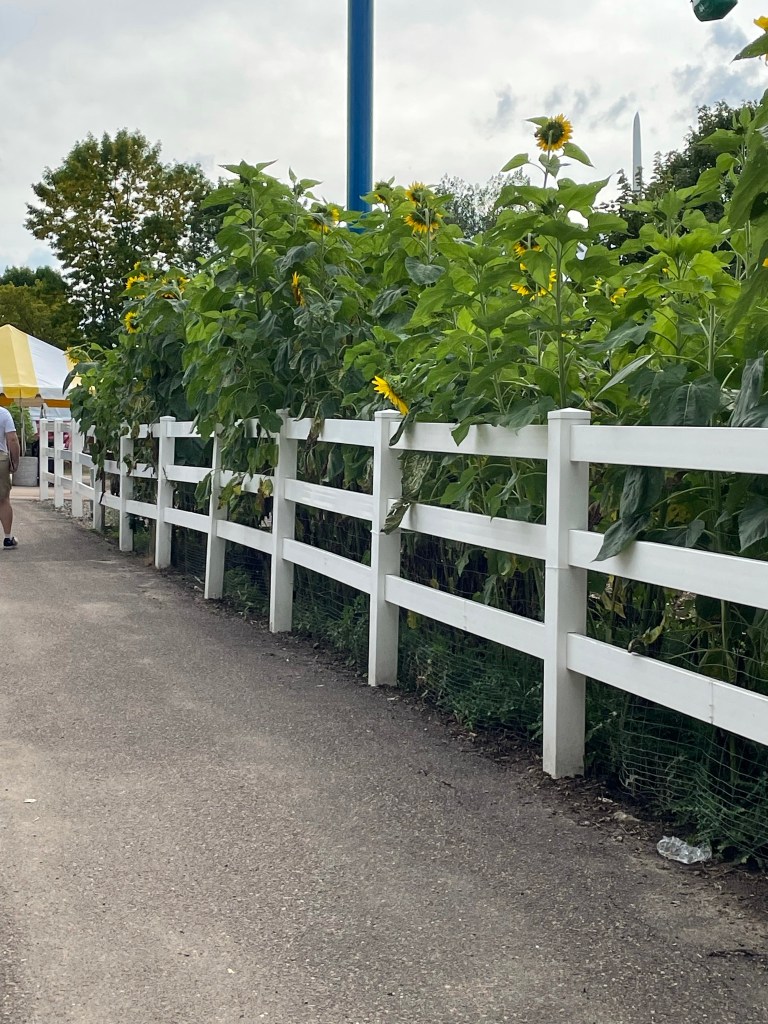
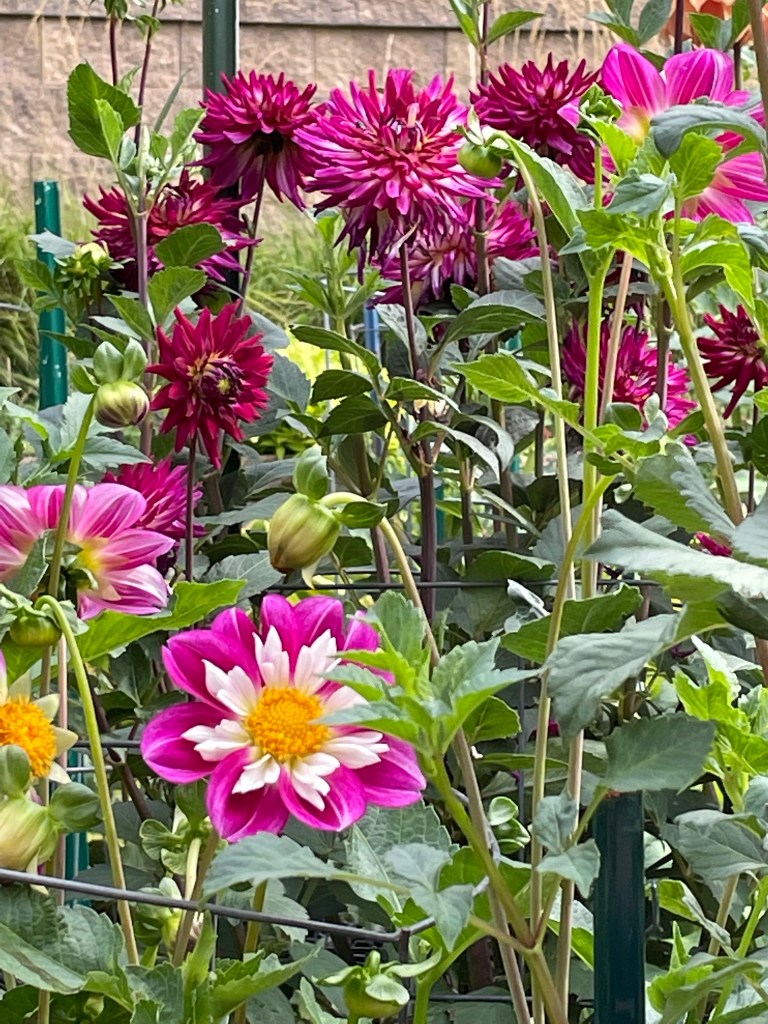
Enjoyed the flora of the fair, a much overlooked aspect of the fairgrounds
Animals:
Creative Activities – My entries:
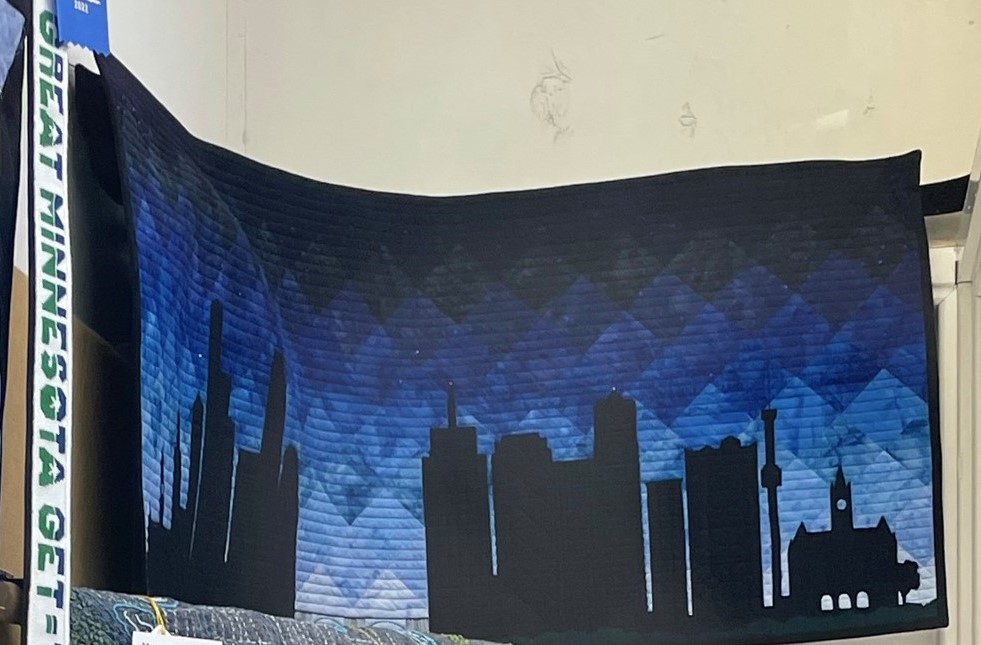
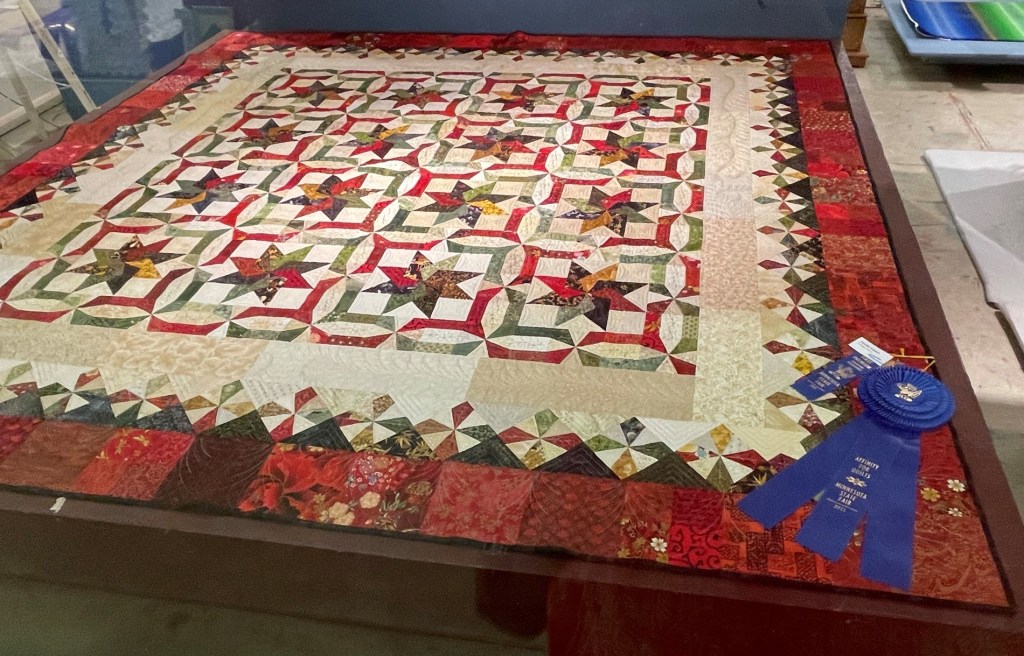
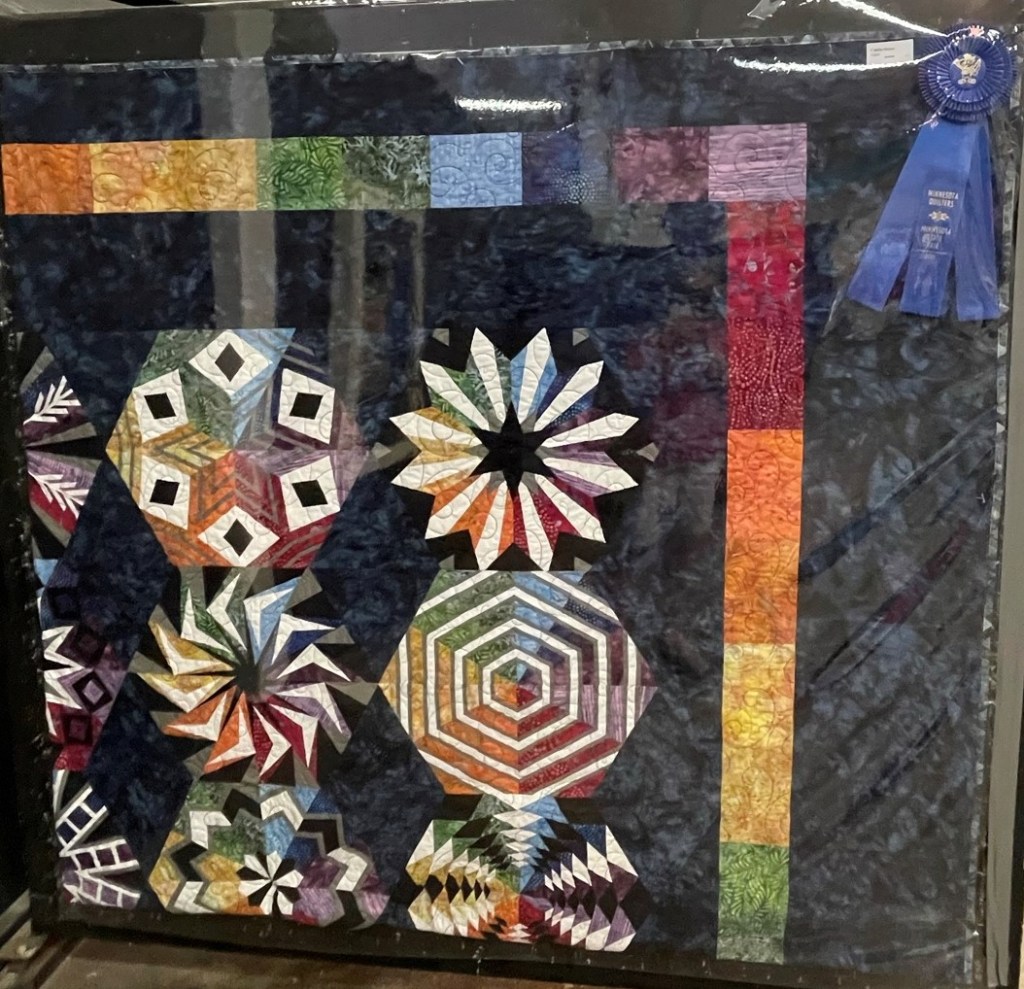
My hexagon quilt received a third place ribbon. The quality of the entries this year was amazing. So, I am pleased with a third place finish. My miniature doll quilt, made with hand dyed fabrics received a second place ribbon. This was a huge surprise to me. I only entered this quilt as a whim at the last minute, the quilt was never intended to be entered into a competition. The Twin Cities Skyline wall quilt that I made for a friend did not place. However, it is displayed in a very prominent location at the entrance to the Creative Activities Building. I will be interested to read the comments from the judge when I pick it up next week.
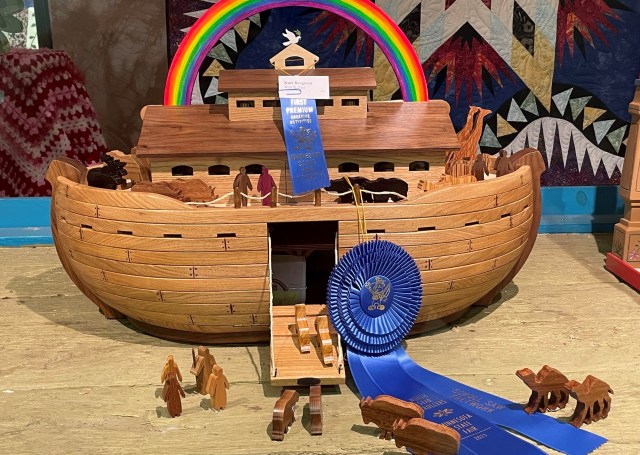
Creative Activities – Noah’s Ark: My absolute favorite of all of the creative activities entries that I saw today!
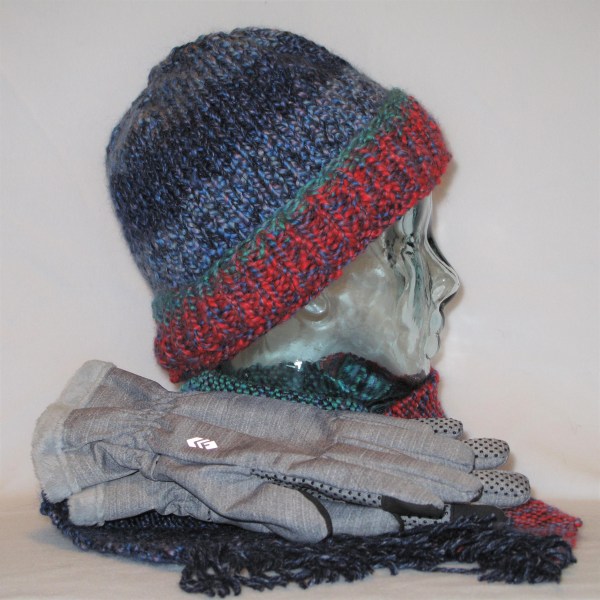
Again this year, my dental office participated in the collection for the Hats & Mittens Organization. The boxes of donated items were picked up on Thursday. About 150 items were donated at our three offices.
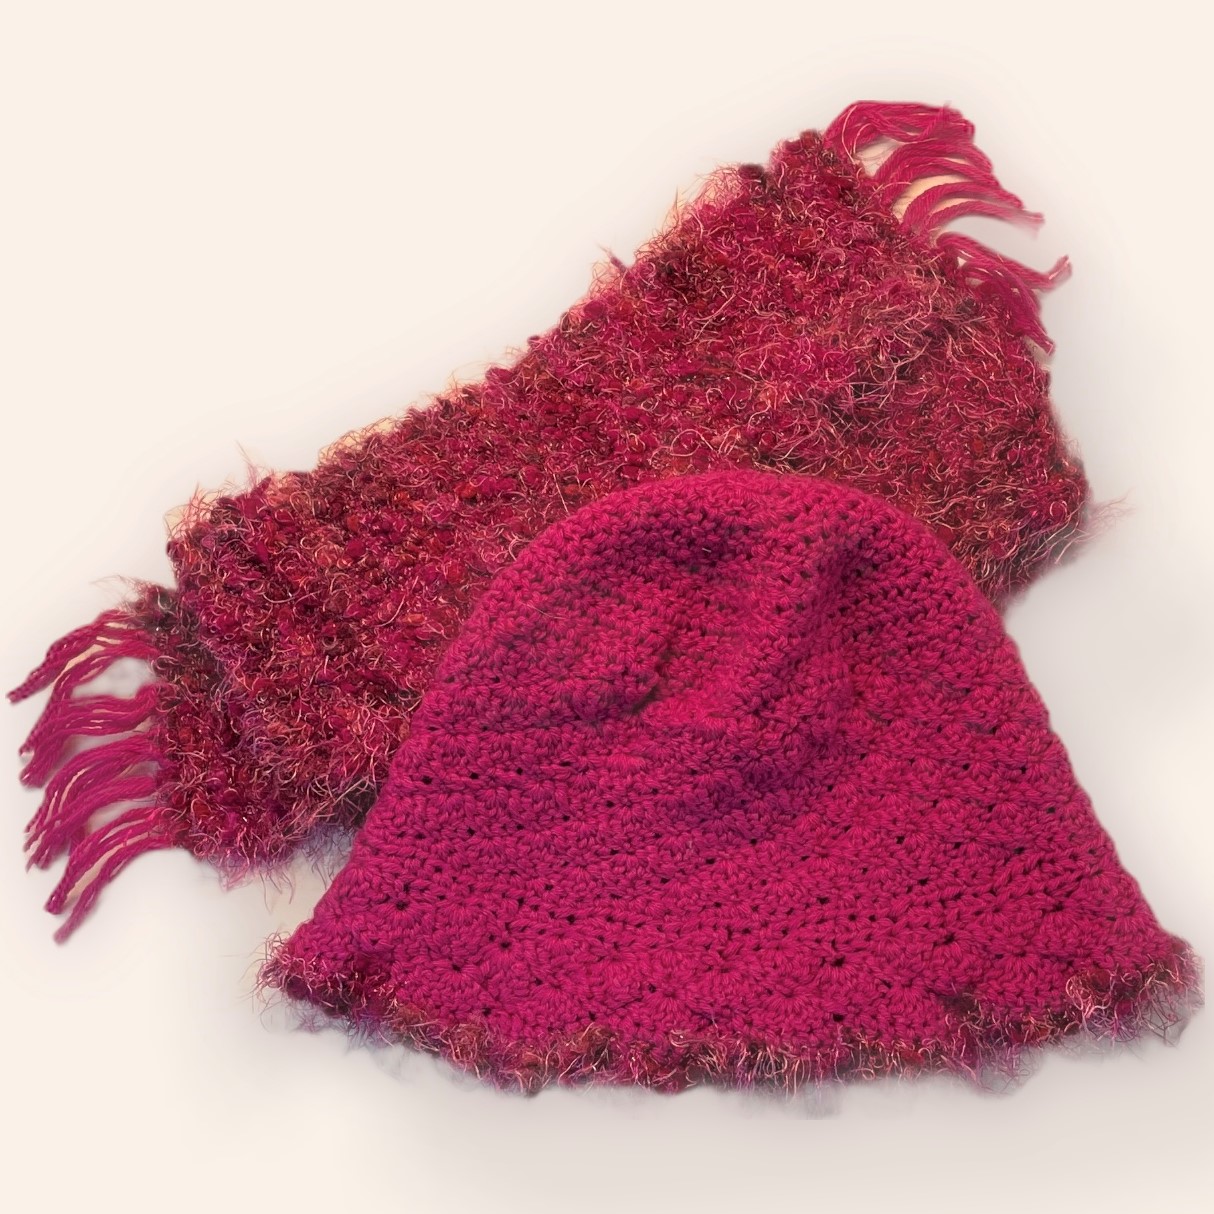
Like last year, I knit several items to donate. New this year, several of the scarves that I included in the sets were woven. The hats and scarves were combined with purchased gloves to make winter sets. Hopefully these sets will keep the children and teens who receive them nice and warm this winter.
Linen Stitch Scarf and Swirl Knit Hat
Ombre Teal to Brown Knit Scarf and Hat
Dotty Stitch Hat and Cowl
Woven Scarf with Cable Knit
Woven Scarf with Swirl Knit Hat
Woven Scarf / Ribbed Knit Hat
Woven Scarf / Ribbed Knit Hat
Woven Scarf / Ribbed Knit Hat
Rib Knit Hat and Cashmere Scarf
Dotty Stitch Hat and Striped Scarf
Boa Yarn Knit Scarf and Hat
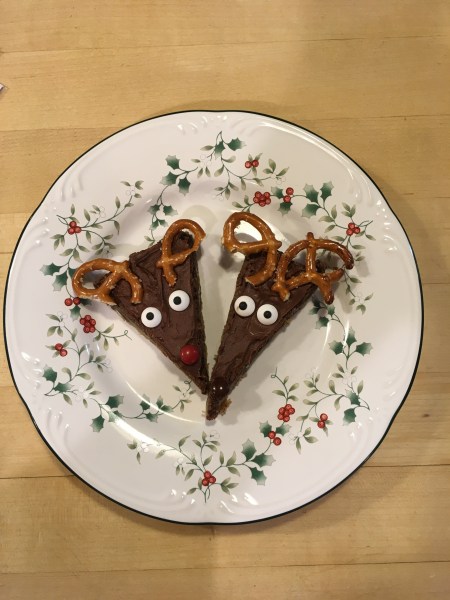
As a special treat, I am including the recipe for the Reindeer Brookies I made today. Kinda fun and very tasty!
Reindeer Brookies (makes 36, plus scraps from cutting triangles) Cookie Base
1/2 cup butter, room temperature
1/3 cup brown sugar
1/3 cup granular sugar
1 egg
1/2 tsp vanilla
1/4 tsp salt
1/2 tsp baking soda
1 cup flour
1 cup chocolate chips (I used Andes Candies chips)
Brownie Layer
1/2 cup butter, melted
1 cup granular sugar
1 egg
1 tsp vanilla
1/4 cup Triple Cocoa Blend
1/4 tsp baking powder
1/8 tsp salt
1/2 cup flour
Chocolate Frosting and Decorations
1/4 cup butter, softened
1/4 cup Triple Cocoa Blend
2 Tbsp milk
1 tsp vanilla
1 1/4 cup powdered sugar
Pretzels, broken
Mini M & Ms, red and brown
Sugar eyes
Directions:
Preheat oven to 375 degrees F. Line a 9×13-inch baking pan with parchment paper.
Beat together butter and sugars until creamy. Add vanilla and egg and mix until creamy. Whisk together flour, salt and baking soda. Gradually mix dry ingredients into batter. Stir in chips. Spread dough into bottom of the pan.
Beat together butter and sugar until creamy. Add vanilla and egg and mix until creamy. Whisk together flour, cocoa, salt and baking powder. Gradually mix dry ingredients into batter. Spread batter evenly over the cookie dough. Bake for 20-25 minutes. Cool completely. Once cooled, cut into 3″ x 1 1/2″ triangles.
Beat together butter, cocoa, milk and vanilla until creamy. Add powdered sugar slowly, beating slowly at first until incorporated, then beat at medium high speed until frosting is smooth and creamy, about 1 minute. Spread over cooled brookies. Place pretzel pieces to look like antlers. Add sugar eyes and noses to complete the decorating of the reindeer.


 Cookie Base