This weekend of the July 4th Independence Day celebration is important to us in the US for expressing our thanks for Independence, the foundation of our country, and its principles and beliefs. I have thought about this freedom in relation to our personal independence, and what is controlling us, influencing us, and holding us back. There are things that are preventing us from having personal freedom. Our self-limiting beliefs. The negative talk in our own heads. The negative talk from others. All the things hold us back from achieving success and taking action and having a happier life. All these things contain a presupposition that we are unable to achieve certain things and that nothing will change in the future. So we create a self-fulfilling prophesy that we carry on our negatively directed path. Some beliefs are subconscious and irrational whereas others are purely a lack of information. I challenge each of my friends to believe in their abilities to achieve almost anything that they desire. To throw away the self-limiting beliefs that you can’t achieve what you want. Let’s make the next six months of the year the best ever. Arnie Weiss
Earlier this spring, I spent some time learning how to dye some of the pine needles that I brought home from South Carolina.
Not wanting to purchase more crafting supplies, I thought I would first try using the Procion MX dyes that I have used for dyeing fabrics. Because I wanted an intense color, I mixed MX Deep Purple dye with soda ash solution warmed to 200 degrees. To this, I added one bundle of pine needles and allowed them to batch for 4 hours. After rinsing, I was very disappointed to find very little (if any) color uptake.
Most of the on-line information about dyeing recommends basic dyes. So, I then tried the vinegar technique that worked well for dyeing silk fabrics. For this, the MX dye was dissolved in vinegar, the pine needles added and then microwaved the same as for dyeing silk. Unfortunately, this was also disappointing.
Next, I tried Rit dye because I found several on-line tutorials for using this dye with pine needles. While the Rit dye worked for creating color in the pine needles, the color was not what I was wanting and definitely not the color on the dye bottle.
Lastly, I purchased a set of Basic Dye from Jacquard. The dye (7 grams) was dissolved in a vinegar bath (2 liters water with 30 ml vinegar). The needles were added, weighted down with a baking rack and baked in a 350 degree oven for 30 minutes. The rack was removed and allowed to cool. The dye was removed and the needles were soaked in another vinegar solution (this time with no dye) for an additional 30 minutes. The needles were then rinsed well and allowed to dry overnight.
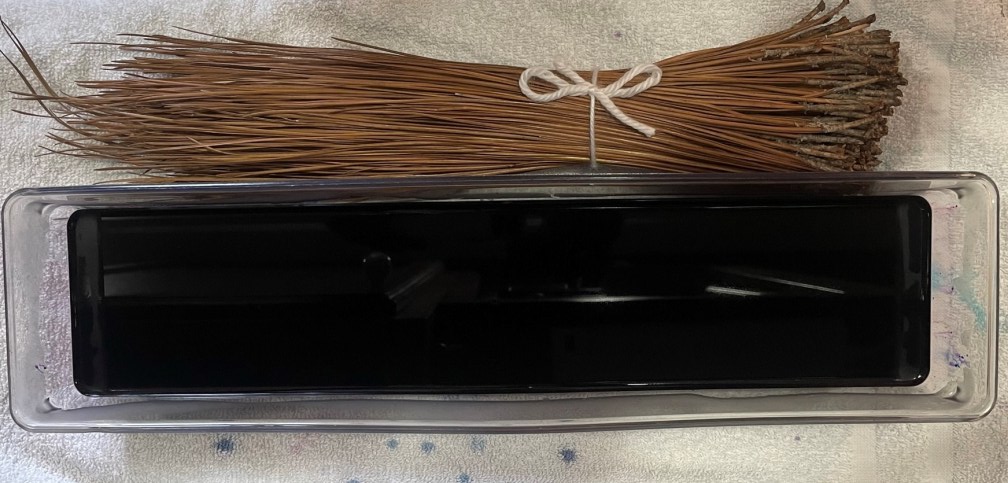
I was extremely pleased with how well the needles took up the dye using this technique. The purple color was very intense. In the picture, you can see the results of the dye attempts. While the Rit dye did create color, it was more of a green color rather than purple.
Untreated needles, MX dye, Vinegar dye, Rit dye, Basic dye
The basic dye worked so well, that I decided to dye more colors. I achieved some really lovely colors!
Needles treated with Basic Dye: Green, Red, Yellow, Untreated, Blue, Purple, Black
A few weeks later, I pulled out some of the needles and started working on a basket idea I had. After getting a short start to my weaving, I set it aside (wrapped in a damp towel to keep the needles flexible) because it was spring planting and I was drawn outside to work in my gardens.
Last week, I had time to work on my project again. Unfortunately, when I opened the bag with the damp towel and pine needles I found that the moisture had cause mold to form on the pine needles. So, the start of the project was tossed into the garbage. Lesson learned – store all pine needle dry and only moisten the ones that will be used within a short amount of time!
After starting over, I continued to work on the basket for several days to avoid the problem of mold growing on the second attempt.
My design idea was to make a basket that (sort of) looked like a flower. The center was three rows of plain needles wrapped in yellow surrounded by three rows of the Ti stitch to make the center of the flower.
For the colors designating the flower, I started with a single row of needles wrapped in red. By wrapping the needles, I could transition to red dyed needles for the next section. The next row was the Ti stitch on red needles with radiating points filled with the Faggot stitch. The next three rows were red needles and the Ti stitch in purple. The last section of the flower was a row of radiating purple wrapped needles that allowed me to transition to green needles.
The outer section of the basket was to look like the plant of the flower and the air/sky surrounding it. To achieve this, I did three rows of simple stitch in green on green needles and then a row of wrapped needles to transition back to plain needles. Five rows of plain needles with the V stitch and a final row was a wrapped row. I plan to hang this on the wall in my craft room
No, I am not talking about the Tom and Jerry Cartoon from 1942.
Nor am I talking about the book about birds in the Cat In the Hat series.
I am actually talking about a family of cardinals in my yard.
A few weeks ago, I noticed that every time I used by side porch door to go outside, a female cardinal would fly out of the evergreen adjacent to my porch.
Upon close inspection, I discovered a nest with six eggs.
The female cardinal was very protective of the nest and I did not want to disturb her. My photos were taken by using the zoom on my phone from a distance, or through the window of my dining room.
While I am not sure exactly which day the eggs were laid, eleven days after I first saw the nest, I discovered that the eggs were hatching.
The baby birds continued to grow, with both parents bringing them food. Unfortunately, the adult cardinals were too fast for me to take photos of them, but I was able to document the growth of the hatchlings for the past week.
Today, the family flew away. I was again unable to get a photo, but it was fun watching the last of the baby birds fly away. I don’t think they will come back to the nest in my evergreen, but I enjoyed watching them while they were there.
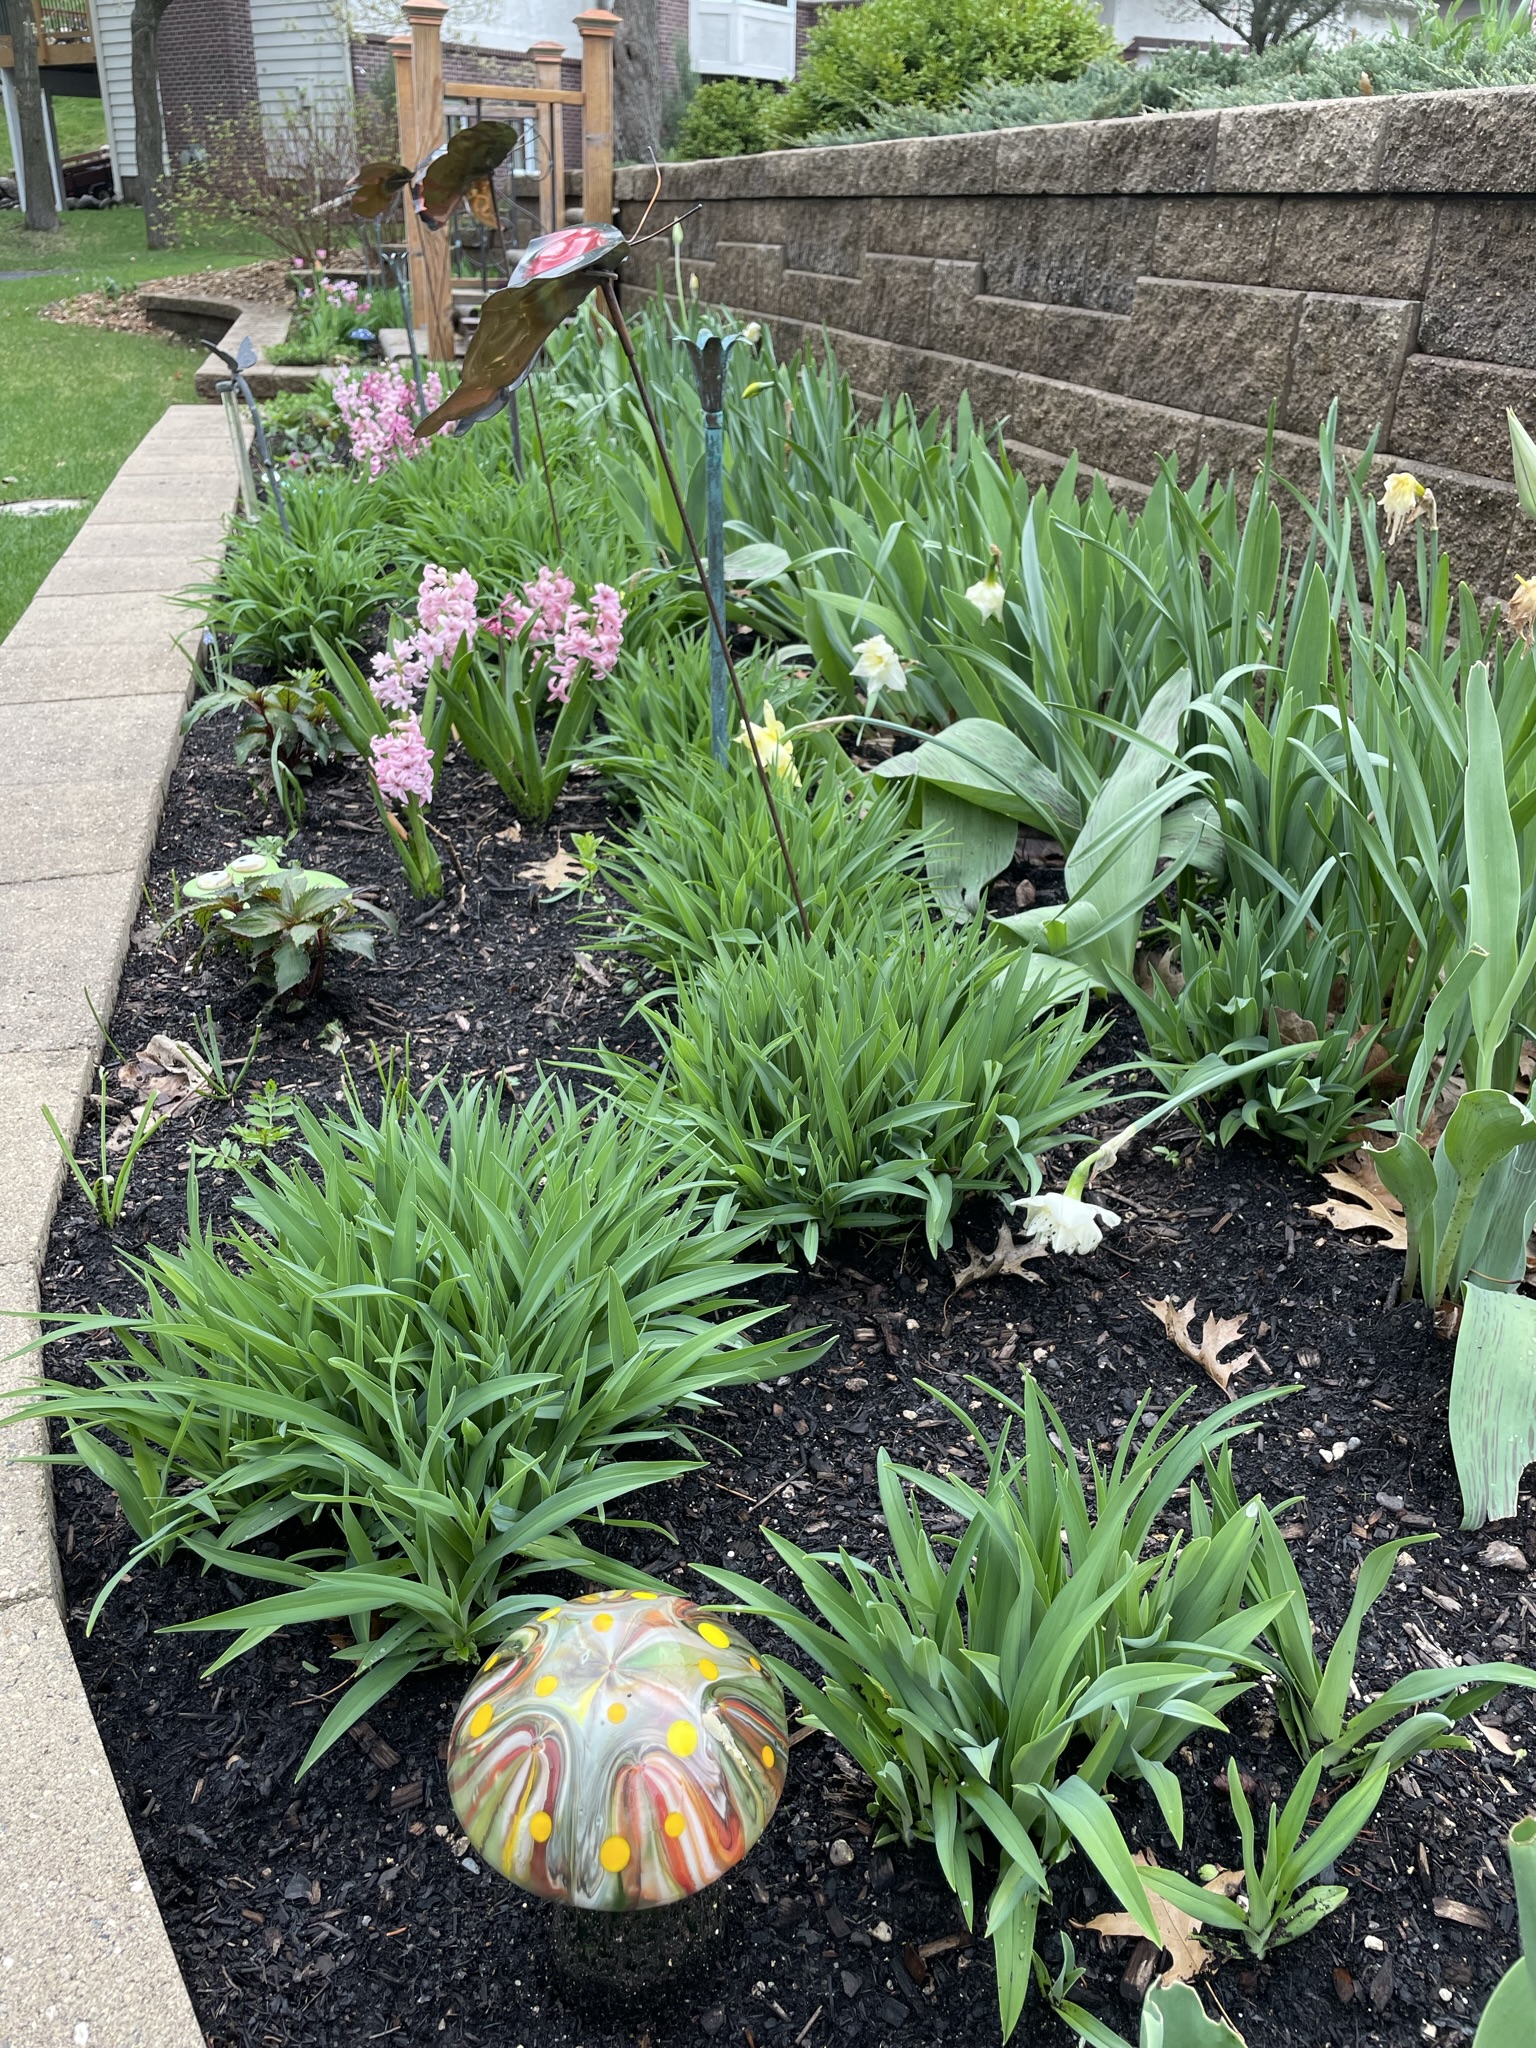
And, while I am sharing some photos, here are some photos showing the progress of my raised bed gardens. Everything is growing nicely without the neighborhood “critters” getting into the garden.
I found some really cute metal black cat silhouettes on-line that I mounted along the edge of the garden beds. These remind me of our cat, Onyx, who passed away last November. Now when I am in my yard or working in the garden, I have a reminder of her to look at.
My lettuce, arugula, spinach and broccoli that are growing in planters on my deck are also doing well.
And, the potatoes planted along my patio are also growing well.
I am already enjoying the salad greens and look forward to harvesting more produce over the next couple of months.
I love this time of year! Well, not the severe storms that blew through last night. But, I do enjoy:
The warmer days. No snow and no need for boots, sweaters, hats, mittens, etc.
Spending time outside without freezing or being overly hot. Yes, even the numerous hours spent cleaning up leaves and debris in preparation for spring planting is relaxing.
The sound of birds singing. I marvel at God’s wonderful creation. I even enjoy watching the rabbits and deer wander through the yard (well at least until they start eating my flowers).
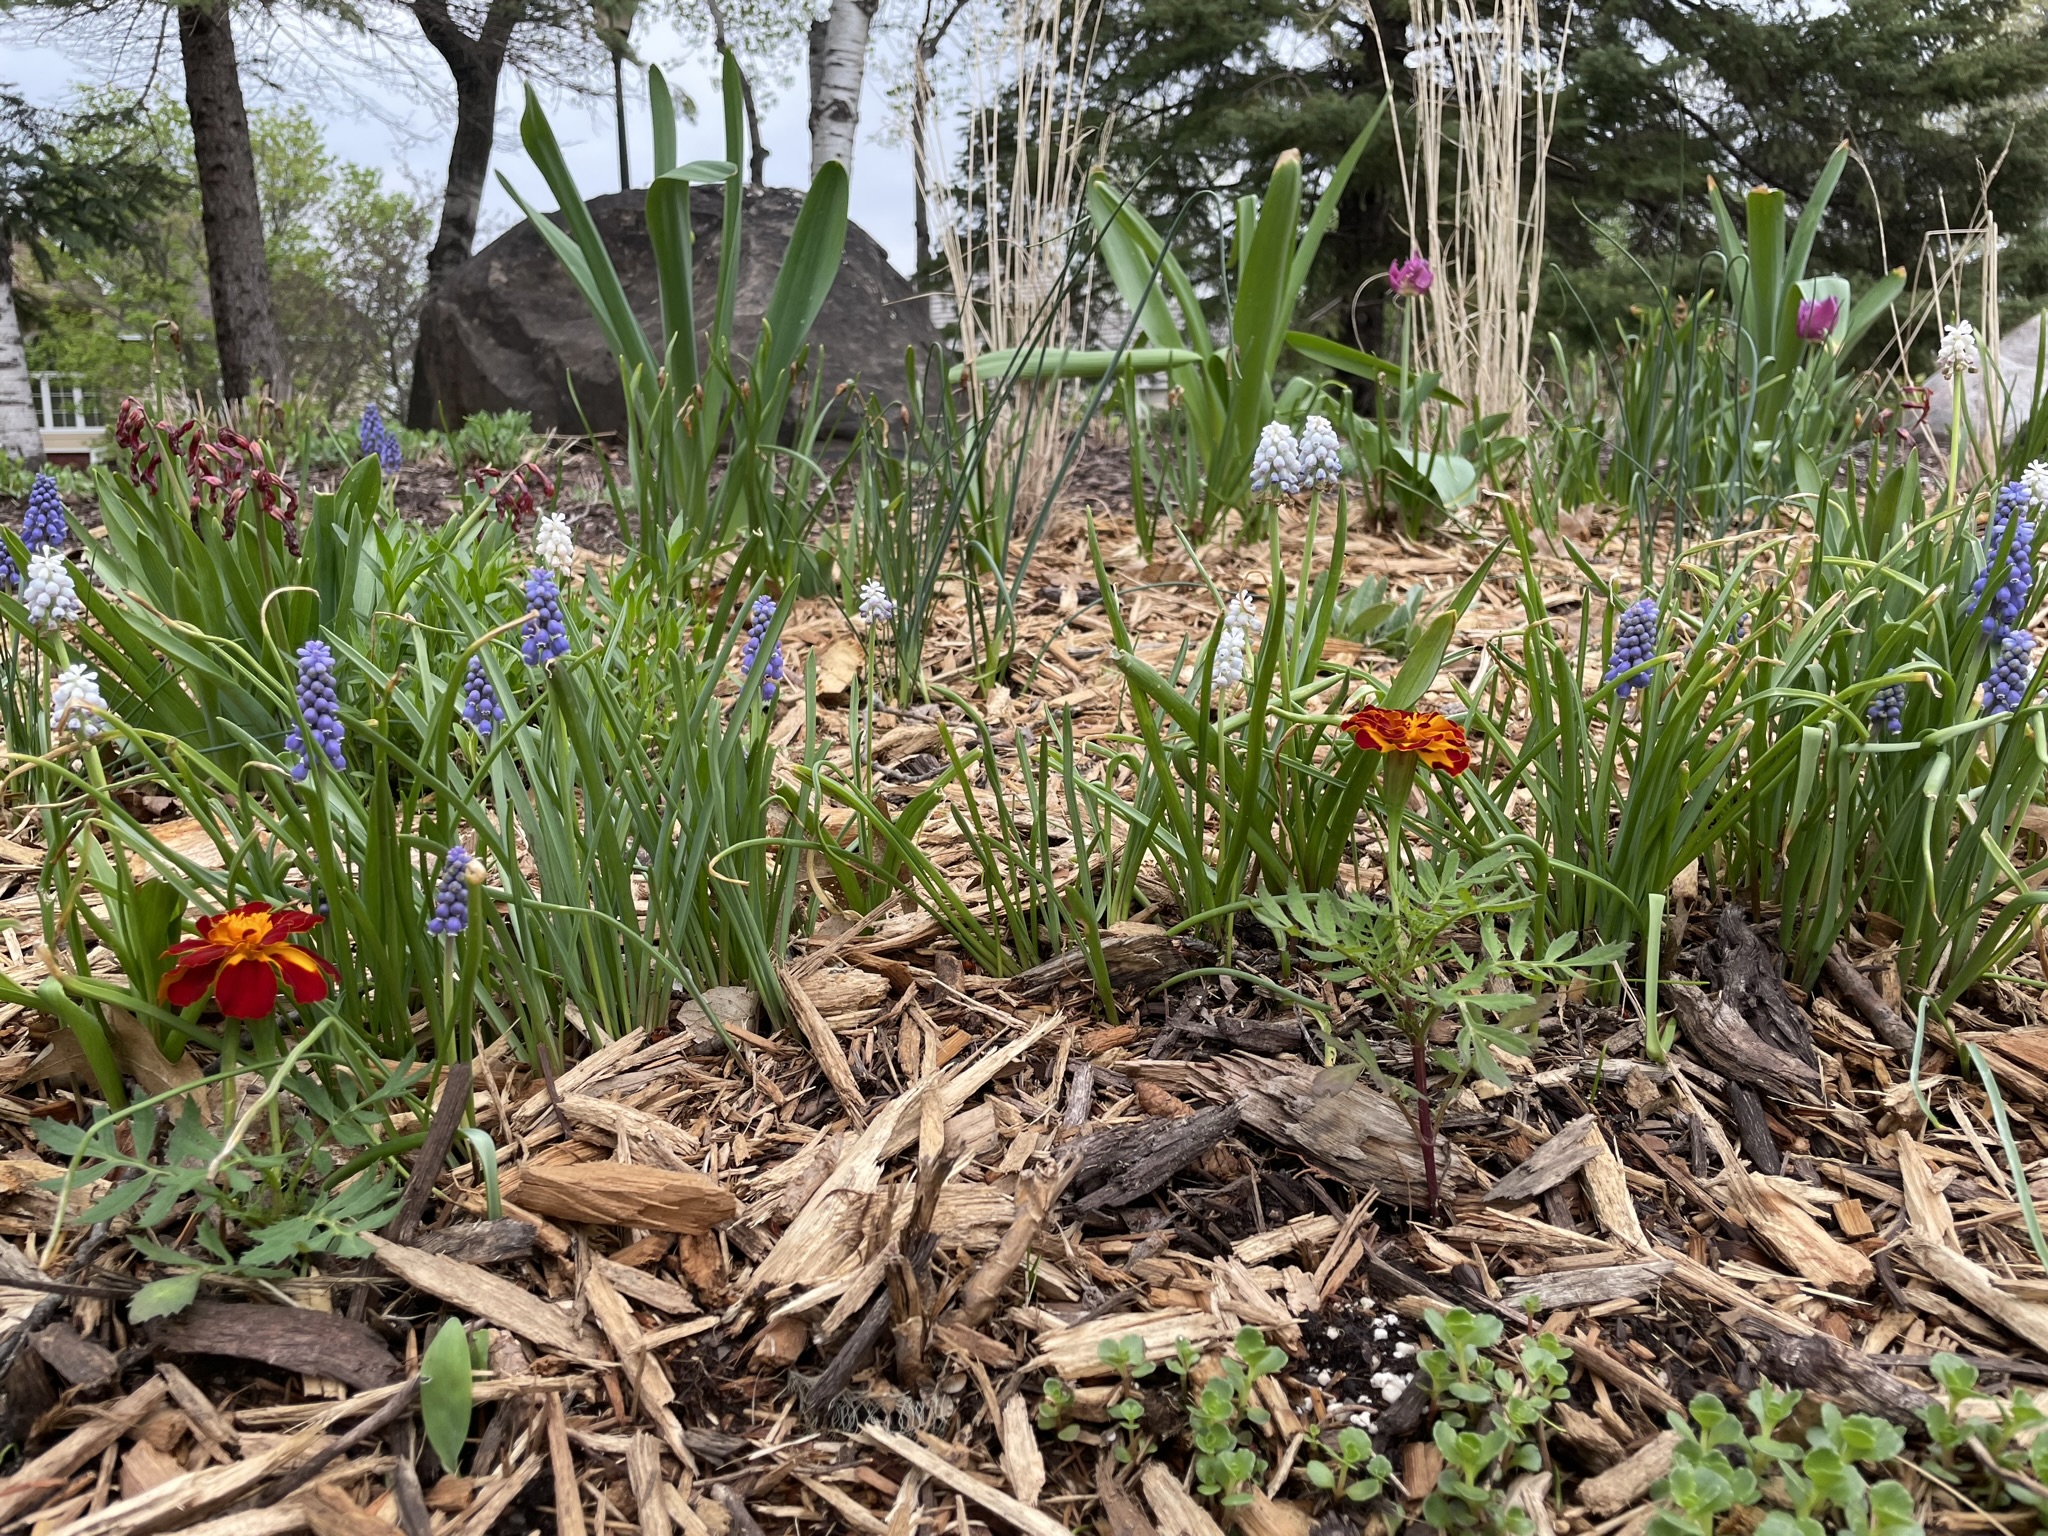
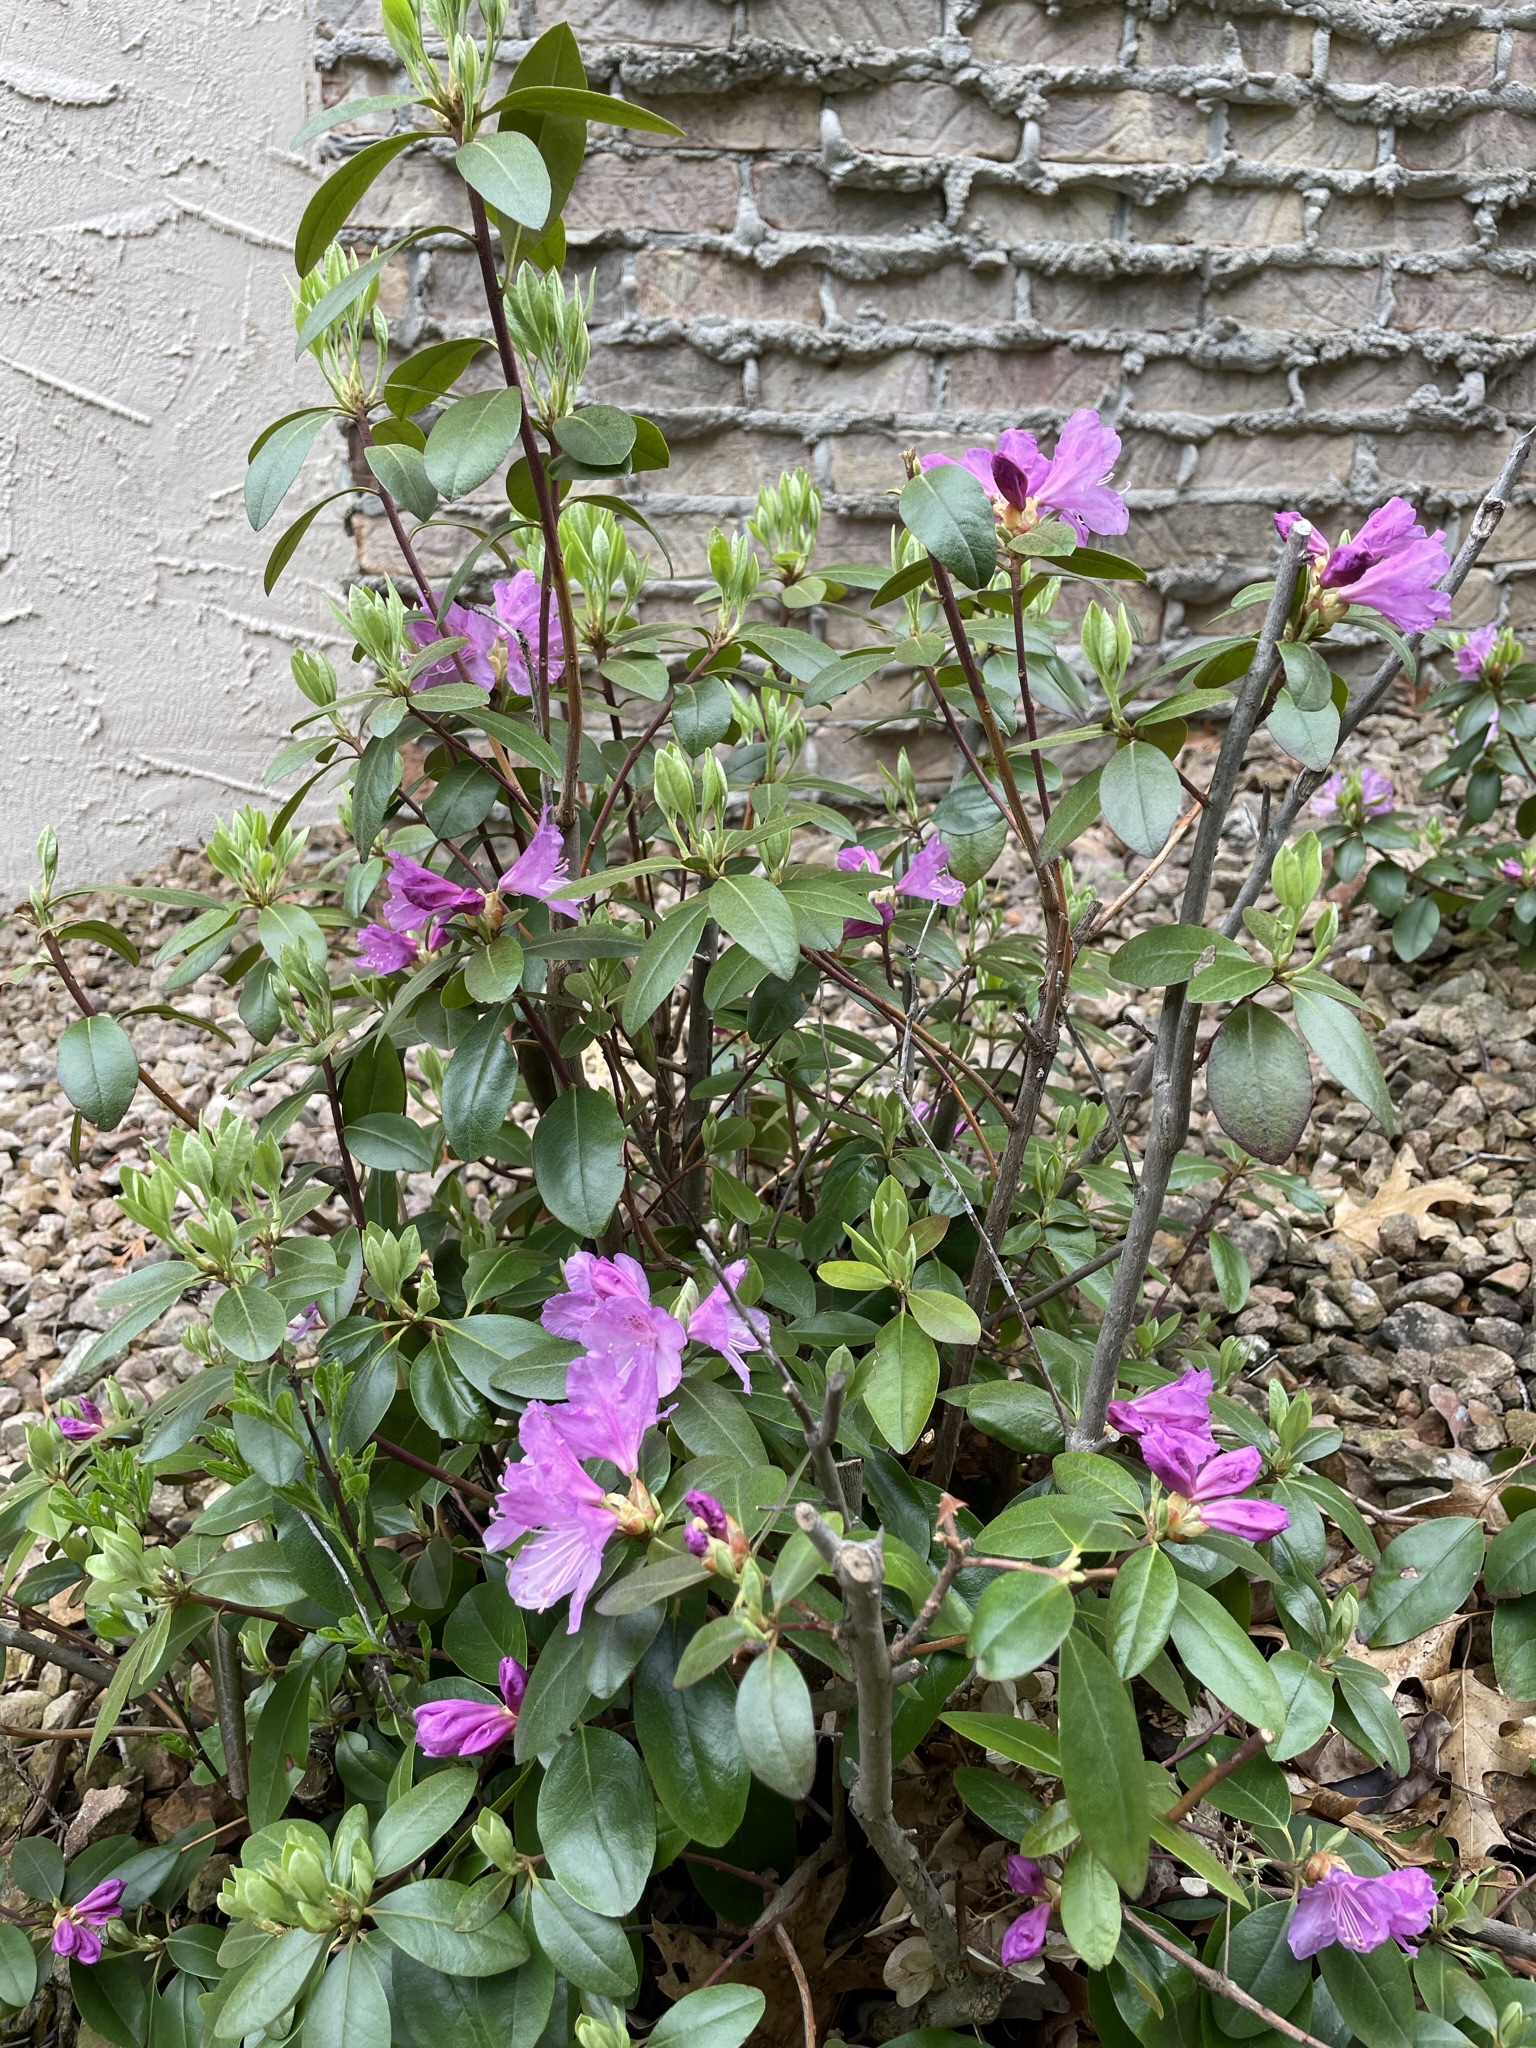
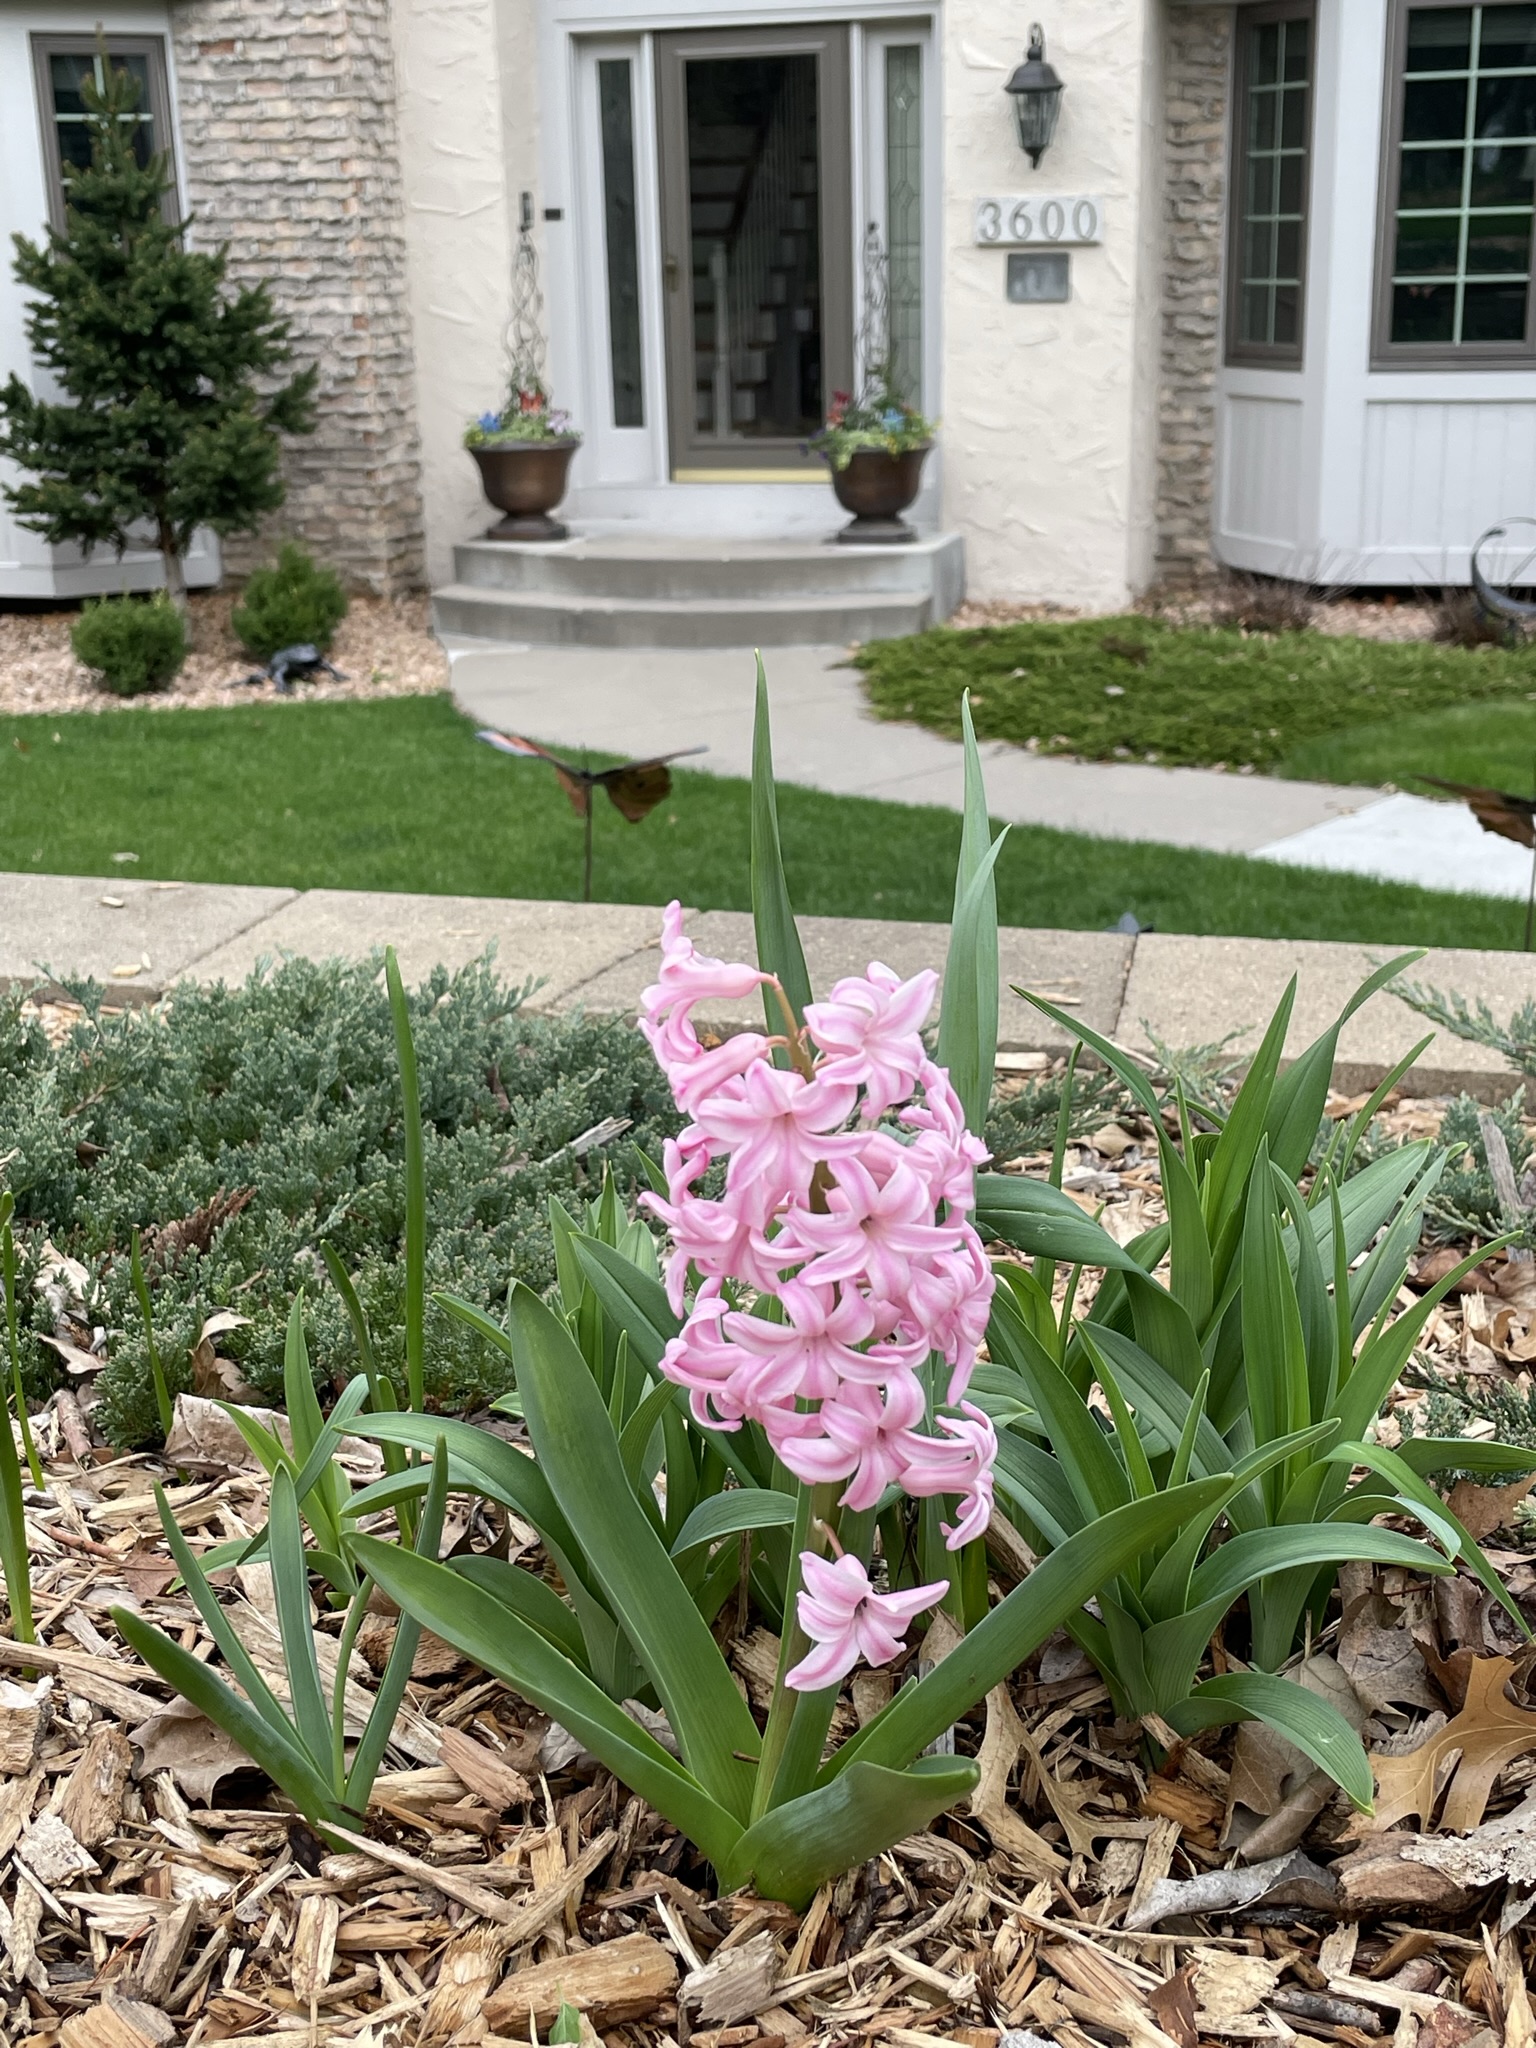
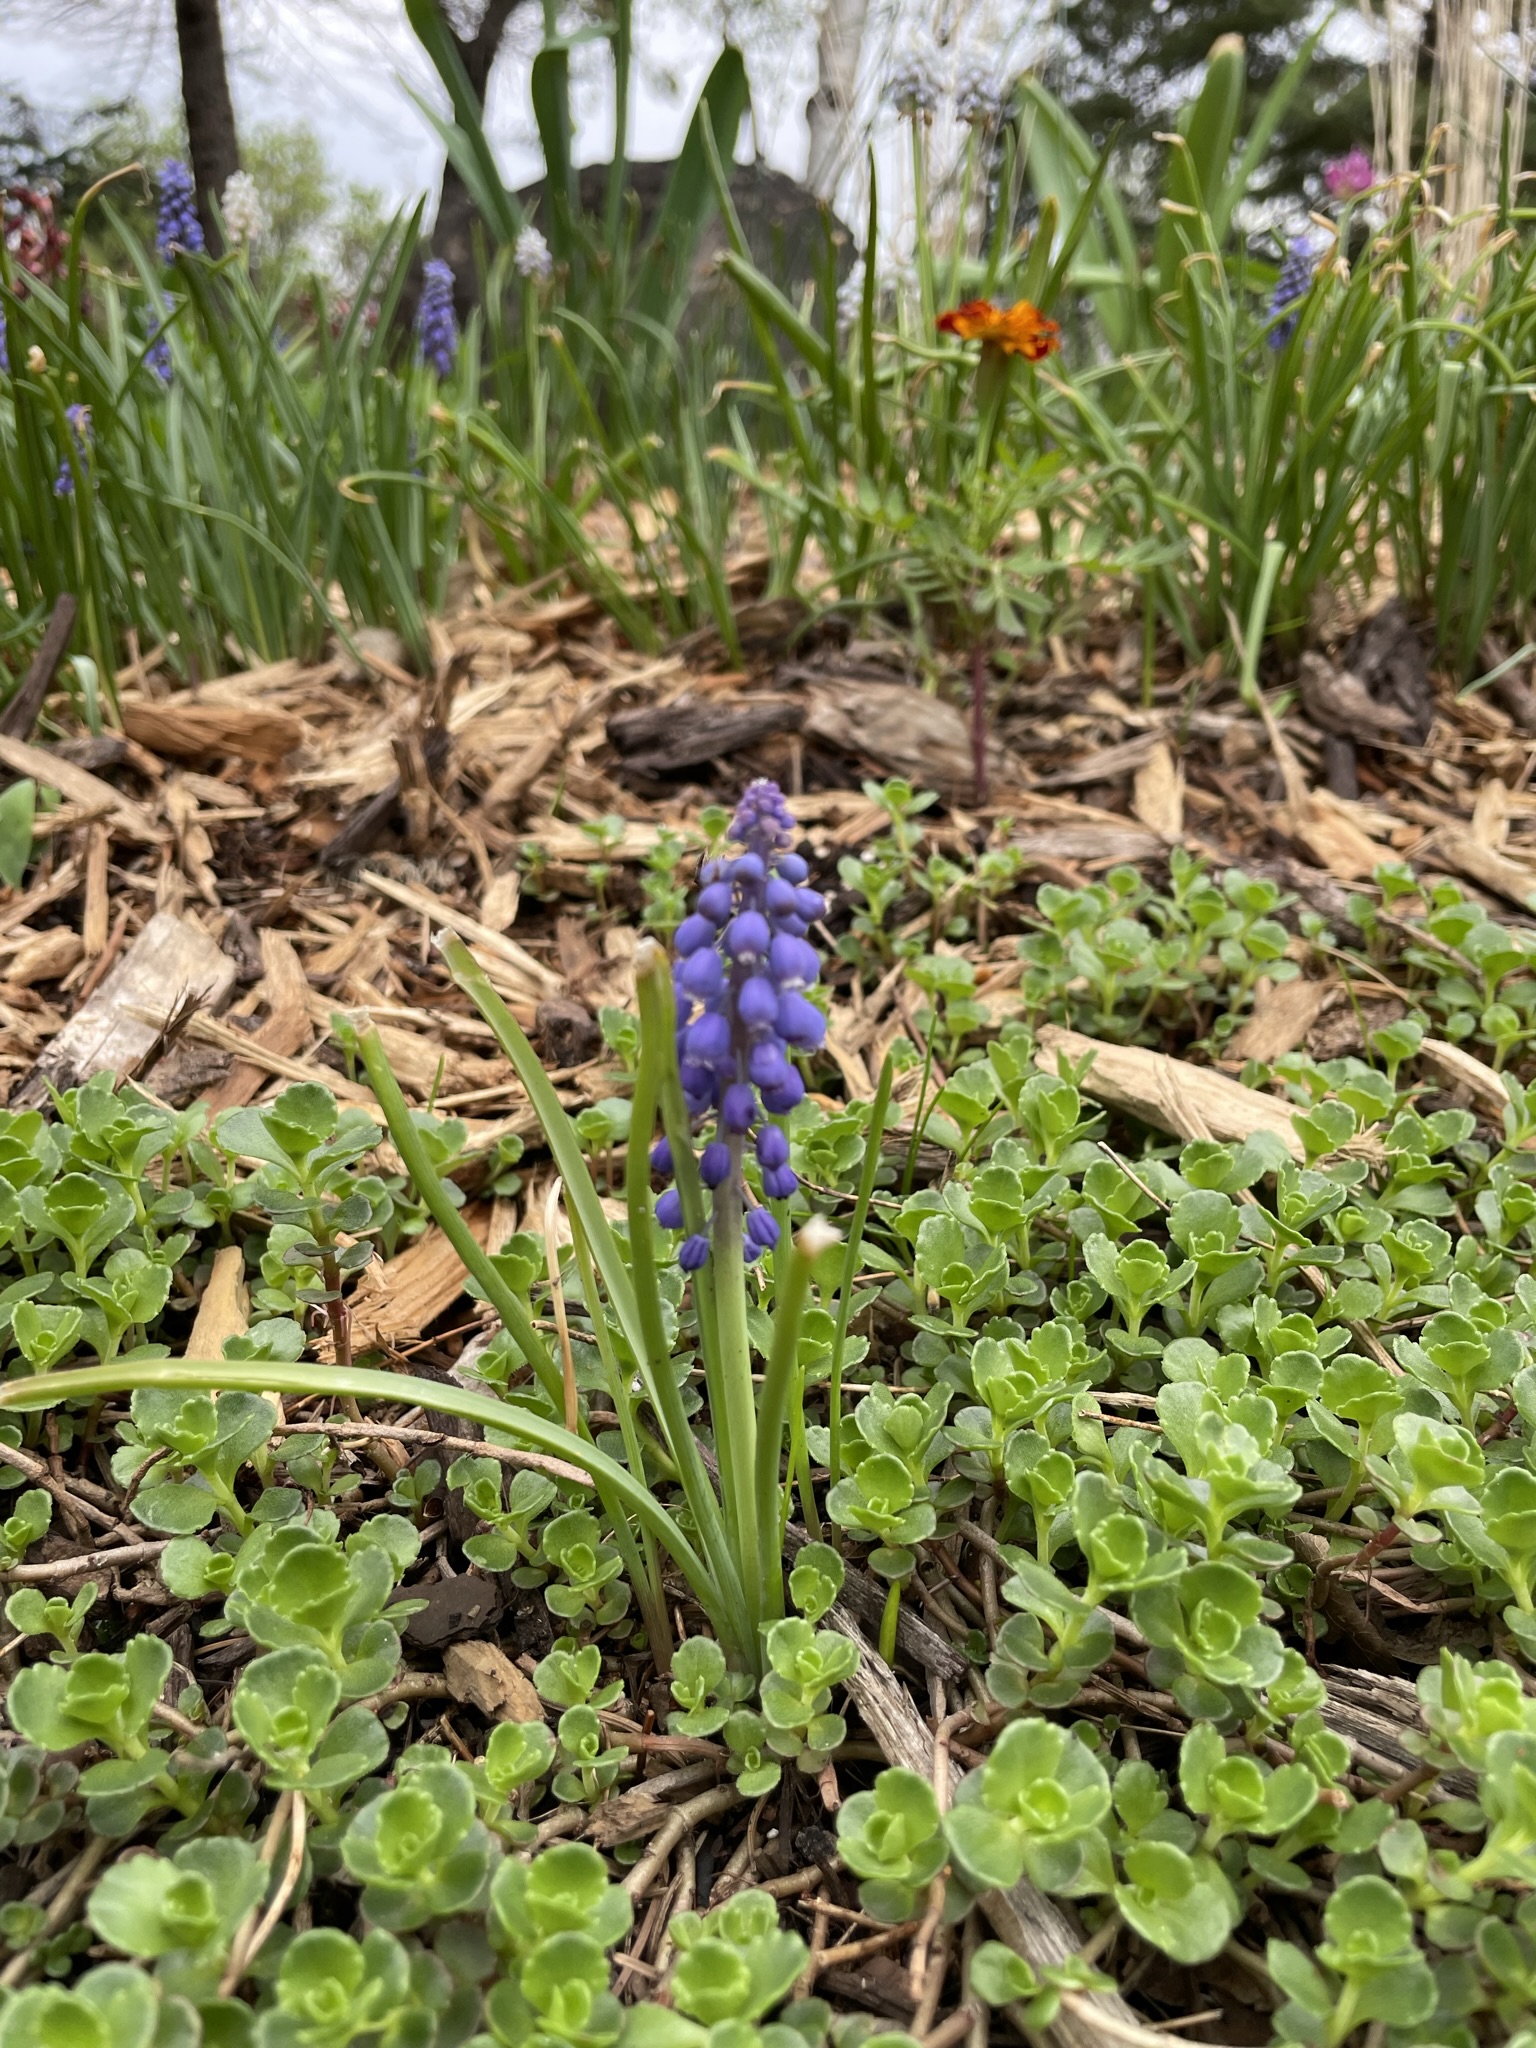
Watching the spring flowers pop into color.
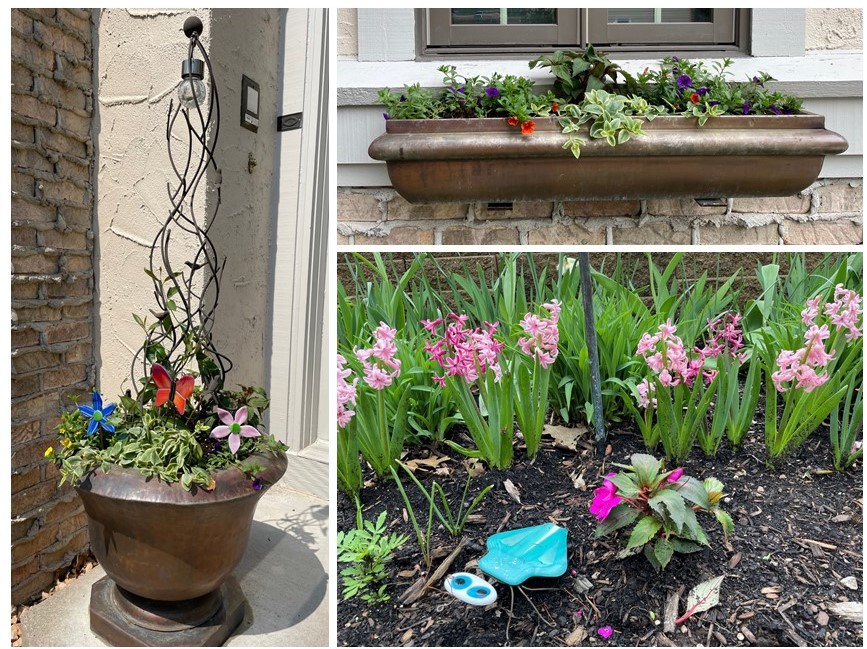
Planting seeds and plants in anticipation of the flowers and vegetables that will be growing over the next couple of months.
On Monday, I took a trip to the local greenhouse to purchase plants. Seeing the prices (yes inflation is impacting every aspect of our lives), I was happy that I had started some plants from seed. Having read that seeds can be saved from year to year, last fall I purchased seeds at the end of the season at 95% off. In March, and then every few weeks thereafter, I started various plants from seed (Ageratum, Beebalm, Broccoli, Cauliflower, Celery, Coleus, Marigolds, Melon, Peppers, Tomatoes and Zinnia). For the most part, I was successful and thus saved a significant amount of money. I was even successful in over-wintering my Mandevilla in my sunroom, which saved me having to purchase those for my large front step planters this year.
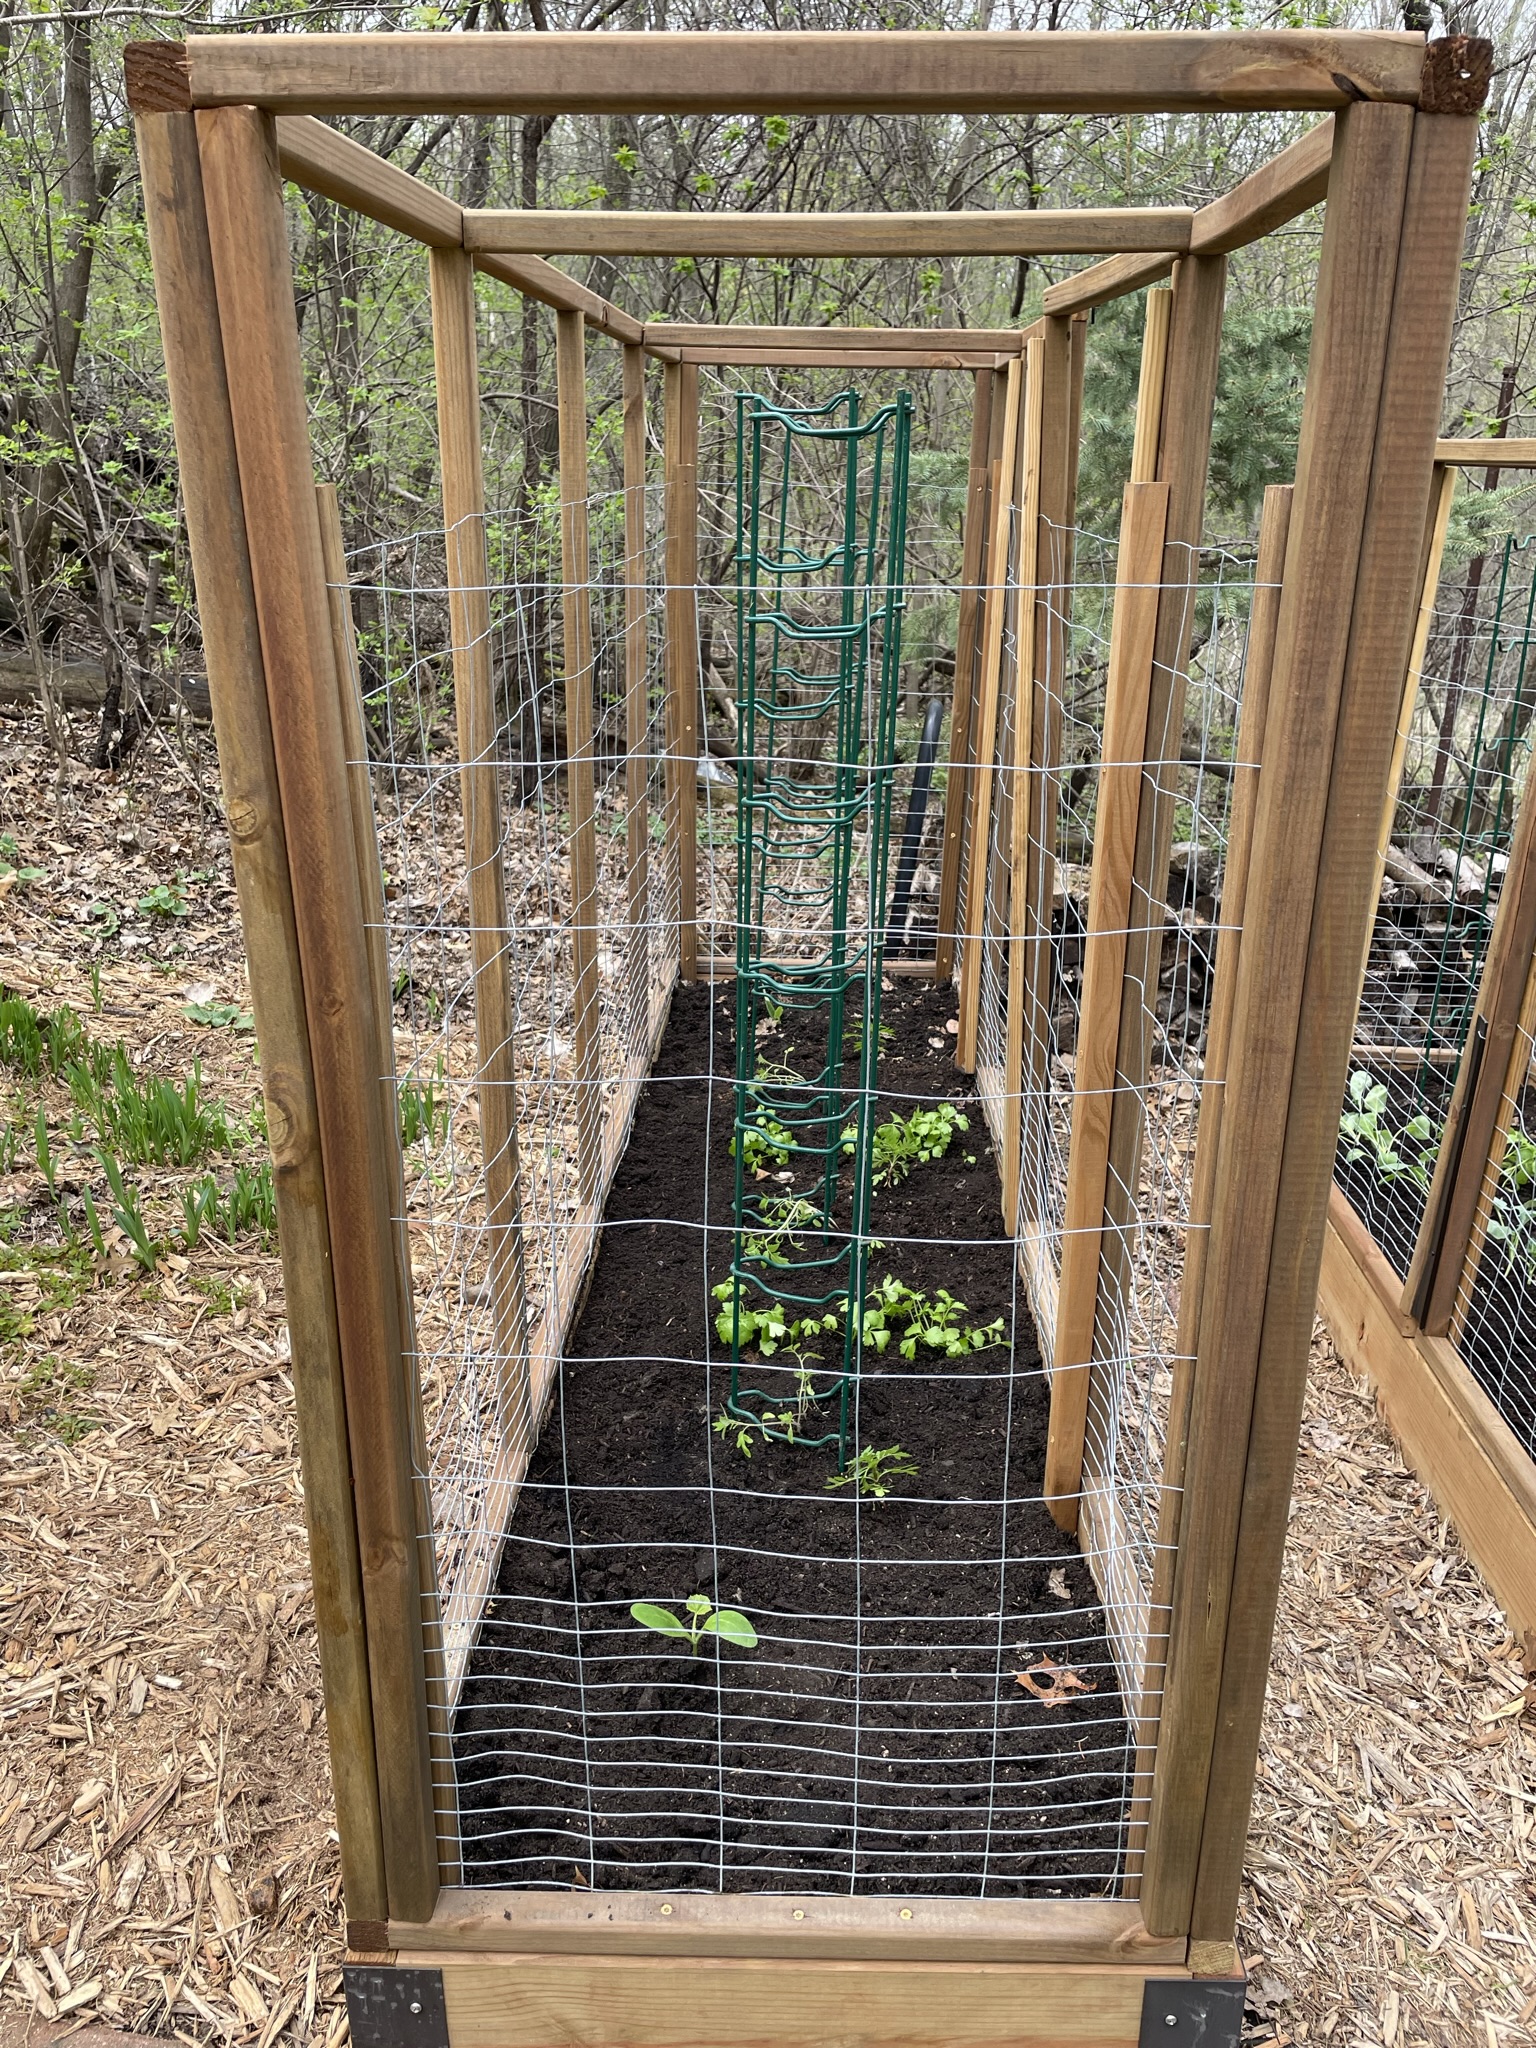
After I returned home, I got busy planting the flowers in my front yard and vegetables in the raised beds I built last fall.
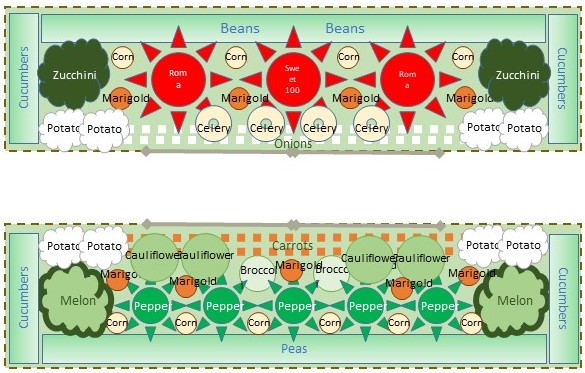
For my vegetable garden, I am trying French Intensive Gardening. French intensive gardening dates back to the market gardens in 16th-century France. Located in the area around Paris and other French cities, this gardening method allows for produce to be grown in less space than in traditional gardening yet with still produce high yields. Many principles of French intensive gardening are standard gardening practices today, especially for small urban spaces. Since the wildlife like to eat anything I plant in my backyard, I am limited to the two 2′ x 8′ raised beds I built last fall (and a few planters for salad greens on my deck).
Soil improvement is the most important aspect of this type of gardening. My raised beds are 12″ deep and are filled with a mixture of topsoil, sand and compost. The enriched soil and depth allows for the plant roots to grow vertically rather than competing with neighboring plants for nutrients. Because the gardens are in raised beds, there is no need for walking paths within the beds, thus no valuable space is wasted. Being two feet wide, I can easily access all areas of the beds for weeding and eventual harvesting. Having reviewed numerous on-line sites about this type of gardening, I planned my planting design with combinations that have been shown to be successful for companion planting and used both seedling plants and seeds.
Because crop rotation is important with this type of gardening, next year I will switch the plants to the opposite bed. I have faith that all those little seeds I planted will sprout and the resulting seedlings will become vegetables in my little garden in my backyard.
Two months ago, I posted about using my 3D printer to make some tools for my crafts. Today, I am describing some additional prints I have made.
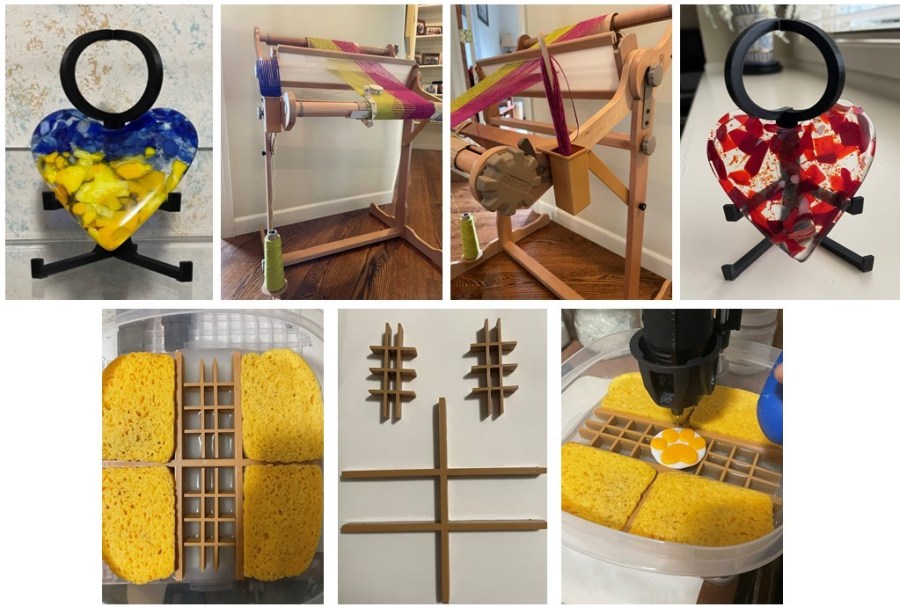
Weaving tools for my Rigid Heddle Loom
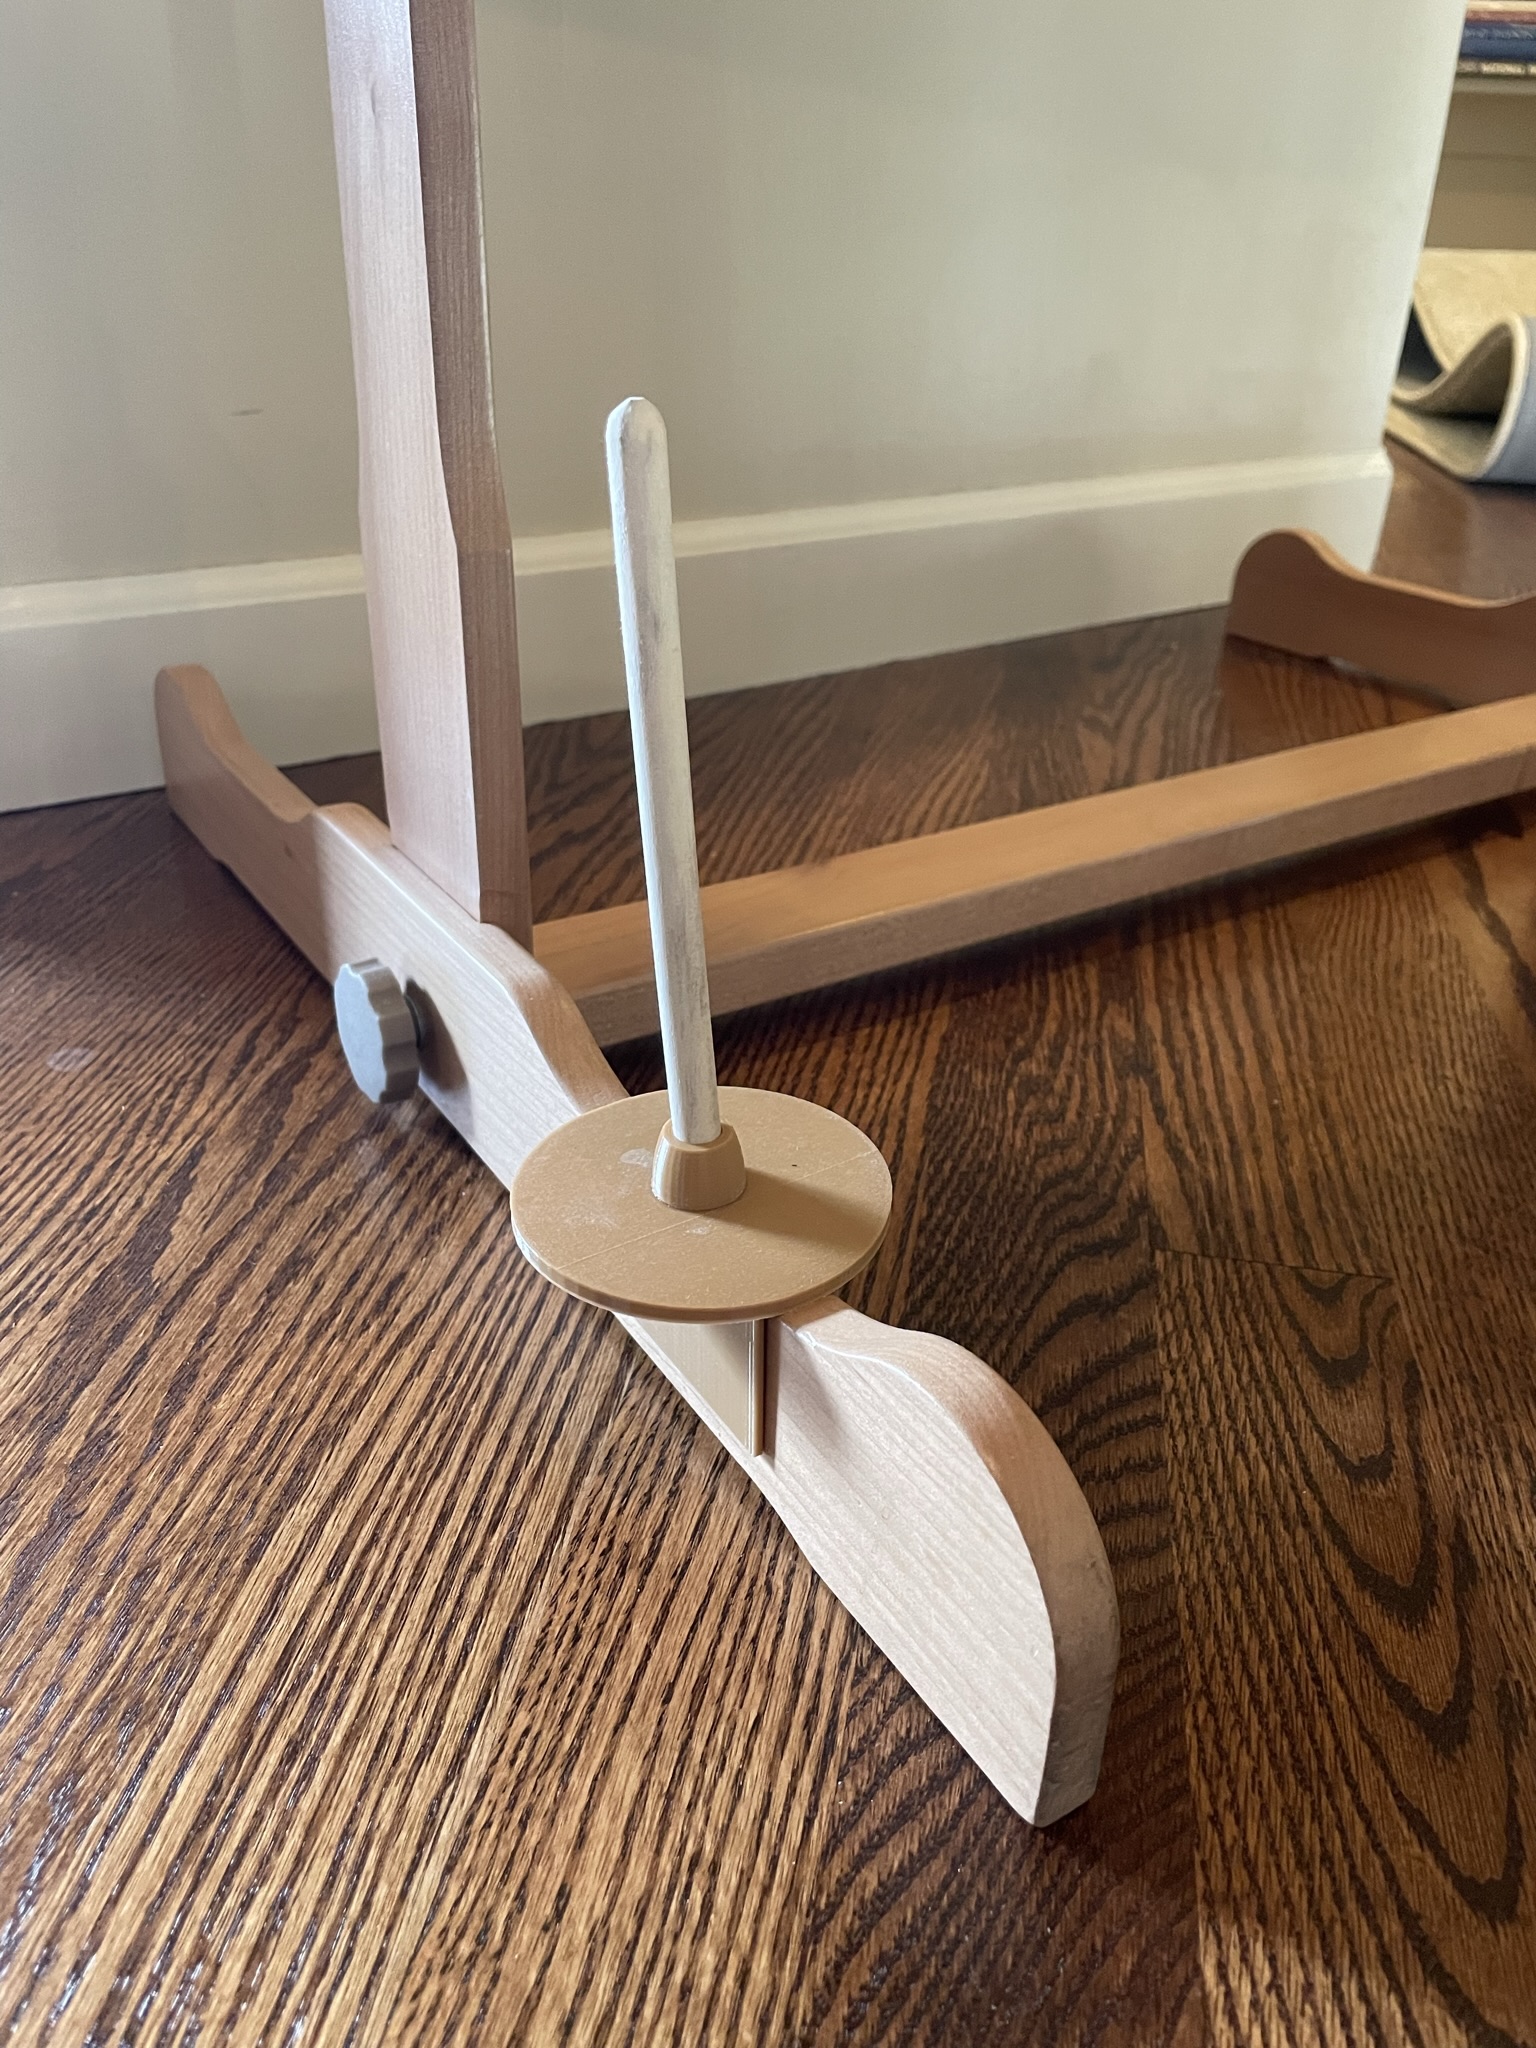
While recently visiting my mom, we were discussing some craft ideas that she can do even with her decreased dexterity and increased arthritis pain. One ideas was weaving. So, I looked up the current information about the loom that I purchased a few years ago, an Ashford Knitter’s Loom and stand. The design of the stand has changed slightly since I purchased mine. The stand now has support braces to make the frame more stable. These braces would keep the loom stable when attached to the stand. This is something that I wish my stand had because the loom did tip after a few minutes of use due to the connection screws loosening. I decided I really wanted some braces and looked them up on-line. After discovering that they cost $37 (for two pieces of wood), I decided to try to make my own. Using TinkerCad, I designed the brace, printed, and made some minor adjustments. I now have a much more stable stand for my loom.
I have been making several clasped weft scarves recently. When doing this technique, one or two spools of yarn are kept on the floor to wrap around the weft yarn when weaving. I became frustrated because the spool would constantly tip over and roll away from where I was weaving. To solve this problem, I tried numerous ideas. l finally settled on printing a platform that slips over the legs of the stand. The spool is held in place by a wooden dowel attached to the platform.
I also adjusted the adjusted the hanging shuttle basket idea, making it smaller and easier to grab the shuttle when working and to store my beater.
I have three new weaving tools – stand brace, spool holder and shuttle basket.
Platform for Dremel Drill Press
I recently started working on some glass windchimes which require me to drill numerous holes in glass. To drill the holes, I connected my Dremel drill to a rotary tool workstation, effectively making it into a drill press. To keep the glass cool, the drilling is done while the glass is in water. At first, I was using a wooden block to stabilize the glass. This proved frustrating because the drill bit would occasionally get stuck in the wood. To solve this problem, printed a couple gridded platforms to hold the glass on. These work really well!
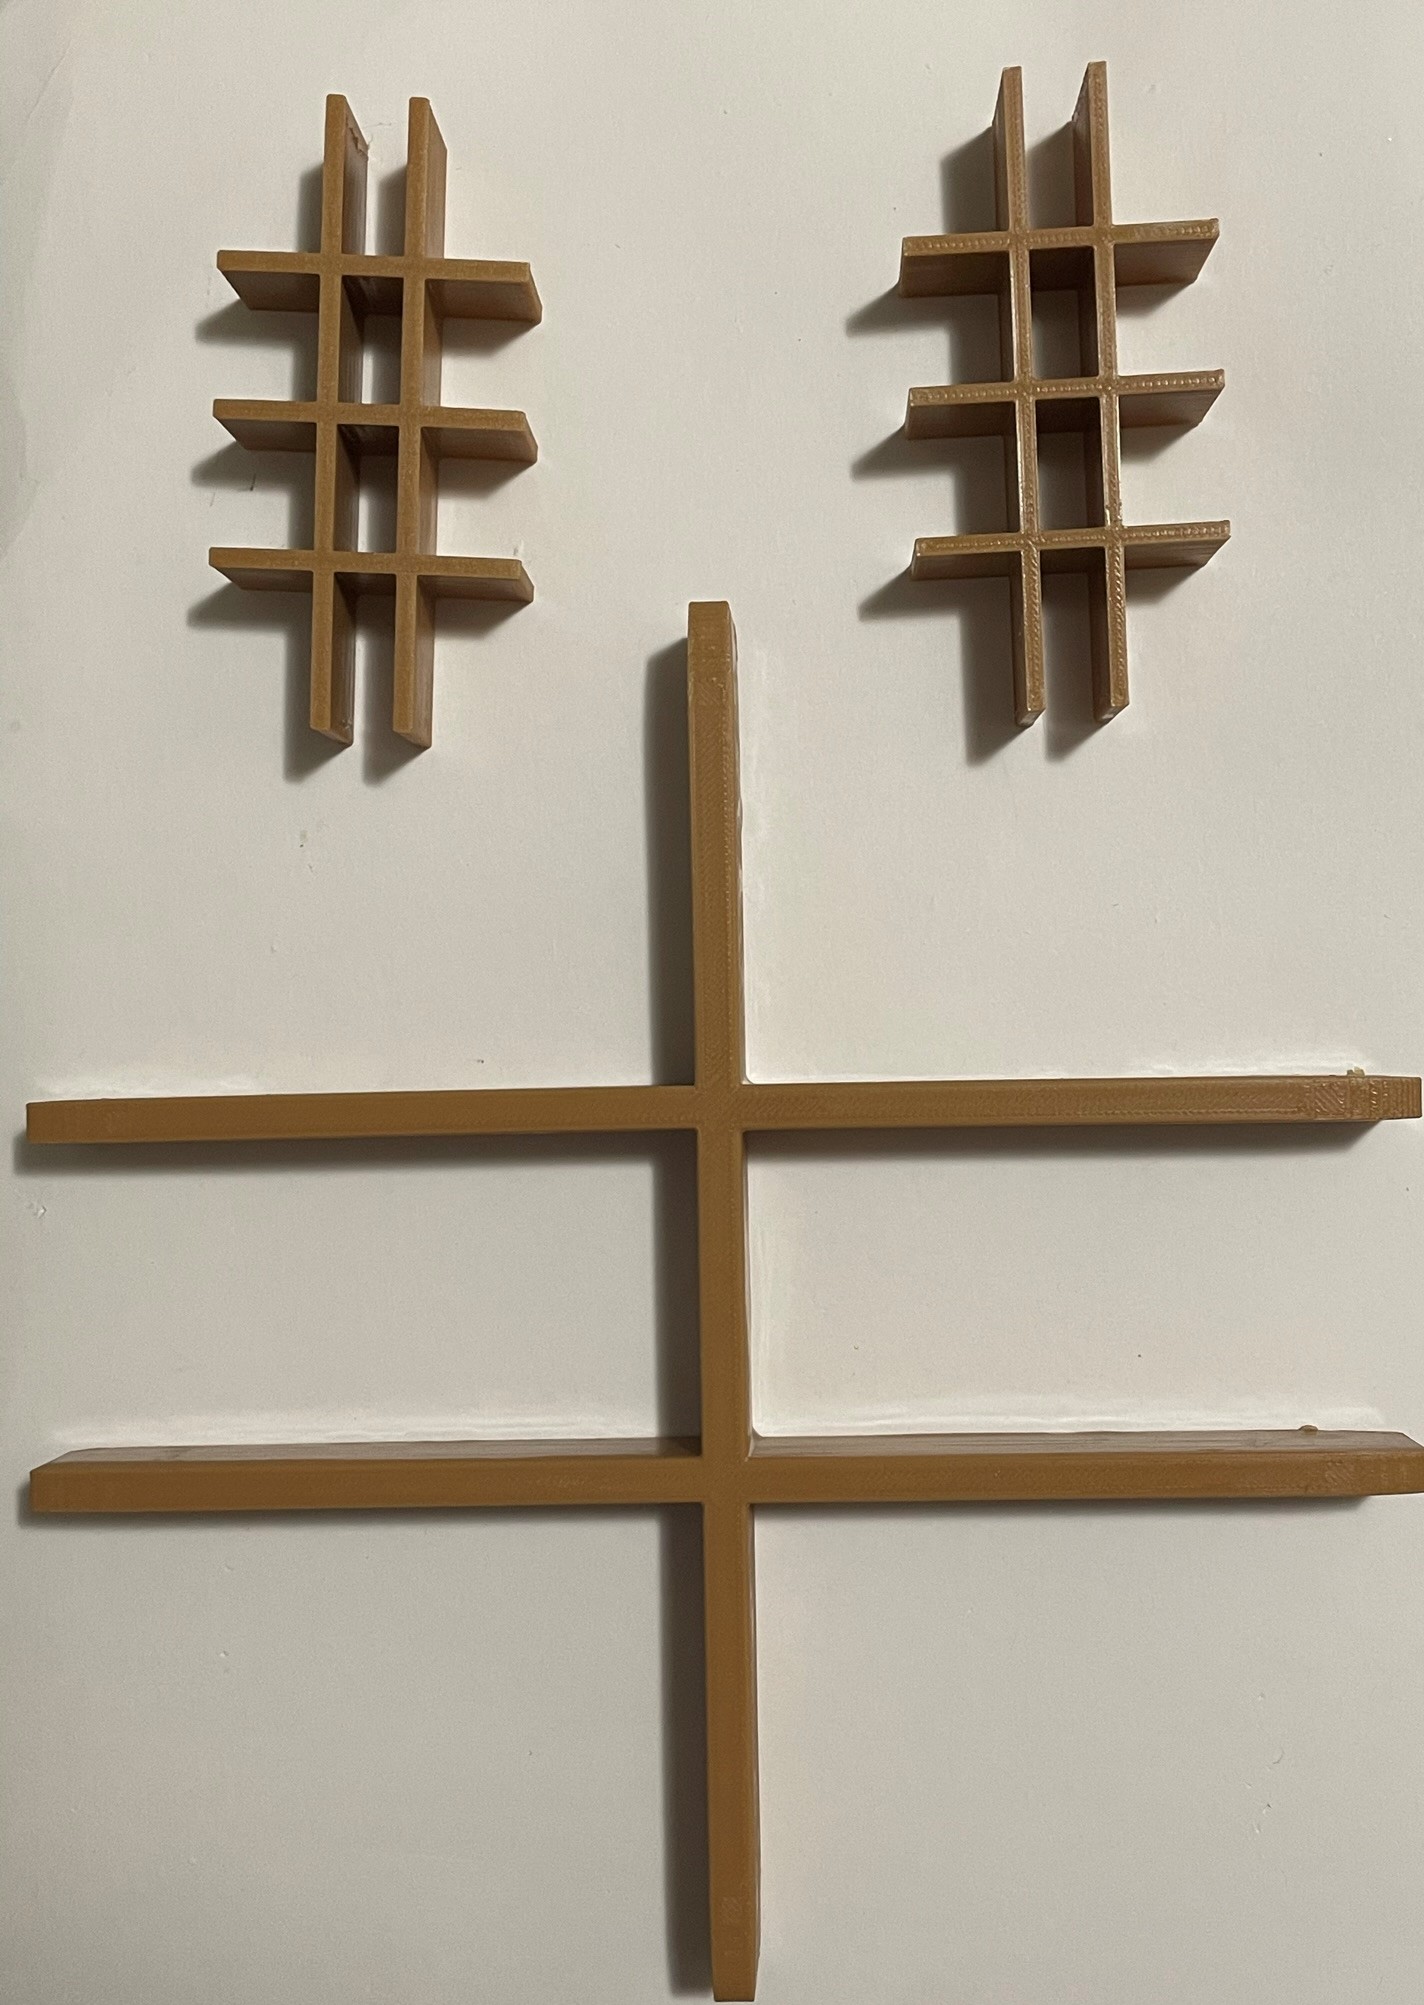
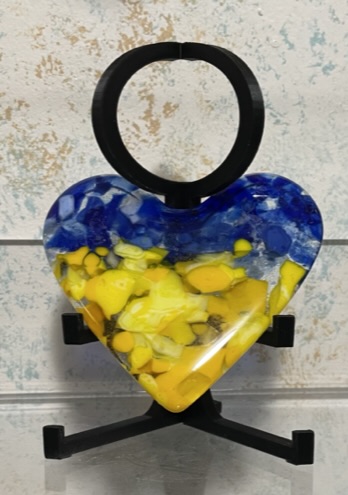
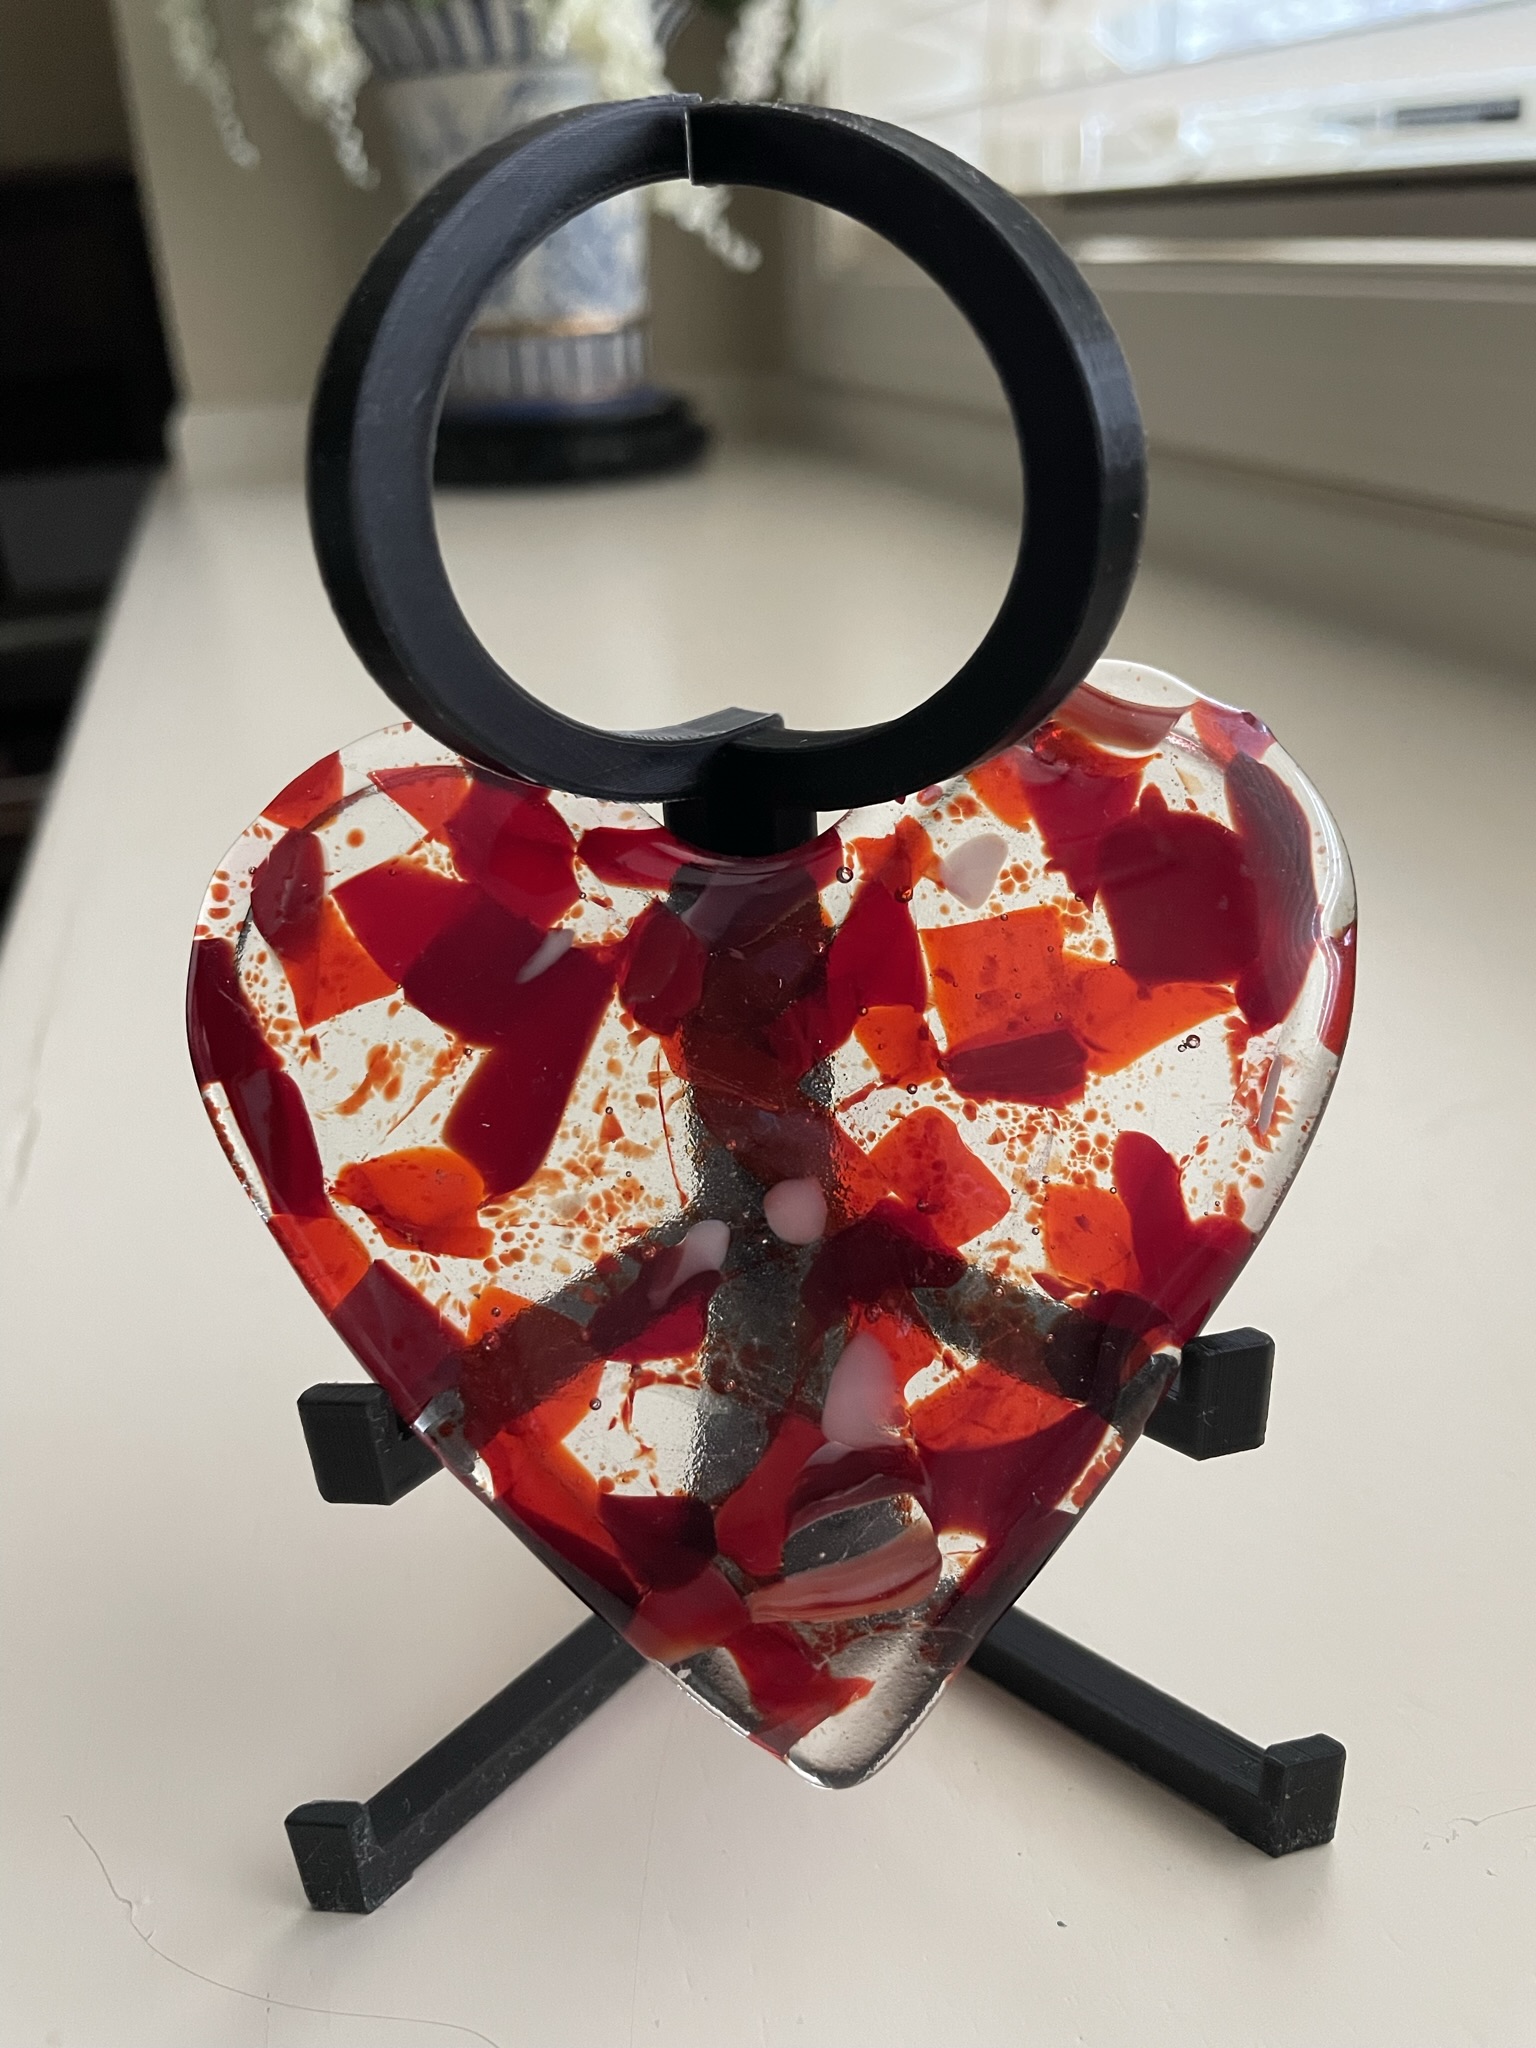
Stickman Holders for Cast Glass Hearts
I have been looking for a way to display hearts that I have made using the molds I purchased from Target. Unfortunately the only displays that I could find were not very interesting. I did see some nice wrought iron stands, but they were too small for my castings. So, I designed a 3D printed stickman that looks somewhat like the smaller wrought iron ones that I liked.
These are printed in two pieces that snap together into a nice stand which the hearts fit perfectly into.
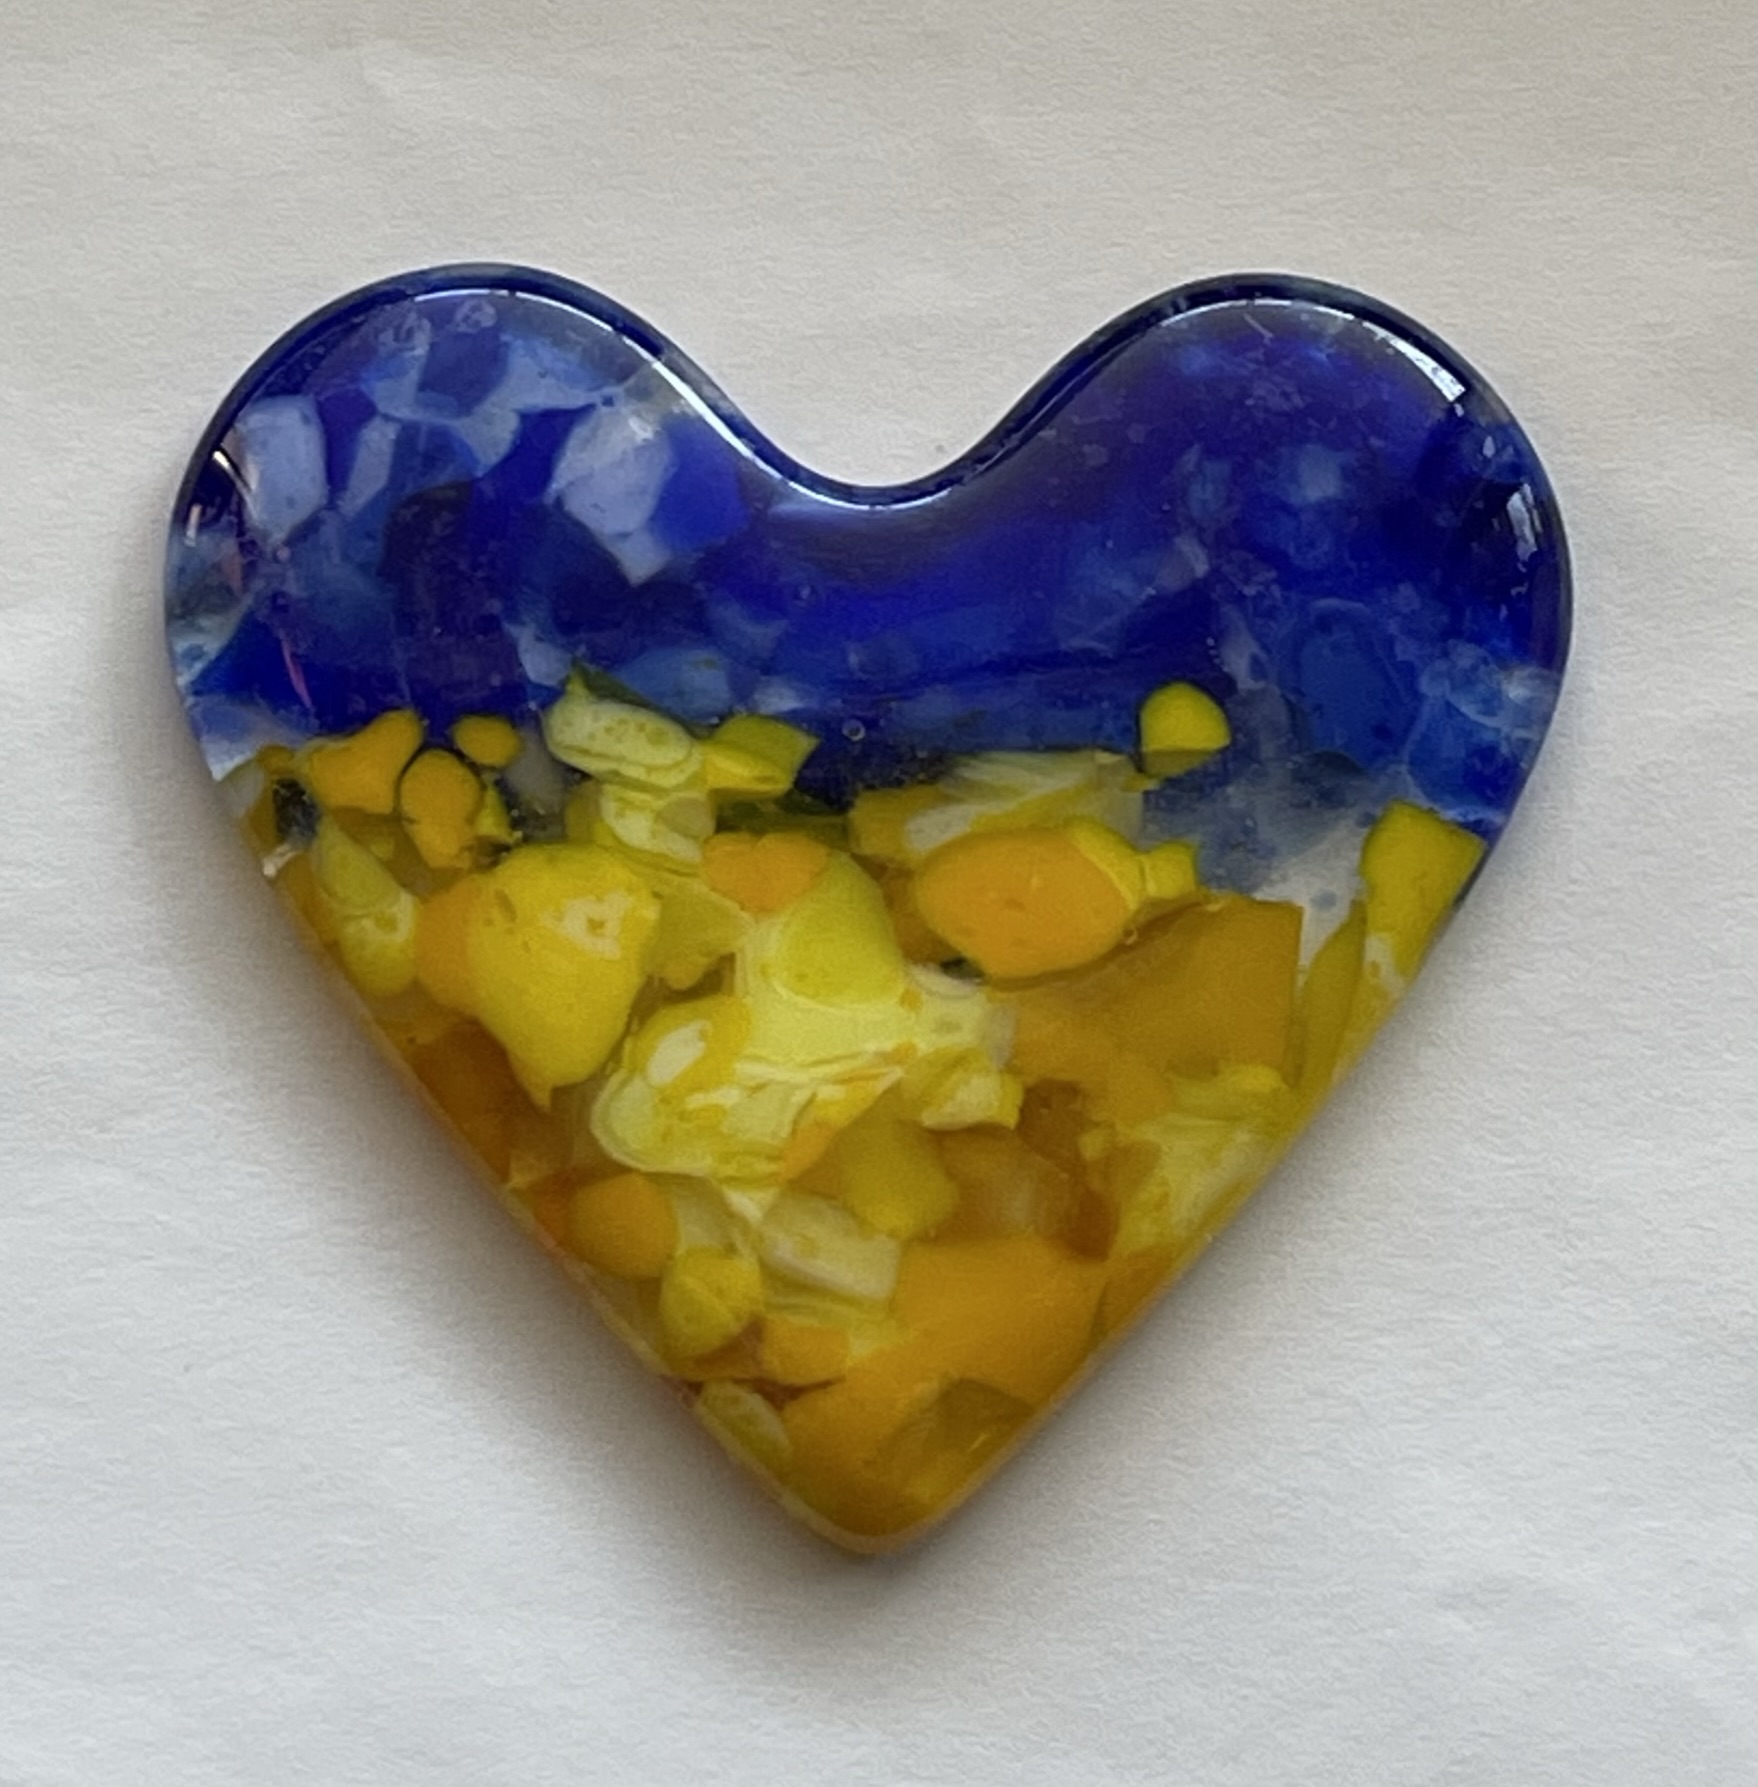
Sometimes art supplies can be very expensive. So, when I find an alternative source, it can be very rewarding. Earlier this year, while walking around our local Target store, I saw some unfinished ceramic dishes in the dollar section of the store. Some were letters of the alphabet and others were geometric shapes.
When I saw these, I wondered if they would be useful for molds for my fused glass. Casting molds can cost $10 for even a small mold. So, if these would work, they would be very economical. I purchased one of the hearts and took it home. I figured if it didn’t work I would only have wasted a dollar (and some scrap glass).
Before testing it, I did some on-line checking to see if anyone else had already tried using one of the small dishes. Sure enough, several people had already tried the dishes and were successful.
Using some scrap glass I made a heart paperweight (for Valentine’s Day) and a heart paperweight in support of Peace for Ukraine.
With Mother’s Day approaching, I had another idea for the heart molds.
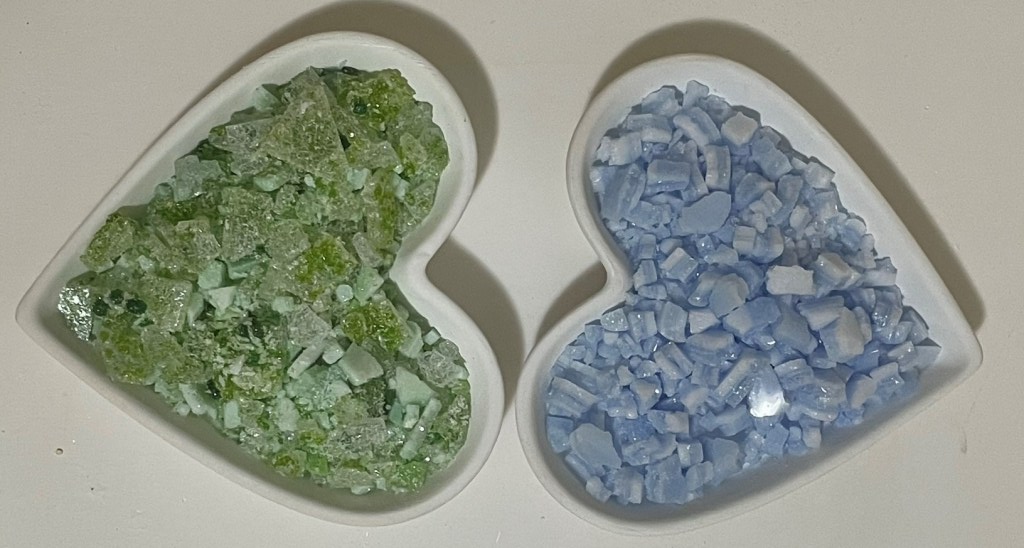
Using scrap glass, I made some hearts of soft blue and soft green glass.
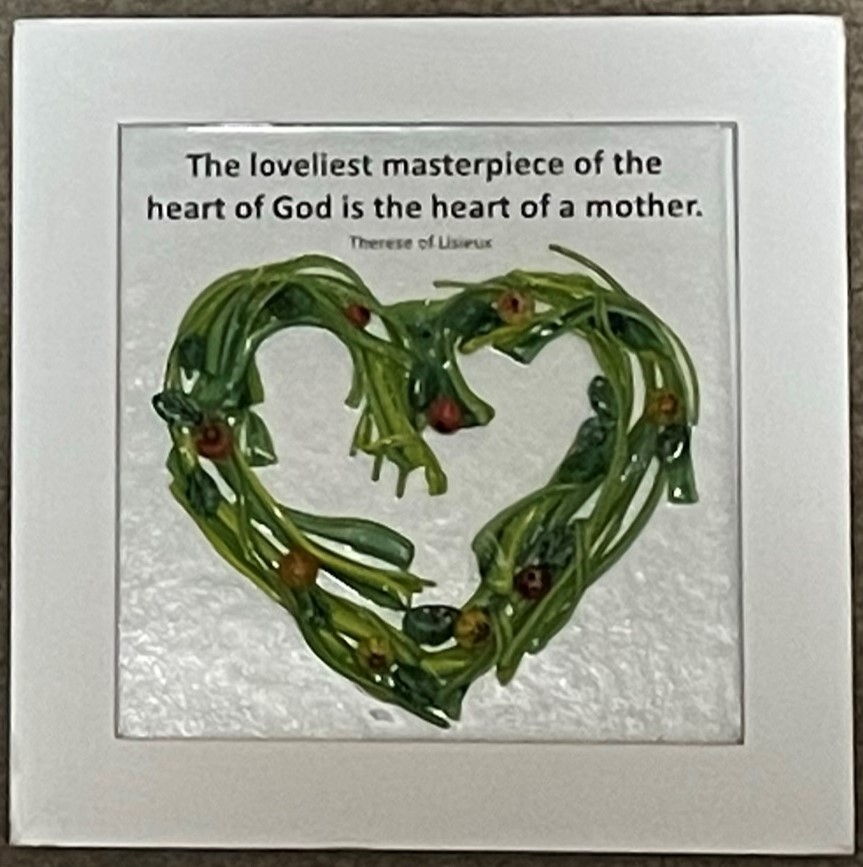
The resulting hearts were enhanced with various murrini and freeze/fuse glass shapes, tack fused to clear glass and placed in a 5×5 frame with a quote from Therese of Lisieux that I thought was very meaningful for Mother’s Day.
I also made another heart using some pieces of vitregraph and murrini.
My mom’s gift was hand delivered when I visited her recently and my mother-in-law’s gift was recently mailed to her. So, don’t worry that their surprise for Mother’s Day is impacted by this post. I think both of them enjoyed their gifts.
I have since stocked up on more dishes, letters (unfortunately they did not have the entire alphabet), diamonds, more hearts and hexagons. I am looking forward to using these new molds. If anyone has any special requests for heart/letter, please contact me to inquire about what I can make.
This morning, while starting a new weaving project on my rigid heddle loom, I realized that I have neglected to write about some of my earlier projects. Over the past two years, I have woven dozens of scarves, most of which I have given as gifts or donated to various charities. For these scarves I generally used the plain weave technique. This is the technique that we all learned in school , the over one / under one weaving style. Made with fun yarns, this technique can make for a lovely scarf.
About a year ago, I tried out a new weaving technique that is really fun to do. Looking more complicated than it really is, clasped weft weaving utilizes the interlocking technique commonly used in tapestry weaving.
For those that do not weave, a brief description of terms. When weaving, there are two components to creating the cloth – warp and weft. The warp threads run lengthwise through the project and are held on the loom under tension during weaving. When woven on a loom, the weft threads run side to side and are inserted, or “thrown”, by the weaver. The resulting cloth is created by the interlacing of the warp and weft where both directions of threads are visible. When doing picture or landscape tapestry weaving the weft threads may change mid shed, the threads are wrapped around one another, or clasped, to avoid having a hole in the cloth.
On a loom, clasped weft technique involves two weft threads that are visually different. This can be two different colors, or shiny vs matte, etc. The basic idea is that one weft goes through the shed, wraps around the second weft and then pulls the second weft into the shed. This results in a weft that is doubled in each shed. The pattern created by the interlocking of the weft can be either planned out or random.
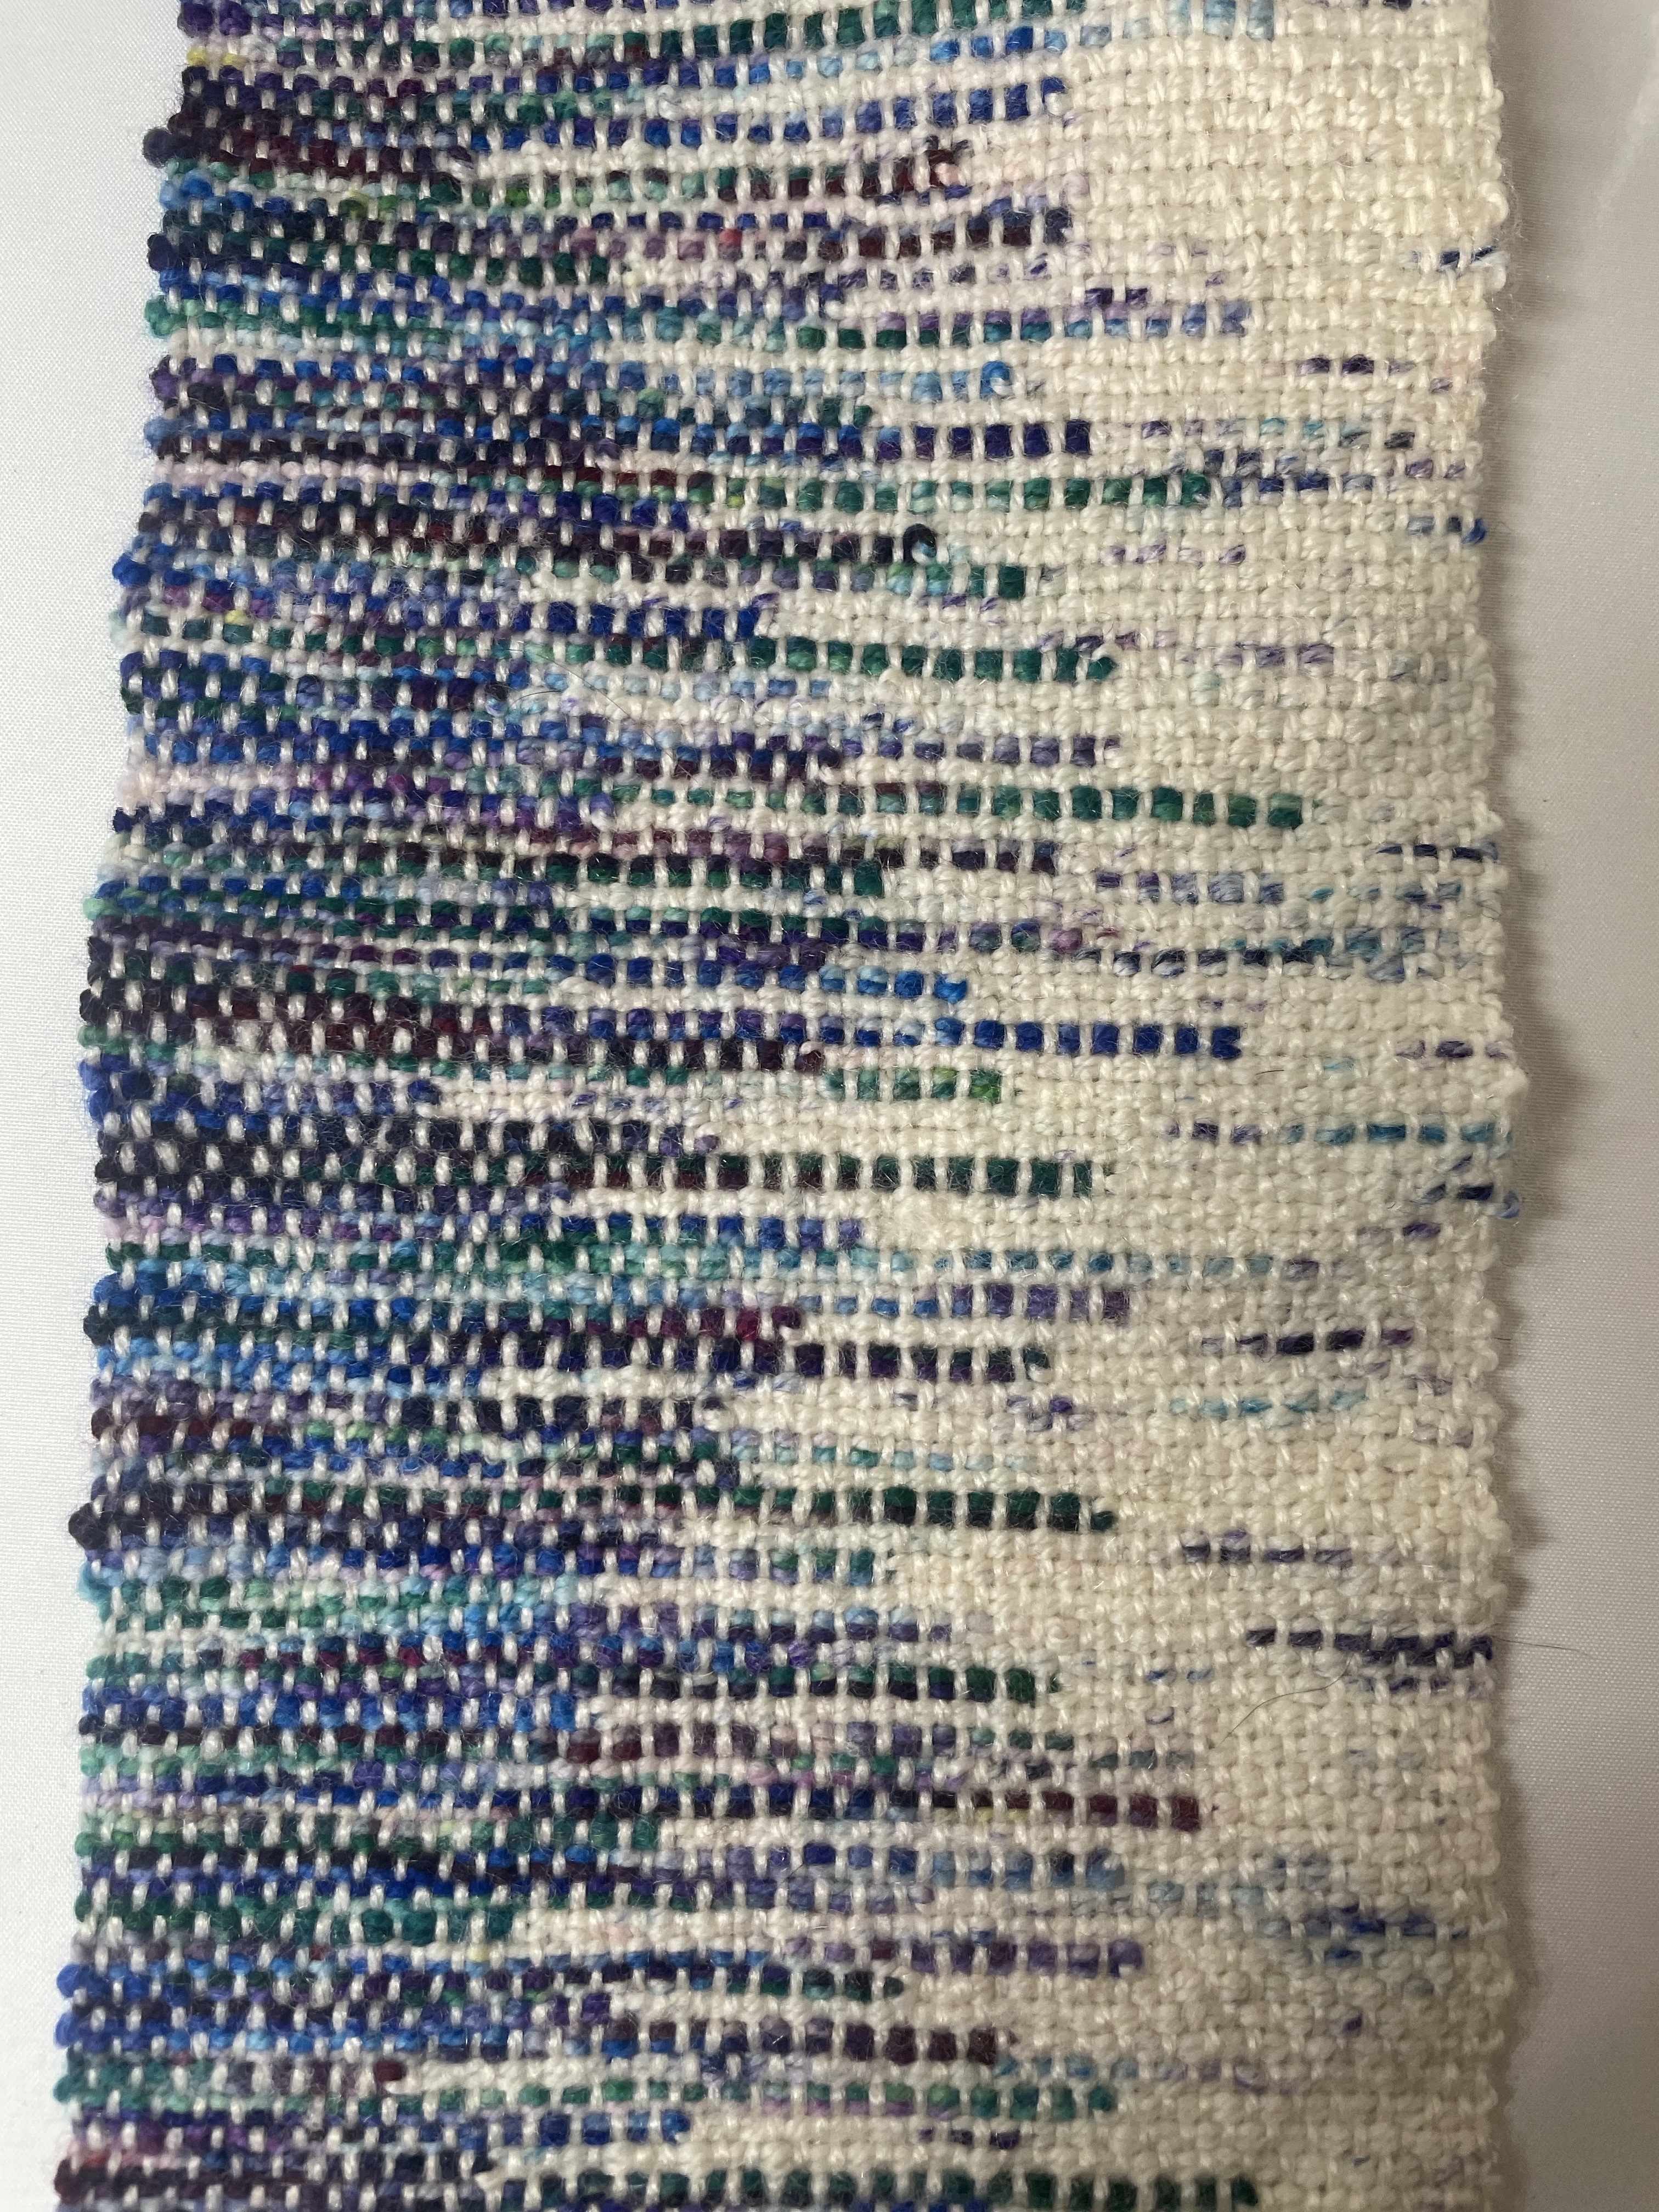
The picture above shows a wall hanging that I made for our guest room. This project was planned out to give an very even design in the clasped weft fabric.
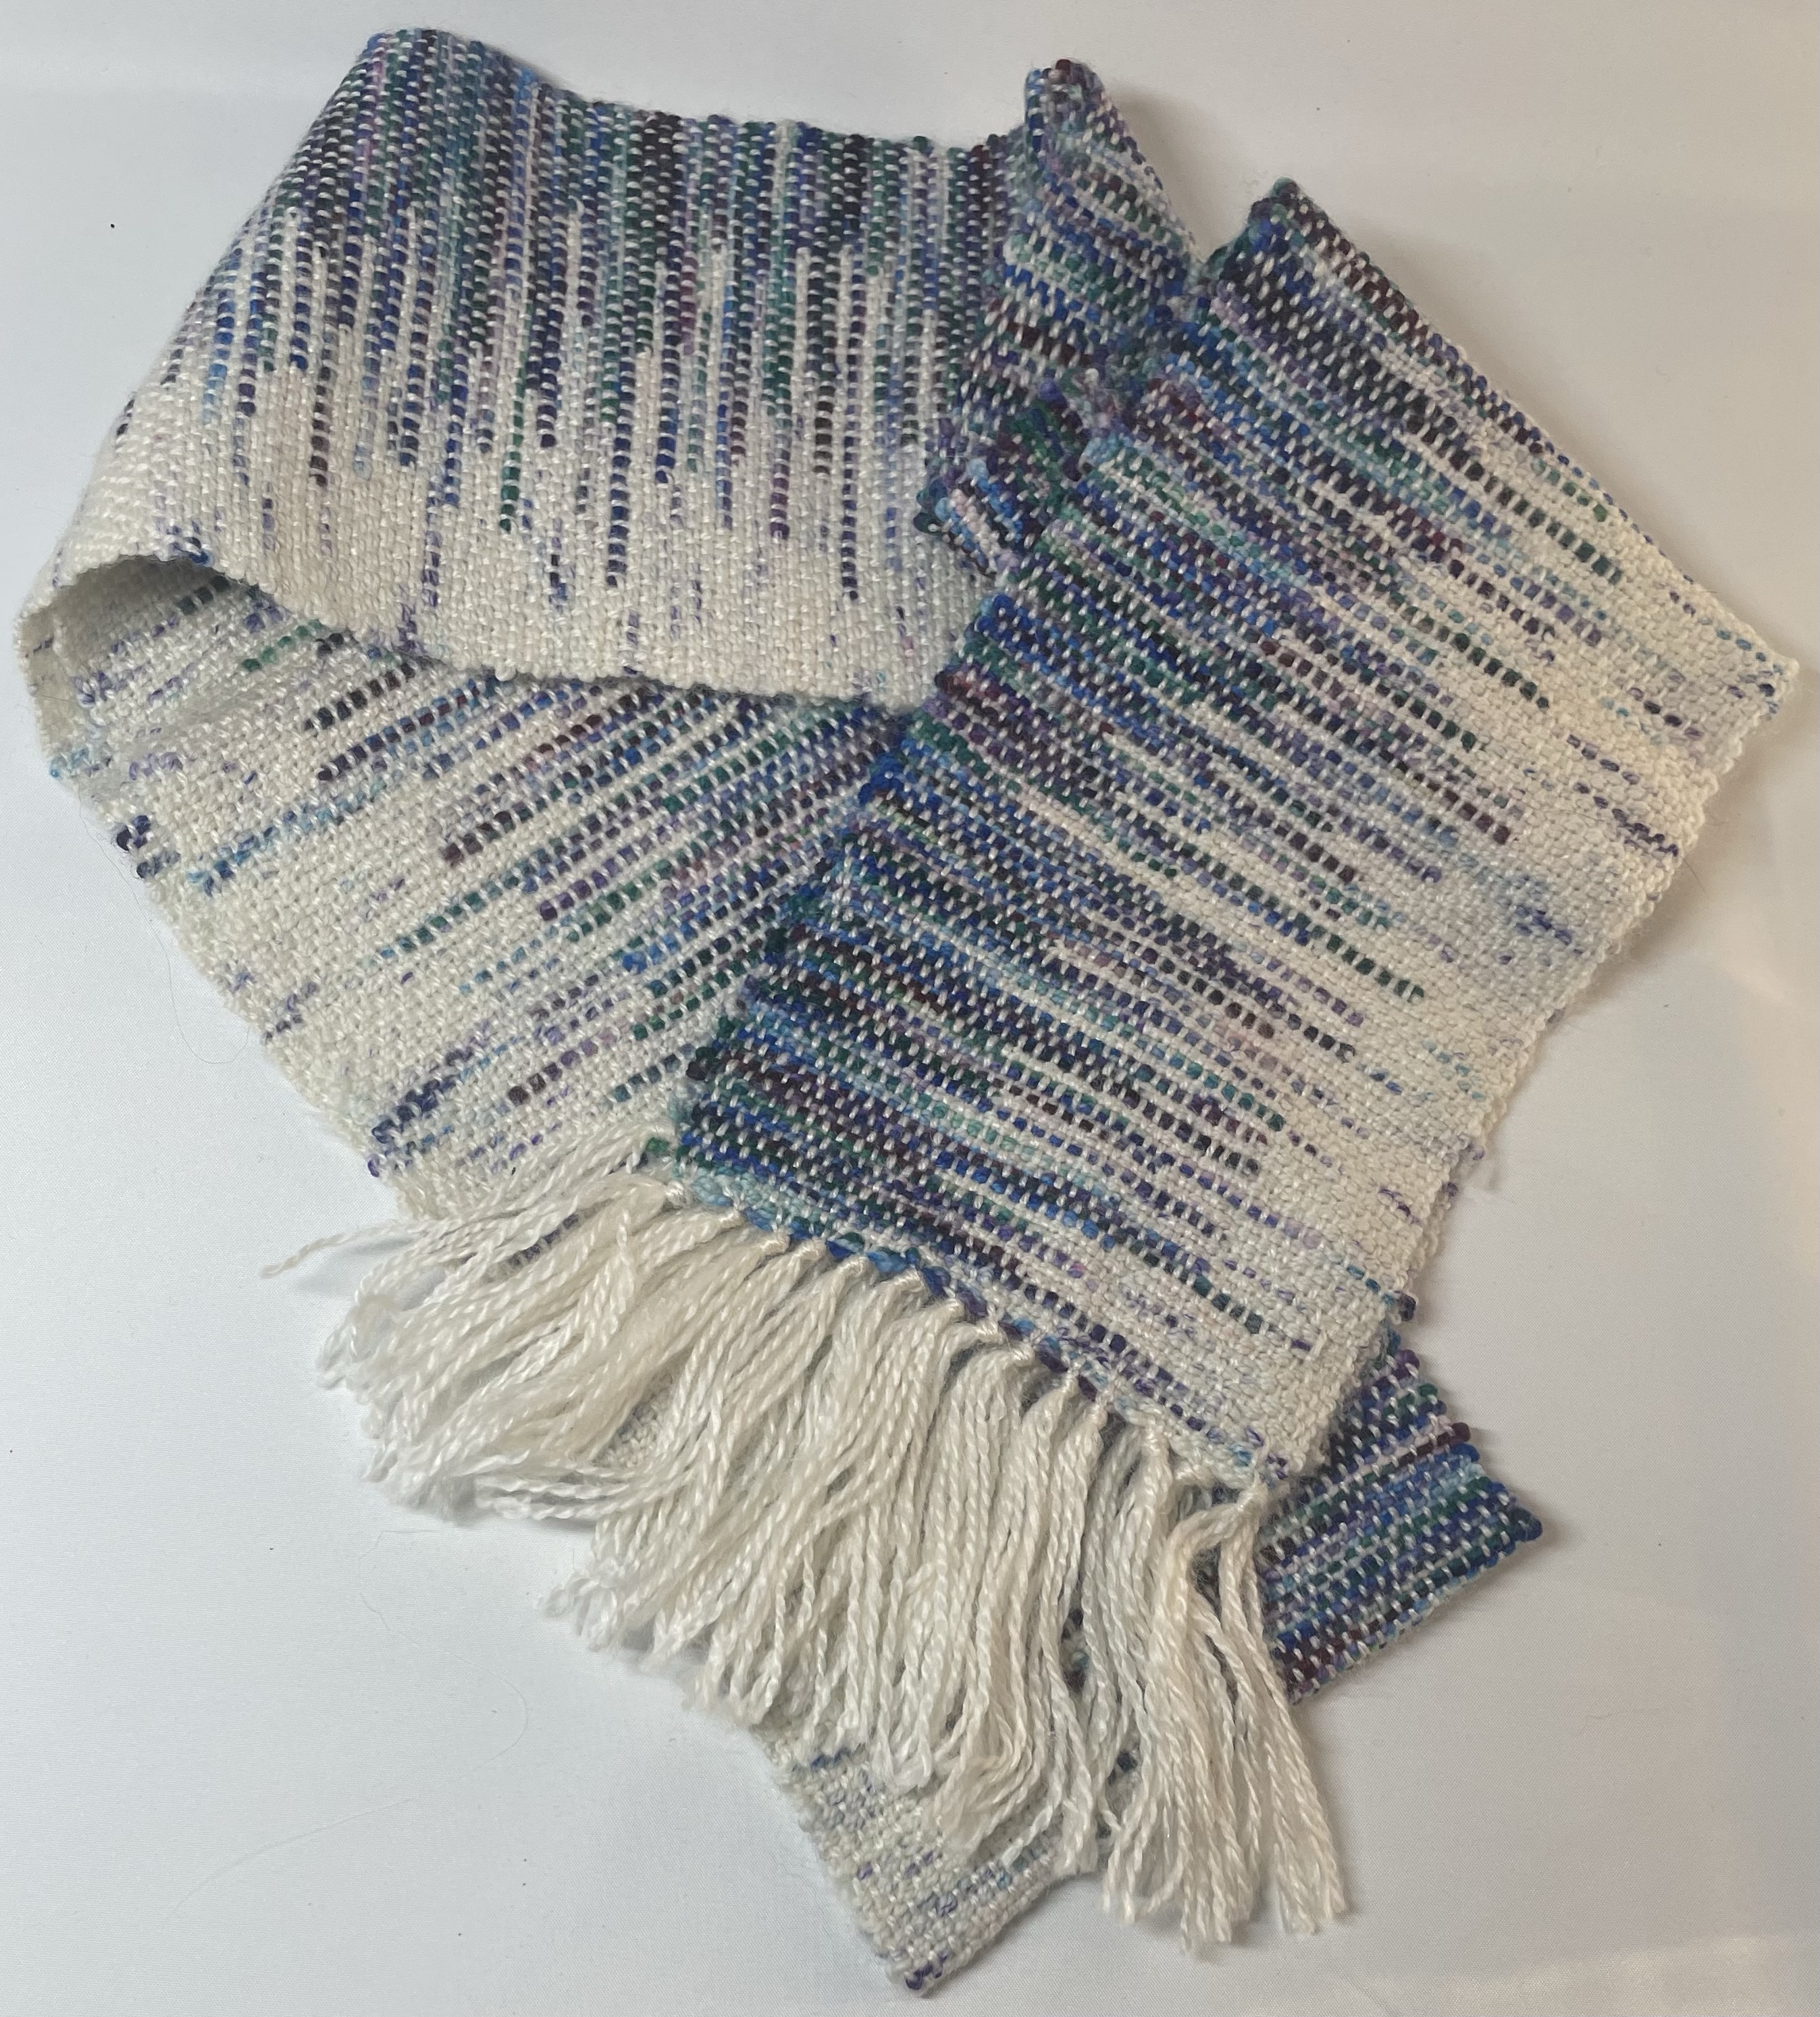
This picture shows a scarf that I made that was a random interlock of the clasp weft. Combined with the variegated yarns, that complemented each other well, the result was a much more organic design.
This morning I started playing with an idea I had that involved a planned out pattern similar to the wall hanging. However, instead of just doing two colors, I opted to do alternating shed from either side to create an argyle looking design. Each shed included one weft yarn that was the same. I really like how it looks so far and look forward to finishing this scarf. After I finish this scarf, I think I will try another scarf where the colors of the sheds are all different to see what other fun designs will result.
When purchasing supplies for my crafts, I try to support my local stores. However, that is not always possible. When I first started fusing, one of the on-line sites I purchased from was Delphi Glass in Lansing, MI. This company has numerous free patterns and project ideas on their website.
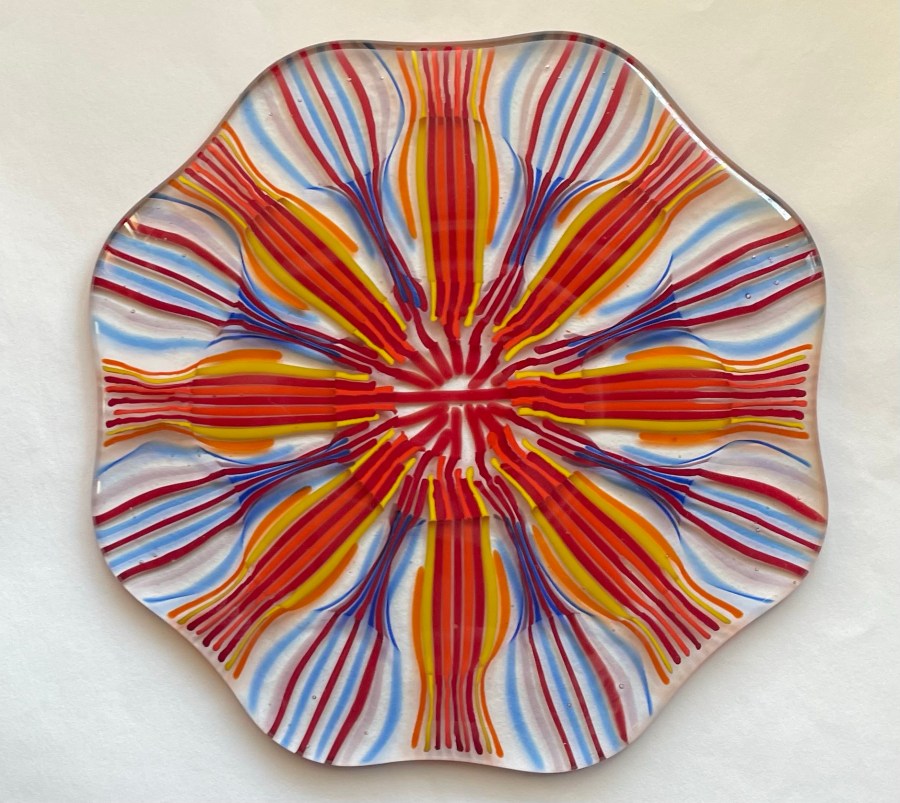
One of the projects that I tried a few years ago is the “Woven Stripes” square plate (Delphi Project Guide found here). To make the plate, I purchased some Vienna Stripe glass. The glass is a semi opaque white with lines of color on the surface.
This project was made with a clear base layer and squares of the striped glass placed in an alternating “woven” pattern. Over every other striped square (those going in only one direction) a square of clear glass was placed.
Fusing glass is normally sold in sheets that are 3mm thick. Thus, the design involved some areas with two layers of glass (making these areas 6 mm thick), and some areas of three layers of glass (9mm thick).
However, glass has a natural tendency to want to be 6mm thick. When fired at a full fuse temperature, the areas of clear glass spread outward to create the 6 mm thickness. This project created a bit of an optical illusion. In the areas where the clear glass spread, the lines appear slightly curved.
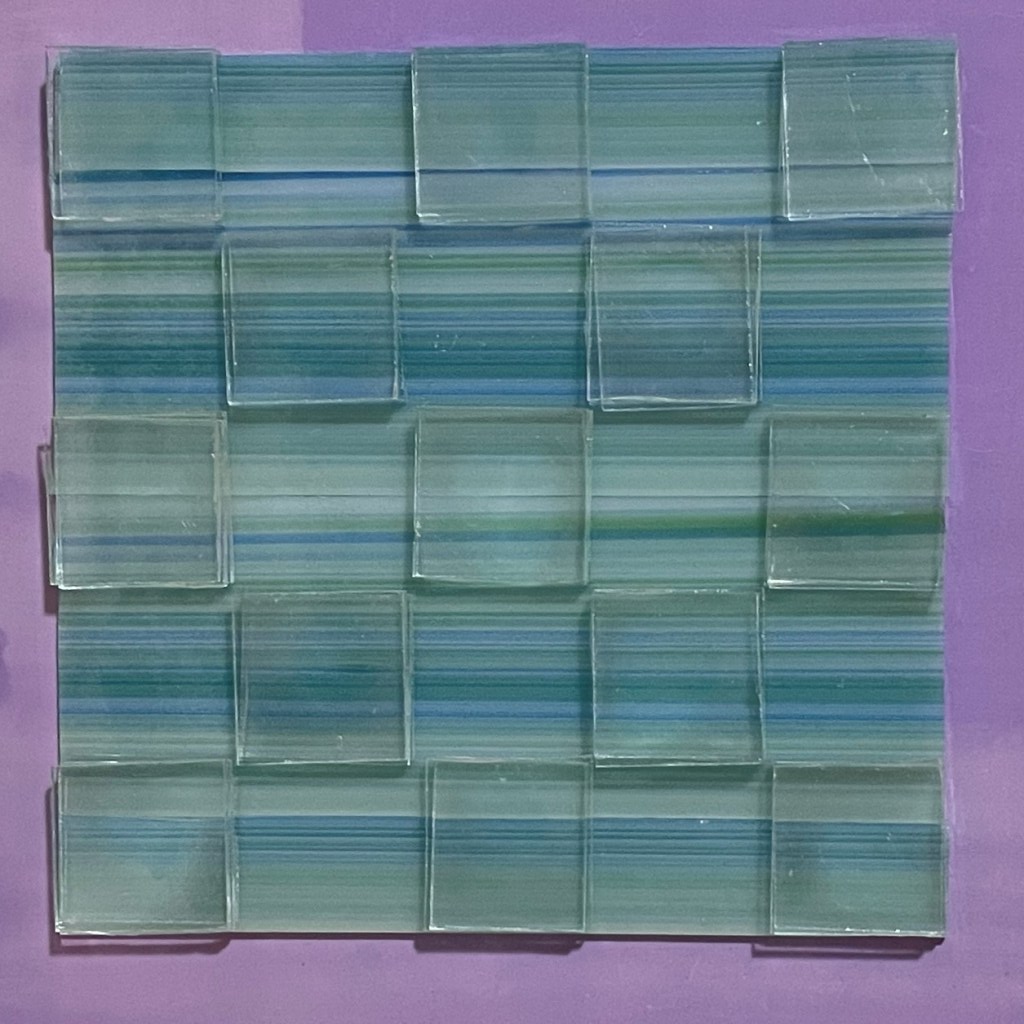
Recently, I tried another variation of this optical illusion. I though that if one piece of glass caused the stripes to curve, then maybe two pieces of glass would create a greater curve effect. Because I was stacking more glass, I opted not to use a clear base layer, to avoid the project spreading out too much. Rather, I used the my excess Vienna Stripe glass as a single base layer. To accentuate the extent of curve, I kept the strip going only one direction. Over the striped glass, I stacked two pieces of clear glass in an alternating fashion, leaving an uncovered area of the base glass between each double stack of clear glass.
The optical illusion I was hoping for worked our really well. Unfortunately, the base layer was not a solid piece of Vienna Stripe, but rather four pieces placed side by side. At the full fuse temperature, the glass naturally tried to settle to 6mm in thickness. This caused contraction in the areas of a single layer of glass and a couple of holes to open up.
I will admit that I was a bit disappointed with these holes because I had originally planned to slump the project into a square plate mold. I pondered some ideas for how to cover the holes, but was not really happy with any of my ideas. When I showed the project to my husband, he suggested that I run some ribbon through the holes as a way to make the project a piece of wall art. I like that idea. And, since the top holes were very symmetrical, it worked well. For the hole at the bottom of the project, I cut some flower petals out of the last bits of Vienna Strip, contour fused them together and hung the flower from the bottom. I think this would make a lovely piece of wall art. If anyone is interested in the piece, please contact me and I will make arrangements for it to be sent to you.
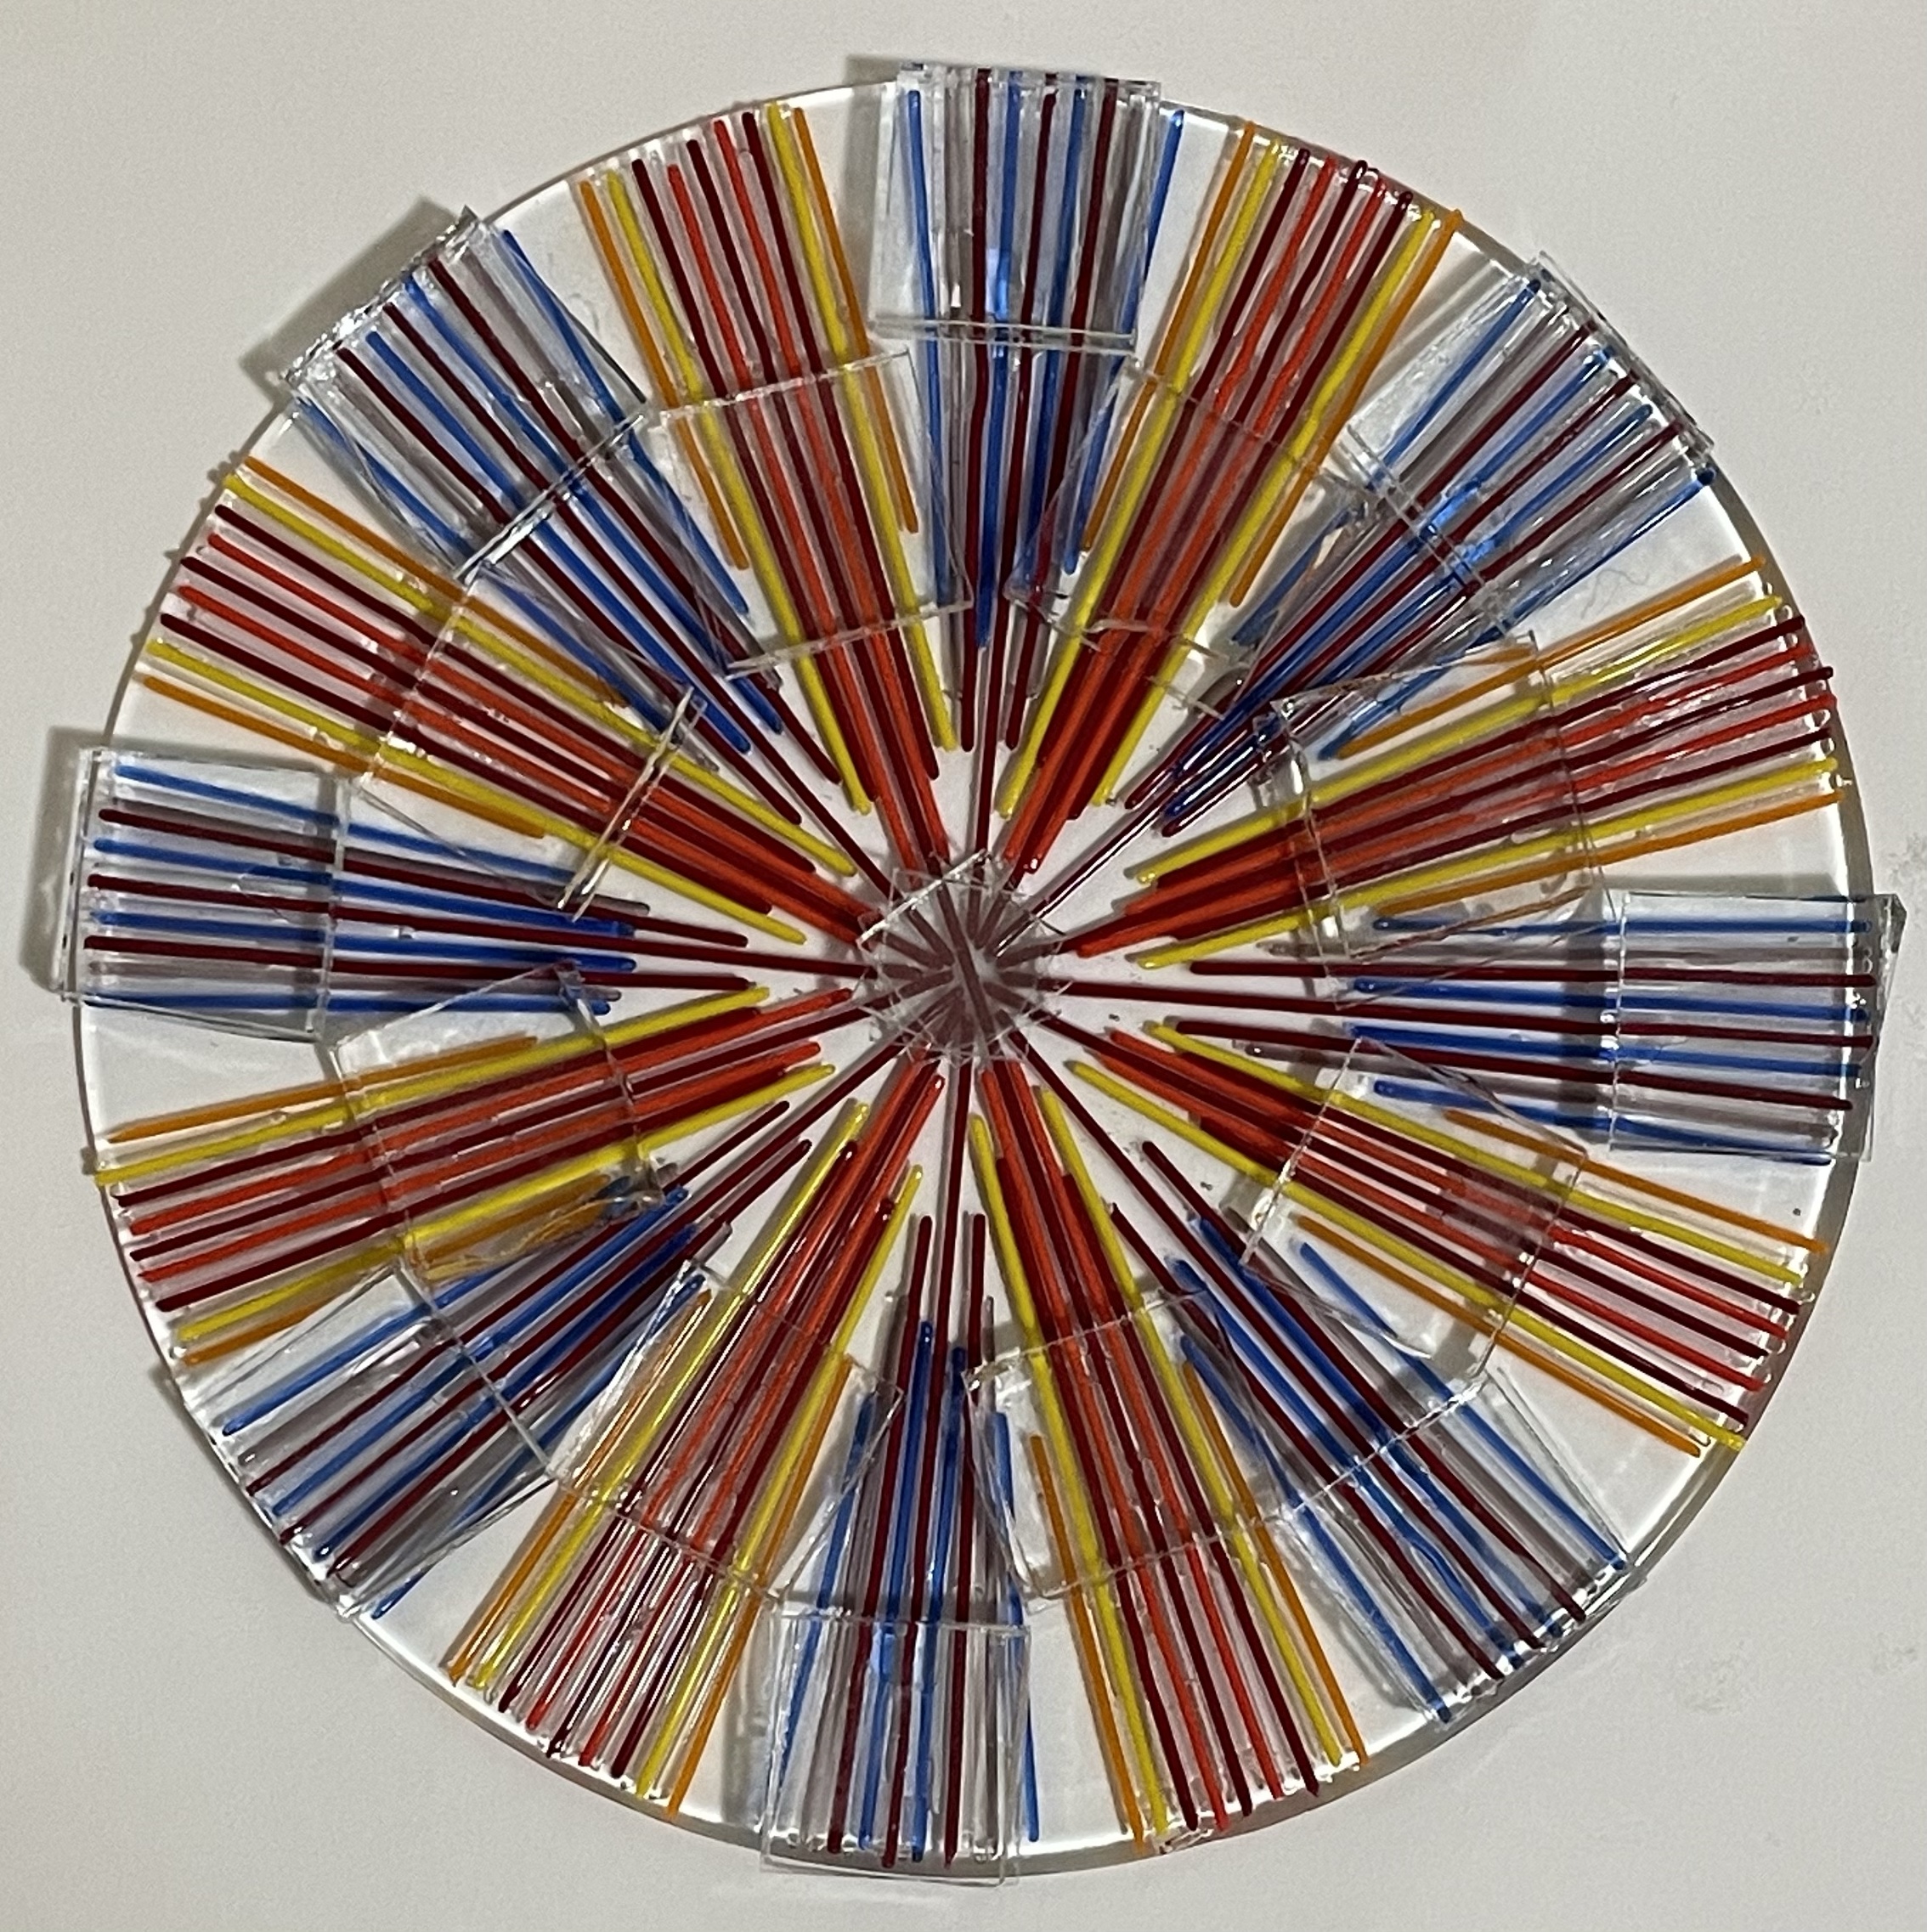
I really like how this optical illusion project turned out and decided to try another idea – a round approach to the same illusion. Unfortunately, Vienna glass is no longer sold, so I needed a different source for my stripes. To do this, I placed stringer pieces around the perimeter of a circle of clear glass in an alternating pattern of two color sets each with eight sections. Two pieces of clear glass was stacked over one set of colors around the perimeter. And, two pieces were stacked over the other color sections but at a position more towards the center of the circle.
I really like how this project turned out! It resulted in an octagon shape that I then slumped into a shallow plate form.
I have some more optical illusion ideas that I will be trying in the future.
Having returned to Minnesota with a good supply of long leaf pine needles, I have been trying out some new techniques. In prior posts, I showed the baskets I made with the Simple Stitch, Wrapped Rows, Ti stitch and incorporating beads. So, here are a few more techniques I have been working on.
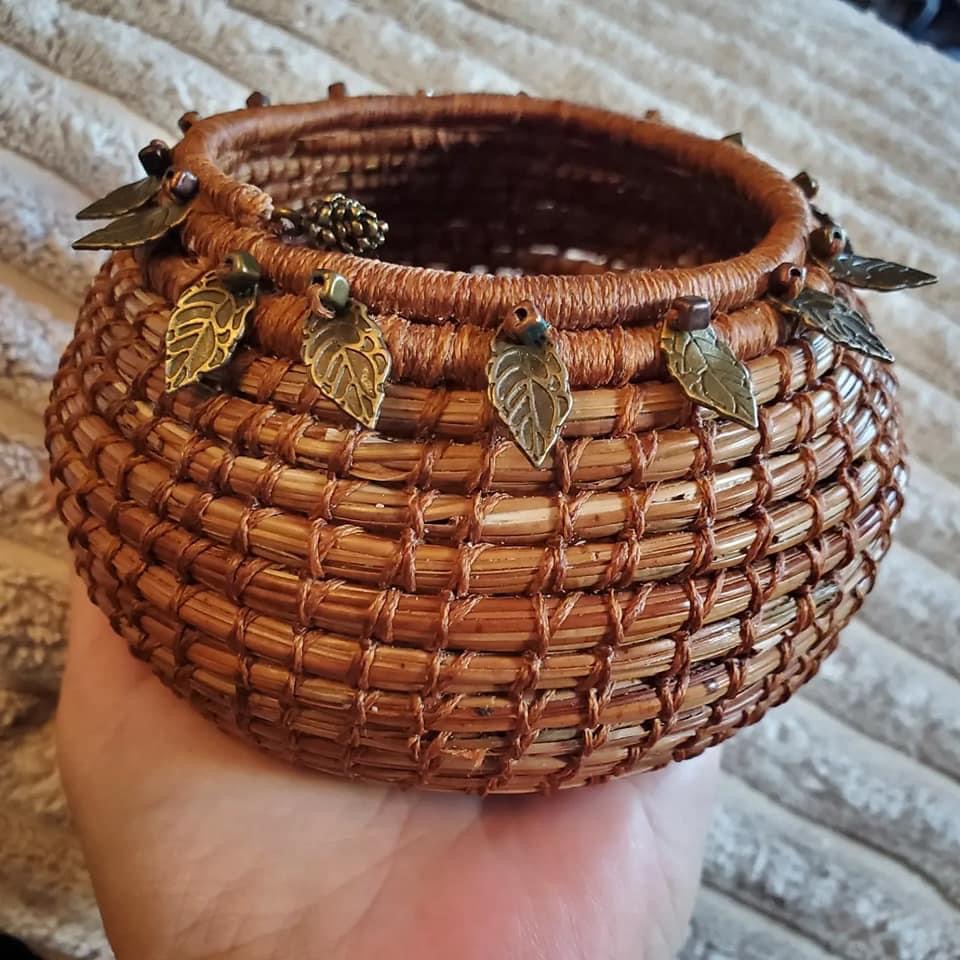
Back stitch and vase shaping. I started this project not really knowing what I was actually going to make, I just wanted to try some new stitches. The basket started out with a base of the basic stitch, followed by a row of wrapped needles. I then switched to the Ti stitch. I prefer this stitch because it is faster, easier, and stronger than the basic stitch. After completing the first half of the basket, I decided to make it into a vase shape. This would give me the opportunity to try some contour shaping of the basket. I also decided I would switch to a different stitch. I reasoned that using the Back Stitch would allow me better flexibility in the placement of each row of needles, thus making the shaping easier. The Back Stitch involves doing row of Simple Stitch. Then, once an entire row is completed, the sinew is wrapped the reverse direction around the circle using the same location of the original stitches. This results in what looks like diamonds on the outside of the basket. To finish the basket vase, I did two Wrapped Rows and added a couple metal charms and beads that I had in my craft supplies. I do need more practice in keeping my rows and stitches more evenly placed.
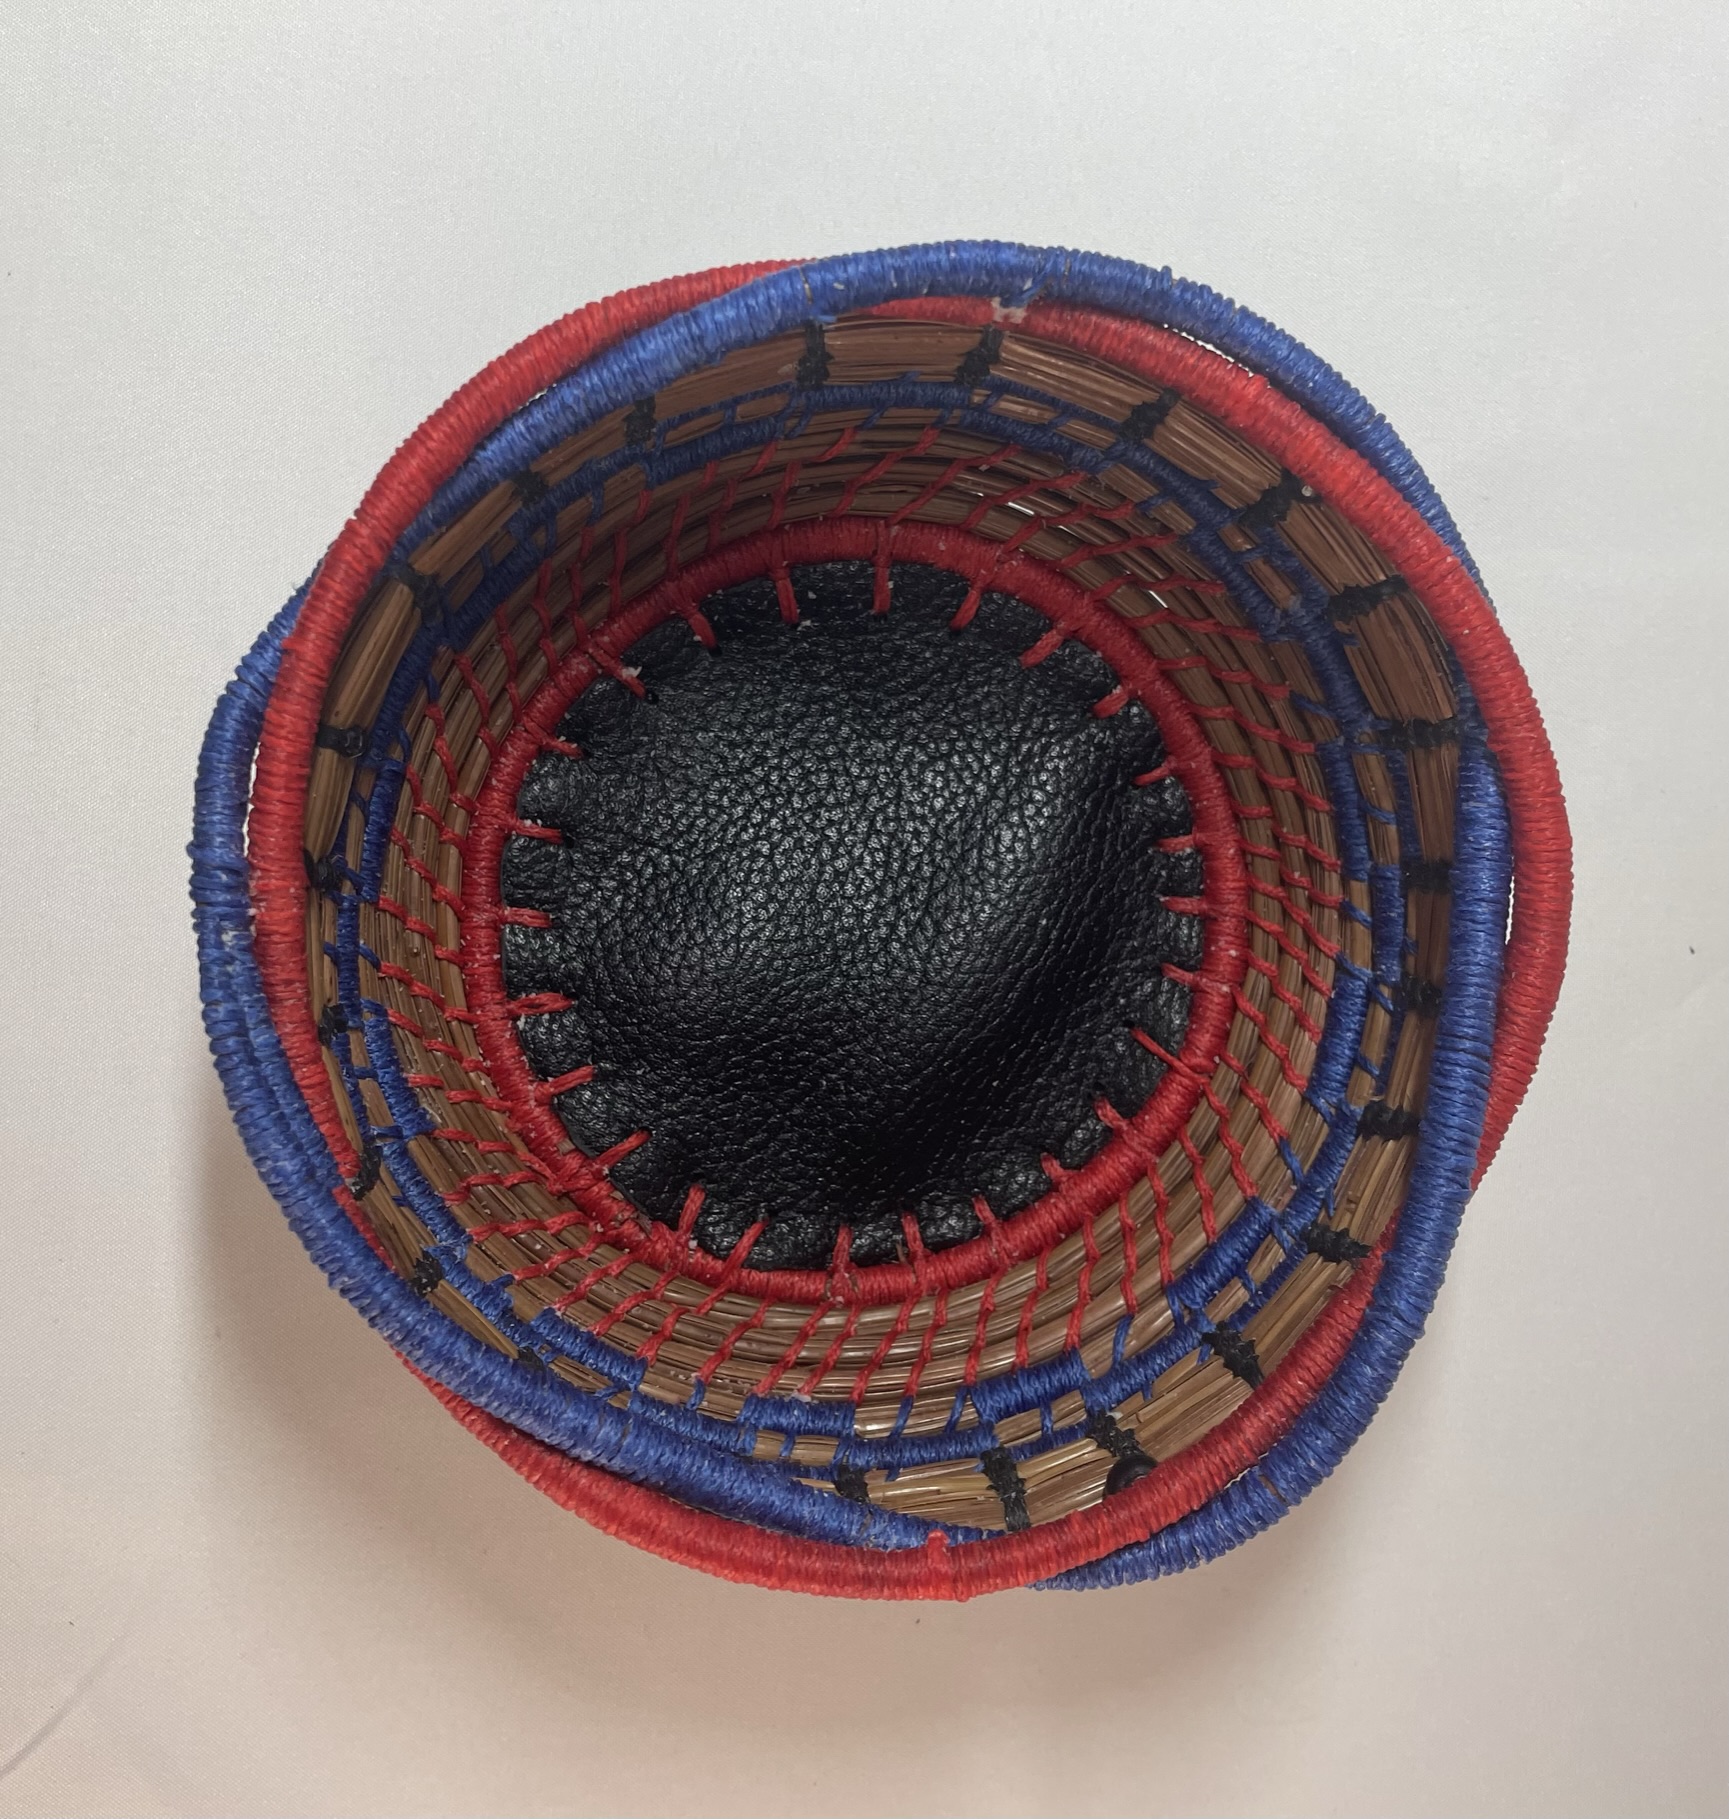
Leather Base and Twisted Rows. This project started with a circle of leather rather than initial rows of wrapped needles. Two matching circles of leather were cut, positioned wrong sides together and holes punched using a leather hole punch. A wrapped row of needles was then stitched to the outer edge of the leather. The weaving then included rows of basic stitch, alternating wrapped stitch sections and a couple rows of Ti stitch. To finish off the basket, I tried out making interlocking rows of wrapped stitches. The first row of an interlocking finish was similar to when beads are place and involved leaving long sections of wrapped needles not connected to the lower row. The second row, however was trickier than I expected. The wrapped needles tended to want to break when I was trying to push the bundle into the gaps of the previous row. I found that if I wrapped the needles in a wet (not just damp) towel over night, then the needles did not break. In this basket, my stitches were more evenly place, but I still need more practice.
V stitch. My final project, I had only one real goal – making the rows and stitches more uniform and even. This project again started with a wrapped row center and a Simple Stitch base. The body of the basket was completed with the V stitch. The V stitch is made by placing two stitches in the same location. One stitch goes diagonal like the simple stitch. The second stitch goes straight up. To finish off the basket, I added some leaf charms and beads. When making this basket, I was successful in creating even rows. I do, however, need more practice on this new stitch.
A couple years ago, I was asked to proof read and test out a quilting pattern for another designer. The pattern was a fun, playful design – paper airplanes – great for a child.
The pattern is available from Blueseum Quilting out of Australia.
When testing out the pattern, I used the colors as described in her design, a bright palette of primary and secondary colors.
My test quilt was one of the quilts that I have donated to Sleep in Heavenly Peace. So, hopefully there is a young child enjoying his/her quilt.
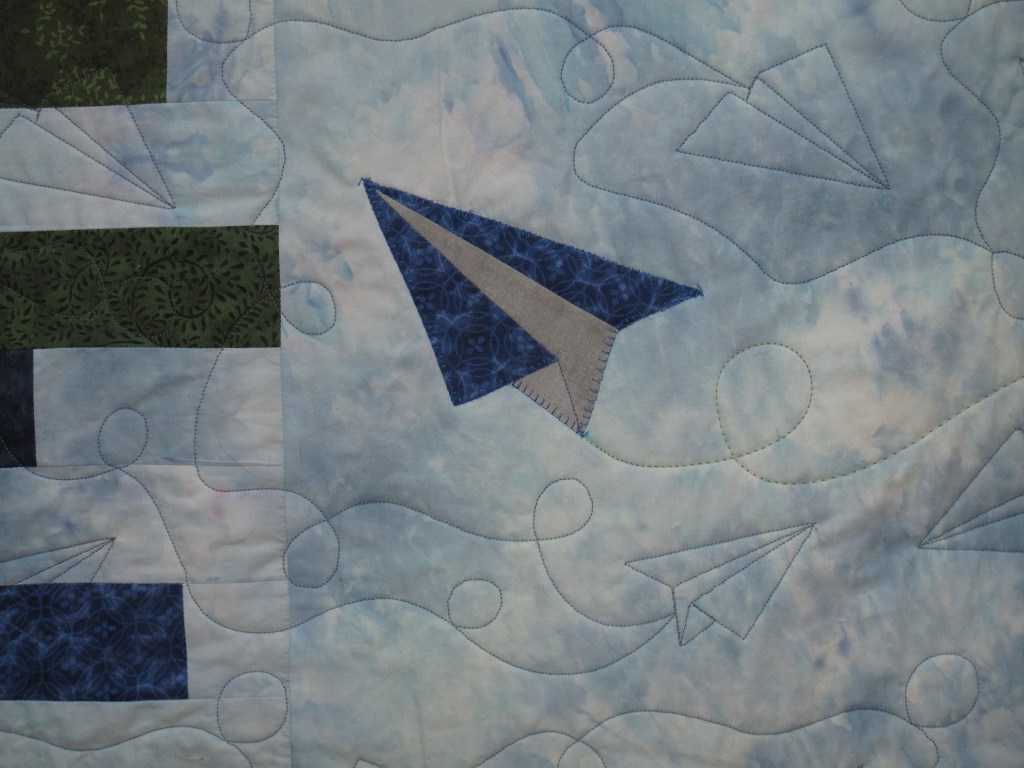
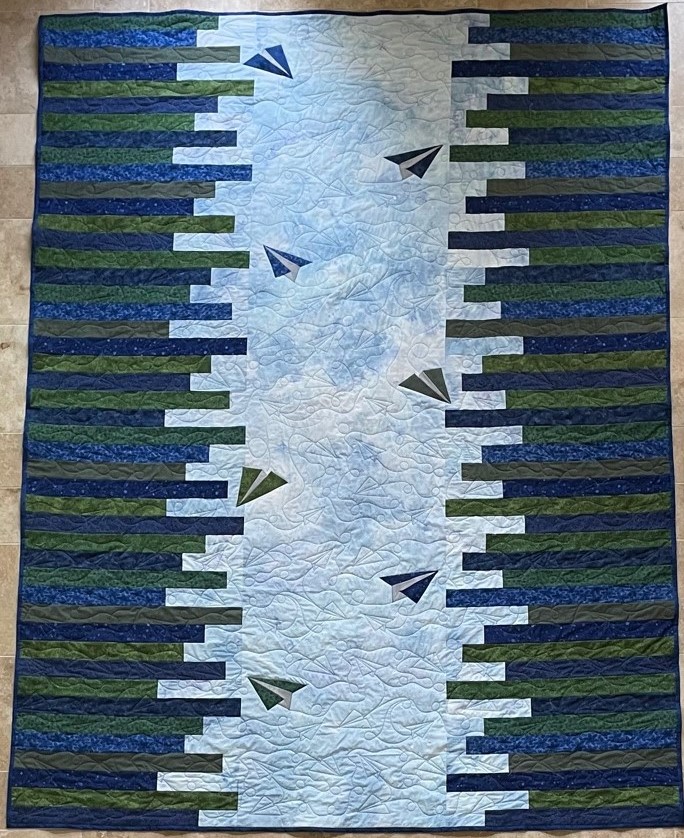
After making the test quilt, I really wanted to make one with sky colors. For the center section, I snow dyed white cotton fabric with dyes in various shades of blue.
For the quilting, I used PatternCAD to create a couple paper airplanes with jet streams surrounding these planes.
For the side color, I sorted through my fabric stash and selected four blue and four green fabrics for the design. This quilt was really fun to make, and was sold prior to Christmas to someone whose business logo includes paper airplanes.